


Supply List:
- Wood Shiplap Heart – Medium
- Decorative Paper Napkins
- Country Chic Paint – Vanilla Frosting
- Mod Podge Matte
- Plastic Wrap
- Ribbons, Laces, Cording
- Stickles – Diamond
- Small Piece of Sandpaper
- Key embellishment
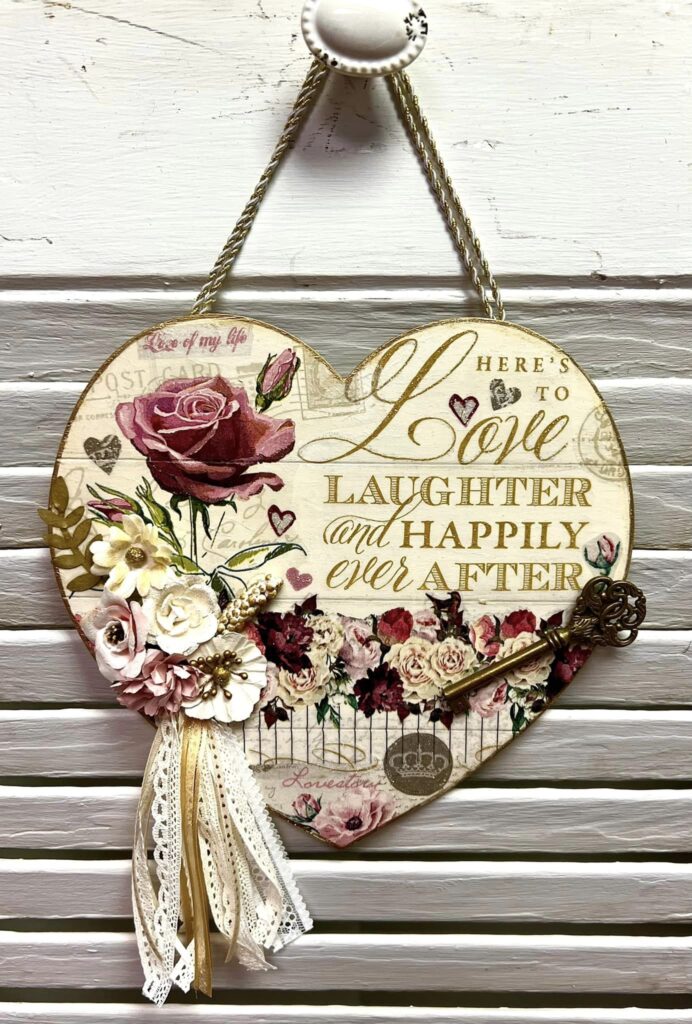
We are celebrating the month of love with this pretty shiplap heart! We will be adding pieces of various napkins to create a little sign, easel, or addition to a wreath. We’ll also add embellishments like flowers, ribbons, lace, and a key for a vintage vibe. This is simple, fun, and a great way to use up things hiding in your stash!
Adding Napkin Art to the Shiplap Heart
Start by painting your shiplap heart with a coat of Country Chic Paint – Vanilla Frosting. Make sure you get inside of the shiplap grooves and the sides. Dry with a heat tool.
Next, I’ll take a small piece of sandpaper and run it along the shiplap grooves and the edges to add some distressing. This will create dimension and go along with the vintage look of this piece. I’ll also use my sandpaper on the front of each shiplap section. Use a baby wipe to clean off your dust.
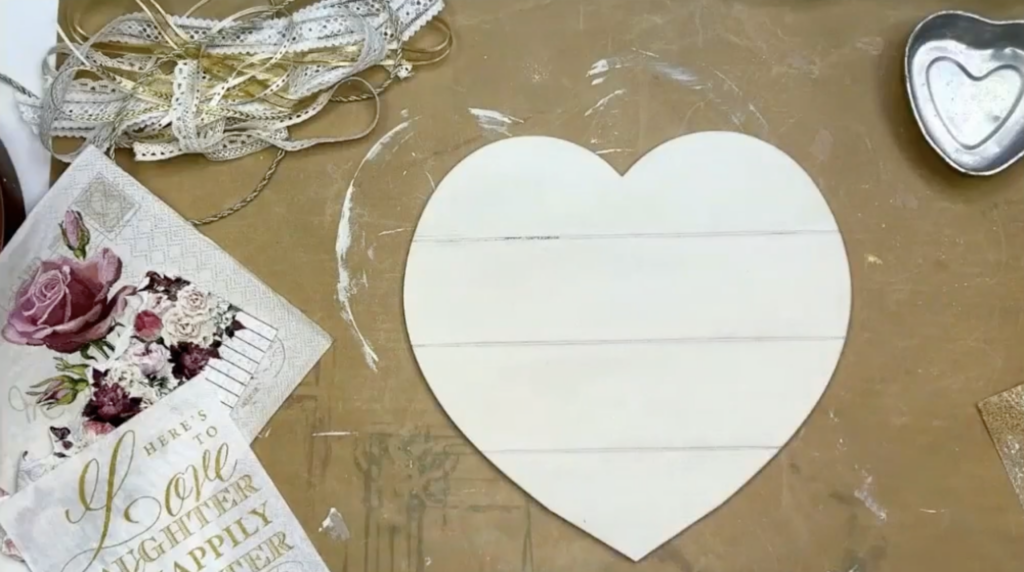
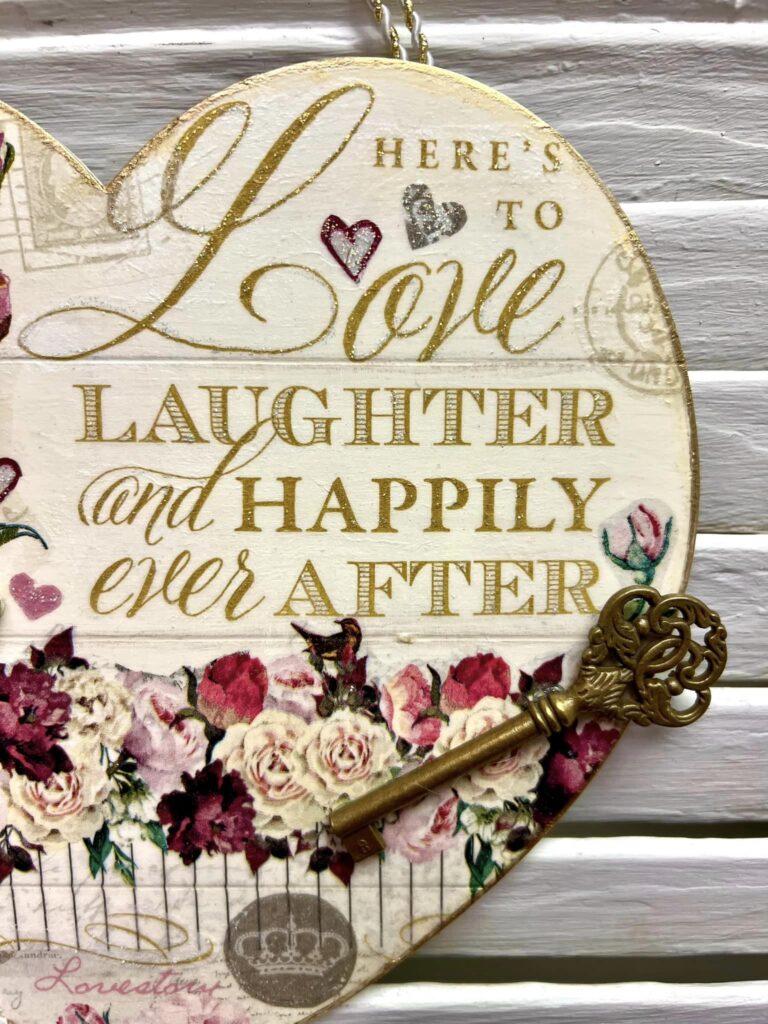
Next, I’ll be adding different pieces of my napkins to my shiplap heart. I have a napkin that says “Here’s to love, laughter, and happily ever after” that I will be adding to the right side of my heart. Use your scissors to cut around the words and then separate the plys.
Add Mod Podge Matte to the area where you are adding your napkin art and place that napkin on top. Smooth it down with some plastic wrap and your hands. Dry with a heat tool and then add a top coat of Mod Podge Matte.
I will continue adding pieces of different napkins to my shiplap heart, including some flowers, postmarks, hearts, and words.

Finishing the Heart with Embellishments
At this point, you can add in some embellishments if you would like! I have some flowers from my stash that I am going to hot glue and bunch together. They aren’t flat but are pushing into each other to create a little cluster.
I’m going to pull together some scrap pieces of ribbons and lace and layer them on top of each other. Then, I’ll fold it in half and tie a tiny ribbon around the middle to create a tassel shape. I’ll add some hot glue underneath my flowers and attach my ribbon bunch. I’ll trim the ends and it now looks like a bouquet!
If you have any other embellishments, charms, or trinkets, you can add them now! I’m going to add a key to my wooden heart as well to add to the antique look of it.

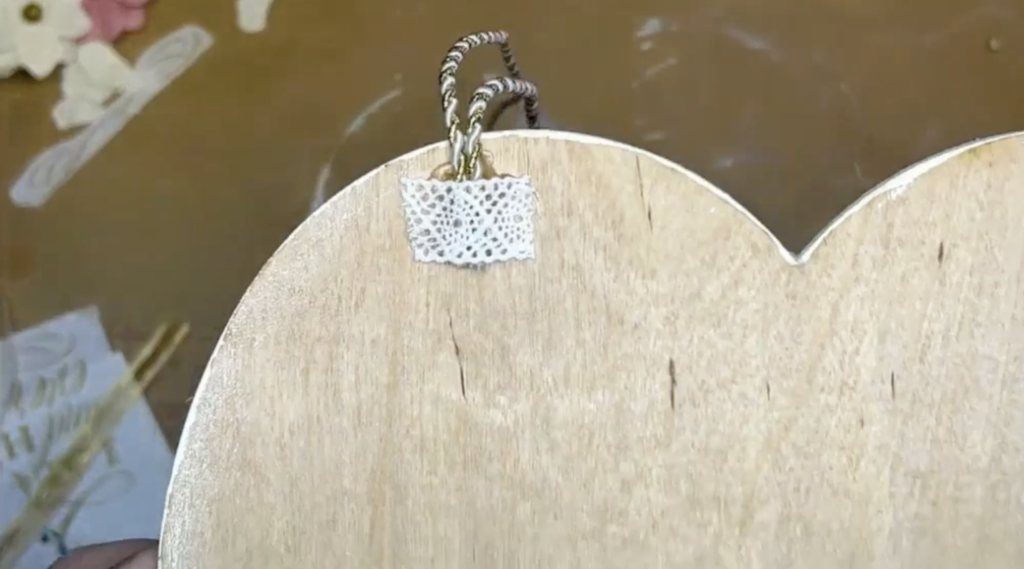
I have some white and gold cording that I will add to create the hanger for my heart sign. I will just dab hot glue on the back of my heart at the top and attach both ends of my cording. I’ll put a piece of crocheted lace on top to help secure it too.
I love the gold accents on this piece so I’m going to take a gold ink pad and run it along the edges of my heart. I’ll also use Stickles – Diamond to add sparkle to my flowers and the word “love” – add sparkle wherever you would like!
This project is perfect for Valentine’s Day decor in your home, Valentine’s Day gifting, or just celebrating love and creating something special with napkins, ribbons, and lace in your stash. Have fun with this and make it with your unique style!
I go LIVE on my Facebook page every Friday at 11 am CST for a fun and easy Craft-n-Chat Session. Come learn something new while creating something beautiful!
Join the waitlist for The Napkin Club where Unique Makers can connect, learn, and be inspired to create with the Individual Unique Napkin Collections that you will receive every month! A place where Napkin Lovers can unite and be inspired!


0 Comments