


Supply List:
- Patriotic Scrapbook Papers
- Cardstock Scraps
- Frixion Pen
- Gold Uni-ball Pen
- Ruler
- Scissors
- Hot Glue
- Chalk Ink
- Twine
- Buttons
- Stickers
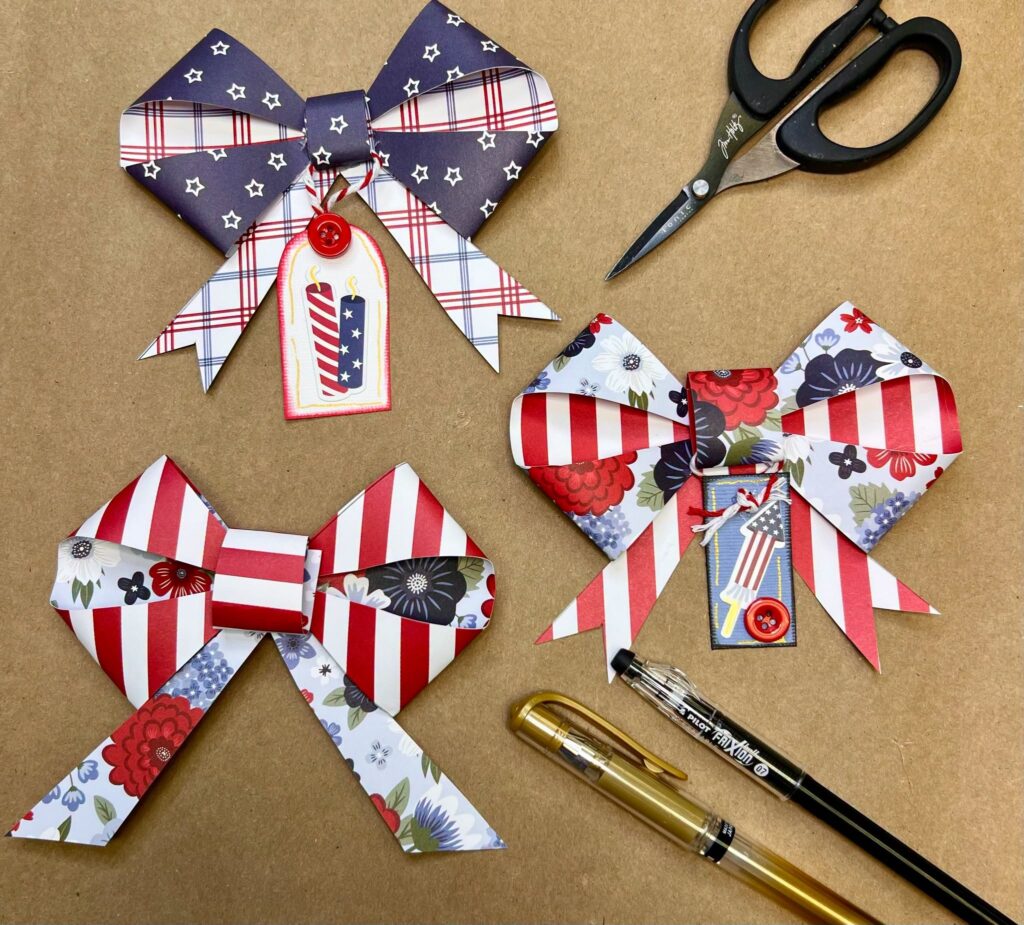
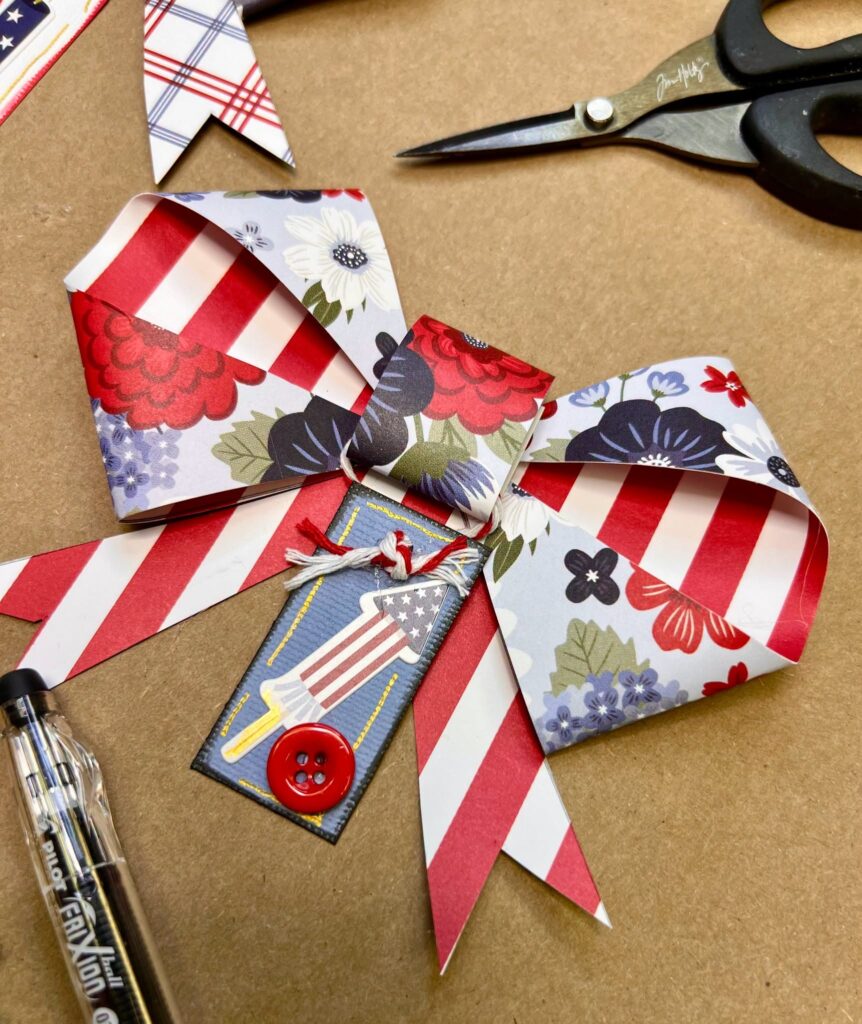
If you need a quick, cute, and easy paper craft, these paper pinwheel bows are such a fun project to make. They start with the same basic idea as a paper pinwheel, but instead of turning them into spinning pinwheels, you’ll fold and glue the paper into adorable dimensional bows. They’re perfect for decorating treat bags, snack bags, gift packages, scrapbook pages, party tables, banners, and more!
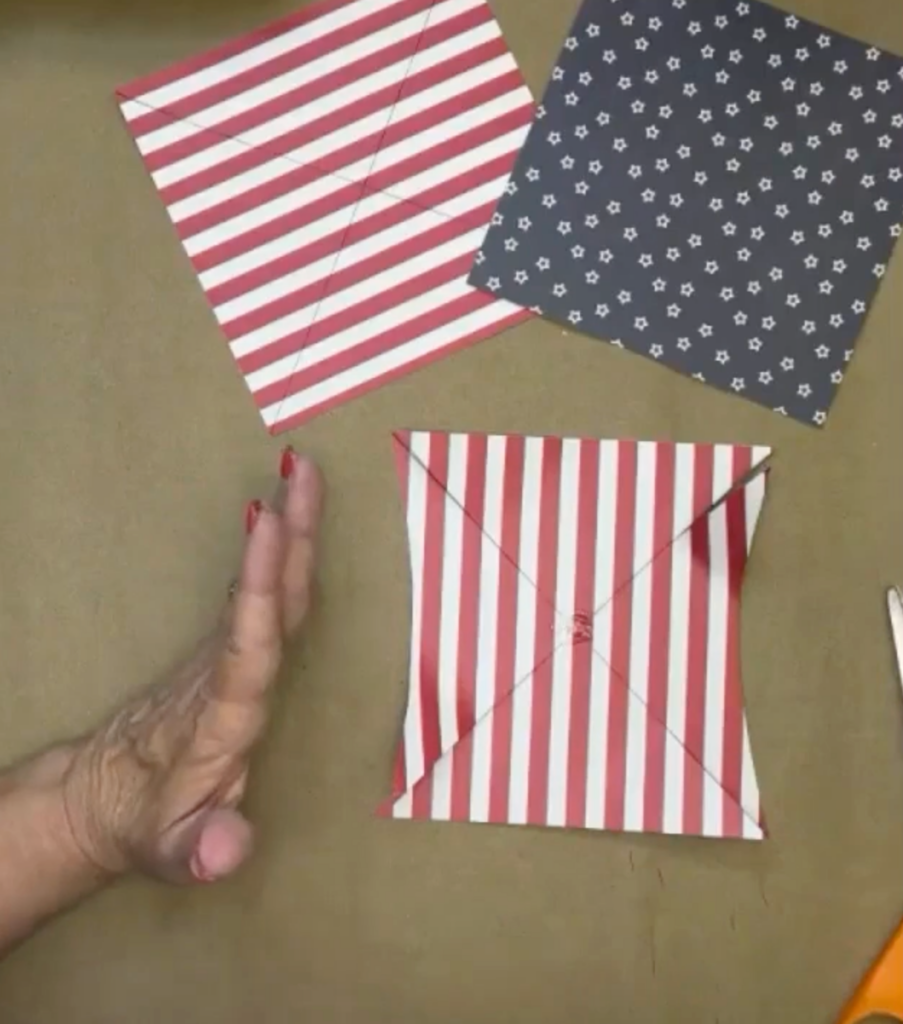
Step 1: Start with a Square Piece of Paper
Begin with a square piece of paper. I used 6×6 scrapbook paper, but you can use any size square as long as all four sides are equal. A smaller square will make a smaller bow, and a larger square will make a bigger bow. You could even use 12×12 paper to make a large bow for a gift package.
Place the paper on your table with the side you can see best facing up. This will make it easier to draw your guidelines.
Step 2: Draw an X from Corner to Corner
Use a ruler and a Frixion Pen or pencil to draw a line from one corner to the opposite corner. Then draw another line between the remaining two corners, so you have a large X across the paper.
If you use a Frixion Pen, the ink will disappear with heat, which makes it great for crafting. If you use a pencil, just draw lightly so the lines are easy to hide or erase later.
Step 3: Cut Toward the Center
Use scissors to cut along each line, starting from the corner and cutting toward the center. Stop about 1/4 inch before you reach the middle. Do not cut all the way through the center, or you will end up with separate triangles instead of one connected piece.
Repeat this on all four diagonal lines. When finished, your paper should still be connected in the center, with four cut sections coming in from the corners.
Step 4: Scoop Two Opposite Sides
To make the paper look more like a bow instead of a traditional pinwheel, cut a small curved “grin” shape into two opposite sides of the paper. This does not need to be exact. Just lightly scoop from one corner toward the center cut and back out to the opposite corner.
This curved cut allows more of the reverse side of the paper to show and gives the bow loops a softer shape. You can scoop a little or a lot depending on how much of the opposite paper pattern you want to see.
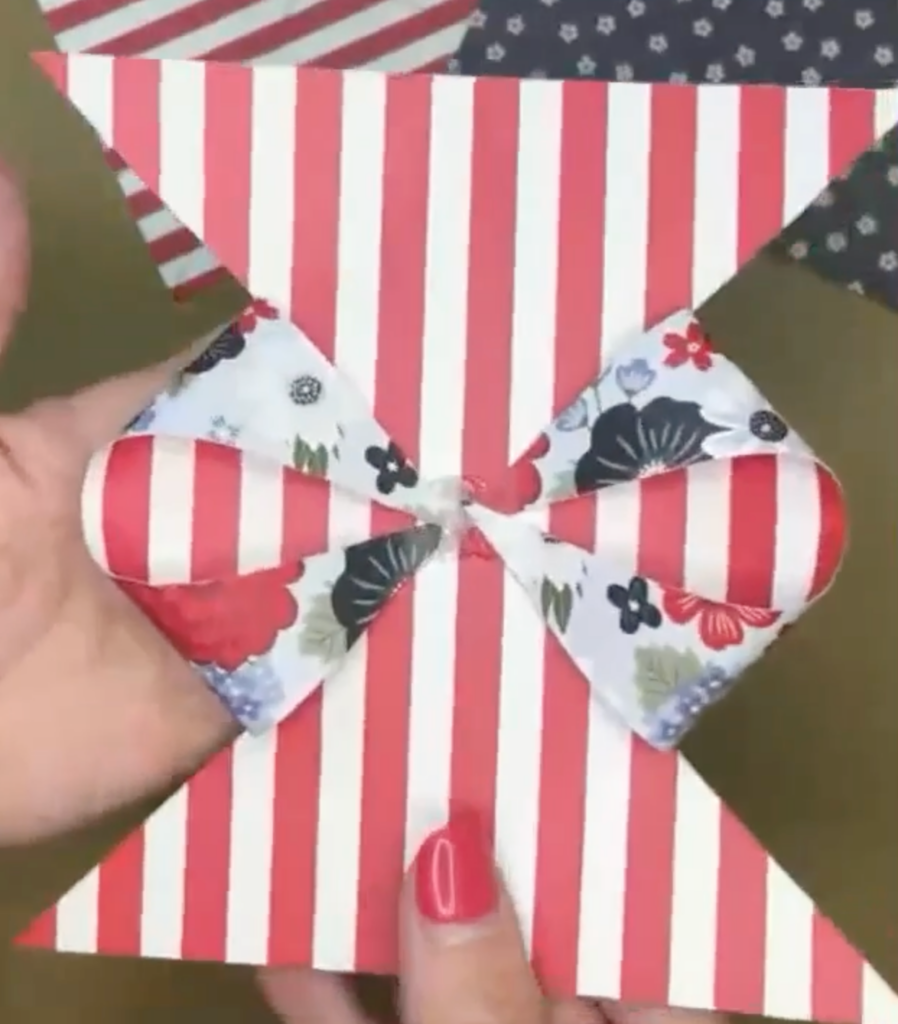
Step 5: Glue the First Two Bow Loops
Place a small circle of hot glue in the center of the paper. Bring two opposite points into the center and press them into the hot glue. Use the end of a paintbrush or craft stick to hold the paper in place while the glue sets so you do not burn your fingers.
These first two folded points create one side of the bow.
Step 6: Glue the Second Two Bow Loops
Add another small amount of hot glue to the center. Bring the remaining two opposite points into the middle and press them into the glue. Hold them in place until secure.
At this point, your paper should already look like a bow. You can gently flatten the loops if you want a lower-profile bow, or leave them puffier for more dimension.
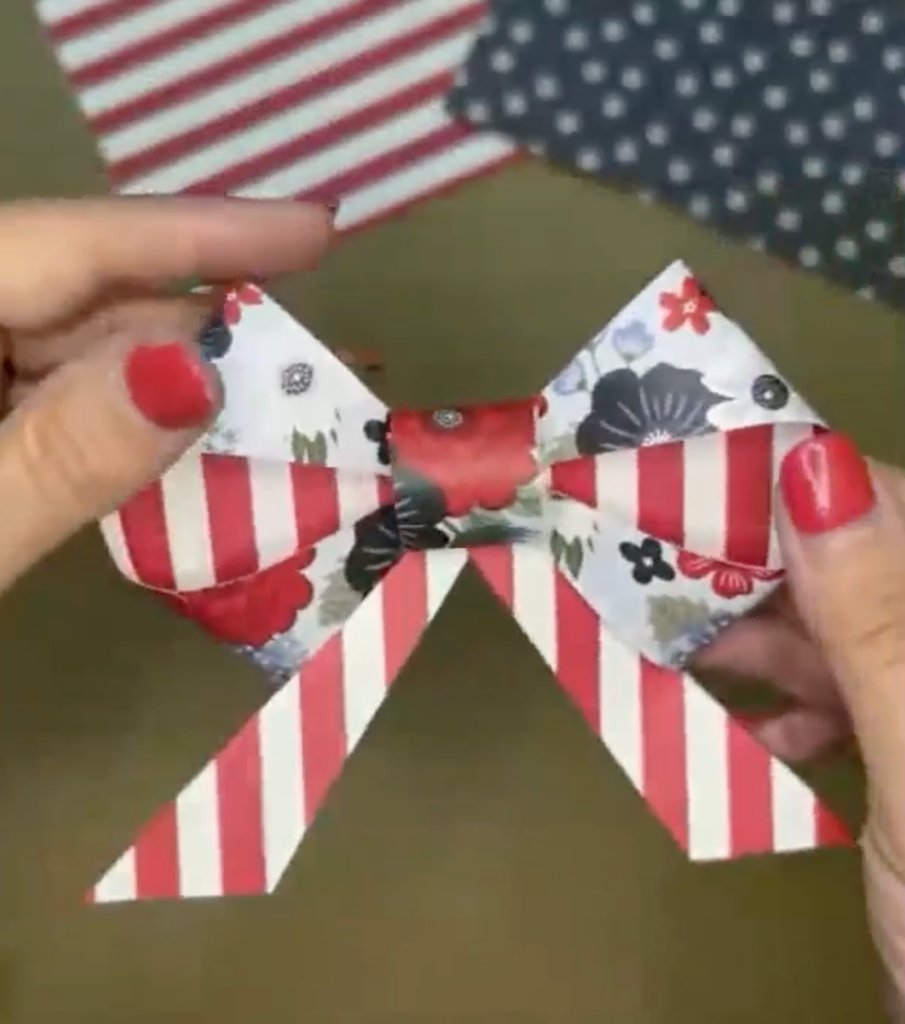
Step 7: Cut the Bow Tails
Now create the tails of the bow. On the two remaining triangle sections, cut up toward the center of each triangle and then trim from the outer edges toward that center cut to create two bow tails.
If the tails look too wide or too long, trim them until you like the shape. You can leave them angled, cut them straight across, or add flag ends by cutting a small slit up the middle of each tail and trimming from each corner into the slit.
Step 8: Create the Center Wrap
Turn the bow over. Cut the remaining center strip down to about 3/4 inch to 1 inch wide. Gently roll this strip around your finger or a paintbrush handle to shape it.
Add hot glue to the front center of the bow and roll the strip down over the center to create the look of a wrapped bow knot. Press and hold until the glue sets. If you do not want this part to be the same pattern, you can cut it off and use a separate strip of coordinating paper instead.
Step 9: Add a Tag or Embellishment
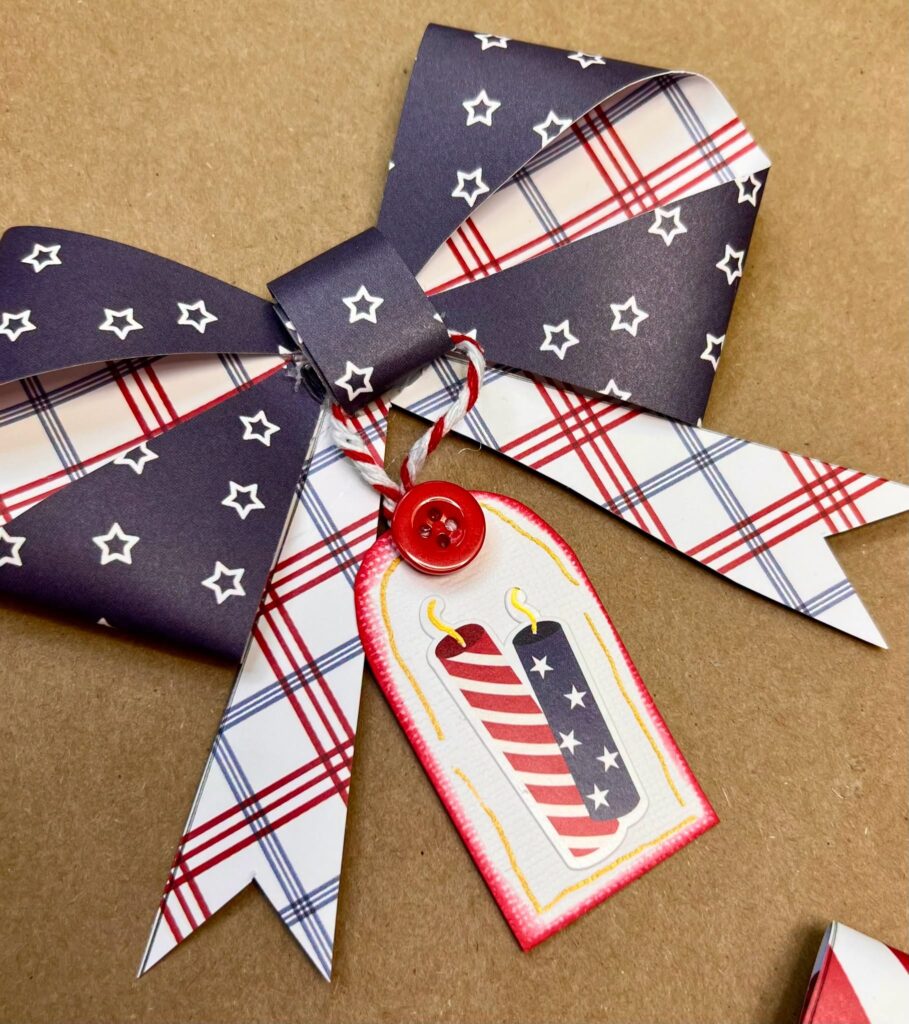
Once your paper pinwheel bow is finished, you can leave it simple or dress it up. Cut a small tag from scrap paper, round the corners if you like, and add a sticker, stamped image, handwritten word, or tiny embellishment.
Punch a hole in the tag and attach it with twine. You can tie it around the center of the bow, slip it through the bow loop, or glue the knot in place so the tag hangs nicely.
Step 10: Add Buttons, Pen Work, or Sparkle
To finish your bow, add a small button, sticker, punched shape, or star to the center. You can also add pen work around the tag, ink the edges, or add Stickles for sparkle.
This is the fun part where you can make each bow feel unique. Keep them simple if you’re making a lot for party favors, or add extra details if you’re making one for a special gift.
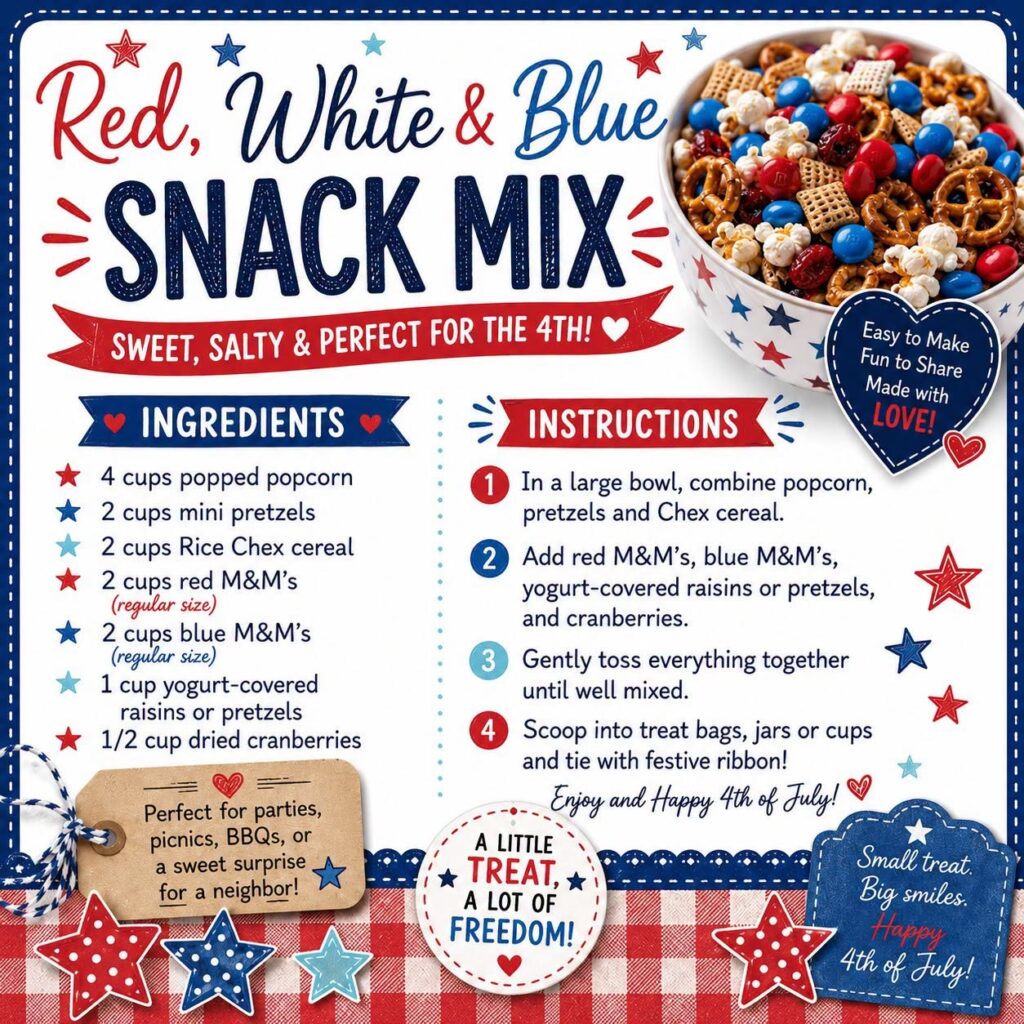
Red, White & Blue Snack Mix Recipe
These paper pinwheel bows are the perfect finishing touch for a simple patriotic snack mix. Fill clear treat bags with this sweet and salty snack mix, tie them closed with twine, and finish them with a handmade paper bow for a festive party favor or Fourth of July treat.
Paper pinwheel bows are such an easy and versatile paper craft. Once you make one, you’ll start thinking of all the different ways you can use them. Try making one as a prototype first, then create a whole batch using your favorite patterned papers.
Whether you use them for patriotic snack bags, birthday gifts, scrapbook pages, or seasonal banners, these cute paper bows are a great way to use your scrapbook paper stash and add a handmade touch to any celebration.
Do you love paper crafting? The Paper Crafters ClubHouse is a warm, welcoming monthly membership designed especially for women who love all things scrapbooking, cardmaking, and creative paper crafting. Join here!


0 Comments