


Supply List:
- Summer Set of Canvases Kit
- Shiplap House AND the Summer Set
- Mod Podge Matte
- Country Chic Paints: Starstruck, Fresh Mustard, Simplicity
- Paintbrushes
- Frixion Pen
- Pitt Pens
- Plastic Wrap Sheets or Chip Brush
- Stickles – Diamond or Crystal
- Heat Tool – Optional for quick drying
Have you been participating in our Welcome Home Canvas kits program? You’ll get a gorgeous shiplap house that you can hang and switch out different canvas decor. We release kits every season, and the summer kits just dropped! I’ll be showing you how to create this adorable canvas decor using the new summer sets.
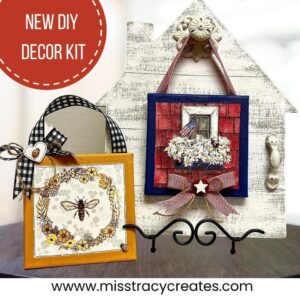
The kit includes everything you need to create these DIY canvases – two 6×6 canvases, Summer Window Napkin, Bee Wreath Napkin, Red Chevron Ribbon, a Black/White Check Ribbon, small jute, Wood Heart and Star, Red Wood Button, two lil’ ladybugs, and two lil’ bumblebees.
Adding Napkin Art to Your Canvases
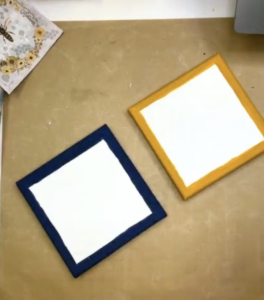
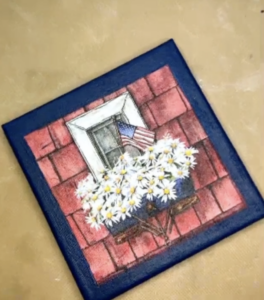
First, prep your napkin to add to your canvases. Cut out one square and lay your napkin down on the center of your canvas. Use a Frixion Pen to make a mark where your napkin is so that you know where to paint your border. (The Frixion Pen marks will disappear with heat!)
For the flag canvas, I am painting the border and edges with Startrucks (a really pretty blue), and for the bee canvas, I am painting the border and edges with Fresh Mustard.
Separate the plys of your napkin until you have that top layer of napkin art. The bee napkin is 2-ply and the flag napkin is 3-ply. Add a coat of Mod Podge Matte to your canvases, and you can go over the painted edge too. Add your napkin on top, place some plastic wrap over top, and smooth the napkin onto the canvas with your hands. Dry with a heat tool, add another coat of Mod Podge Matte to seal it, and let it dry again.
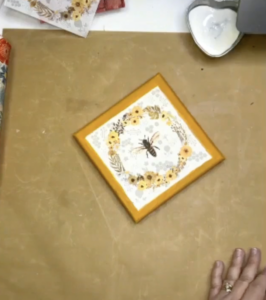
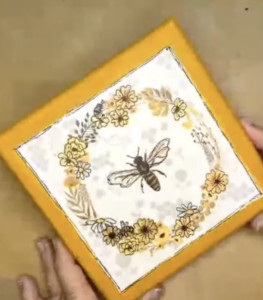
Now, let’s do our pen work! I like to use Pitt Pens for this. I will add a border around my napkin art, add some detail lines to my bumble bee, and some lines to my flowers as well. I’m not going to do every single flower, but just a few of them.
I’ll do the same on my flag napkin art too. I’m going to add some detail lines on my window box, around my window, and on my flag as well.
Finishing Your DIY Canvases with Embellishments
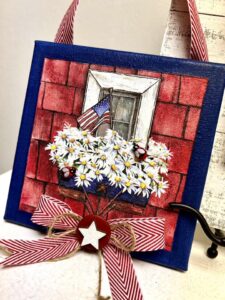
At this point, we are going to add some embellishments. I am creating a hanger for each canvas – these need to be 11 inches long. I like to staple my ribbon to my canvas.
Let’s embellish the patriotic canvas! I have some ribbon and jute twine that I will create to make a bow for the bottom of my patriotic canvas. Hot glue your bow right onto the canvas. I’ll also add a red button and white star to the middle of the bow with hot glue. This one also gets the ladybugs! Use a tiny dot of hot glue and add them to the daises on your canvas. Finally, I’ll add some Diamond Stickles to my flag, white star, the star on the window box, and the ladybig wings.
I’m going to make the same kind of bow for my bee canvas – the ribbon with jute twine. I’m going to hot glue this one to the top corner of my canvas. I’ll also add the white heart to the middle of my bow. I also have little bumble bees that I will hot glue to the white heart and the bottom right corner of my canvas. Finally, I’ll add Stickles to my bumble bee, the wings of my embellished bees, and the white heart.

I go LIVE on my Facebook page every Friday at 11 am CST for a fun and easy Craft-n-Chat Session. Come learn something new while creating something beautiful!
Join the waitlist for The Napkin Club where Unique Makers can connect, learn, and be inspired to create with the Individual Unique Napkin Collections that you will receive every month! A place where Napkin Lovers can unite and be inspired!


0 Comments