

Supply List:
- Cardstock
- Scissors
- Frixion Pen
- Chalk Inks
- Hole Punch
- Ribbon
- Black Journaling Pen
We’re diving into an easy paper-folding technique that’s perfect for celebrating spring and adding a touch of floral charm to your projects. As we commemorate 5 wonderful years of creativity, connection, and inspiration within the Page Builder’s Clubhouse, what better way to mark the occasion than with a bouquet of beautifully crafted folded paper tulips? I will guide you through the step-by-step process of creating these paper tulips from simple folds of paper. I’ll also show you how to incorporate them onto a personalized tag, adding a unique and handmade touch to your gift-giving or scrapbooking projects.
Learn to Fold a Paper Tulip
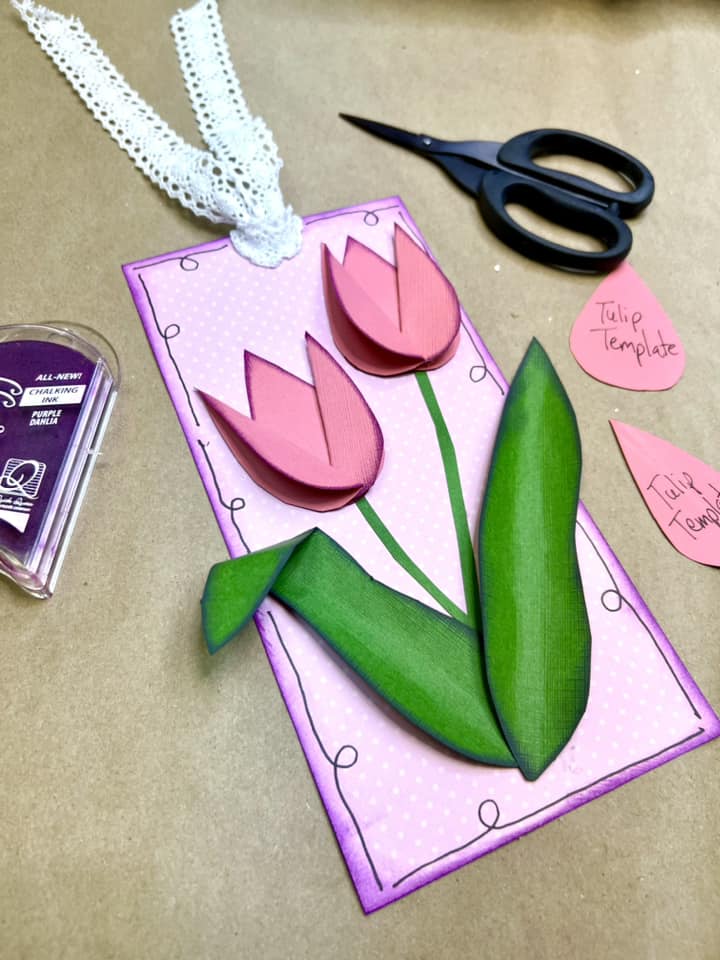
Start by creating a teardrop-shaped template using cardstock – the fatter the teardrop, the larger your tulip will be. Use a Frixion Pen to outline your template on pink cardstock. You will need three teardrops to make one flower. Cut your shapes out and use a heat tool to erase the pen lines.
Next, I will use purple chalk ink to add color to the edges of my teardrop shapes. Take two teardrops, turn them over, and fold them in half. You will have two folded teardrops and one that is not folded.
Build your tulip by adding hot glue to one side of your folded tag and attaching it to your full teardrop. Make sure it sticks out a little bit to form a V shape. Do the same thing on the other side, making sure it overlaps the other folded side a little bit.

Creating a Paper Tag
I will take my purple chalk ink and add color to the edges of my two cardstock tags. Next, I will cut out my tulip leaves from a piece of green cardstock. I am freehand cutting these out because they do not need to be perfect!
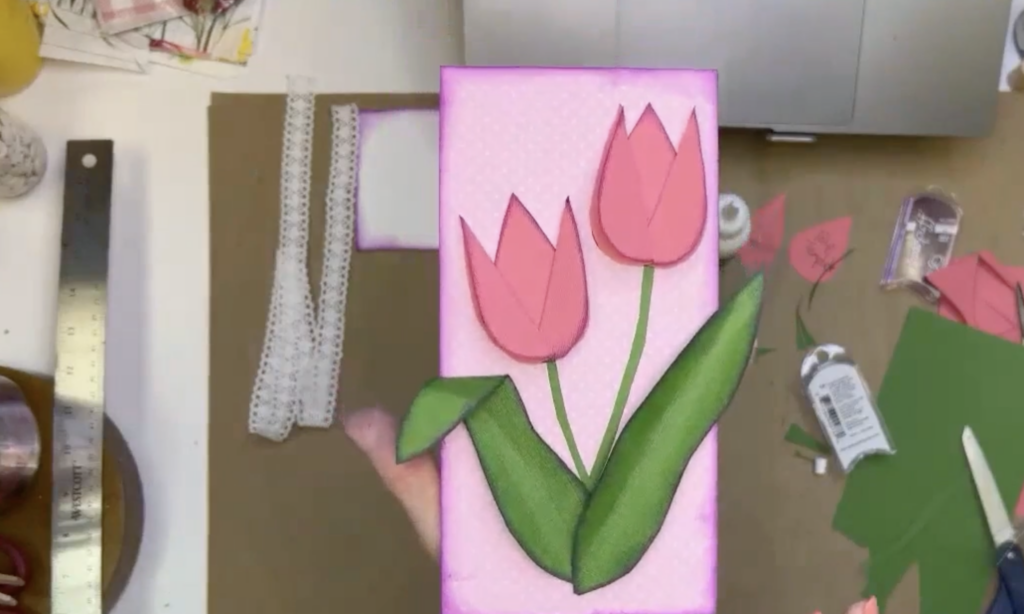
I’m going to have one of my leaves flopped over like how a real tulip leaf may be, so I will fold one of my leaves at an angle. I’ll also cut out a thin strip of green cardstock to make the stems. Attach your stems and tulip flowers to your tag with tacky glue.
I am going to add gray chalk ink to the edges of my leaves for a little dimension. Wrap the tulip leaf paper around your finger, so it pops a little bit. Use hot glue to attach the leaves to your tag.
I will punch a hole in the top of my tag and tie some pretty lace ribbon on the top. Finally, I will use a Black Journaling Pen to doodle a border around my tag.

This tag would be perfect for adorning a Mother’s Day gift bag or adding something special to a spring-themed scrapbook page. This easy paper craft isn’t just about creating something beautiful – it’s about sharing joy and warmth with loved ones. So whether you’re giving them as a gift or keeping them as a personal treasure, enjoy this simple paper craft!
I go LIVE on my Facebook page every Friday at 11 am CST for a fun and easy Craft-n-Chat Session. Come learn something new while creating something beautiful!
Join us in The Page Builders Club House! This is a monthly membership that combines creative guidance and community to help you bust your scrapbooking stash, create beautifully unique layouts, and banish “Blank Page Syndrome” for good!


0 Comments