

")
St. Patrick’s Day Glass Jar Napkin Art Craft
Supply List:
- Lucky Me Napkin Value Pack
- Glass Jars or Canisters
- Simplicity – Country Chic Paint
- Hard Coat Mod Podge
- Plastic Deli Sheets – found in my Amazon Shop
- Dry Erase Marker
- Uniball Pen – Gold
- Hot Glue
- Stickles, if desired
- Embellishments – Ribbon, Twine, Jewels, Buttons
- Golden-wrapped candy to fill the jars!
St. Patrick’s Day is the perfect time to get creative with festive decor! If you love crafting with glass jars, this project is a fun way to transform ordinary containers into something special. With just a little paint, napkin art, and embellishments, you can create a beautiful, one-of-a-kind piece to display in your home or give as a thoughtful gift. Plus, adding gold-wrapped candy makes it even more magical!

How to Paint Glass Jars
When crafting with glass jars, the best types of paint to use are chalk-based or mineral-based paints, as they adhere well to glass surfaces. Acrylic paint won’t provide the same durability or coverage.
For this project, I’ll be painting a mason jar using Country Chic Paint in Simplicity. When painting on glass, it’s important to build up the color gradually. Apply three thin coats, allowing each layer to fully dry before adding the next. This ensures a smooth, even finish.
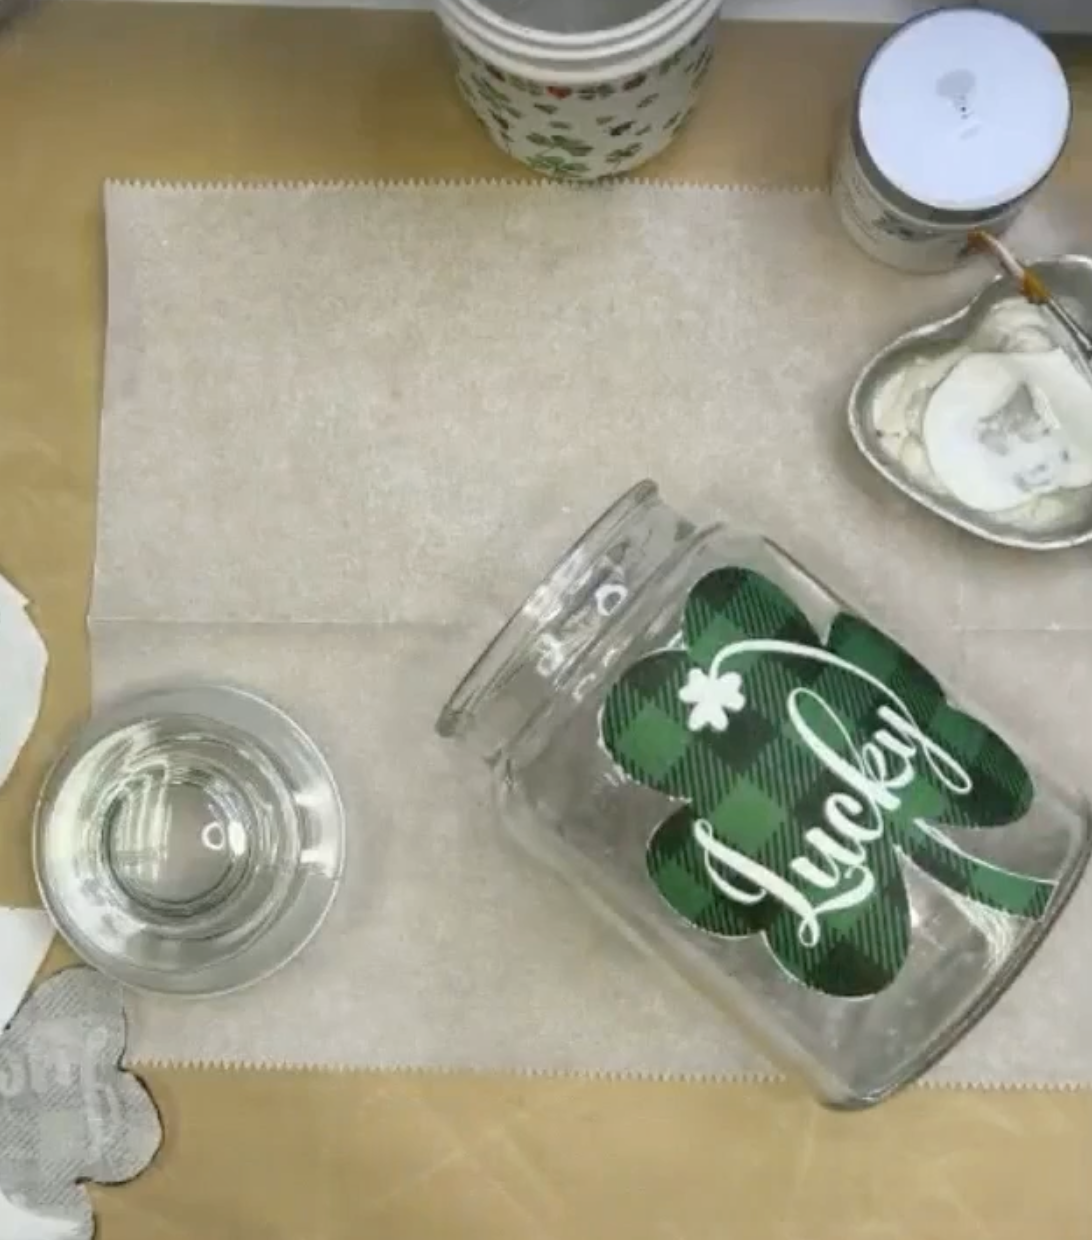
I’m also working with a glass canister but will only be painting a portion of it – just enough to serve as a backdrop for my napkin art. I’ll be applying a napkin shamrock to this canister. Here’s the process:
- Cut out the shamrock and separate the napkin plies.
- Take the back ply and use a dry-erase marker to trace the shamrock shape onto the glass.
- Paint inside the traced shape with Country Chic Paint in Simplicity.
- Use a heat tool to dry the first coat, then apply a second coat for better coverage.
- Dry it again before moving on to the next step.
- Wipe off the dry erase marker with your finger or wipe.

Adding Napkin Art to Glass Jars
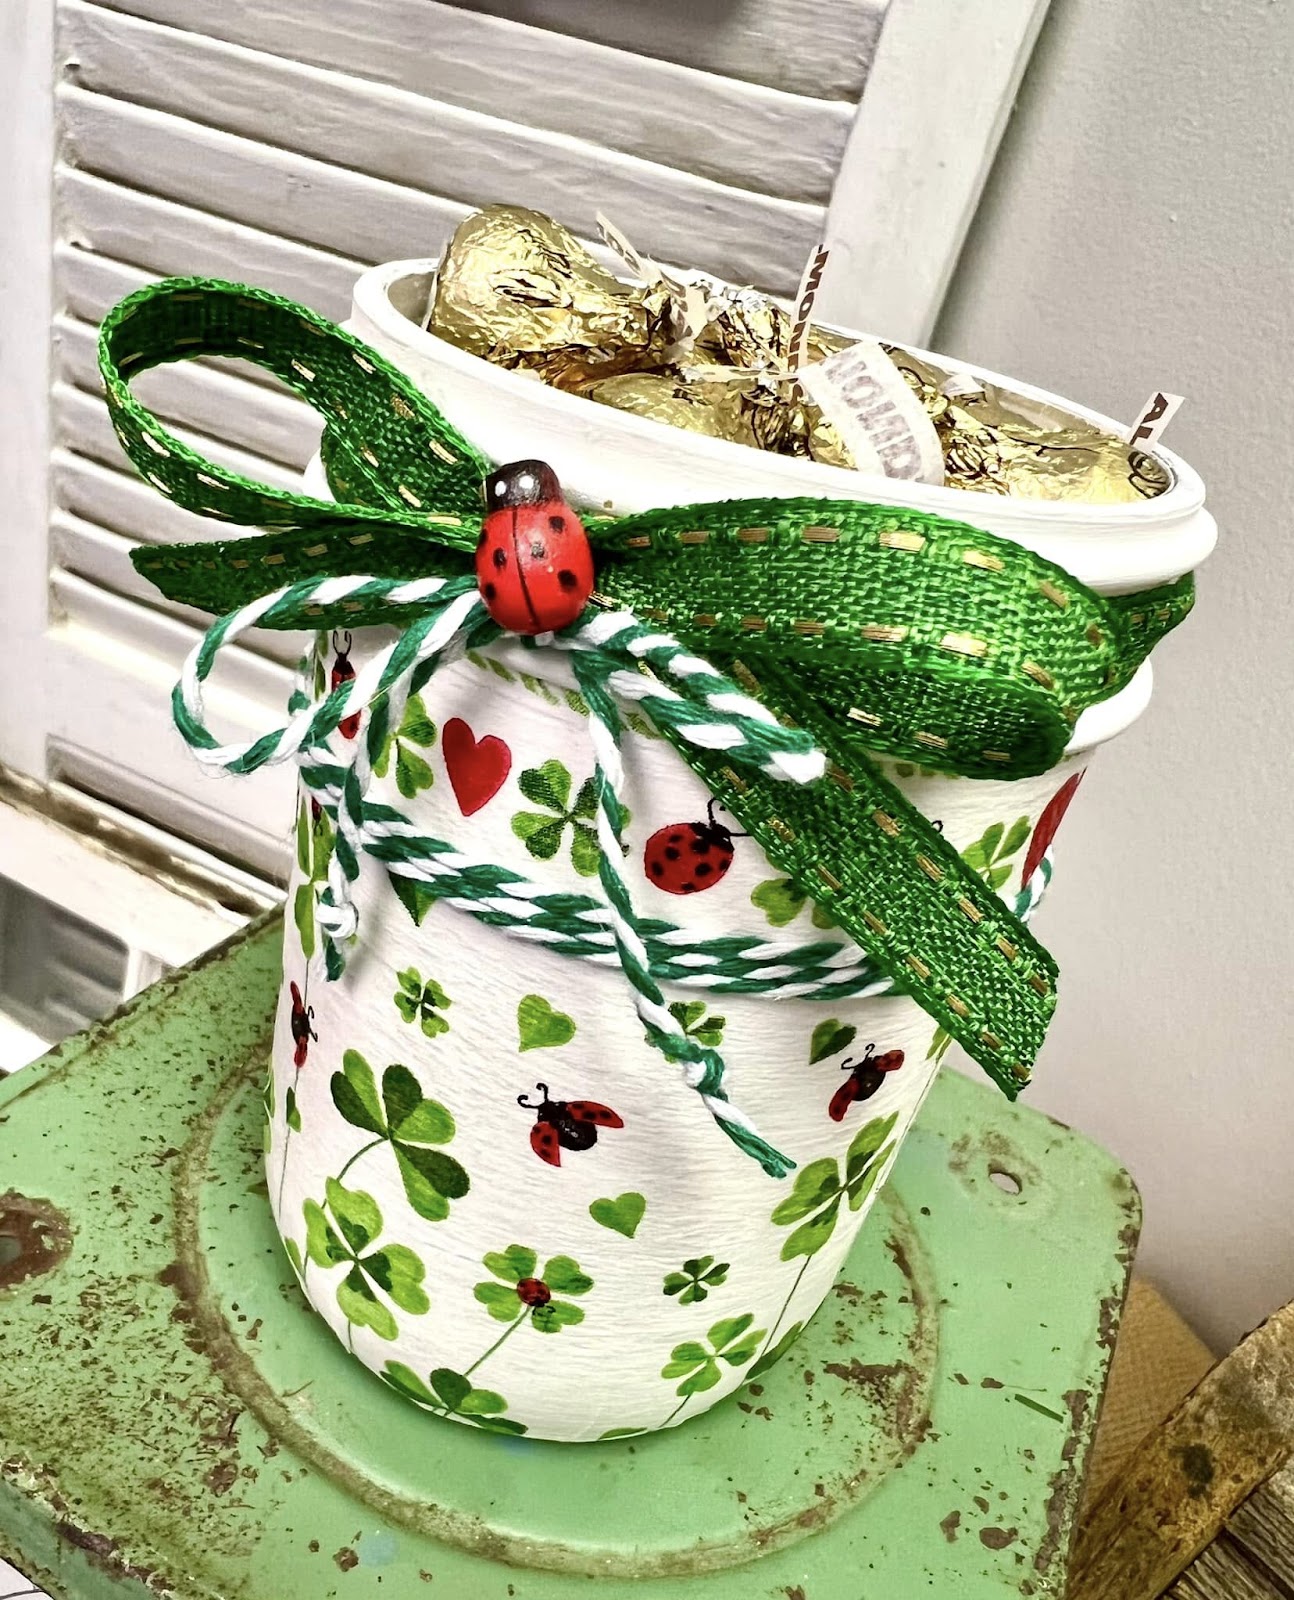
On my fully painted jar, I’ll be applying a napkin featuring shamrocks and ladybugs, adding a festive touch to this project. The napkin also has a charming border that I’ll cut and apply to the jar for extra detail. Since glass is a non-porous surface, Hard Coat Mod Podge works best for strong adhesion and durability.
To start, I’ll separate the napkin plies, keeping only the top printed layer. Then, I’ll brush a thin layer of Hard Coat Mod Podge under the lip of the jar and carefully place the napkin border around it, using plastic wrap to smooth it down and prevent wrinkles. Next, I’ll trim the main napkin design to fit the jar and apply it using the same technique. Once everything is in place, I’ll use a heat tool to dry it quickly before sealing the design with a final coat of Mod Podge.

Next, I’ll move on to my glass canister! To start, I’ll apply a layer of Hard Coat Mod Podge over the painted shamrock, then carefully place the napkin shamrock on top, using plastic wrap to smooth it down and eliminate any wrinkles. If there’s any excess paint outside the shamrock’s edges, I’ll simply scrape it off with the end of my paintbrush for a clean finish. Finally, I’ll use a smaller brush to apply a second coat of Mod Podge to seal the napkin art, then dry it with a heat tool to set everything in place.
Adding Embellishments to Your St. Patrick’s Day Glass Jars
Now comes the fun part – adding the finishing touches! Feel free to embellish your jar with ribbons, twine, or any decorative accents you like. For my fully painted jar, I’ll use a hot glue gun to attach baker’s twine just below the napkin border, wrapping it around the jar about three times for a nice layered look. To add even more charm, I’ll take a dark green ribbon and wrap it around the rim of the jar, securing it in place with hot glue.
Next, I’ll create a simple yet elegant bow using the same green ribbon. To do this, I’ll cut a piece of ribbon and shape it into a ‘tribute ribbon’ loop, then gather the center and secure it with baker’s twine or a thin ribbon. For a polished finish, I’ll trim the ends into flag shapes and hot glue the bow to the front of the jar. As a final touch, I’ll add a tiny ladybug embellishment to the center of the bow for a bit of extra charm!
For my glass canister, I’ll add a touch of elegance by using a gold Uniball pen to highlight the edges of the clover and letters, giving them a subtle shimmer. To add even more sparkle, I’ll use Stickles to fill in the clover and white letters, creating a beautiful, eye-catching effect. To finish off this festive project, I’ll fill the jars with gold-wrapped candy – perfect for a charming St. Patrick’s Day gift or a decorative touch for the season!

I go LIVE on my Facebook page every Friday at 11 am CST for a fun and easy Craft-n-Chat Session. Come learn something new while creating something beautiful!
Join the waitlist for The Napkin Club where Unique Makers can connect, learn, and be inspired to create with the Individual Unique Napkin Collections that you will receive every month! A place where Napkin Lovers can unite and be inspired!

0 Comments