


Supply List:
- Advice from a Flower Napkin Art Canvas Kit
- Mod Podge Matte
- Plastic Deli Sheets
- Hot Glue
- Scissors
- White Gel Pen
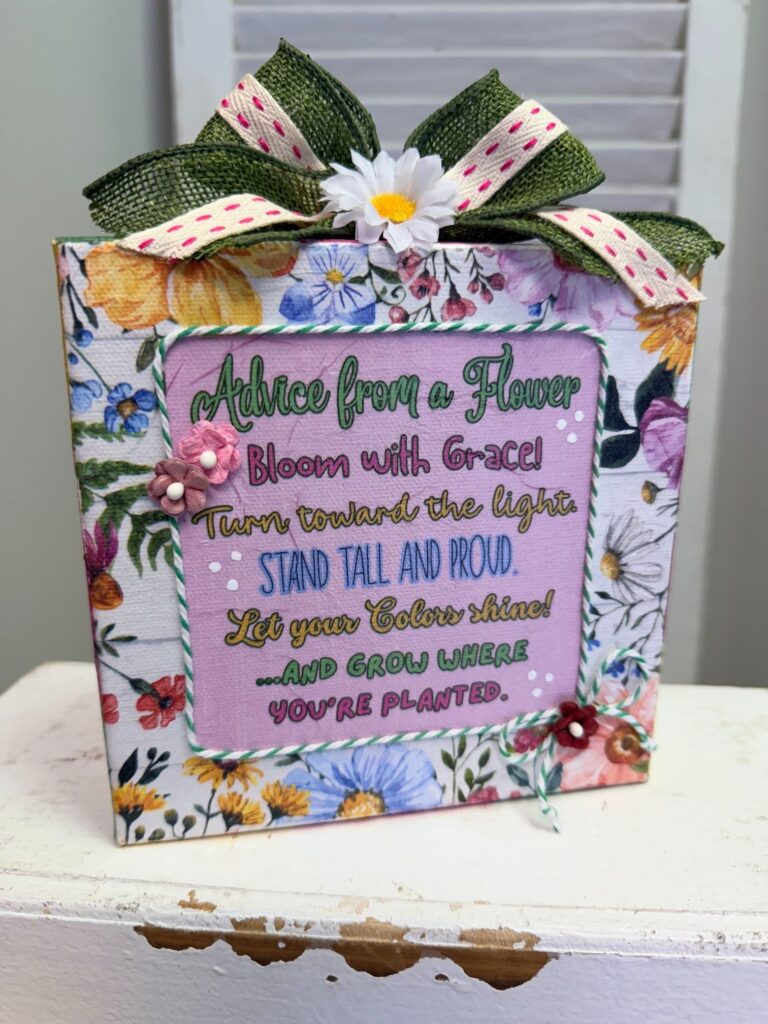
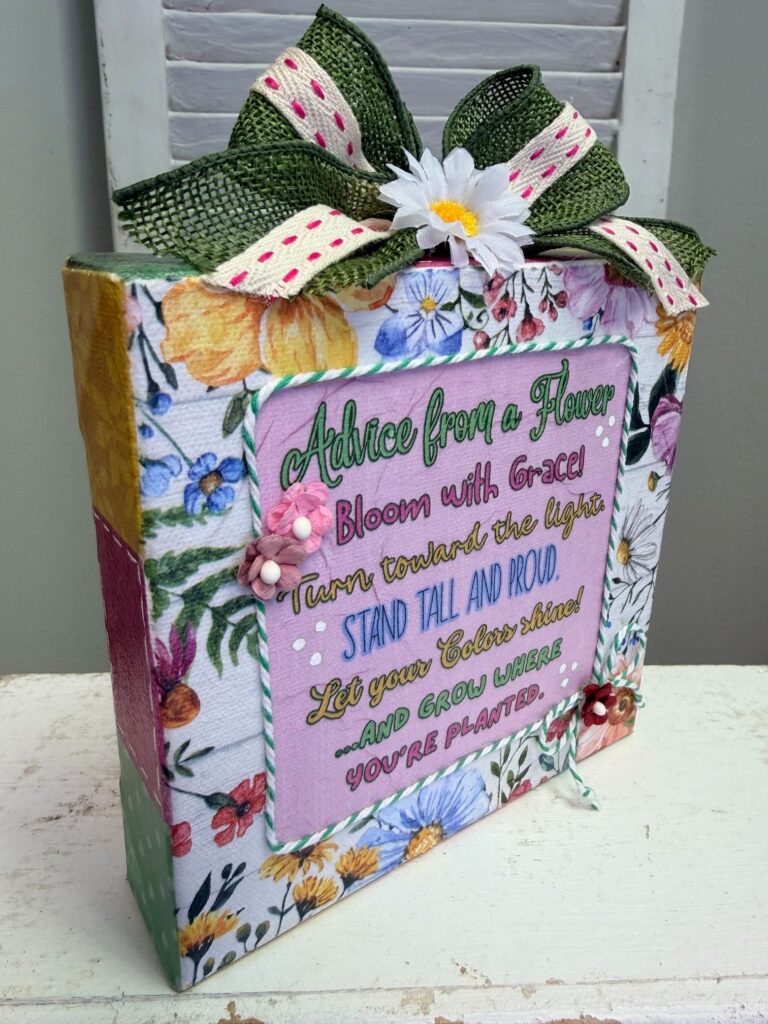
If you’re looking for a simple spring craft that is both beautiful and meaningful, this Advice from a Flower canvas is the perfect project to try. This easy napkin art tutorial walks you step-by-step through creating a bright and cheerful piece using Mod Podge, decorative napkins, ribbon, and a few embellishments. It’s especially perfect for spring decorating, Mother’s Day gifts, or adding a little encouragement to your space!
Step 1: Cut and Prep Your Patchwork Napkin Pieces
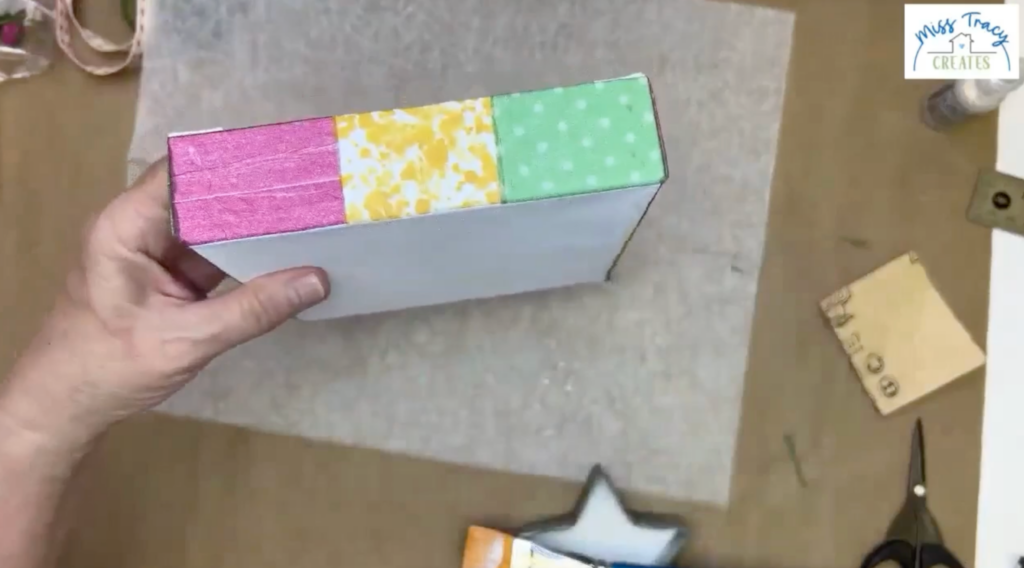
Begin by preparing the patchwork pieces that will wrap around the sides of your canvas. Cut your coordinating napkins into strips that are about 1 1/2 inches wide to match the depth of the canvas. Then cut those strips into smaller sections, about 2 inches long, so you can create a patchwork effect. Plan to use three pieces per side, mixing patterns and colors in a way that feels balanced and fun. This step is all about creating a soft, quilt-like look, so don’t worry about everything matching perfectly.
Once your pieces are cut, separate the napkins until you are left with just the top printed layer. Most napkins have multiple plies, but only the top layer is needed for this technique. Take your time with this step, as the layers can be delicate. If they are difficult to separate, lightly dampening your fingers can help you grip the layers more easily.
Step 2: Apply Patchwork to the Canvas Sides
Apply a generous coat of Mod Podge Matte to one side of the canvas, making sure the surface looks evenly coated and slightly wet. Place your napkin pieces directly into the glue, arranging them side by side to create your patchwork design. Cover the napkin pieces with deli paper or plastic wrap and gently smooth them down, starting in the center and working outward. Continue this process around all four sides of the canvas, making sure each piece is secured and smoothed in place.
Step 3: Dry and Trim Edges
Allow the sides to dry completely before trimming any excess napkin. Once dry, use scissors or lightly sand the edges to remove any overhang. Sanding works especially well because the napkin is so thin, giving you a clean, finished edge. If you notice small imperfections, they can usually be smoothed out or blended in with the next layer of Mod Podge.
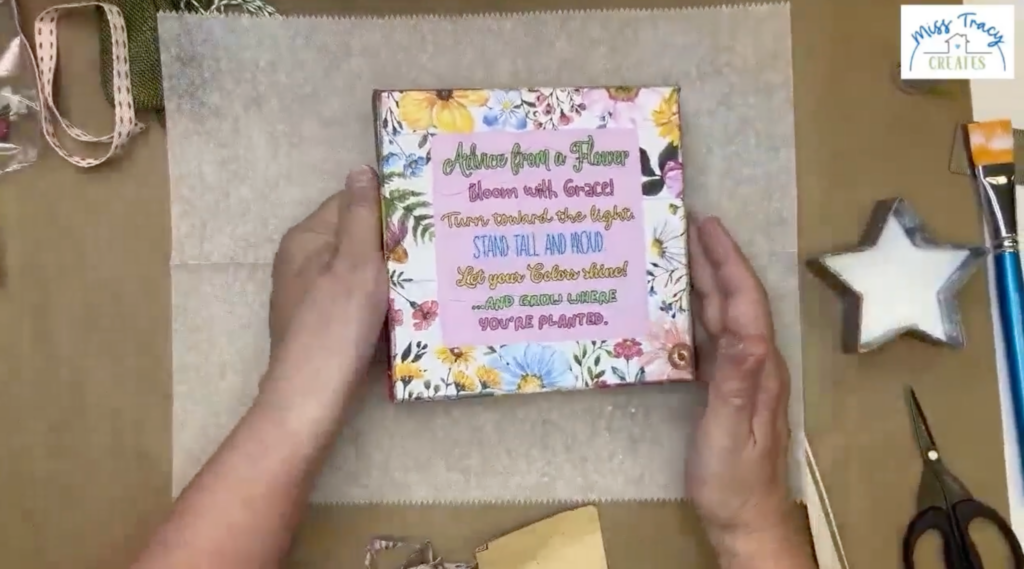
Step 4: Add the Main Napkin Design
Next, apply a layer of Mod Podge Matte to the front of the canvas. Carefully position your main napkin design, starting at the top and gently laying it down across the surface. Use deli paper to smooth the napkin, beginning in the center where the text is and working outward. This helps prevent tearing and keeps the design aligned. Don’t worry if you see a few soft wrinkles, as they will add texture and character to the finished piece.
Let the top dry completely before moving on. Once it’s fully dry, lightly sand the edges to remove any excess napkin and create a smooth finish. This step helps the design look polished and professionally done while blending everything seamlessly into the canvas.
Step 5: Seal and Add Twine Border
Apply a thin, even coat of Mod Podge Matte over the entire canvas to seal everything in place. While the top is still wet, press baker’s twine around the border of the main design, following the square shape. Start and stop at the bottom so the ends can be hidden later. Press the twine gently into the glue so it adheres as it dries, creating a soft, dimensional frame.
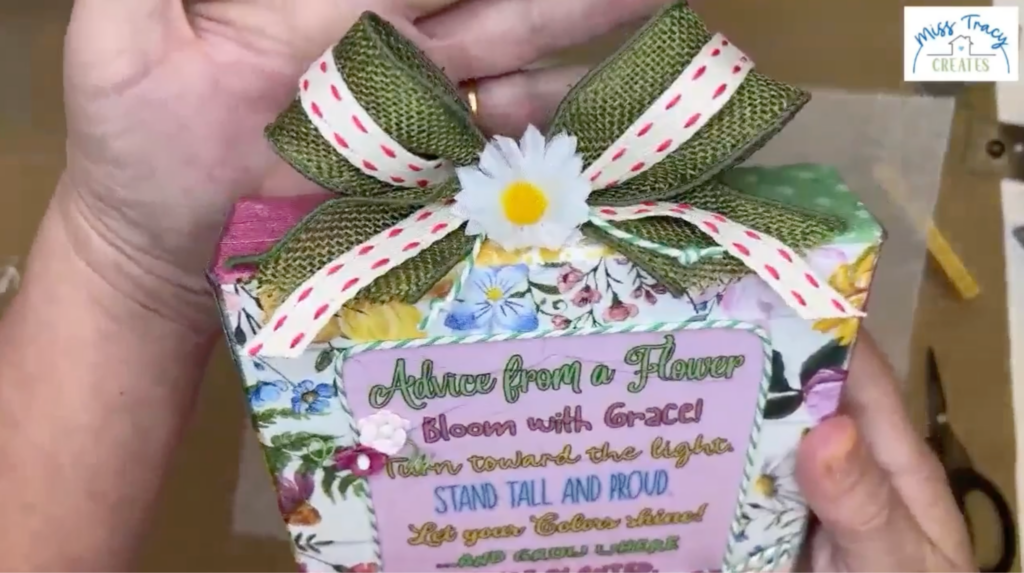
Step 6: Add the Small Bow and Flowers
Create a small bow using baker’s twine and glue it over the spot where the twine border begins and ends. This hides the join and adds a sweet decorative detail. Place a small flower in the center of the bow, and add additional floral embellishments nearby for balance.
Step 7: Create the Layered Ribbon Bow
Layer your ribbons together and create a bow by crossing them in the center and gathering them with twine. Adjust the loops and tails until the bow looks full and balanced. Because the ribbon is wired, you can shape it easily. Attach the bow to the top of the canvas using hot glue, allowing the loops to sit up slightly for dimension.
Step 8: Add Faux Stitching and Details
Once everything is dry, use a white pen to add small dashed lines around the patchwork pieces to create a faux stitched look. You can alternate with black pen if you want more contrast. If desired, use a fine-tip pen to outline or emphasize certain words in the design. These small details help bring the entire project together and give it a more finished, handmade feel.
At this stage, you can personalize your canvas even more. Add sparkle with glitter glue, enhance details with additional pen work, or keep it simple for a softer look. There’s no right or wrong way to finish it – this is where you can really make it your own!
This canvas makes a wonderful handmade gift for spring, Mother’s Day, or any occasion where you want to give something thoughtful and encouraging. The uplifting message paired with the colorful design makes it a meaningful piece that anyone would love to display!
Want more napkin art projects like this? If you loved this technique, you’ll love learning inside the Napkin Club, where I teach napkin art projects, creative techniques, seasonal crafts, and tons of inspiration using napkins in fun, unexpected ways. Join the Napkin Club here and craft along with us!


0 Comments