

Supply List:
- Cardstock
- Patterned Papers
- Chalk ink (optional)
- Scotch Tacky Glue
- Hole Punch
- Twine or Ribbon
- Stickers or Embellishments
- Stickles for Sparkle
May is a month of celebration! Teachers are wrapping up the school year, graduations are in full swing, and Mother’s Day brings an outpouring of love and appreciation. And what better way to show you care than with a thoughtful gift card?
That’s where this adorable paper craft tutorial comes in! In just a few minutes, you can transform leftover scrapbook paper into charming and colorful gift card holders. Perfect for any occasion, these little pockets are a great way to add a personal touch to your gift-giving. Plus, they’re a fantastic way to use up those paper scraps that tend to pile up in every craft lover’s stash!

CREATING YOUR PAPER GIFT CARD HOLDER
First, grab your white cardstock and cut out two pieces measuring 4 inches by 5 inches each. You will need two pieces of this size cardstock to create one gift card holder. Then, choose a piece of decorative cardstock or patterned paper and cut out a single piece that is 3.5 by 4.5 inches. Finally, you will need one more piece of decorative paper that is 4 inches by 2.5 inches.
Want to add a touch of charm? Use chalk ink to gently darken the edges of your cardstock pieces before assembling.
Take your 3.5-inch by 4.5-inch decorative paper and glue it to your white cardstock piece, leaving a border around the edges.
Apply a thin line of Scotch Tacky Glue to your smallest piece of decorative cardstock, then carefully adhere it to your second white cardstock piece, making sure the bottom edges line up perfectly.
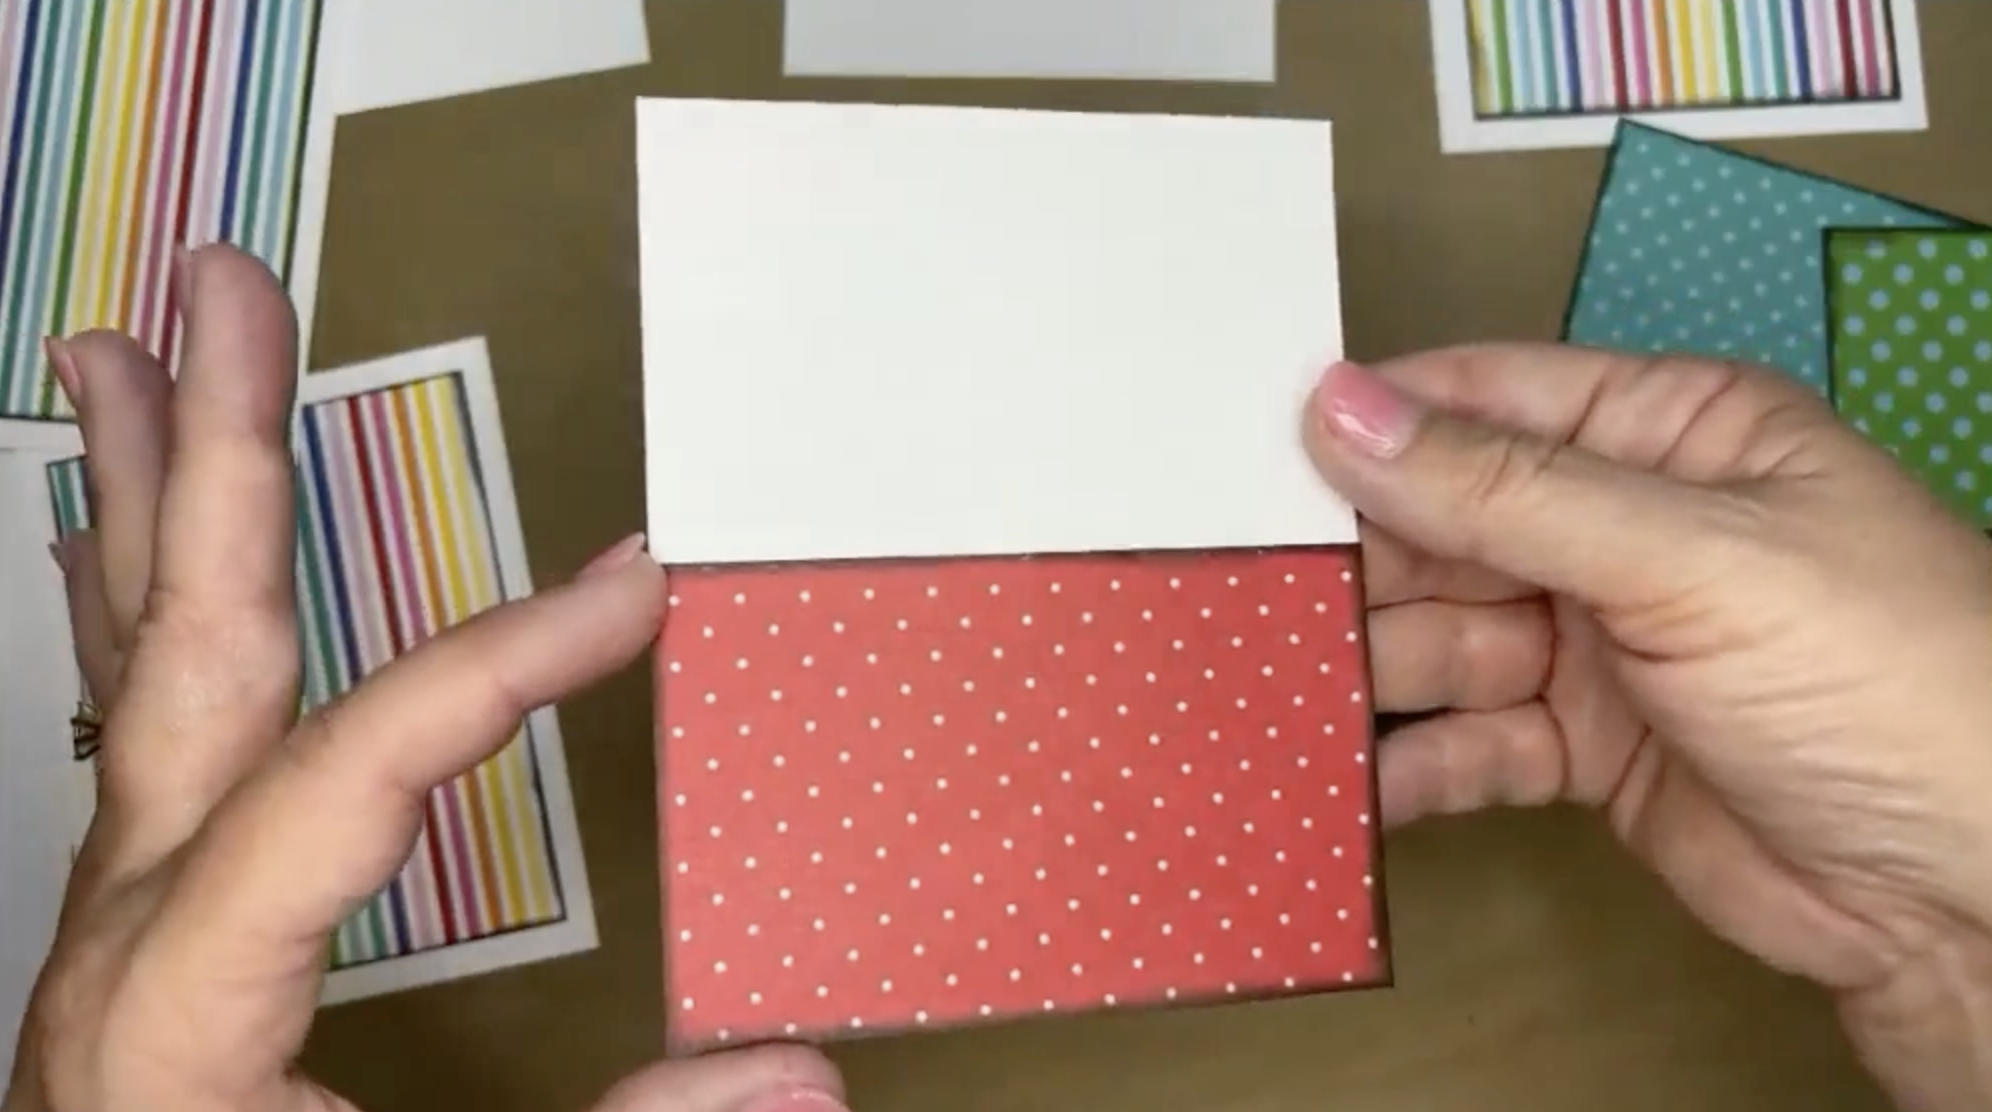
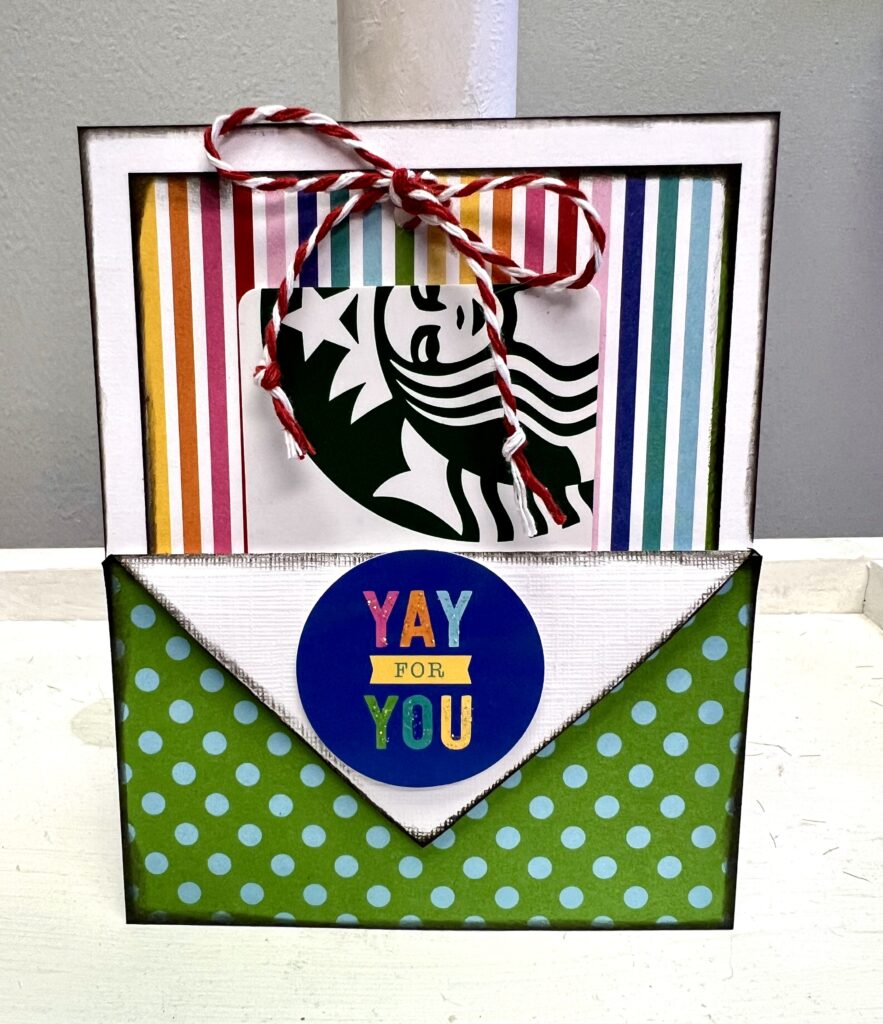
Next, we’ll form the envelope flap. Take the white cardstock piece and fold down the top two corners to meet in the center, creating a triangle shape. Open the triangle carefully and use your scissors or paper trimmer to cut off the excess corners. Fold the triangle back down to form a flap – this will be the closure for your gift card holder. You can even add some ink to the edges of the flap for a cohesive look. I will also take a piece of foam tape and stick it under the envelope flat to give it some dimension.
Ready to put it all together? Apply a small amount of glue to the back of the little envelope you made (not the top edge) and adhere it to the bottom of the first cardstock piece you created earlier. This will form your gift card pocket!
Embellishing Your Gift Card Holder
Now comes the fun part – embellishing! Stickers, punched shapes, or any other creative touches you can dream up are all welcome.
To finish it off, thread your ribbon or twine through the hole (if you punched one) and tie a cute little bow.
You’ve just created an adorable, personalized gift card holder in no time at all. These are perfect for any occasion, from birthdays to holidays, and can be easily customized with different colors, patterns, and embellishments. They even make fantastic little pockets for your scrapbook layouts!
I go LIVE on my Facebook page every Friday at 11 am CST for a fun and easy Craft-n-Chat Session. Come learn something new while creating something beautiful!
Did you love this? Check out my online creative memberships! They are all a little different, and each is designed to ignite your imagination, inspire your craft, and connect you with fellow art enthusiasts. If you’re a creative looking for an online space to learn and thrive, we have something for everyone!


0 Comments