


Supply List:
- NEW Small Shiplap Pumpkins
- DecoArt Spiced Pumpkin Paint (in Amazon Storefront)
- Liquid Antiquing Wax
- Baby Wipes
- Decorative Paper Napkins
- Mod Podge Matte
- Glaze Pens
- Wool Felt for Flowers (Dandelion, Cranberry, Pumpkin)
- Jute and Buttons
As we’re getting into the thick of the fall season, we are going to be doing a fun fall project today! We have these new small shiplap pumpkins that I absolutely love and we are going to be making a simple fall banner! We will be painting these pumpkins, adding some napkin art, and finishing them off with felt flowers and embellishments. This project is truly customizable to what you have in your stash or what you would like to add!

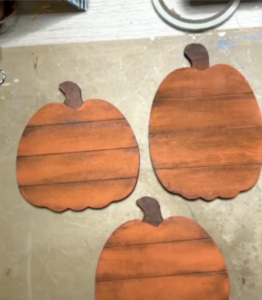
Painting the Shiplap Pumpkins
First, start by painting your pumpkins with DecoArt Spiced Pumpkin. You can paint the front and the back of them to make it reversible too. Let dry.
Next, take some Liquid Antiquing Wax and apply some to the shiplap valleys on your pumpkin and your stem with a paintbrush. Then, take a baby wipe and wash it away. I’m going to leave the color on my stem and let that harden.
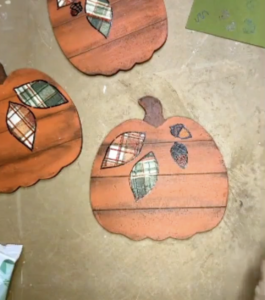
Applying Napkin Art to Wooden Pumpkins
I have some scraps from lots of fall-themed decorative napkins from the Napkin Club. I’m going to draw a few leaves on some plaid patterned napkins and cut those out. I’ll also cut out a few leaves and acrons from another napkin.
I want white to show through behind these napkin pieces, so I’ll take a Frixion pen, outline these leaves, and add some white paint to my pumpkin. Dry with a heat tool. Separate the plys of your napkin until you just have that top layer of napkin art. Add some Mod Podge Matte on your pumpkin and add those napkin pieces to your pumpkin, using some plastic wrap to smooth it down. Use this same technique for any napkin art that you will be adding to your pumpkins! Add a coat of Mod Podge Matte over top of your entire pumpkin to seal your piece.
Adding Pen Work and Felt Flowers to Your Art Project
I’m going to use some Glaze Pens to add some detail lines to these napkin art pieces. I’m going to outline my little acorns and add a criss-cross pattern. I’m also going to draw some detail lines on my plaid pattern.
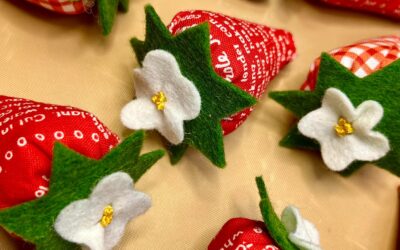
Next, I’ll be adding some embellishments, including some adorable Wool Felt flowers. Take your a Frixion Pen and draw a circle on your piece of felt. Then, draw a spiral inside of your circle. Take your scissors and cut the circle out, then cut along the spiral line. I’ll take my heat tool to erase those pen marks.
Pinch the outside end of your spiral in your finger and start coiling the flower up tightly into your hand, wrapping it up. As you get further out, you should wrap looser.
Turn your flower upside down, dab some hot glue in the center, and attach the end so that it acts as a cap for your flower. Give your flower a push in the center to spread it out a little bit, and there you have a cute felt flower!
Repeat this step for however many flowers you would like to add to your pumpkins.

Hot glue your felt flowers to your pumpkins wherever you would like. I am going to cluster three flowers together in the middle of my napkin art leaves.
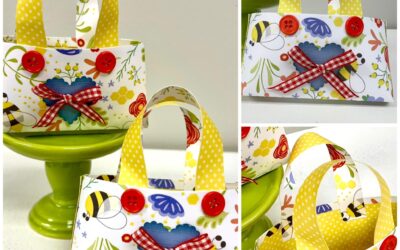
At this point, you can add a jute twine bow or some buttons – whatever you have in your stash that would look cute!
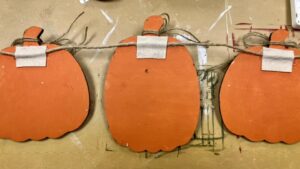
To create a banner, you can hot glue some felt on the back of each pumpkin over top of twine, especially since these pumpkins do not have any hooks or holes.
This is such a cute and easy project that you can use for so many different home decor ideas. If you do not want to create a banner, you could style these in a wreath, on floating shelves, just stuck into a haybale, or as part of your Thanksgiving tablescape. The options are endless!

I go LIVE on my Facebook page every Friday at 11 am CST for a fun and easy Craft-n-Chat Session. Come learn something new while creating something beautiful!
If you loved this project, join the waitlist for The Napkin Club where Unique Makers can connect, learn, and be inspired to create with the Individual Unique Napkin Collections that you will receive every month! A place where Napkin Lovers can unite and be inspired!


0 Comments