Supply List
- Shiplap Cross – Small
- Shiplap Bunny – Small
- Simplicity CCP Paint
- Decorative Napkins
- Hymnal Paper
- Mod Podge Matte
- Sandpaper
- Pitt Pens
- Wood Beads and Wire
- Stickles – Crystal
- Ribbon, Twine
- Rosette Flowers, foam Easter Eggs
- Hot Glue Gun
We are creating some fun Easter crafts today with two shiplap wooden pieces – a cross and a bunny. We’ll apply paint, napkin art, and all of the cute embellishments! These would be perfect to add to your Easter or spring decor this season, and I’ll show you exactly how to make them from start to finish!


First, I am going to paint them both white with Country Chic Paint in Simplicity. I’ll take a toothpick and clean out my shiplap valleys to make those pop. Let dry or dry with a heat gun.
Making a Shiplap Cross with Napkin Art
I’ll start with the mini cross and we’ll be adding a page from an old hymnal. I love to use the music paper in these old hymals and I know this cross will look amazing with this! Think of this as a background. I’m going to cut the page into strips. Then, I’m going to apply a layer of Mod Podge Matte to my cross. I’ll add some plastic wrap on top and smooth it out with my hands. Make sure you push it into those shiplap valleys. Let dry or dry with a heat gun. Finally, take some sand paper and sand off that excess paper.
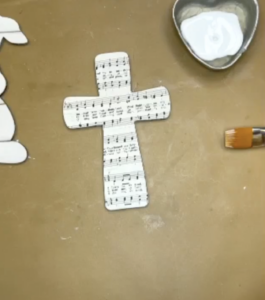
I have a napkin with a gold cross and some greenery. I’m going to cut out the gold cross and remove those plys until I just have that top napkin art. I’ll add some Mod Podge Matte to my cross, apply the golden cross, and smooth it out with plastic wrap. I’ll also take the greenery from napkin and apply that using the same method to some of my edges. Let dry or dry with a heat gun.
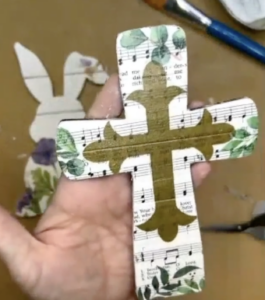
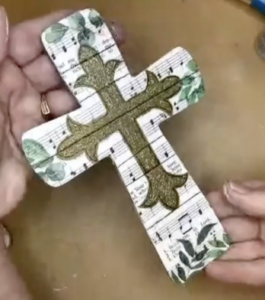
Next, grab a Pitt Pen and add some detail lines. I am outlining my golden cross and adding some lines to those shiplap valleys. I’m also going to add something a little extra, so I’ll applying some Crystal Stickles to the golden gross to give it sparkle.
Applying Napkin Art to My Shiplap Bunny
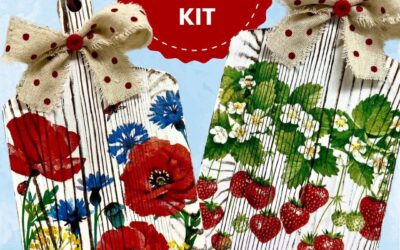
Before I add any more embellishments, let’s work on our shiplap bunny. I have a gorgeous floral napkin that I am going to use for this one. I am going to trace the shape of the bottom half of my bunny onto the napkin and cut that out. I’ll apply the flowers to the bunny using the same method with my Mod Podge Matte and smoothing it down with plastic wrap. I’ll also add a few flowers to my bunny’s ear. I’ll use some Crystal Stickles here too and add some sparkle to the flowers.

Adding Embellishments to My Cross and Bunny
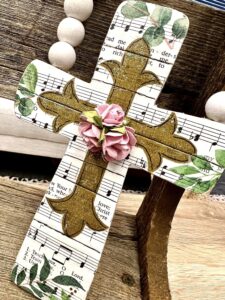
Let’s add some embellishments! If you would like, you can use my clothespin hack to create an easel for the back of your shiplap pieces. For my cross, I am actually going to create a white-beaded hanger with some wire. Add the beads to your wire, fold each end up, and take a toothpick and twist it around to create a corkscrew end. Then, mash that down with a hammer to keep your beads on the wire. Attach the wire to your wooden cross with your hot glue gun. I’ll also hot glue some extra flowers to the center too.
For the embellishments for my bunny, I’m going to add a piece of baker’s twine around the neck with a bow. I also have these cute little styrofoam eggs. I’ll cut off the back to make it flat and then I’ll glue a few eggs to my bunny too. I have a piece of pink ribbon with polka dots that I’ll cut and add to my bunny’s ears. Finally, I’ll outline my bunny with my pen. These little extra goodies really bring the whole piece together!

I absolutely love the way these two turned out! They are simple and easy Easter art projects that will look beautiful in your home or as a gift. Be creative and add any embellishments you would like to really pull the entire piece together.
I go LIVE on my Facebook page every Friday at 11 am CST for a fun and easy Craft-n-Chat Session. Come learn something new while creating something beautiful!
Come join The Napkin Club this month and bypass the wait list! Doors are OPEN and will close again in April (and not reopen until August!) I don’t want you to miss out on all the creative fun we will be having! Grab your spot now!



0 Comments