


Supply List:
- Chunky Wood Star
- CCP Paints- Poppy, Simplicity
- Mod Podge Matte
- Decorative Paper Napkins (The Napkin Club)
- Aluminum Tape (Industrial Metal Tape found at Home Improvement or Hardware Stores)
- Sandpaper or Small Foam Sanding Block
- Decorative Ribbons and Baker’s Twine
- Small Wood Stars
- Stickles – Diamond or Crystal
- Optional – Heat It Craft Tool for quick drying
- Scrap piece of paper for the star template
- Frixion Pen
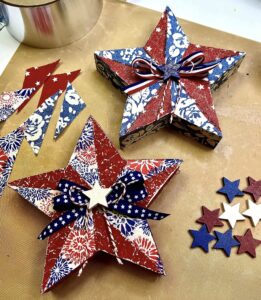
I am creating with these adorable chunky wooden stars, which I love because they are a great size (about 7 inches tall) and they can stand up on their own for the best decor. I’ll be adding some napkin art, aluminum tape, and all of the cute embellishments to these patriotic wooden stars. Grab a set for yourself and get creative! You can use these stars for lots of other things too, like Christmas, birthdays, kid’s room decor, and more.
Adding Napkin Art to a Chunky Star
I painted both of my stars with white Simplicity paint. Now, I am going to start by adding napkin art to the sides of my chunky star. I have two 1.5-inch wide strips of blue floral napkins. Separate the plys until you just have the top layer of napkin art. Apply a coat of Mod Podge Matte to the sides of your star and lay your napkin art on top, using a chip brush to pounce it down. Dry with a heat tool, sand off any edges, and add a quick top coat of Mod Podge Matte.
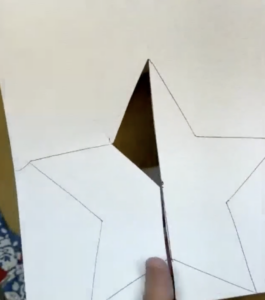
I created a little template to use for this project. I took my wood star and traced it onto a scrap piece of paper, put a dot in the center, and used a ruler to cut out the triangle half that I’ll use to create some napkin pieces for my project.
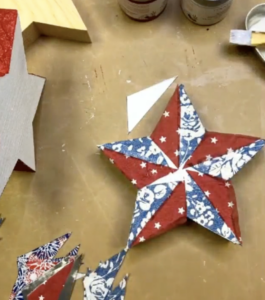
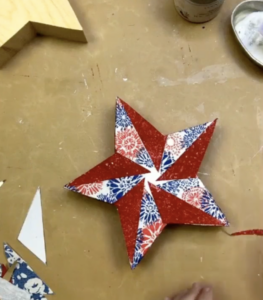
Apply a coat of Mod Podge Matte to your star. Then, add your floral blue triangles on top, pouncing them on with a chip brush. Then, do the same thing with your red napkin art. We are going to add some embellishments to the middle, so don’t worry about that part! Dry with a heat tool and sand off any overlapping edges. Finally, seal it with a coat of Mod Podge Matte.
Using Aluminum Tape on a Wooden Star
I am starting by adding aluminum tape to the sides of my chunky star. This is industrial strength tape that you will find at your local hardware store, and I love to use it in my crafting! Cut your tape to 1.5 inches wide. For this project, I am going to use the “wrinkle crinkle method” – take your fingers and just wrinkle your metal tape. Take the adhesive backing off and apply the aluminum to the sides of your star and just press down (don’t smooth it because we want those wrinkles!) Paint the aluminum tape with red paint. Don’t brush it on – pounce it on with your chip brush.
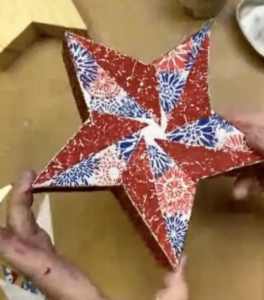
I’m going to use the same triangle template from my star to create some aluminum tape and napkin pieces for the front of my star. I have a red, white, and blue fireworks napkin that I am using for this one, and I’ll just separate the plys until I have the top layer of napkin art. Apply a coat of Mod Podge Matte to the front of your star and apply your napkins, pouncing them on with a chip brush. Dry with a heat tool, sand off the edges, then seal with a coat of Mod Podge Matte and dry again.
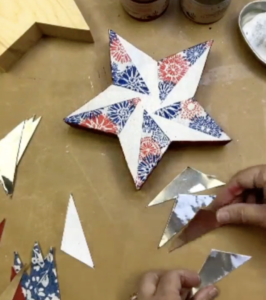
Take your aluminum tape triangles and use the “wrinkle crinkle” method. Paint each piece with red paint, pouncing it on instead of brushing. Let dry, then remove the adhesive backing and apply them to your wooden star.
Use the edge of a paintbrush handle to press down any foil edges that are sticking out. Now, we will sand! Use a foam sander or just a piece of sandpaper and sand your aluminum tape to expose some of those wrinkles and crinkles. Do this on the sides and front aluminum pieces on your wooden star.
Adding Embellishments to Patriotic Stars
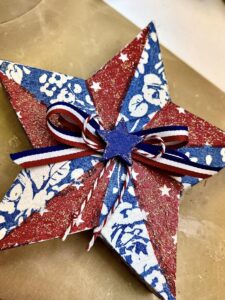
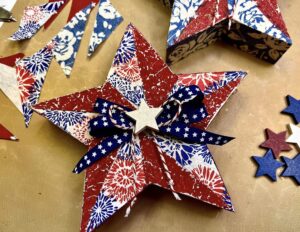
I have some red, white, and blue wooden stars, which you can find at any craft store right now. For my napkin art star, I’m going to create a bow using red, white, and blue striped ribbon and some baker’s twine. Then, I’ll hot glue it to the middle of my star, and then top it with a blue star. I’ll finish it off with some Stickles on my center star and on my red napkin areas.
I’ll do the same for my other wooden star – hot gluing a ribbon bow with baker’s twine and adding a white wooden star to the center.
These are so fun to make and you can really get creative with your supplies and embellishments! I showed you two different ways to craft with these, using just napkins or adding in some aluminum tape too. This is the perfect patriotic project to do this summer!
I go LIVE on my Facebook page every Friday at 11 am CST for a fun and easy Craft-n-Chat Session. Come learn something new while creating something beautiful!
Join the waitlist for The Napkin Club where Unique Makers can connect, learn, and be inspired to create with the Individual Unique Napkin Collections that you will receive every month! A place where Napkin Lovers can unite and be inspired!


0 Comments