


Supply List:
- Decorative Napkins – The Napkin Club
- Wood Box Frame – Hobby Lobby
- Wood Heart Tag – Hobby Lobby
- Country Chic Paint – Crinoline
- Mister Bottle with Water
- FriXion Pen
- Mod Podge Matte
- Chalk Inks
- Pitt Pens
- Plastic Wrap Sheets
- Small piece of Sandpaper
- Hot Glue
- Wood Butterfly Buttons were from my stash
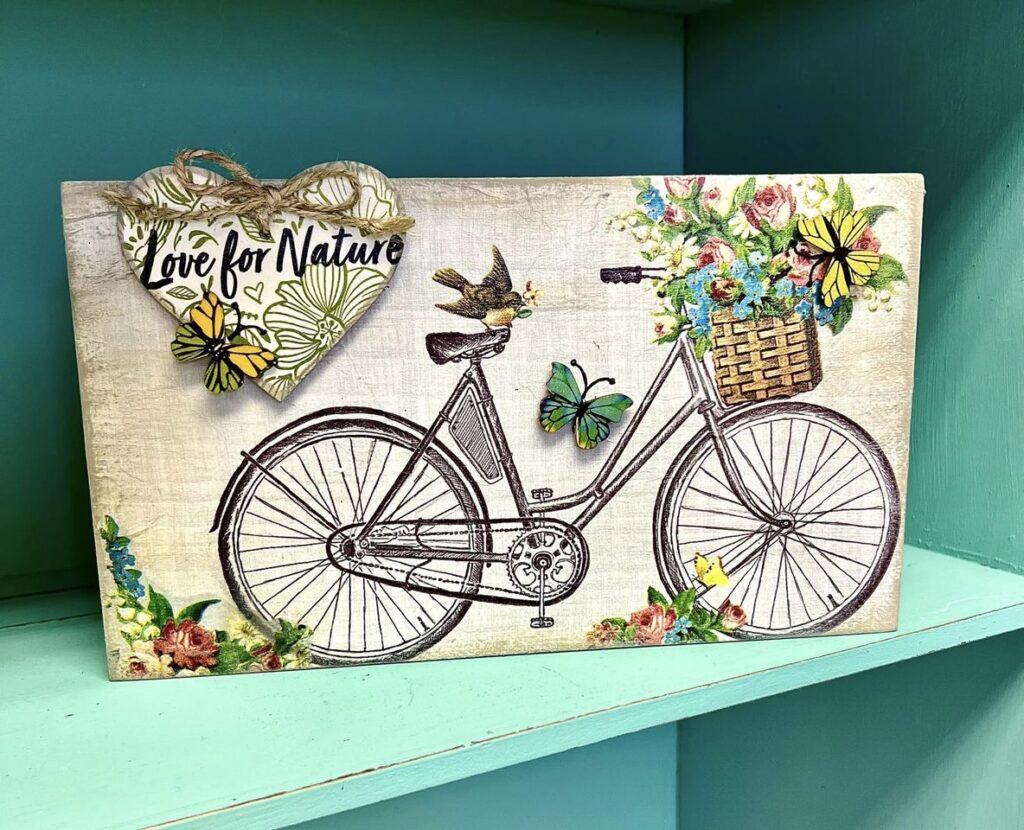
I am sharing how to create a charming wood box frame decorated with the sweetest bicycle and nature-inspired napkins. With summer just around the corner, this project is the perfect way to infuse your home with some seasonal decor.
Whether you choose to hang it on your wall or display it proudly on a shelf, this versatile piece is sure to brighten up any space. It’s incredibly simple and fun to make, perfect for crafters of all skill levels. If you’ve never experimented with napkin art before, this tutorial will guide you through each step with ease and get you hooked on napkinizing!
Adding Napkin Art to Your Wood Boxframe
Begin by applying a coat of Country Chic Paint in Crinoline onto your wooden box frame. You can use a white paint color here, but I’m using Crinoline since my bicycle napkin has a slight gray hue to it.
Using a pouncing motion, apply the paint onto the frame’s surface. Lightly mist it with water and gently wipe it down with a paper towel. This technique will give you a whitewash effect while allowing the natural wood grain to show through. Remember to cover both the sides and the front of the frame. I’m also going to use a wooden heart on this piece, so I’ll do the same whitewash technique with that too.

Cut your bicycle napkin to size and seperate the plys until you just have that top layer of napkin art. Add a coat of Mod Podge Matte to your surface, place your napkin on top, and use plastic wrap to smooth it down with your hands. Dry it with a heat tool and sand off the excess edges with a piece of sandpaper. Add another coat of Mod Podge Matte to seal your napkin.
Adding Details and Embellishments
Next, I am going to work on my wooden heart. I have a nature-inspired napkin that says “love for nature” that I am going to apply to this heart.
Place the wooden heart on top of your napkin and use a FriXion Pen to outline the heart. Cut out the napkin art and separate the plys. Add a coat of Mod Podge Matte to your heart, place your napkin on top, and smooth it down with a piece of plastic wrap. Dry with a heat tool. (This will also erase your pen lines!) Use sandpaper to remove the excess napkin on the edges and seal it with another coat of Mod Podge Matte.
I’m going to play with some of my Chalk Inks! I’m going to use a color called River Rock to ink around the edges of my wooden heart. I’ll also ink around the edges of my wood boxframe. I’ll also put some around the sides and corners too. If you get a little heavy with it, you can use a wet paper towel to mute it. Dry with a heat tool.
My wooden heart has a little hole in the top, so I’ll take a piece of twine and tie a bow through that hole. I’ll add foam tape to the back of my wooden heart along with hot glue and adhere it to my boxframe. I also have some wooden butterflies from my stash that I’ll stick to my frame with foam tape as well.
The last step is to use Pitt Pens to do pen work and outlining on your napkin art to make different areas pop.

With a few easy steps, you’ve turned a basic wooden boxframe into a lovely decor piece! Whether you’re sprucing up your space for spring or summer, this craft adds a charming touch to any room. Plus, it’s simple enough for crafters of all levels to enjoy!
I go LIVE on my Facebook page every Friday at 11 am CST for a fun and easy Craft-n-Chat Session. Come learn something new while creating something beautiful!
Join the waitlist for The Napkin Club where Unique Makers can connect, learn, and be inspired to create with the Individual Unique Napkin Collections that you will receive every month! A place where Napkin Lovers can unite and be inspired!
Enjoy making these beautiful celebration canvases to use to decorate your home. These are both wonderful to use for birthdays and any kind of celebration for those you love.
I go LIVE on my Facebook page every Friday at 11 am CST for a fun and easy Craft-n-Chat Session. Come learn something new while creating something beautiful!
Join the waitlist for The Napkin Club where Unique Makers can connect, learn, and be inspired to create with the Individual Unique Napkin Collections that you will receive every month! A place where Napkin Lovers can unite and be inspired!


0 Comments