


Supply List:
- Make Life Sweet Kit
- Country Chic Paint: Simplicity and Bliss
- Mod Podge Matte
- Plastic Wrap or Chip Brush
- Pitt Pens
- Stickles – Diamond
- White Paint Pen
- Pin
- Plastic card (like a gift card)
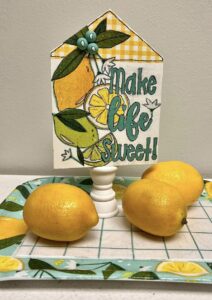
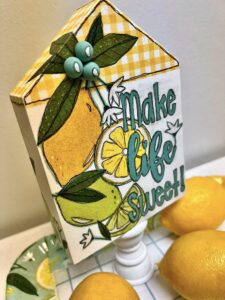
We released a brand new DIY Decor Kit that includes a 5×7 chunky house and everything you need to add embellishments and napkinize! This would be perfect as part of your summer kitchen decor or would make a really sweet gift. Your kit includes a chunky wood house, decorative napkins, a vinyl stamp that says “make life sweet”, transfer tape, and wooden beads.
Painting and Adding Napkin Art to Your Chunky House
First, we are going to start by painting the front, back, and top of our house with white paint. This helps your napkin art be really crisp and vibrant. Dry with a heat tool.
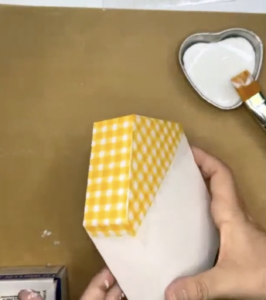
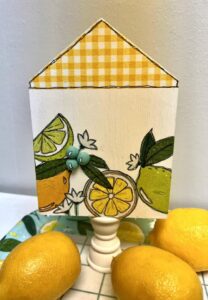
Next, we are going to work on the rooftop of our house. We will be adding our yellow gingham napkin to the top. Lay your napkin on top and create a crease where you need to cut your napkin strip and have your napkin art go over the edge a bit. Separate the plys of your napkin until you just have the top layer of napkin art. Add Mod Podge Matte to your rooftop, place your napkin on top, and use a piece of plastic wrap to smooth it down. Sand off any hanging edges.
Now, we will add the front part of the rooftop. Lay your yellow gingham napkin on top of where the rest of your roof should go, then crease it down so you know exactly where to cut. Separate your plys. Apply your Mod Podge Matte, lay your napkin art on your wooden house, and then smooth it down with some plastic wrap. Do the same thing for the other side of your roof. Dry with a heat tool.
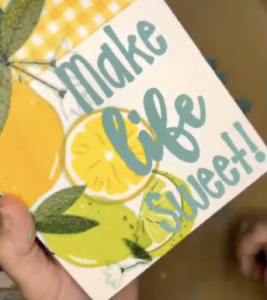
Let’s add our fruit! Grab your fruit napkin and we will cut out one lemon, one lime, one lemon slice, and one lime slice. Separate your plys and then lay your fruit where you would like them on your house – I am placing my lemons towards the top left and my limes toward the bottom left. Add your Mod Podge Matte, lay your napkin fruit down, and then smooth it all down with plastic wrap.
I’ll also cut out some flowers and leaves from the same fruit napkin and add those to my chunky wood house. I’ll add a small flower towards the bottom and then a flower and some larger leaves at the top of my whole lemon. At this point, add a coat of Mod Podge Matte to everything to seal it in. Dry with a heat tool.

Creating Your Vinyl Stencil
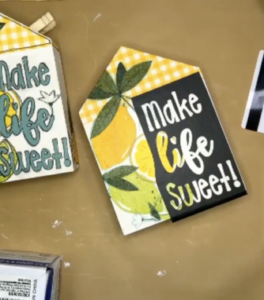
At this point, you could just use the black vinyl letters that are included in your kit. You could also create a stencil out of it and add paint to your house. I’m going to do that and use a pretty blue paint called Bliss.
Start by removing the letters from your vinyl sheet. Then, take your transfer tape, separate it, and place the sticky side down on top of your vinyl. Use an old gift card to squeegee your transfer tape on top of the vinyl so that it sticks really well. Flip it over and remove the backing of the vinyl carefully.
Place your vinyl stencil on top of your wooden house where you would like your letters to go. Use your old gift card to smooth it down again. Then, peel your transfer tape off and you have your stencil ready to go!
Paint over your stencil with the blue Bliss paint. You want to pounce your paint instead of brushing it on so that it doesn’t go underneath your stencil at all. Dry with a heat tool. Add a second coat of blue paint to your letters again. Since you have your paint out, you can also paint your wooden half-beads with the same color. Dry with a heat tool and then peel your stencil off of the wooden house. Use a pin to pick out those inner pieces.
Adding Details and Embellishments to Your Wooden House
I am going to cut one more flower out of my fruit napkin to add to the very end of my e in the word “life”. Separate your plys, add a little bit of Mod Podge Matte, and lay your napkin flower onto your house.
Now, we are going to do more line work! I am using my Piit Pen and outlining each of my fruits, my leaves, my flowers, the edges of my rooftop, and each letter. We’ll add some sparkle to our fruit and flowers with Stickles.
Next, I am going to take a white paint pen and draw little commas on each of my wooden beads. It’s like a little highlight on each berry. I’ll add a bit of pen work to each berry, outlining the comma. Add some hot glue right where your leaves meet and then add your wooden beads in a cluster.
At this point, feel free to napkinize and embellish the back of your chunky wooden house as well. I added more napkin fruit, flowers, and leaves as well as the rest of my wooden beads.
This is such a fun project that you can enjoy creating and customizing to your own unique style! To make this project even easier, grab a kit, which includes everything you will need to make this (minus the paint!) and get creative this summer season.

I go LIVE on my Facebook page every Friday at 11 am CST for a fun and easy Craft-n-Chat Session. Come learn something new while creating something beautiful!
Join the waitlist for The Napkin Club where Unique Makers can connect, learn, and be inspired to create with the Individual Unique Napkin Collections that you will receive every month! A place where Napkin Lovers can unite and be inspired!


0 Comments