Supply List:
- Christmas Tree Tag Kit
- Simplicity or Vanilla Frosting CCP paint
- Crackle Medium CCP
- Mod Podge Matte
- Pitt Pens
- Stickles -Diamond
- Krylon Gold Leaf Pen
- Sandpaper
- Scissors, Brushes, Plastic Wrap, Hot Glue
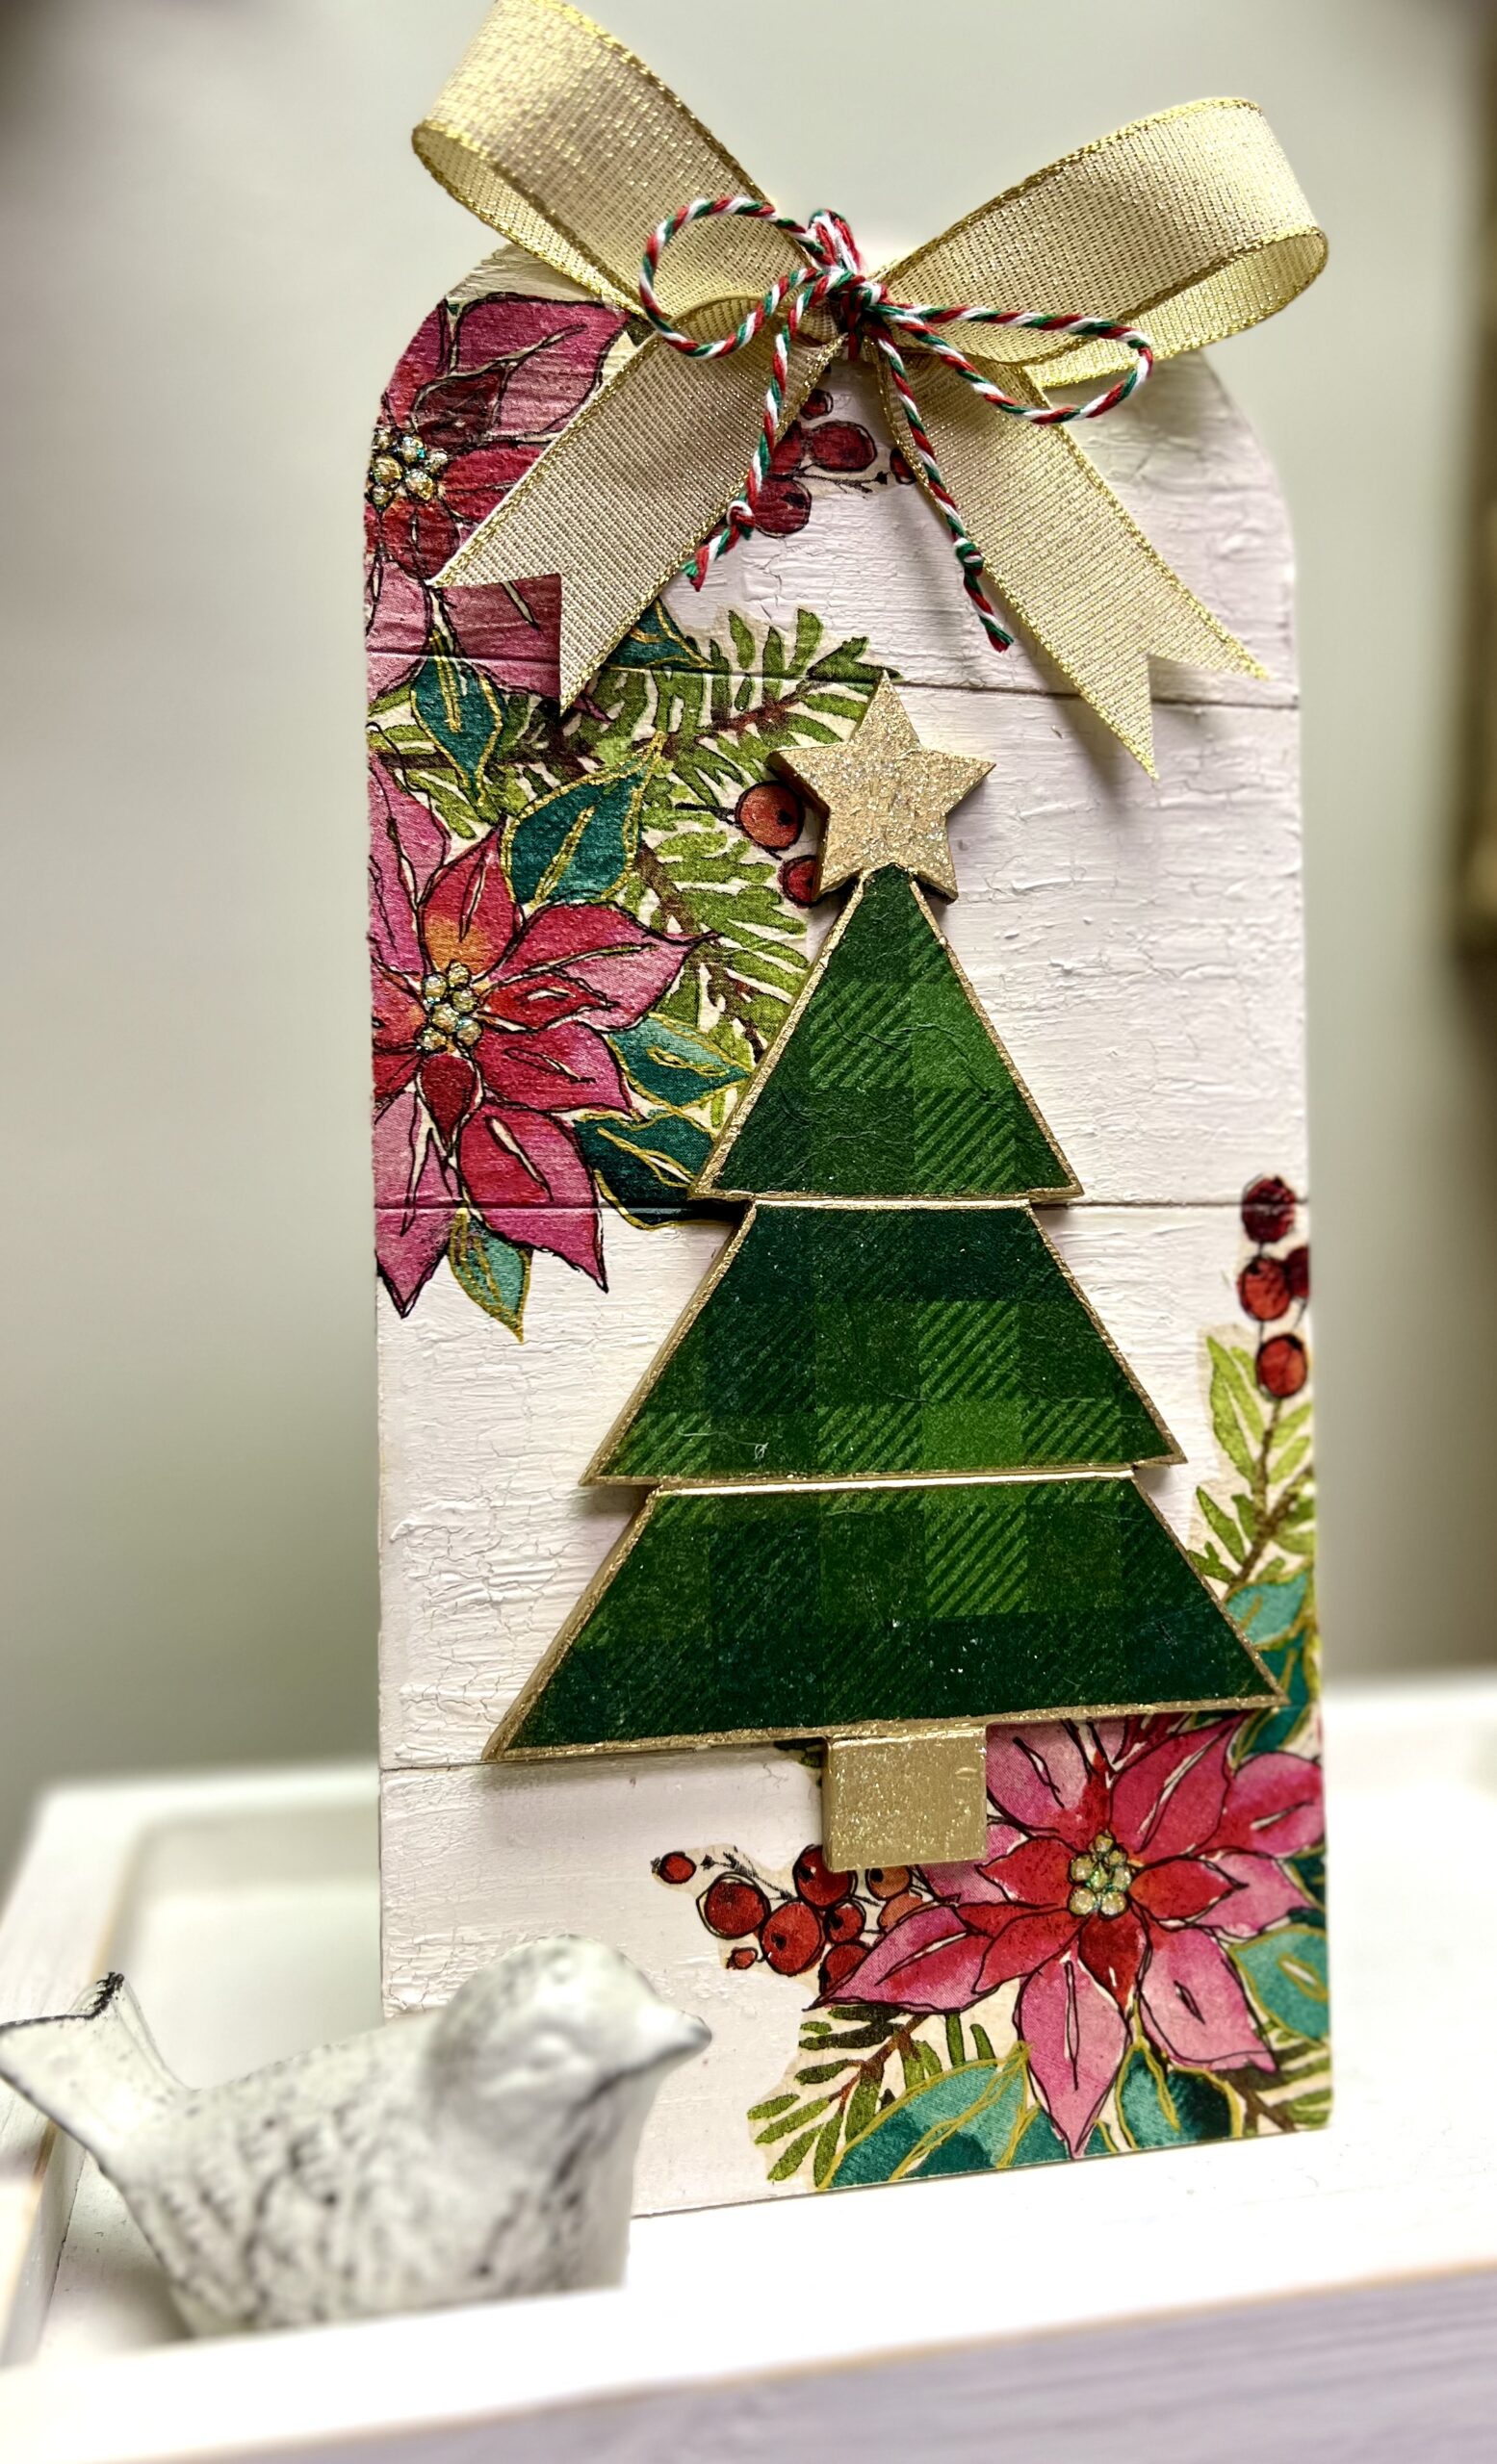
I adore crafting on oversized surfaces, and this Christmas tree tag is perfect for the holiday season. Whether you hang it on your Christmas tree as a large ornament, incorporate it into your holiday wreath, or add a pocket on the back for gifting, this napkin art project is simple, quick, and charming.
Your kit will include: a medium Round Wood Shiplap Shape Tag, a Small Wood Shiplap Shape Tree, 2 Decorative Napkins, and one gold ribbon & red/green twine.
Adding Napkin Art to Your Shiplap Christmas Tree
Start by painting your shiplap tag and shiplap tree with a coat of Simplicity or Vanilla Frosting CCP paint. (I recommend doing the back of your tag too!) Dry with a heat tool.
This part is optional, but I will add a crackle background on my tag. Take Crackle Medium CCP and stir it well with a stir stick. Paint a coat of crackle medium onto your tag and let it dry.
While this is drying, we will do some “fussy cutting” of our decorative napkins. In your kit, you will have a beautiful poinsettia napkin. Take this napkin and cut out some poinsettia flowers. Separate the plys of your napkin until you just have the top layer of napkin art. You’ll also have a green plaid napkin, which will cover our shiplap Christmas tree. Lay your tree onto the napkin, use a Frixion pen to outline the shape, and cut your tree out. Separate the plys of this as well.
Add a coat of Mod Podge Matte to your shiplap Christmas tree, lay your green napkin on top, and smooth it down with plastic wrap and your hands. Use your finger to get the napkin into the valleys of the shiplap too. Dry with a heat tool. Take a small piece of sandpaper and sand off any excess napkin hanging. Add a top coat of Mod Podge Matte and let dry.
Adding Napkin Art to Your Shiplap Tag
Once the crackle medium on your tag is dry, apply another coat of Simplicity or Vanilla Frosting CCP paint (whichever you used earlier). Be sure to paint in one direction, from left to right, without going back and forth. Your surface will start to crackle immediately! Use a file or toothpick to clear out the valleys of the shiplap, then use a heat tool to dry it further.
Next, apply a coat of Mod Podge Matte where you want to place the poinsettia napkin art on your tag. Lay the napkin on top, press it into the valleys of the shiplap, and use a chip brush to gently press it down to capture the crackle texture. Dry with a heat tool and sand off any excess napkin hanging over the edges. Finally, add a top coat of Mod Podge Matte to seal the napkin.
Embellishing Your Christmas Project
Next, I am going to use a Krylon Gold Leaf Pen to add some gold accents! I am going to use it to color the star, trunk, and edges of my Christmas tree. I’ll also go along the valleys of the shiplap on the tree. Dry with a heat tool. At this point, I will add Stickles -Diamond to the star and trunk as well. You could also add the Gold Leaf Pen to the edges of your shiplap tag too.
Then, take some Pitt Pens and doodle and trace on your poinsettia flowers, outlining different areas to make the artwork pop. You could also add gold accents and Stickles here as well.
Let’s put it together! Hot glue your Christmas tree onto your tag. Then, create a bow using the gold ribbon and twine included in your kit. Hot glue the bow onto the top of your tag. You could also create a hanger using the twine if you would like it to hang.
I hope this guide inspires you to create your own beautiful Christmas tree tag. With the decorative napkins, Mod Podge, and creative embellishments, you’ll have a unique holiday decoration. Whether you hang it on your Christmas tree, add it to a festive wreath, or use it as a gift tag, this project is sure to add a touch of handcrafted charm to your holiday season.
I go LIVE on my Facebook page every Friday at 11 am CST for a fun and easy Craft-n-Chat Session. Come learn something new while creating something beautiful!
Join the waitlist for The Napkin Club where Unique Makers can connect, learn, and be inspired to create with the Individual Unique Napkin Collections that you will receive every month! A place where Napkin Lovers can unite and be inspired!



0 Comments