


Supply List:
- Wool Felt
- Snow White
- Baby Blue
- Ocean
- Light Olive
- Wired Raffia – Hobby Lobby
- Frixion Pen
- Hot Glue
- Snips – Detail Scissors
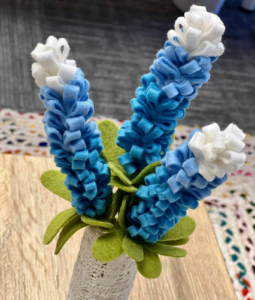
I’m in Texas and our state flower is the bluebonnet, so I’ll be showing you how to create the prettiest wool felt bluebonnets. You can also use this same technique to make lavender or lilacs too, if you prefer something a little different. Get colorful, make it your own, and have fun creating these felt flowers!
I am using a variety of wool felt colors today, including Snow White, Baby Blue, and Ocean for the flowers. The green for my leaves is called Light Olive. We are also using wired raffia for the stem, which should be about 14 inches long. Cut the felt into strips. For one bluebonnet, you will need a 1.5” x 12” strip, a 1.5” x 6” strip, and a 1.5” x 4” strip.
Creating Wool Felt Bluebonnet Flowers
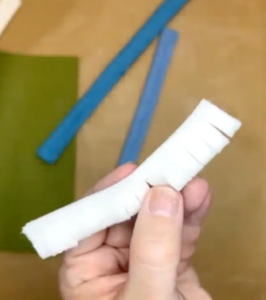
Take each of your strips and run a line of hot glue along one long edge, and fold it in half to glue those outer edges together. Take your detail scissors and cut a fringe on the edge that you did not glue.
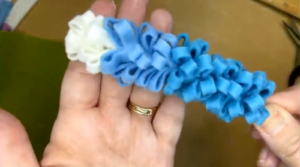
I am going to start with my white, which will be at the top of my flower. Add some hot glue, take the tip of the wired raffia stem, and wrap the felt around the stem. Hold it for a moment to make sure it is secure. Add more glue and continue to wrap it down the stem. Take your lighter blue felt and follow the same technique.

Move on to your biggest piece, which is the darker blue, and continue to follow the same technique. You’re simply adding hot glue and wrapping the felt around the wired raffia, holding tight for a few moments as you go so it sticks.
Adding Felt Leaves to Your Flowers
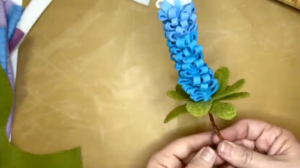
Next, we will create our leaves! I am using Light Olive wool felt for this and a Frixion pen. Start by drawing five lines that come to a point. Then, create rounded leaves around each line. You will create two of these.

Cut your shapes out and use a heat tool to erase your Frixion pen marks. These shapes are supposed to be imperfect! Fold them in the center, and add a tiny slit. Take the end of your stem and put it through the center slit in your leaves. Add some hot glue and push it up to the flowers to secure it. Do this for both pieces of felt.
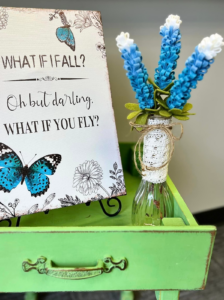
Look how pretty that is! You can create multiple and put them in a vase. They would be beautiful in other arrangements or a wreath too. You can do so much with these, and they are so fun and easy.
I go LIVE on my Facebook page every Friday at 11 am CST for a fun and easy Craft-n-Chat Session. Come learn something new while creating something beautiful!If you love working with all things fabric, come join the waitlist for the Fabric Fan Club! Keep the gorgeous fabric flowing AND actually create something unique with it.


0 Comments