

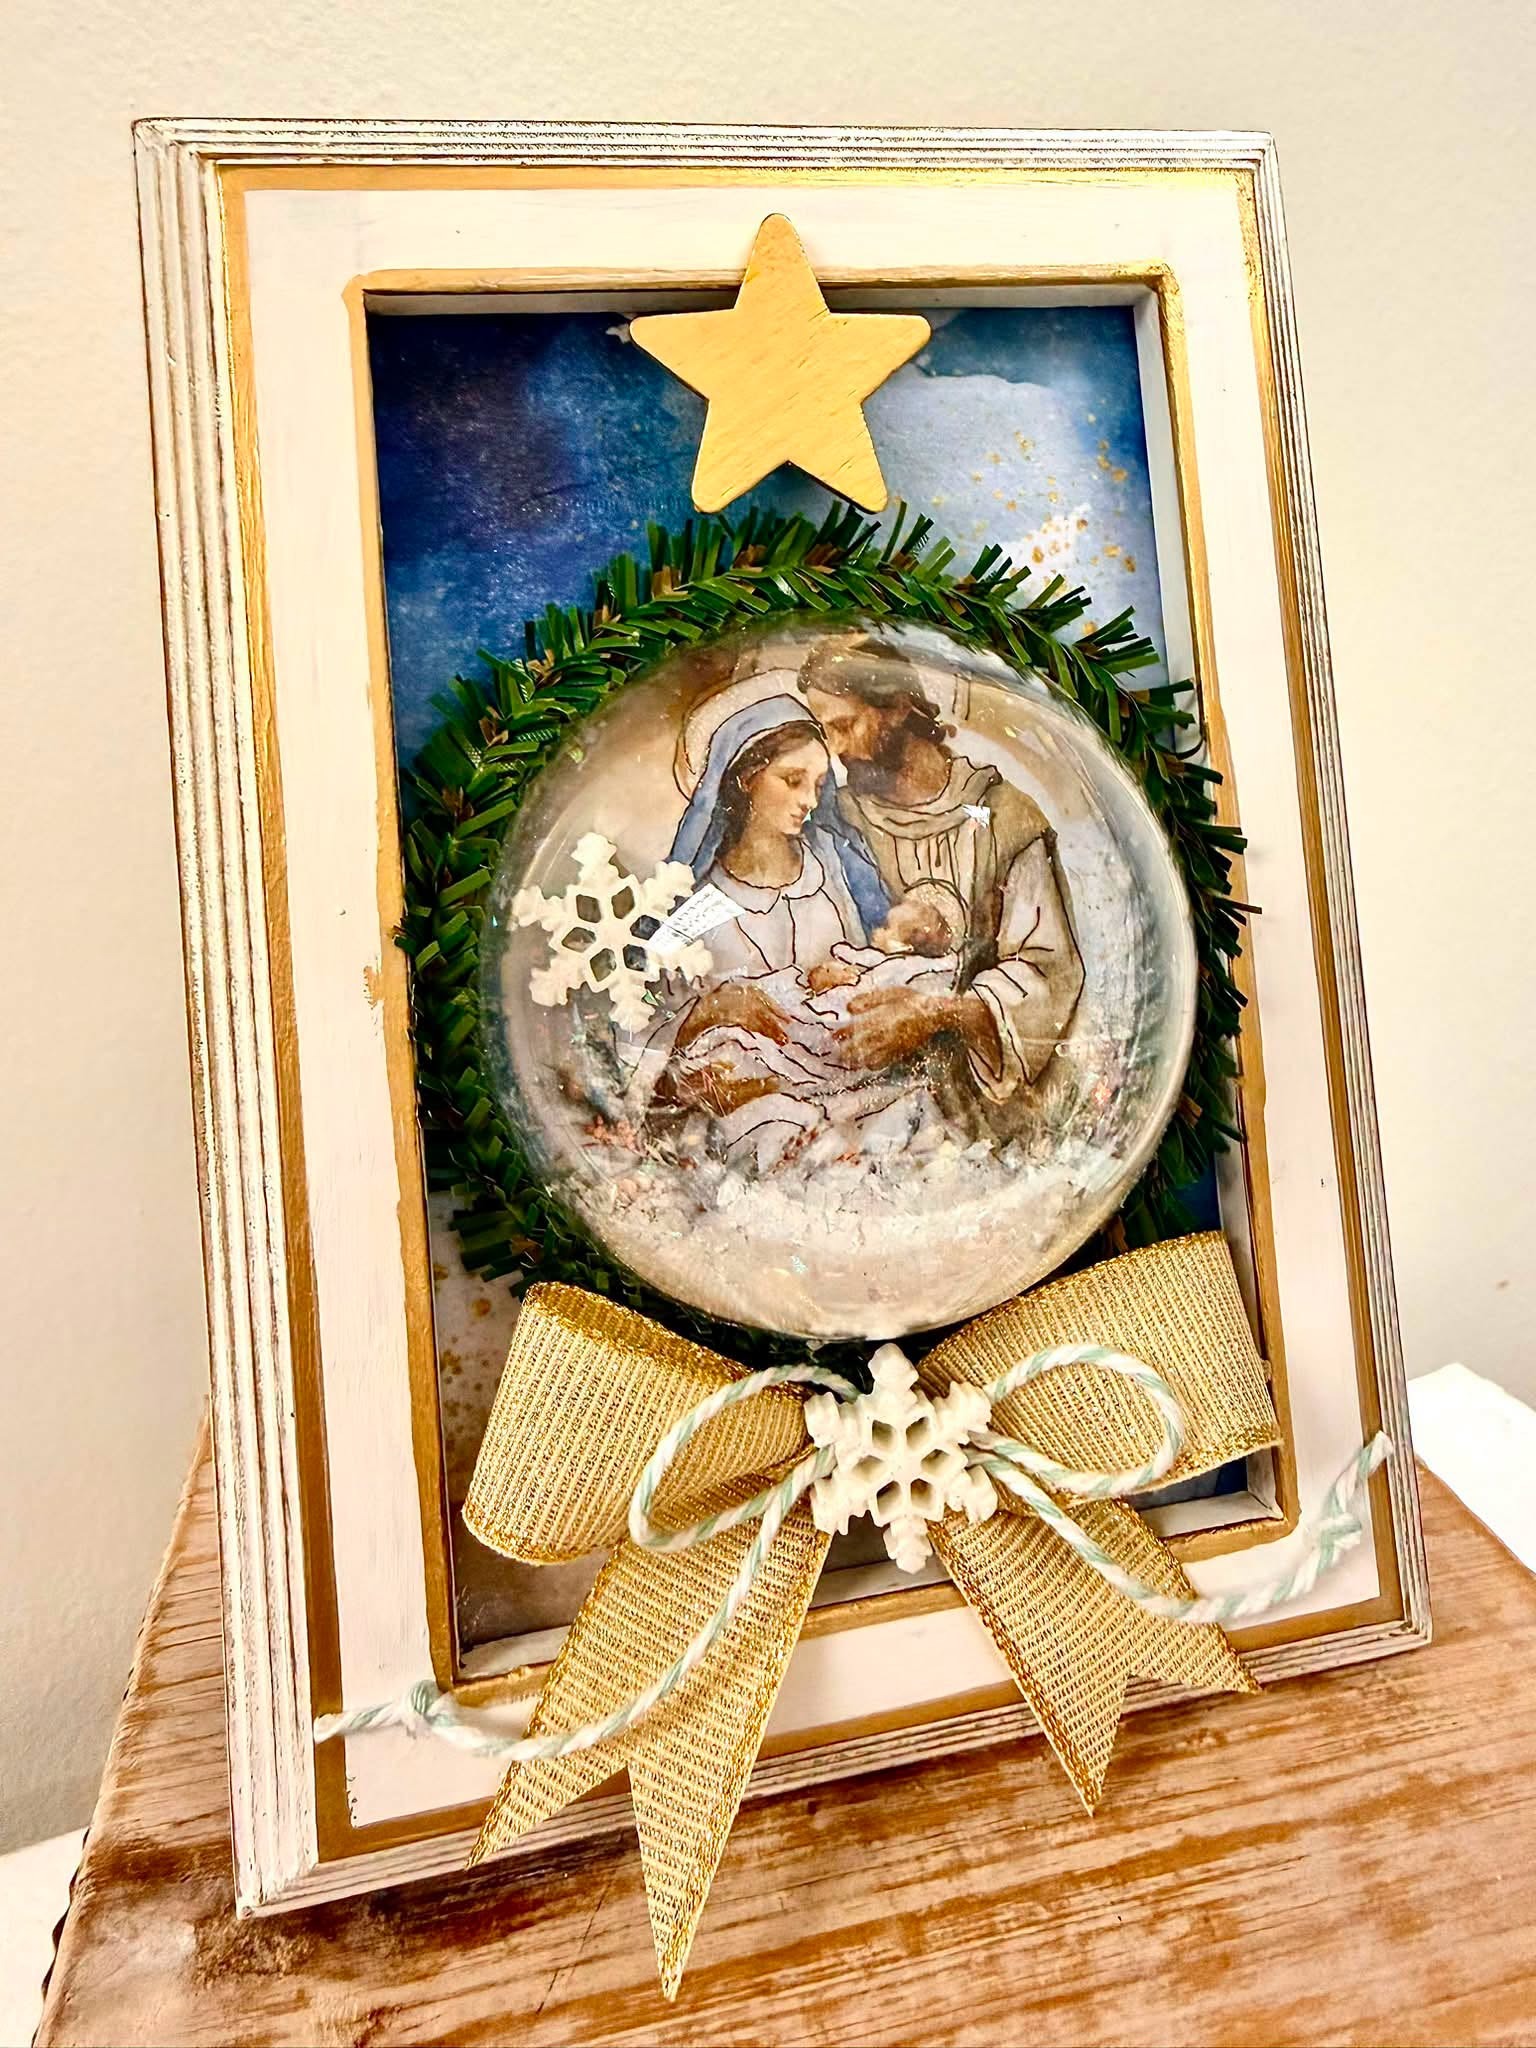
Supply List:
- The Christmas Story Napkin Bundle
- 4×6 Frame
- Country Chic Paint – Simplicity
- Clear Plastic Ornament (half)
- Smooth White Cardstock
- Mod Podge Matte
- Used Dryer Sheet
- Iron
- Parchment Paper
- Frixion Pen
- Black Pitt Pen
- Gold Uniball Pen
- Pop Dots/Foam Tape
- Wood Star
- Greenery
- Snowflake Embellishments
- Faux Snow
- Gold Krylon Pen
- Gold Wax
- Ribbon/Twine
- Stickles
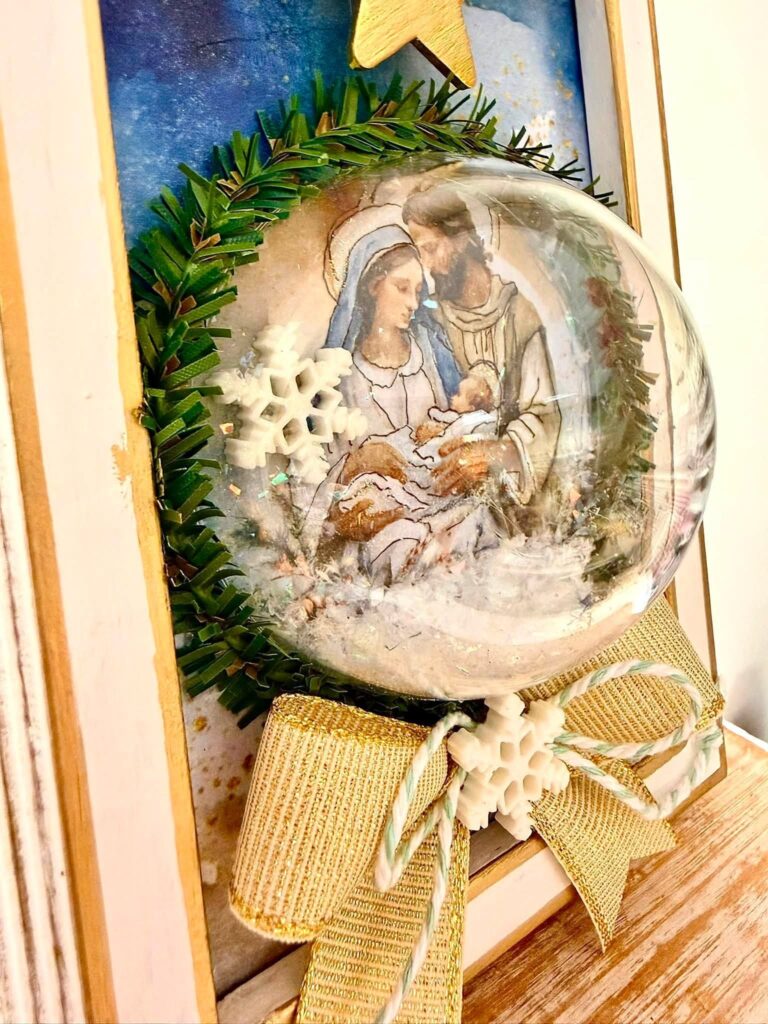
Create a beautiful reminder of the true meaning of Christmas with this DIY nativity snow globe frame. This project combines napkin art, a simple thrifted or dollar-store frame, a clear half-dome ornament, faux snow, greenery, ribbon, and gold accents to create dimensional Christmas decor that feels both festive and meaningful.
Although this version features the nativity, the same technique can be customized with angels, shepherds, wise men, Santa, snowmen, bottle-brush trees, gingerbread houses, or any miniature Christmas scene you love.
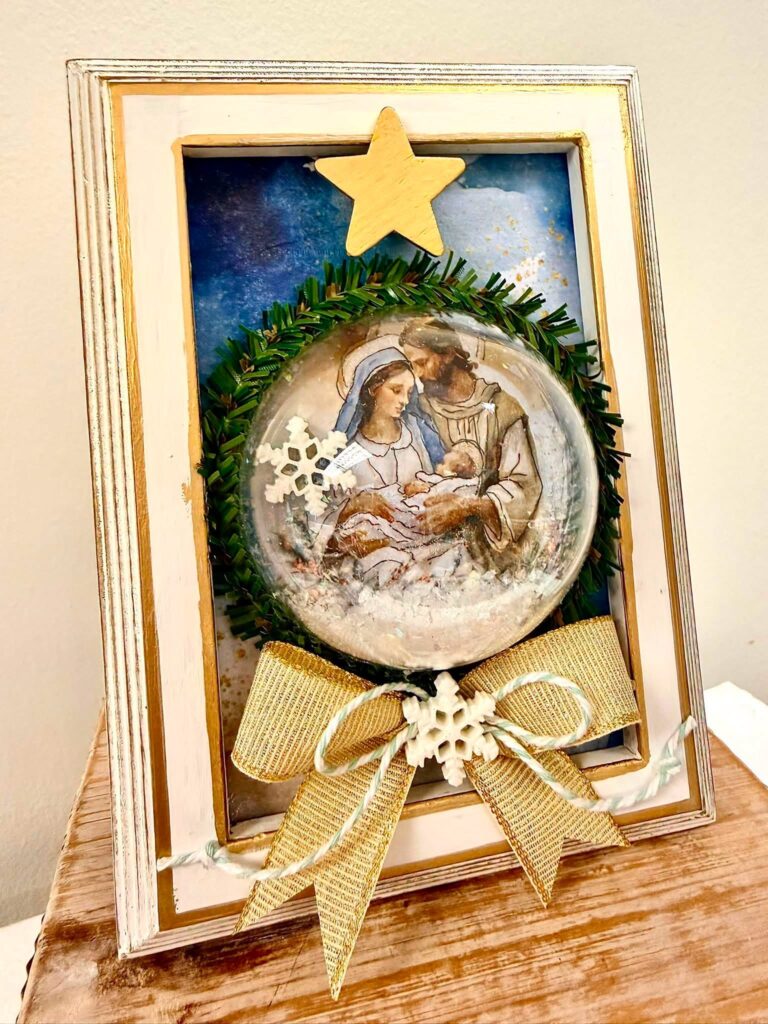
Step 1: Prepare the Cardstock for Napkin Art
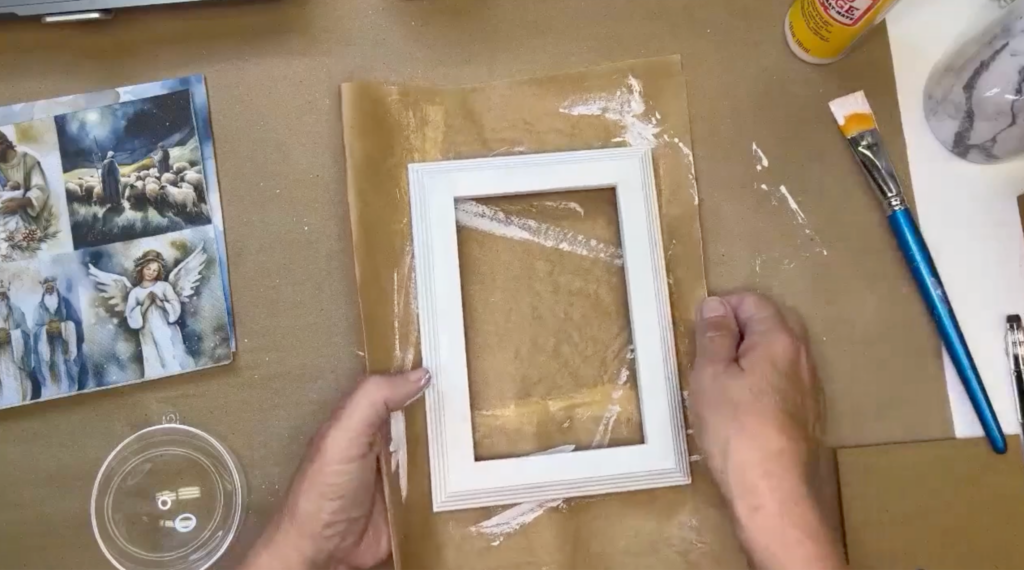
Cut one piece of white cardstock to fit the opening of your frame. For a 4×6 frame, cut the cardstock to 4×6 inches. This piece will become the decorative background behind the snow globe.
Cut a second scrap of white cardstock large enough to fit beneath your half-dome ornament. Trace the ornament onto the cardstock with a Frixion Pen or pencil, then cut out the circle. This circular piece will hold the nativity image inside the snow globe.
Brush an even coat of Mod Podge Matte over both pieces of cardstock and allow them to dry completely. These dry Mod Podge surfaces will be reactivated later with heat using the iron-on napkin method.
You can prepare larger sheets of Mod Podge-coated cardstock ahead of time and store them once dry. Then simply cut off the size you need whenever you are ready to create.
Step 2: Paint the Picture Frame
Remove the glass or plastic insert from the frame. You will not need it for this project, but keep the frame backing because it allows the finished piece to stand upright.
Paint the front and inside edges of the frame with white chalk or mineral-based paint. Apply a thin first coat and allow it to dry. Think of this first layer as a primer rather than trying to create full coverage immediately.
Add a second coat of white paint, smoothing out the brushstrokes as you work. Paint slightly inside the frame opening so none of the original frame color shows around the finished background. Let the paint dry completely before distressing or adding metallic details.
Step 3: Distress the Painted Frame
Use fine-grit sandpaper, an emery board, or a small sanding block to lightly distress the raised details, corners, and edges of the frame.
Concentrate on areas where natural wear might occur, allowing a little of the original frame color to show through. You do not need to sand every detail evenly. A hit-or-miss approach creates a softer, aged finish.
Distress the frame after the paint is dry but before it has fully cured. Chalk and mineral paint becomes harder and more durable as it cures, so it is much easier to sand during this earlier stage. Brush or wipe away the sanding dust before continuing.
Step 4: Choose the Nativity Image and Background
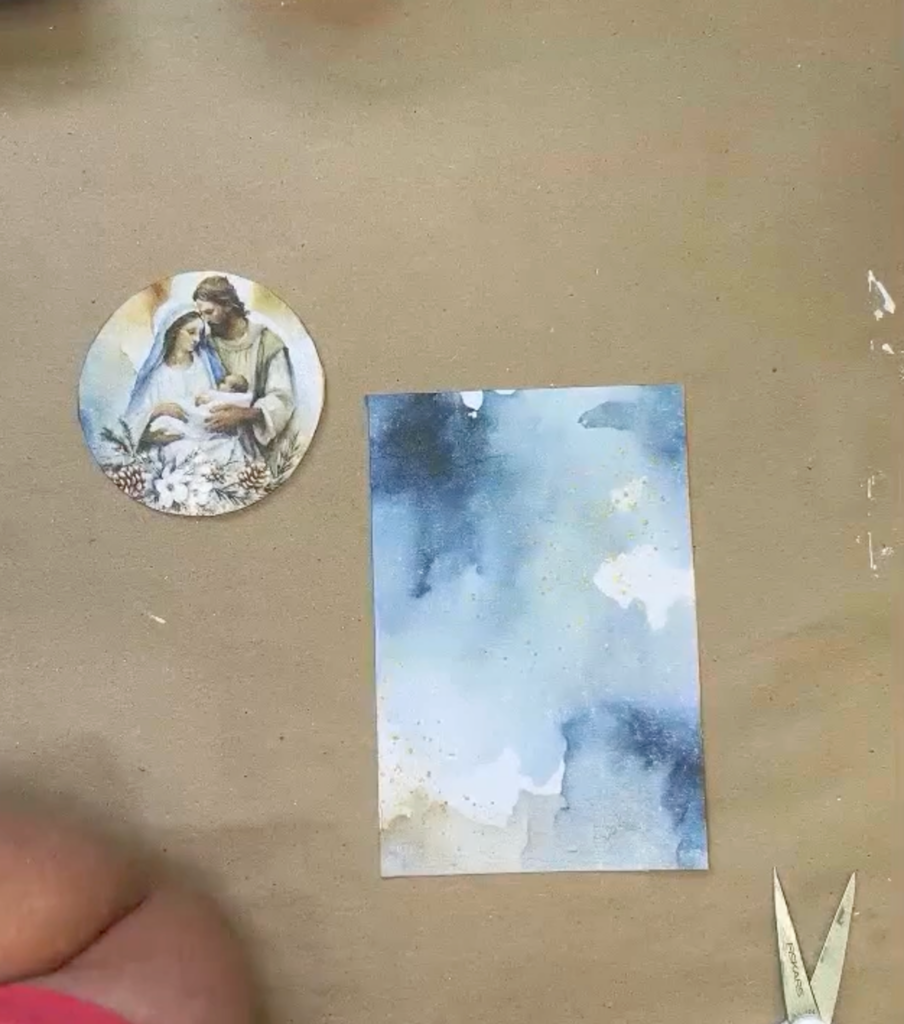
Select a miniature nativity image from your Christmas napkin. This project uses Mary, Joseph, and baby Jesus, but an angel, wise men, or shepherd scene would also be beautiful.
Choose a coordinating napkin pattern for the background. A soft watercolor design with blue, cream, and gold accents creates the appearance of a nighttime sky while keeping the nativity image as the focal point.
Before applying either napkin, remove all of the plain backing plies. Most decorative napkins have two or three layers, but only the thin printed top layer should be used.
Step 5: Apply the Background Napkin with the Iron-On Method
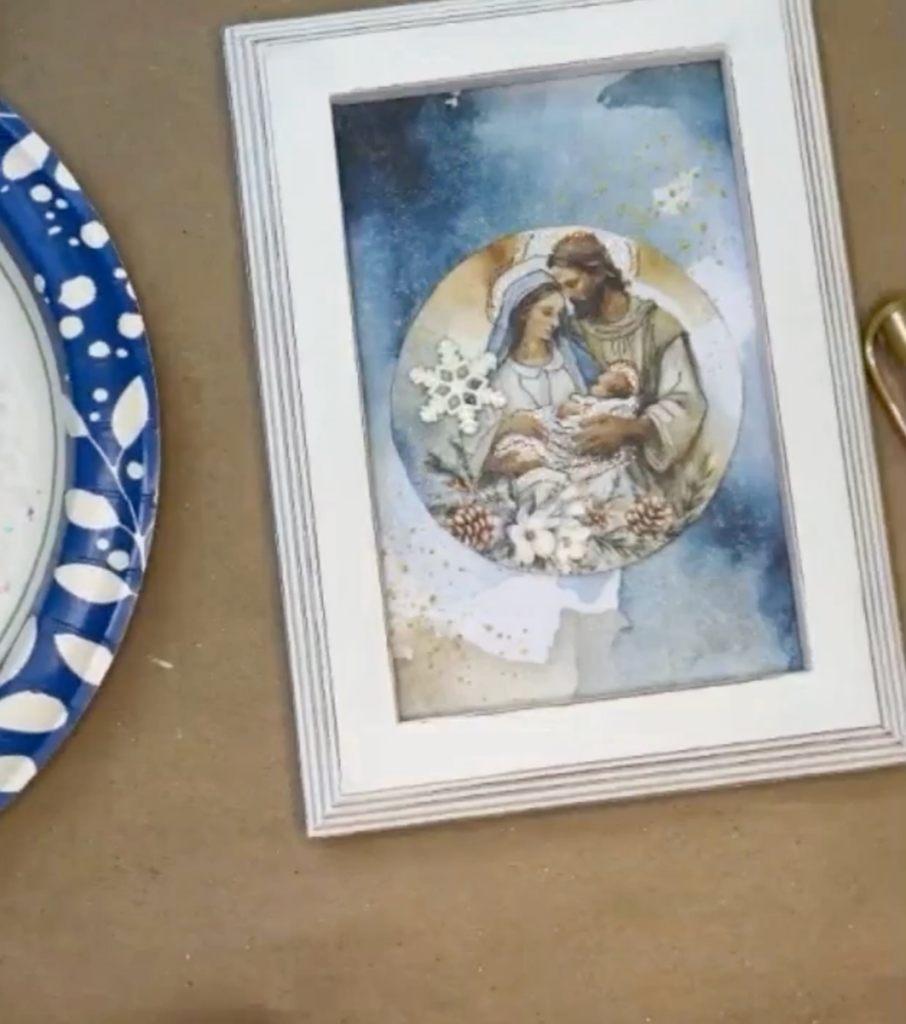
Lay the background napkin over the 4×6 Mod Podge-coated cardstock. Adjust the position until the most attractive portion of the watercolor design covers the paper.
Place a sheet of parchment paper over the napkin. Set your craft iron to its hottest dry setting with no steam and no water.
Press the iron over the parchment paper, moving it slowly across the entire surface. The heat reactivates the dried Mod Podge and bonds the napkin tissue to the cardstock. Lift the parchment and check that the napkin is fully adhered. Repeat the ironing process if any areas remain loose. Allow the paper to cool before trimming away the excess napkin around the edges.
Step 6: Add the Nativity Image to the Circle
Position the nativity napkin image over the circular piece of Mod Podge-coated cardstock. Lower the design slightly toward the bottom of the circle so Joseph’s head and the upper details remain visible once the faux snow is added.
Cover the image with parchment paper and press it with the hot, dry iron. Move the iron across the entire surface until the napkin has bonded smoothly to the cardstock.
Allow the piece to cool fully before handling it further.
Step 7: Seal the Napkin Art
Brush a thin coat of Mod Podge Matte over the nativity circle. This top coat seals the tissue and prepares it for pen work, glitter glue, and additional details.
You may also seal the background paper for extra protection, although it is less necessary if no pen work or embellishing will be added directly to it.
Let both pieces dry completely. Do not apply the top coat while the cardstock is still warm from the iron, because the iron-on process needs time to set.
Step 8: Add Doodle-Style Pen Work
Use a fine or extra-fine permanent black ink pen to lightly trace selected details in the nativity image.
Outline parts of Mary’s head covering, Joseph’s robe, baby Jesus’s swaddling cloth, and a few facial or clothing details. Keep the lines delicate because the image is small. This technique is simply doodle tracing. You are not trying to redraw the artwork or trace every line. A few carefully placed outlines are enough to add definition and help the image stand out behind the clear dome.
Step 9: Add Sparkle to the Nativity
Use Diamond, Crystal, or Unicorn Stickles to add subtle sparkle to the nativity scene. Highlight the halos around Mary, Joseph, and baby Jesus, along with parts of the swaddling cloth.
Apply the glitter glue in thin layers. Heavy areas will take longer to dry and may cause the faux snow to stick later.
Dry the Stickles completely before assembling the snow globe. This is important because any damp glitter glue inside the ornament can collect snow and obscure the artwork.
Step 10: Insert the Background into the Frame
Place the finished watercolor napkin cardstock into the frame as though it were a photograph.
Reattach the frame backing and secure any clips or tabs. Make sure the design is facing forward and positioned the way you want it. This napkinized paper now creates the decorative sky and background for the entire Christmas scene.
Step 11: Attach the Nativity Circle
Position the nativity circle over the framed background. Place it slightly below the exact center so there is enough room above the globe for the star and enough room below for the decorative bow.
Use hot glue or strong craft glue to attach the circle firmly to the background. Press it flat and allow the adhesive to set before adding the snow globe dome.
Step 12: Add a Dimensional Snowflake
Glue a small white snowflake embellishment to the nativity circle. Position it to one side of the image so it adds dimension without covering Mary, Joseph, or baby Jesus.
You can skip this detail or replace it with a small star, pearl, charm, rhinestone, or another miniature embellishment. Keep the dimensional elements fairly flat so the half-dome ornament can sit securely over the scene.
Step 13: Reduce Static Inside the Ornament
Rub the inside of the clear half-dome ornament with a used dryer sheet.
Plastic ornaments can create static that causes faux snow to cling to the sides rather than settling naturally at the bottom. A used dryer sheet helps reduce that static and keeps the snow moving more freely. Rub the entire inside surface, especially around the curved sides.
Step 14: Add Faux Snow
Place a small amount of faux snow in the center of the nativity image. Start with less than you think you need.
The snow will settle at the bottom once the frame is upright, so avoid covering too much of the nativity. You want enough to create a snowy scene without making baby Jesus look buried beneath it.
You can also add tiny sequins, seed beads, pearls, rhinestones, miniature stars, glitter, or very small charms along with the snow. Choose embellishments that complement the featured scene without overwhelming it.
Step 15: Glue the Half-Dome Ornament in Place
Apply a continuous line of hot glue around the rim of the half-dome ornament. Quickly position the ornament over the nativity circle, making sure the hanging tab or small protruding piece is centered at the top. Press the dome firmly into the glue and hold it still until the adhesive sets.
Do not shake or tip the frame during this step. Allow the glue to dry fully before moving the faux snow. Check the entire edge to make sure there are no gaps where snow could escape.
Step 16: Frame the Globe with Pine Stems
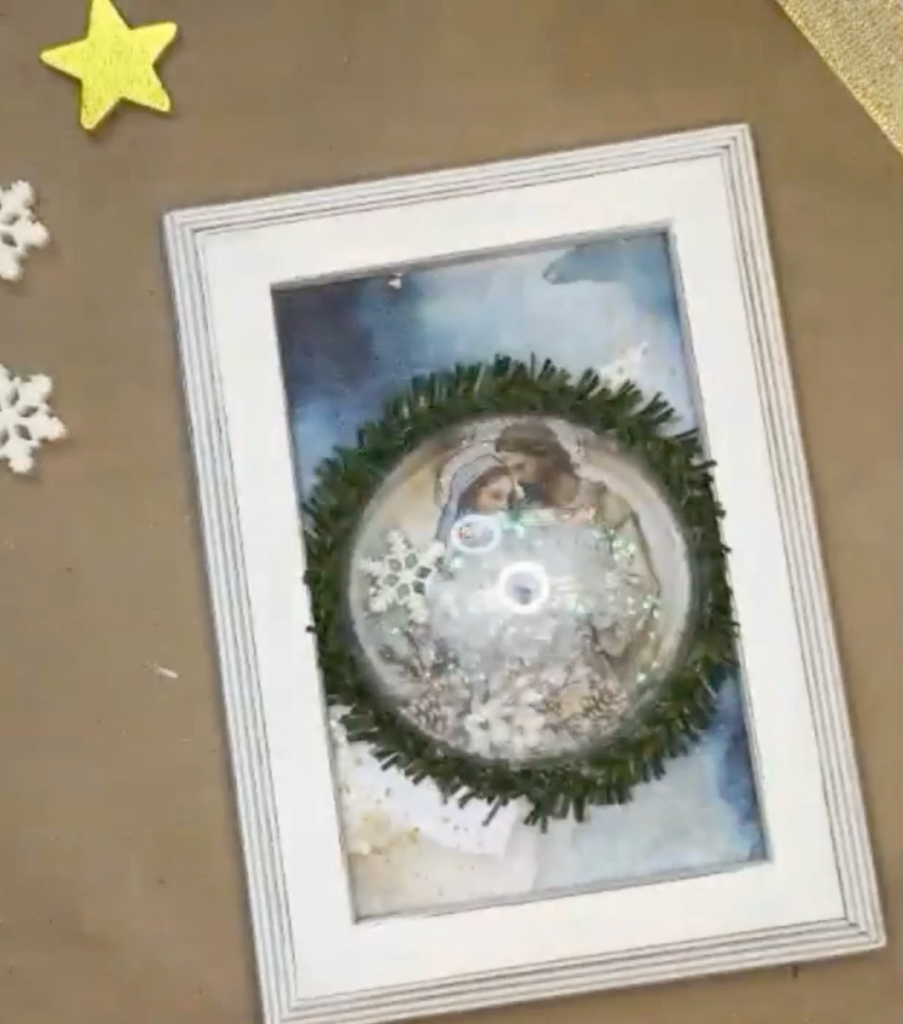
Bend a pine-style chenille stem into a rounded shape that follows the outside edge of the half-dome ornament.
Starting near the top, attach the pine stem around the globe using small dots of hot glue. Continue shaping and gluing it around the sides until the ends meet.
Trim away any extra stem with craft scissors or wire cutters. Avoid using your best fabric or paper scissors because the stem contains wire. The finished greenery should resemble a small Christmas wreath framing the nativity snow globe.
Step 17: Add Gold Details to the Frame
Use a gold metallic paint pen to highlight the inside edge of the frame. Hold the firm chisel tip partly on the raised frame and partly off the edge, then slowly draw it around the opening.
You can also add a thin gold line along the outer raised details or selected carved sections. For an aged metallic finish, rub a little gold metallic wax over the distressed areas with your fingertip or a small brush. Concentrate on the raised textures and decorative edges.
These gold accents coordinate with the napkin design, ribbon, and star while adding warmth and elegance to the finished frame.
Step 18: Make the Gold Ribbon Bow
Cut a length of metallic gold ribbon. Form the ribbon into an awareness-ribbon shape with the tails crossed at the bottom. Pinch the top loop down into the center and scrunch the layers together to form an easy bow.
Secure the center temporarily with a clothespin, then wrap coordinating baker’s twine around the middle. Remove the clothespin and tie the twine into a double knot.
Turn the bow over and tie the twine into a small decorative bow on the front. Add knots to the ends of the twine if desired. Trim the ribbon tails with flag ends by cutting a slit up the center of each tail and trimming diagonally from the outside corners toward the top of the slit.
Glue the finished gold ribbon bow to the lower portion of the frame beneath the snow globe. Position it so it complements the scene without covering the bottom of the dome. Use a generous amount of hot glue behind the center knot and press firmly.
Add tiny dots of glue beneath the baker’s twine knots if you want the twine to remain neatly positioned. Glue a small snowflake, button, brooch, or other decorative piece to the center of the bow.
Step 19: Paint and Attach the Star
Use a small wooden star as a symbol of the Star of Bethlehem. If the original color does not coordinate with the project, cover the front and edges using a gold metallic paint pen. Allow the paint to dry completely.
Stack two or three small pieces of foam tape on the back of the star. This extra height allows the star to appear as though it is floating above the greenery and globe.
Add a small amount of hot glue to the foam tape and to any portion of the star that touches the frame. Position the star above the nativity globe and press it securely into place.
Step 21: Settle the Snow
Once all glue is completely dry, gently tap the frame so the faux snow moves toward the bottom of the half-dome.
Avoid shaking it aggressively. A few soft taps along the sides and top will help the snow settle naturally without disturbing the ornament seal. If you used a dryer sheet inside the dome, the snow should move more freely and cling less to the plastic.
Ways to Customize Your Snow Globe Frame
Create a non-faith-based version using bottle-brush trees, miniature houses, gingerbread ornaments, snowmen, woodland animals, or Santa. Use patterned scrapbook paper or napkinized cardstock behind the scene and coordinate the frame colors with your chosen theme.
Make small hanging ornaments by backing the half-dome with decorative paper rather than placing it on a frame. Add ribbon or twine to the top and hang them on your Christmas tree, wreath, garland, or gift package.
You can also use a miniature cutting board, wood plaque, small canvas, shadow box, tag, or clipboard as the base.
Love Creating with Decorative Napkins?
Ready to learn more ways to transform decorative napkins into beautiful handmade projects? Inside The Napkin Club, you’ll receive fresh inspiration, exclusive designs, step-by-step tutorials, and a welcoming creative community to encourage you along the way.
Whether you’re brand-new to napkin art or ready to build your skills, The Napkin Club will help you use your supplies with confidence and turn simple napkins into meaningful home decor, gifts, seasonal projects, and keepsakes. Come join The Napkin Club and create with us here!


0 Comments