


Supply List:
- Napkin Art Value Pack (Springtime)
- White Cardstock for Card Bases
- Mod Podge Matte
- Scissors
- Parchment Paper
- Craft Iron
I’m thrilled to walk y’all through a project that’s both beautiful and meaningful. Whether you’ve got napkin scraps piling up or you’re looking for a heartfelt way to give back, this tutorial will show you how to create stunning napkin art cards using the iron-on method and donate them to Cards for Kindness.
We first did this project at my Napkin Art Live event in Fort Worth, Texas. It turned into something truly special: a community service project that combined creativity with compassion.

What is Cards for Kindness?
Cards for Kindness is a program that collects handmade cards and distributes them to hospitals, nursing homes, veterans’ programs, cancer centers, and more.
Last month alone, they distributed over 79,000 cards – that’s 79,000 moments of encouragement! You can join the mission by creating and donating your own cards. You don’t need to be a card-making expert – and yes, napkin art is totally welcome.
Step 1: Prep Your Card Fronts
Brush a thin but full coat of Mod Podge Matte onto the front of your cardstock card. Cover edge to edge. Let dry completely (air dry or speed things up with a heat tool).
Pro Tip: Prep a bunch of card fronts in one sitting and let them dry overnight. That way, you’ll be ready for mass card-making when creativity strikes.
Step 2: Cut Your Napkin Art
Separate your napkin layers (most are 3-ply) so you’re only working with the top printed layer. Use a 4.25” x 5.5” template to trace and cut out your desired design.
Use a friction pen for tracing – it disappears with heat when ironed!
Step 3: Iron It On
Place your dried, Mod Podge-coated card front on a heat-safe surface. Lay the napkin on top, then sandwich it between two pieces of parchment paper.
Use a hot, dry iron and press firmly for 15–20 seconds. The heat reactivates the Mod Podge and fuses the napkin to the card.
Step 4: Trim the Edges
Once it’s cool, trim any overhanging edges for a neat finish. Fold your card, and just like that, you’ve got a beautiful handmade card ready to inspire someone.
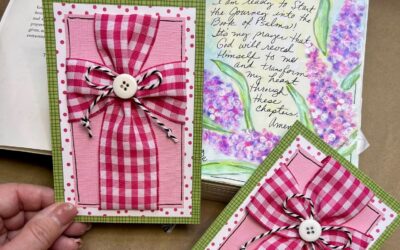
Add a Sentiment (Optional!)
At our live event, we kept it simple by pre-printing sentiments like: Happy Hello, Thank You for Your Service, Happy Mother’s Day, etc.
These were printed on cardstock in coordinating colors and glued flat to avoid added dimension. You can also use stamps, stickers, or leave your card blank – the foundation accepts all styles!
Important Donation Tips
Cards for Kindness has a few guidelines:
✅ No writing or stamping inside the card
✅ Must include an envelope
✅ Avoid bulky embellishments
✅ Follow their submission instructions here
Whether you’re crafting solo or planning a card-making party with friends, Bible study, or your art group, this is a simple, joy-filled way to bless others. We’ve got some fabulous $7 napkin packs on sale right now – perfect for this project!
Crafting is powerful. It’s healing. It’s community. And when we use it to uplift others – that’s when it really shines. So let’s spread the love, one napkin card at a time.


0 Comments