
Supply List:
- Easter Blessings Napkin Bundle
- 6 x 6 Frames from Amazon
- Mod Podge Matte
- Light Colored Burlap
- Chip Brush
- E6000 Adhesive
- Hot Glue
- Scissors
- Heat Tool
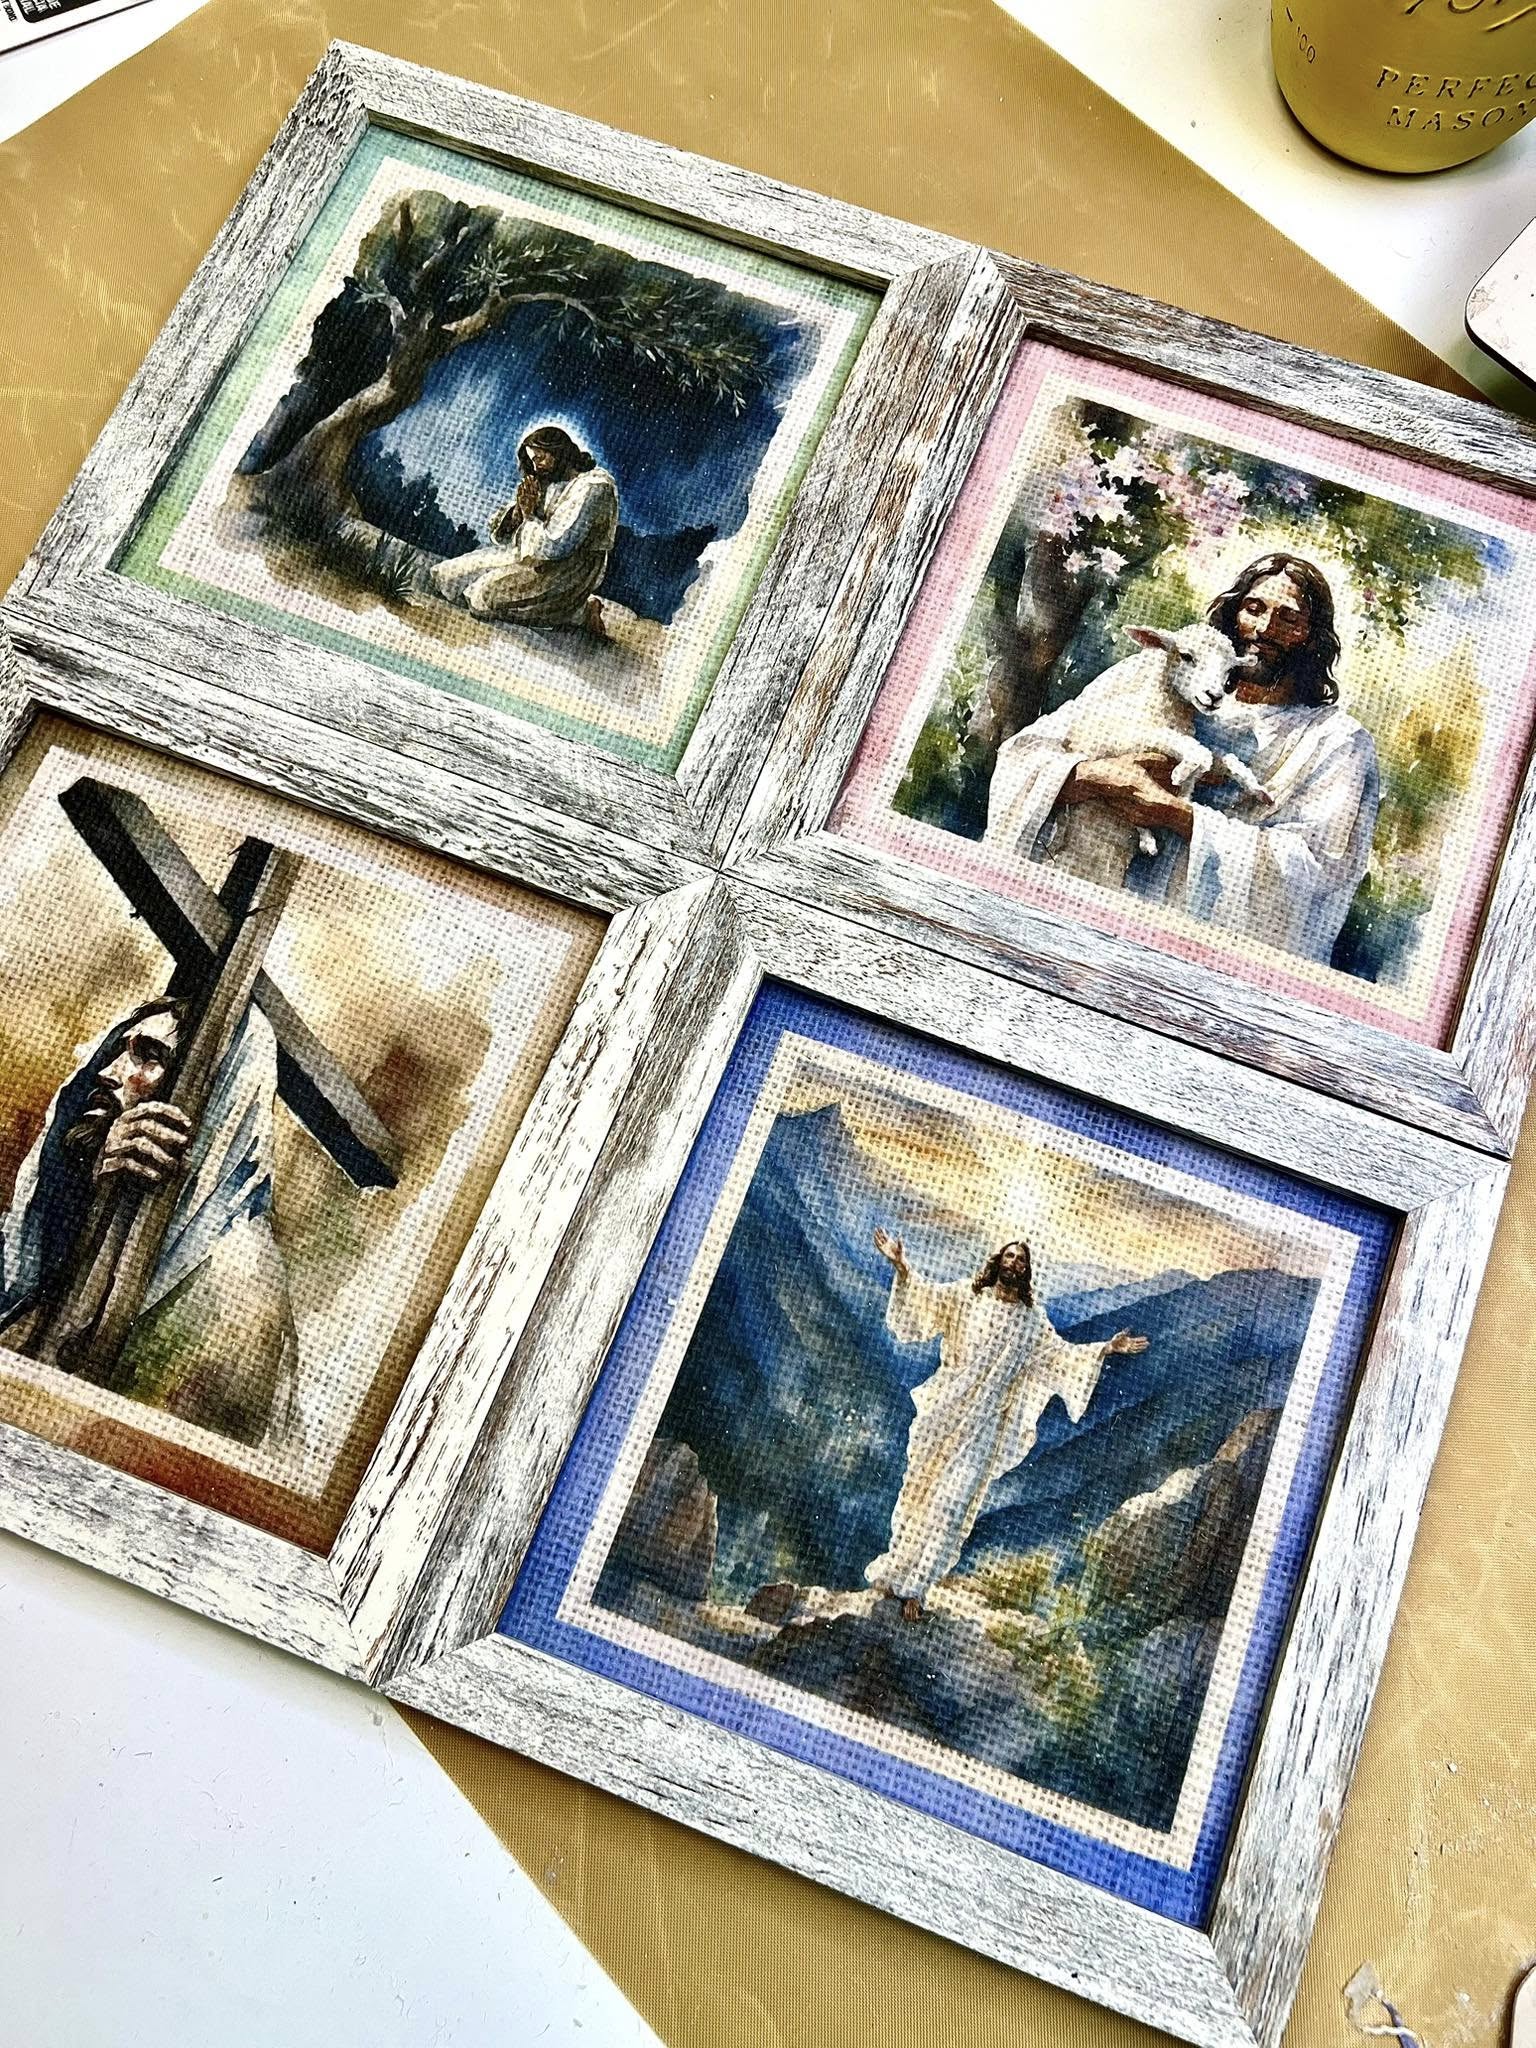
Bringing faith into my handmade décor is something I truly enjoy, and this project is a perfect example of that. I’m using the Easter Blessings Napkin Bundle (featuring my own designs!) to create a beautiful, textured display. With four different napkin images, I’ll be layering them onto light burlap squares and framing them in 6×6 frames to create a cohesive four-piece set. The finished piece is versatile – hang it on a wall, place it on a mantel, or display it on an easel – making it a meaningful way to celebrate the Easter season through creativity and faith.

Applying Napkin Art to Burlap Squares
Lay down a few sheets of parchment paper to keep your workspace clean. Begin by cutting your napkin into squares, separating out the four different images. Carefully peel away the extra plies until you’re left with just the top printed layer of each design.
Take your 6×6 light-colored burlap square and apply a thin, even coat of Mod Podge Matte using a brush. Be sure to work the Mod Podge into the texture of the burlap by swirling your brush to get into all the little nooks and crannies.
Next, place a napkin square onto the burlap, gently pressing it down with your hands. Then, take a dry chip brush and lightly pounce over the napkin, helping it settle into the fabric’s texture without tearing. Repeat this process for each napkin design, making sure each piece adheres smoothly. Dry each piece with a heat tool – both the front and the back.

Framing Napkin Art to Create Wall Decor
Place the back panel of your 6×6 frame in the center of your burlap napkin art. Apply a few swipes of Mod Podge Matte to the inside of the frame back and press it firmly onto the back of your burlap-covered piece. Once secure, trim away any excess burlap with scissors for a clean edge. Assemble the frame, choosing either to use the included plexiglass for protection or sealing the napkin art with another coat of Mod Podge Matte.
To create a larger square decor piece, attach all four frames together using E6000 Adhesive for a strong hold. Work on a flat, protected surface, applying three small dots of E6000 between each frame. For extra security, add a few drops of hot glue between the adhesive dots. Allow it to dry overnight for the best bond. For a finishing touch, consider mounting a decorative cross at the center of your framed design.

I go LIVE on my Facebook page every Friday at 11 am CST for a fun and easy Craft-n-Chat Session. Come learn something new while creating something beautiful!
Join the waitlist for The Napkin Club where Unique Makers can connect, learn, and be inspired to create with the Individual Unique Napkin Collections that you will receive every month! A place where Napkin Lovers can unite and be inspired!

0 Comments