


Supply List:
- Easter Shadowbox Napkin Art DIY Decor Kit
- Tropical Cocktail – Country Chic Paint
- Simplicity – Country Chic Paint
- Sponge for Painting
- Mod Podge Matte
- Stickles – Unicorn
- Pitt Pen – Black Fine-tip
- Foam Tape or Pop Dots
- Detail Scissors
- Hot Glue
- Heat Tool
- Craft Iron
- Parchment Paper
Celebrate the season with this Easter Shadowbox DIY Decor Kit, a fun and creative way to add a handmade touch to your spring decor! Using napkin art, layered textures, and 3D elements, we’ll transform a wooden shadowbox into a cute Easter display. With pastel colors, a mini woven basket, and delicate embellishments, this project is perfect for bringing some creativity into your home.
Your kit will include: 1 – 8×8 Wood Shadowbox, 1 piece of white cardstock, 1 mini woven basket, 5 decorative napkin sheets, cute pink/white twine and lilac dotted ribbon, 1 small bag of spring moss, and little easter eggs and flowers for embellishing.

Painting and Adding Napkin Art to Your Easter Shadowbox
Begin by painting both the front and back of your wooden shadowbox with Tropical Cocktail by Country Chic Paint. Allow it to fully dry, or speed up the process with a heat tool.
Next, we’ll add some texture and dimension using a sponge painting technique. For this step, I’m using a sea sponge with Simplicity by Country Chic Paint to create a soft, natural effect. Lightly dip the sponge into the paint, offload any excess onto a paper towel, and gently pounce the sponge across the background and edges of the shadowbox.
Next, take the bunny napkin from your kit, which will serve as the background for your shadowbox. Cut out one napkin square and carefully separate the plies until you’re left with just the top printed layer.
Apply a thin, even coat of Mod Podge Matte to the inside background of the shadowbox. Gently place the napkin on top, then use a piece of plastic wrap to smooth it out and press it into place, preventing wrinkles or bubbles. To ensure the napkin adheres well to the corners and edges, take a dry chip brush and press the napkin into the corners. Dry with a heat tool and add a top coat of Mod Podge Matte to protect it. Let dry again.

Creating Napkin Art Paper Embellishments
Take the white cardstock from your kit and brush on a coat of Mod Podge Matte. Set it aside to dry completely.
Next, grab the second square of your bunny napkin from your kit and carefully cut out the bunny and eggs. Separate the plies until you’re left with just the top layer of the napkin art. Continue to do this for the rest of your napkin art – the flower bouquet, baby chicks, carrots, and a few of the eggs.
Prepare your work surface by laying down a piece of parchment paper, making sure you’re working on a heat-resistant mat. Position the napkin art over the dried cardstock and place another piece of parchment paper on top. Using a craft iron on its highest setting (no steam), press over the parchment. The heat will reactivate the Mod Podge, bonding the napkin art to the cardstock for a smooth, seamless finish.
Let the piece cool, then apply a thin coat of Mod Podge on top to seal it. Use a heat tool to speed up drying, then carefully fussy cut around the images with scissors for crisp, detailed edges. I’ll actually cut the bouquet of flowers in half to add to both side of my background.

Assembling the Easter Shadowbox DIY Decor
Now it’s time to bring everything together and assemble our adorable shadowbox scene!
Start by positioning the flower bouquet napkin art onto the background. Since this will be a single stack, place one piece of foam tape on the back of each bouquet, add a small amount of hot glue, and press it securely onto the back of the shadowbox.
Next, layer the bunny napkin art directly on top of the bunny in the background. This piece will be double-stacked using two layers of foam tape to create dimension. For added depth, attach an Easter egg in the background using one layer of foam tape.
Now, let’s start building the Easter basket! Your kit includes a mini woven basket that will add a fun 3D element to the scene. Begin by hot gluing the handle, then wrap a small section with baker’s twine for extra detail. To create filler, tear off a piece of parchment paper, crumple it into a ball, and trim the bottom to create a flat base. Hot glue this inside the basket to give it some height.
Next, add the napkin art chick by hot gluing the back of the napkin art to the basket handle. Repeat the same process for a carrot napkin piece. Take a small piece of moss from your kit and hot glue it onto the basket filler. Then, tuck in and glue the tiny Easter eggs and flowers to complete the arrangement. For the final touch, tie a small bow with the baker’s twine, knot the ends of the tails, and hot glue it to the front of the basket.

Secure your assembled Easter basket into the corner of the shadowbox using hot glue. To add a natural touch, take small pieces of moss and glue them around the base of the basket, extending along the bottom edge of the entire shadowbox for a cohesive, textured look.
Now, it’s time to fill in the rest of your Easter scene! Arrange and attach the napkin art eggs, carrots, and second chick, placing them at different heights to create depth. For extra detail, incorporate flowers from the embellishments bag, layering them throughout the design to bring in even more color and dimension.
To finish off your piece, add a few pen details using a Black Fine-Tip Pitt Pen – I kept mine minimal, just adding a little extra definition to some of the flowers. For some shimmer, apply Stickles in Unicorn to select areas of your napkin art.
For the final decorative touch, take the purple polka-dotted ribbon from your kit and hot glue it along the front edge of the shadowbox, wrapping it all the way around. To complete the look, create a small bow with the same ribbon, tie baker’s twine around the center for extra detail, and hot glue it to the top of the shadowbox. This final accent ties everything together beautifully!

I go LIVE on my Facebook page every Friday at 11 am CST for a fun and easy Craft-n-Chat Session. Come learn something new while creating something beautiful!
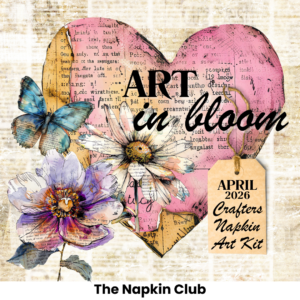
Join the waitlist for The Napkin Club where Unique Makers can connect, learn, and be inspired to create with the Individual Unique Napkin Collections that you will receive every month! A place where Napkin Lovers can unite and be inspired!


0 Comments