


Supply List:
- Double-Sided Scrapbook Paper
- Stickers
- Fabric Pieces
- Needle and Thread
- Buttons
- Twine
- Hot Glue
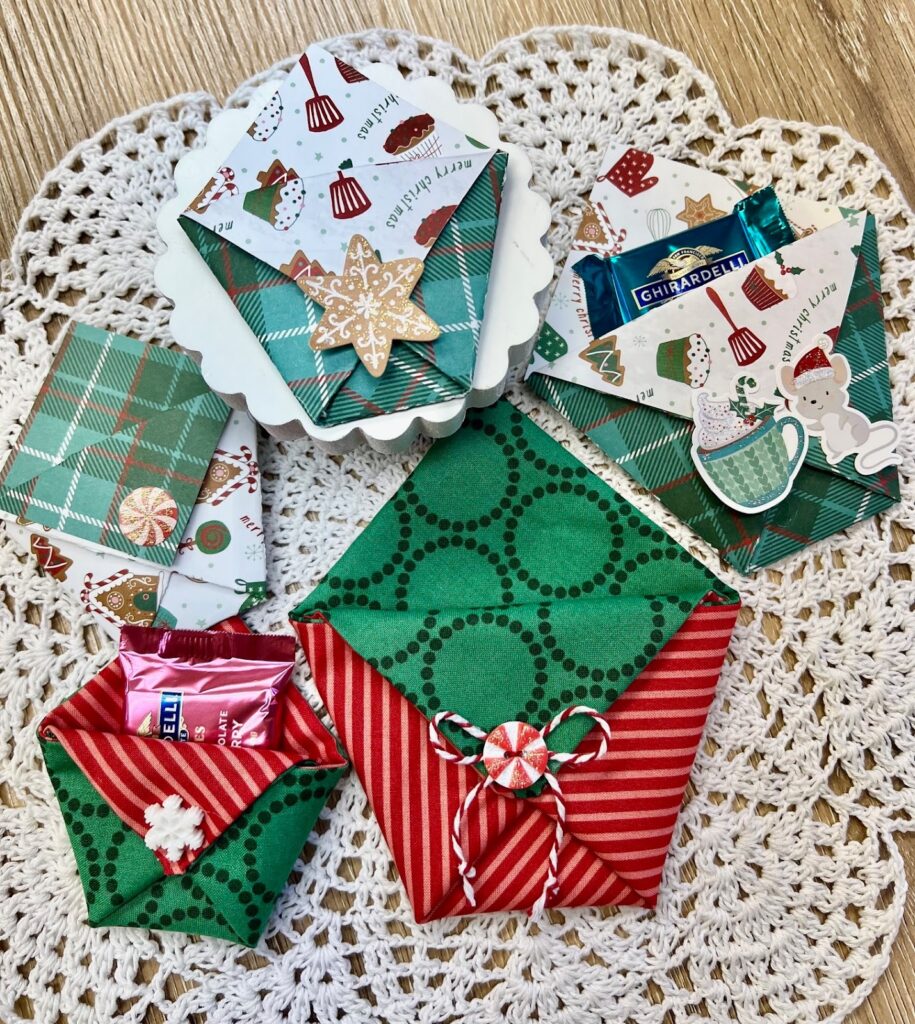
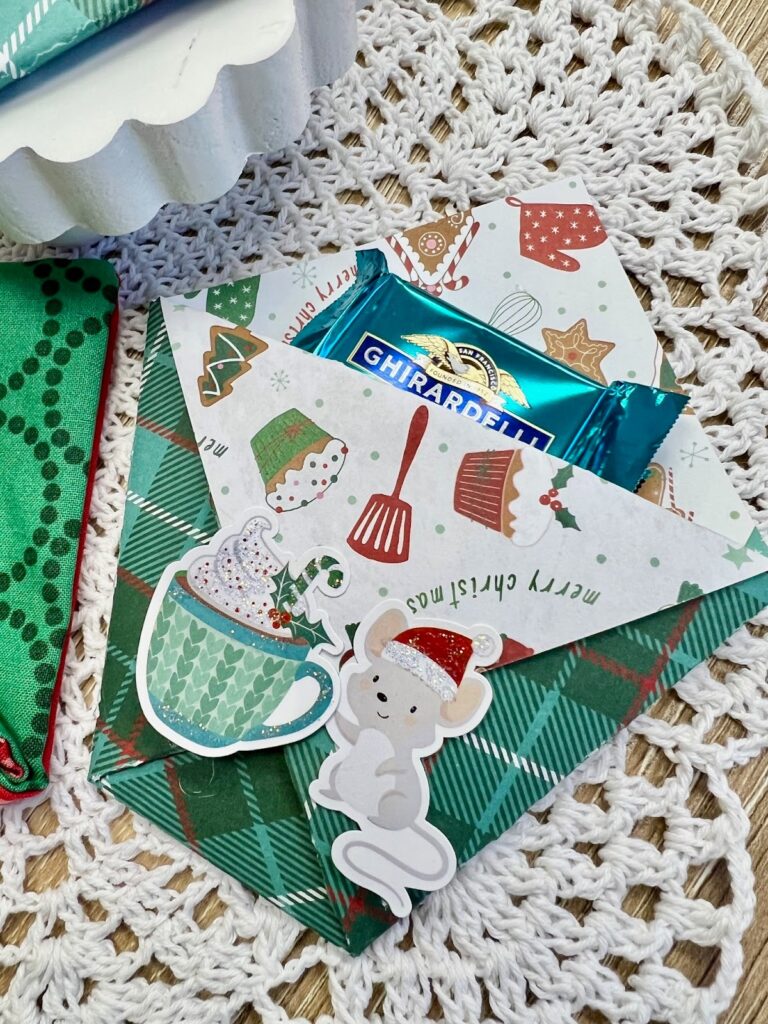
If you need a quick, cute way to package a little something for Christmas (treats, a gift card, chapstick, hot cocoa packets, or a tiny stocking stuffer), this project is for you. I” ‘m sharing how to make an adorable folded pocket two ways: with double-sided scrapbook paper (super fast!) and with fabric scraps (perfect for crafters who save every cute leftover piece).
You’ll learn the simple “taco fold + diaper fold” method, then how to embellish your pockets with stickers, buttons, baker’s twine, or ribbon for a finished look that feels gift-ready in minutes.
Choosing Your Size: 6×6 vs 8×8
A 6×6 pocket is perfect for small treats, a gift card, chapstick, or a mini hand lotion. An 8×8 pocket gives you more room for bulkier goodies, like a cocoa packet, candy, a small ornament, or a couple of wrapped treats. You can also experiment with 7×7, but my sweet spot starts at 6×6 for the best “useful but still cute” size.
Step-by-Step: Paper Treat Pocket
Step 1: Start with a square and turn it like a diamond
Place your square paper so it’s sitting like a diamond (point up, point down). This makes the folds easy to line up and keeps the pocket shape crisp.
Step 2: Make the “taco fold”
Fold the bottom point up to the top point to form a triangle. Press the crease well – this is the base fold that starts the pocket shape.
Step 3: Do the “diaper fold” (side fold #1)
Take one side corner and fold it across toward the center, keeping the top edge straight. Bring the point just slightly inside the opposite edge so you don’t have a sharp tip sticking out.
Step 4: Repeat the “diaper fold” (side fold #2)
Fold the other side corner across to mirror the first. You’ll now have a tidy shape that looks a little like a diaper
Step 5: Create the pocket flap
Gently separate the two front layers and fold the top flap down into place. Use your fingers to “pop” the pocket open – paper naturally holds the shape.
Step 6: Embellish (and optionally secure)
Add a sticker, die-cut, bow, or button to the front. I recommend a tiny dot of hot glue under stickers so they hold up over time. If you want the flap more secure, add a tiny dot of glue under the fold.
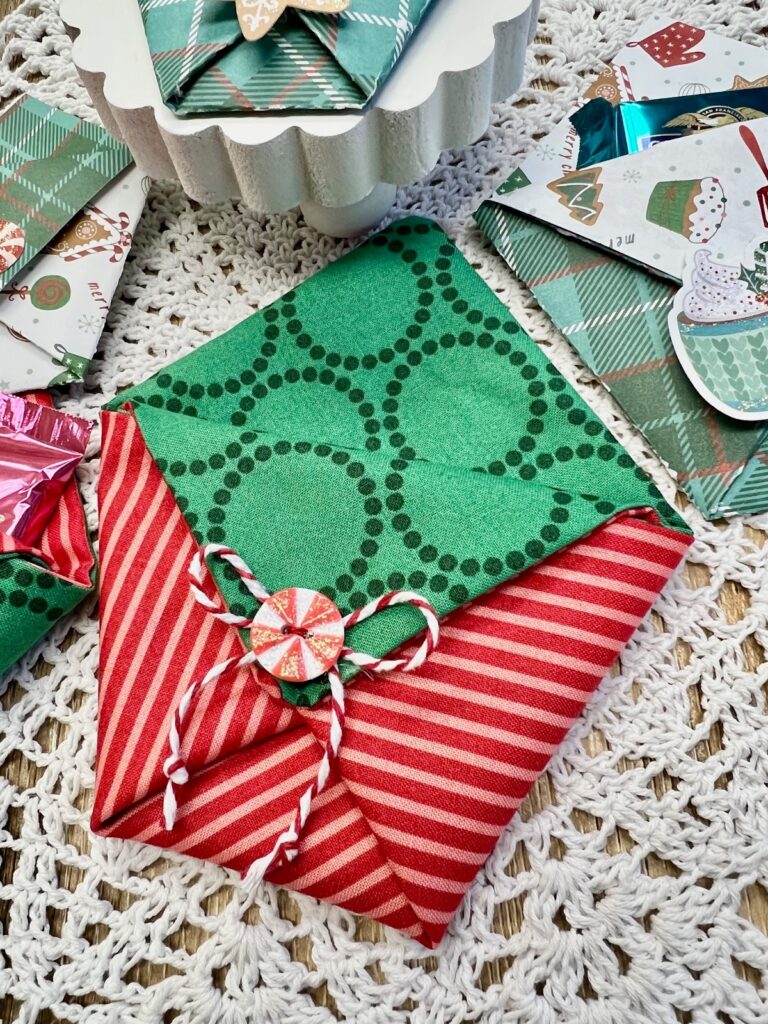
Step-by-Step: Fabric Treat Pocket
Step 1: Make your fabric “double-sided”
To turn fabric into a sturdy pocket, place two fabric squares right sides together. Stitch around the edges with a simple straight stitch, leaving a small opening for turning.
You can hand stitch with a basic running stitch, or zip around quickly with a sewing machine.
Step 2: Turn right side out & press
Turn your stitched square right side out through the opening. Use the end of a paintbrush (gently) to push out corners, then press the square flat with an iron. Close the opening with a small dab of glue – easy and totally fine because it gets hidden in the folds.
Step 3: Fold it the same way as paper
Turn the fabric square into a diamond. Do the taco fold (bottom point to top point), then the two diaper folds, bringing each side point slightly inward so nothing pokes out.
Step 4: Fold down the flap and secure it
Unlike paper, fabric won’t “stay” as easily, so you’ll secure the flap with either:
- One quick stitch through the layers (simple and tidy), or
- A dot of hot glue/fabric glue (fast and effective)
Step 5: Add your finishing detail
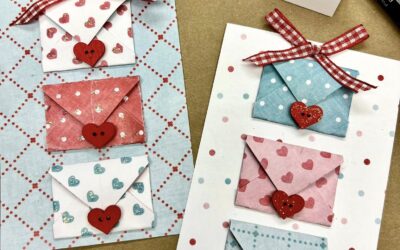
This is where fabric pockets shine – add a snowflake, peppermint button, or twine bow. I also shared a fun hack: thread through a button a few times first so it looks stitched, then glue it on for the cutest faux-sewn finish.
Gift Ideas to Put Inside These Pockets
These are perfect for neighbor gifts, coworker treats, stocking stuffers, and those “oh no, they’re coming too!” last-minute situations. Try filling them with a gift card, hot cocoa packet, chocolate-dipped spoon, candy canes, mini hand sanitizer, chapstick, small jewelry, or a tiny ornament.
Watch the full replay! If you love ideas like this that work for both crafting and memory keeping, come hang out with me inside the Page Builders Clubhouse, where I share creative layout inspiration, printable elements, and projects that help you document the season in a fun and doable way.


0 Comments