

")
Supply List:
- Variety of scrap strips of patterned papers (½ inch)
- Scotch Tacky Glue
- Hole Punch
- Ribbon or Twine
- Clear Label Paper
- Embellies of your choice
- Scissors
Today, I’m crafting with my bestie, Susan, and we’re excited to share a fun and simple project with you – a paper photo tag! This is a perfect activity to do with your own best friend, and it’s a fantastic way to use up all those leftover paper scraps you’ve been saving in your stash. These colorful tags are easy to make and versatile – they can be used as bookmarks, gift tags, on a scrapbook page, or just a creative way to display your favorite photos.
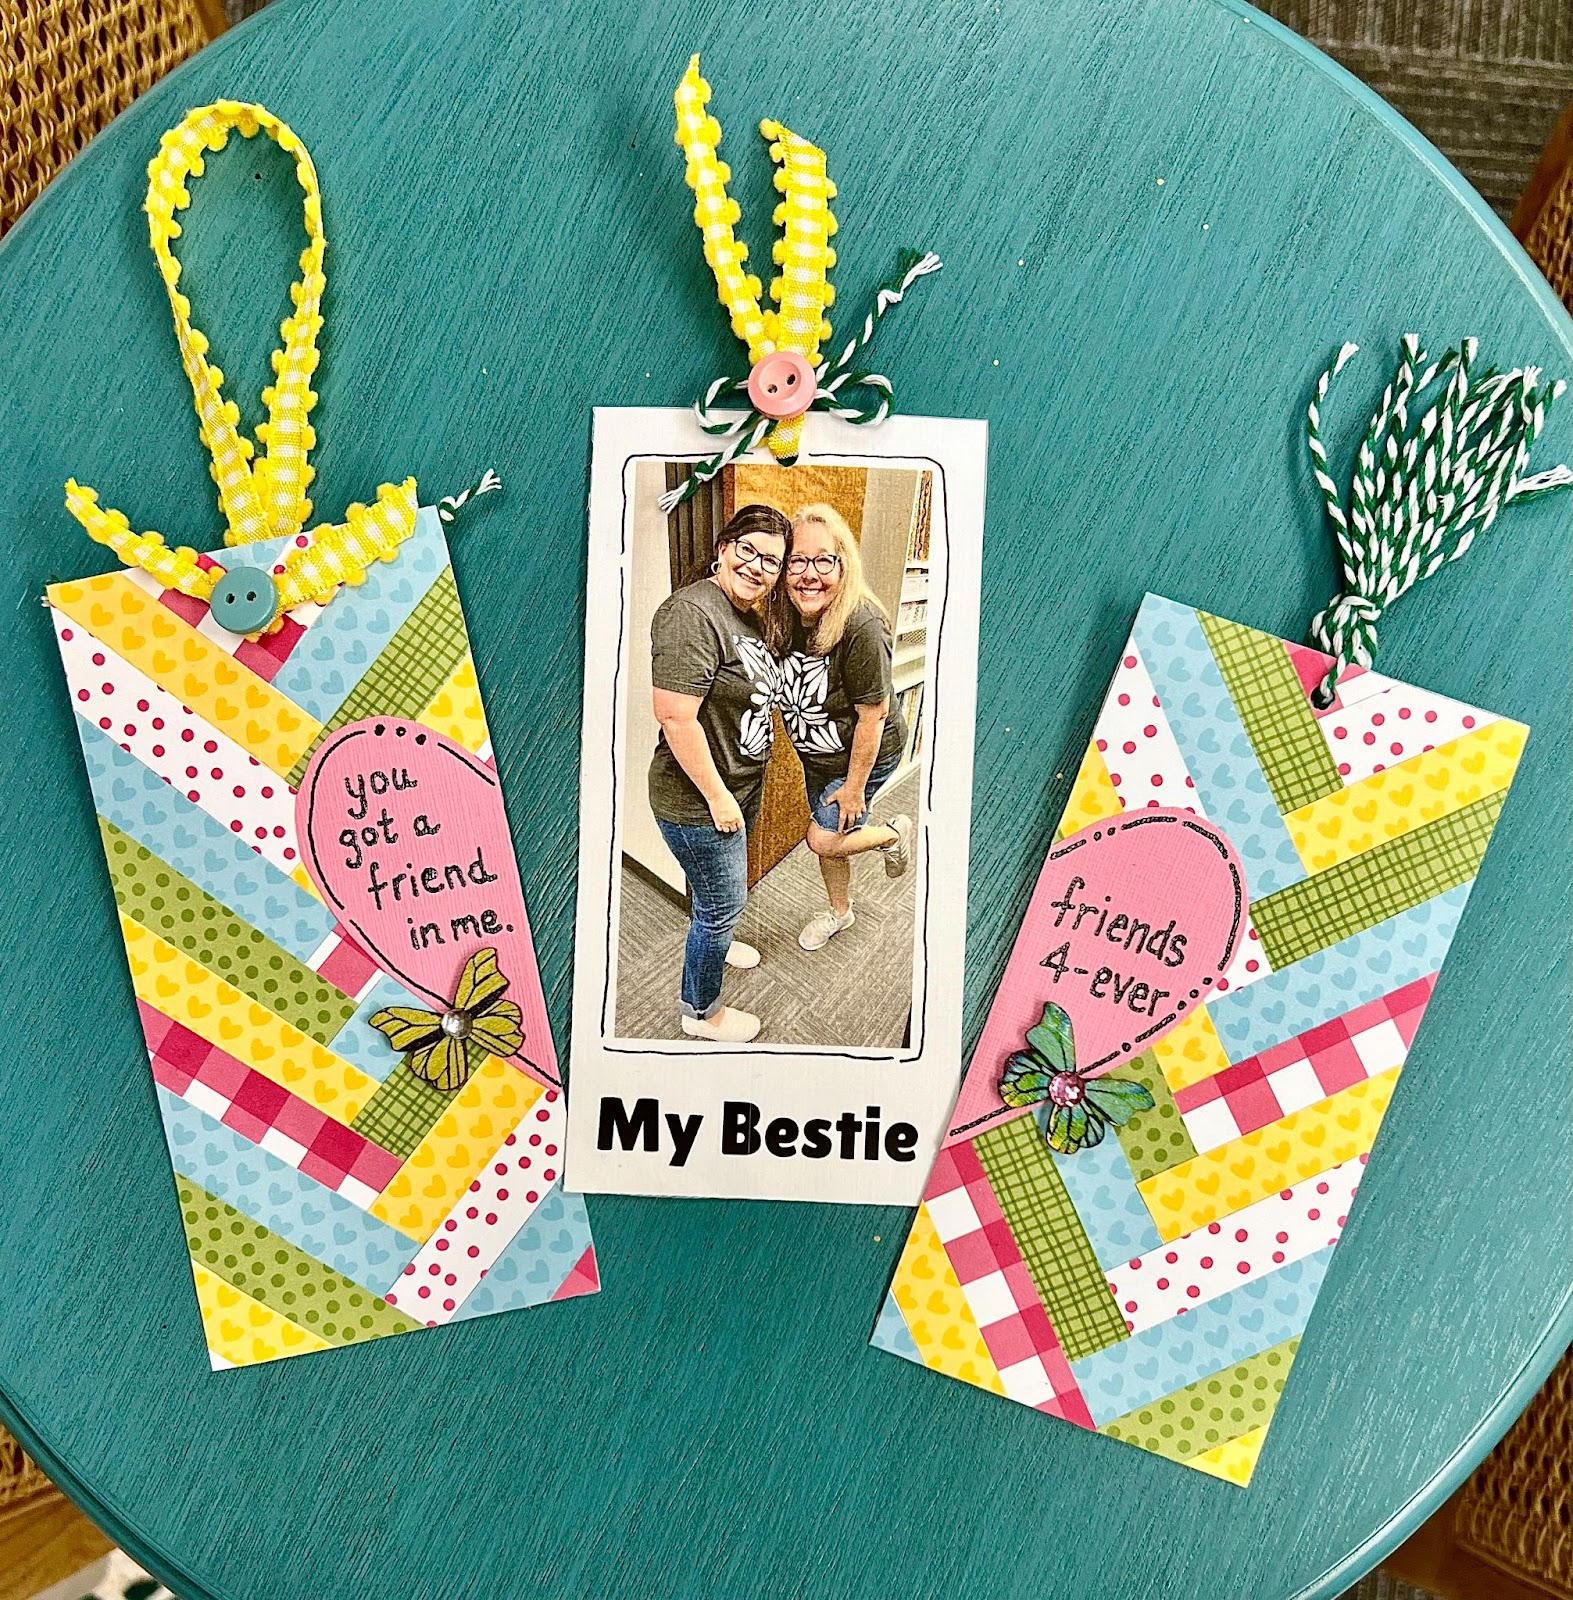
Create a Patterned Paper Tag
First, let’s create our tag. Start by cutting a piece of white cardstock to a size of 3 inches by 6 inches. This size is versatile and can be used for tags, bookmarks, or even gift toppers! For those who prefer a more precise look, create a center guide. Use a ruler and a Frixion pen to lightly mark the center of the cardstock horizontally at 1 ½ inches. This line will help guide you as you create the herringbone pattern.
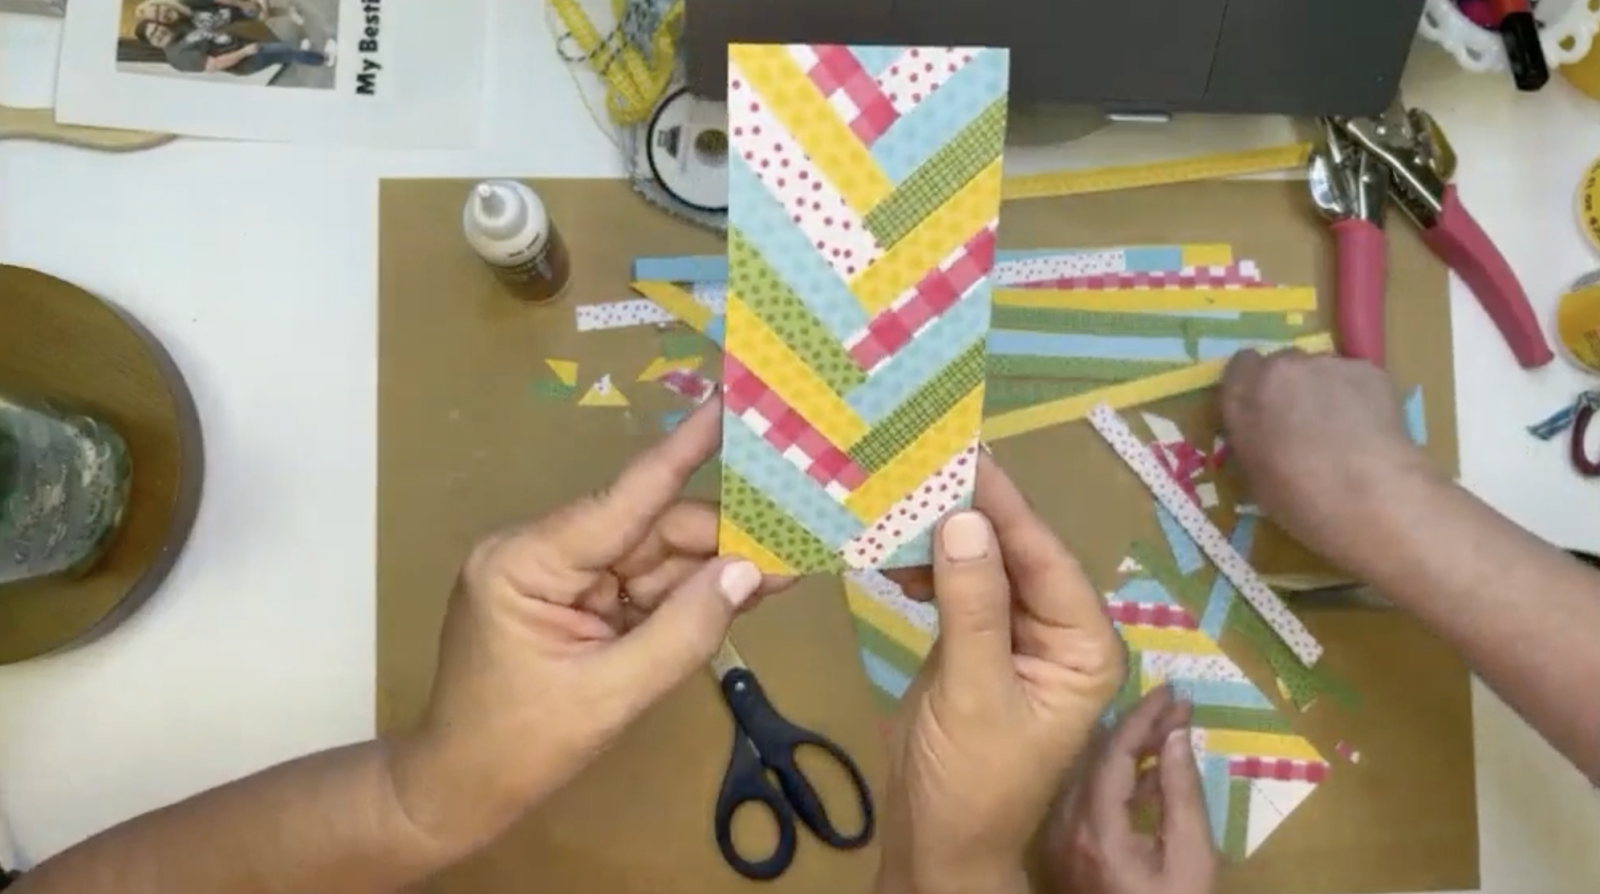
Gather your scrap paper from your stash and cut them into half-inch strips. The length of the strips can vary depending on the size of your tag. You can use all kind of different patterns and colors – make it unique!
Begin at one corner of your cardstock and adhere a paper strip diagonally to create a V-shape. Use Scotch Tacky Glue or a tape runner to secure the strip in place. Add another strip next to the first, creating a second V-shape that points in the opposite direction. Continue this pattern, alternating the direction of the V-shapes to form the herringbone design. As you work your way down the cardstock, use smaller pieces of scrap paper to fill in any gaps or spaces.
Personalize Your Tag with Photos
I love and use the Print to Size app on my phone to resize and edit photos. You can use something like this to resize photos of you and your bestie to fit the back of your tag. Print these photos onto Clear Label Paper, which is actually a shipping product and not a crafting product. I’ve found it works great for printing photos and sticking them onto paper!
Carefully peel the backing off the clear label paper and place the photos on the back of the tag. Smooth out any air bubbles for a clean finish and trim off the excess. If you don’t have clear label paper, you can use regular sticker paper or even print directly onto the cardstock.
Add Embellishments and Finishing Touches
Use a hole punch to create a hole at the top of the tag. Add a hanger by threading a piece of ribbon or twine through the hole to create a hanging loop.
We also thought it would be cute to add half of a heart of each of our tags. Take a piece of pink paper, fold it in half, and freehand cut out a heart. Glue each half of the heart on each tag and add a sentimental message or doodles. This is such a cute matching set of tags for you and your bestie!

You can experiment with different paper types, such as washi tape, fabric strips, or even ribbon, to create unique looks. Customize your tag with stickers, glitter, markers, and more! With a little creativity, you can create a one-of-a-kind herringbone paper tag that perfectly captures your friendship.

I go LIVE on my Facebook page every Friday at 11 am CST for a fun and easy Craft-n-Chat Session. Come learn something new while creating something beautiful!
Did you love this? Check out my online creative memberships! They are all a little different, and each is designed to ignite your imagination, inspire your craft, and connect you with fellow art enthusiasts. If you’re a creative looking for an online space to learn and thrive, we have something for everyone!


0 Comments