Supply List:
- Angel DIY Decor Kit
- Country Chic Paint: Simplicity
- Stickles – Diamond or Unicorn
- Krylon Gold Leafing Pen
- Mod Podge
- Hot Glue
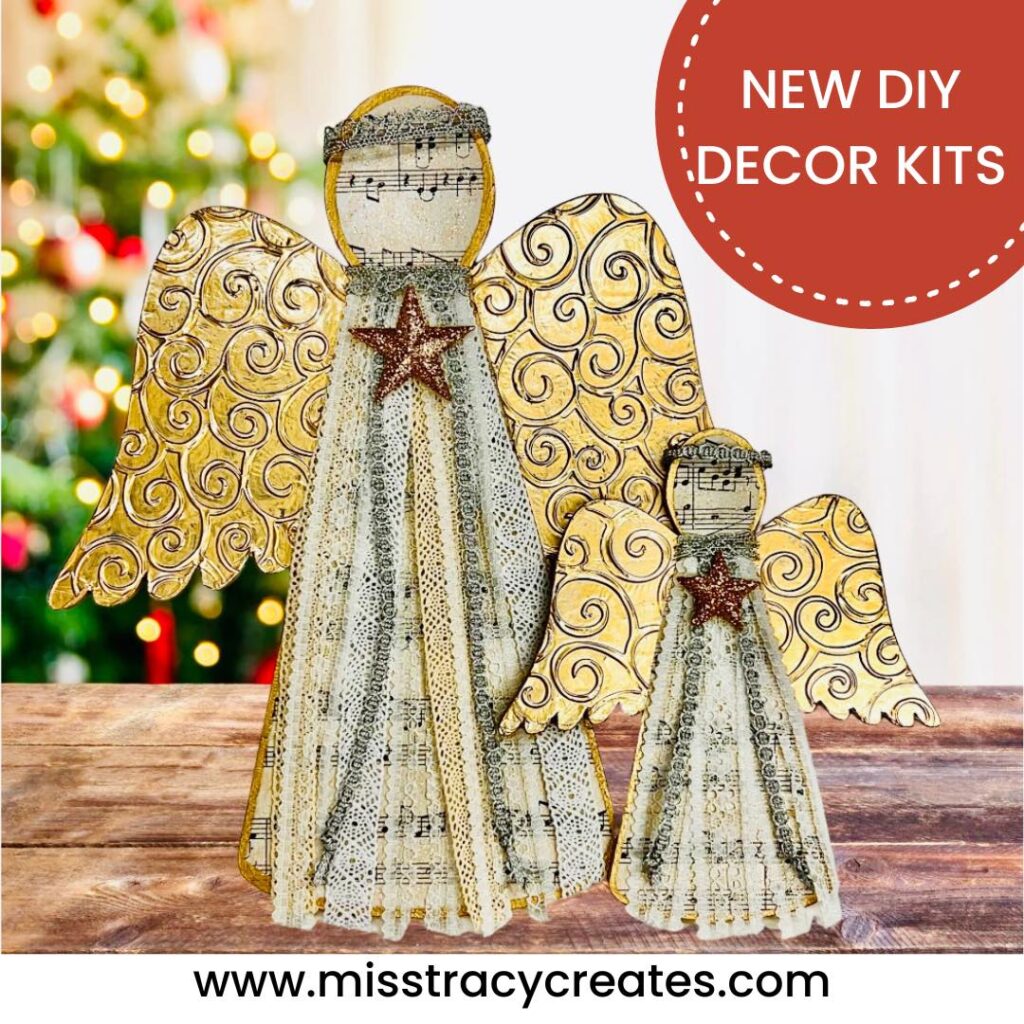
We are creating beautiful angels today, which can be used as Christmas decor this holiday season, an ornament on your tree, or the perfect gift for someone you love. We have two different sizes available for this project – a small angel and a medium angel. You can grab whichever kit you would like with most supplies included and craft these gorgeous angels for your home!
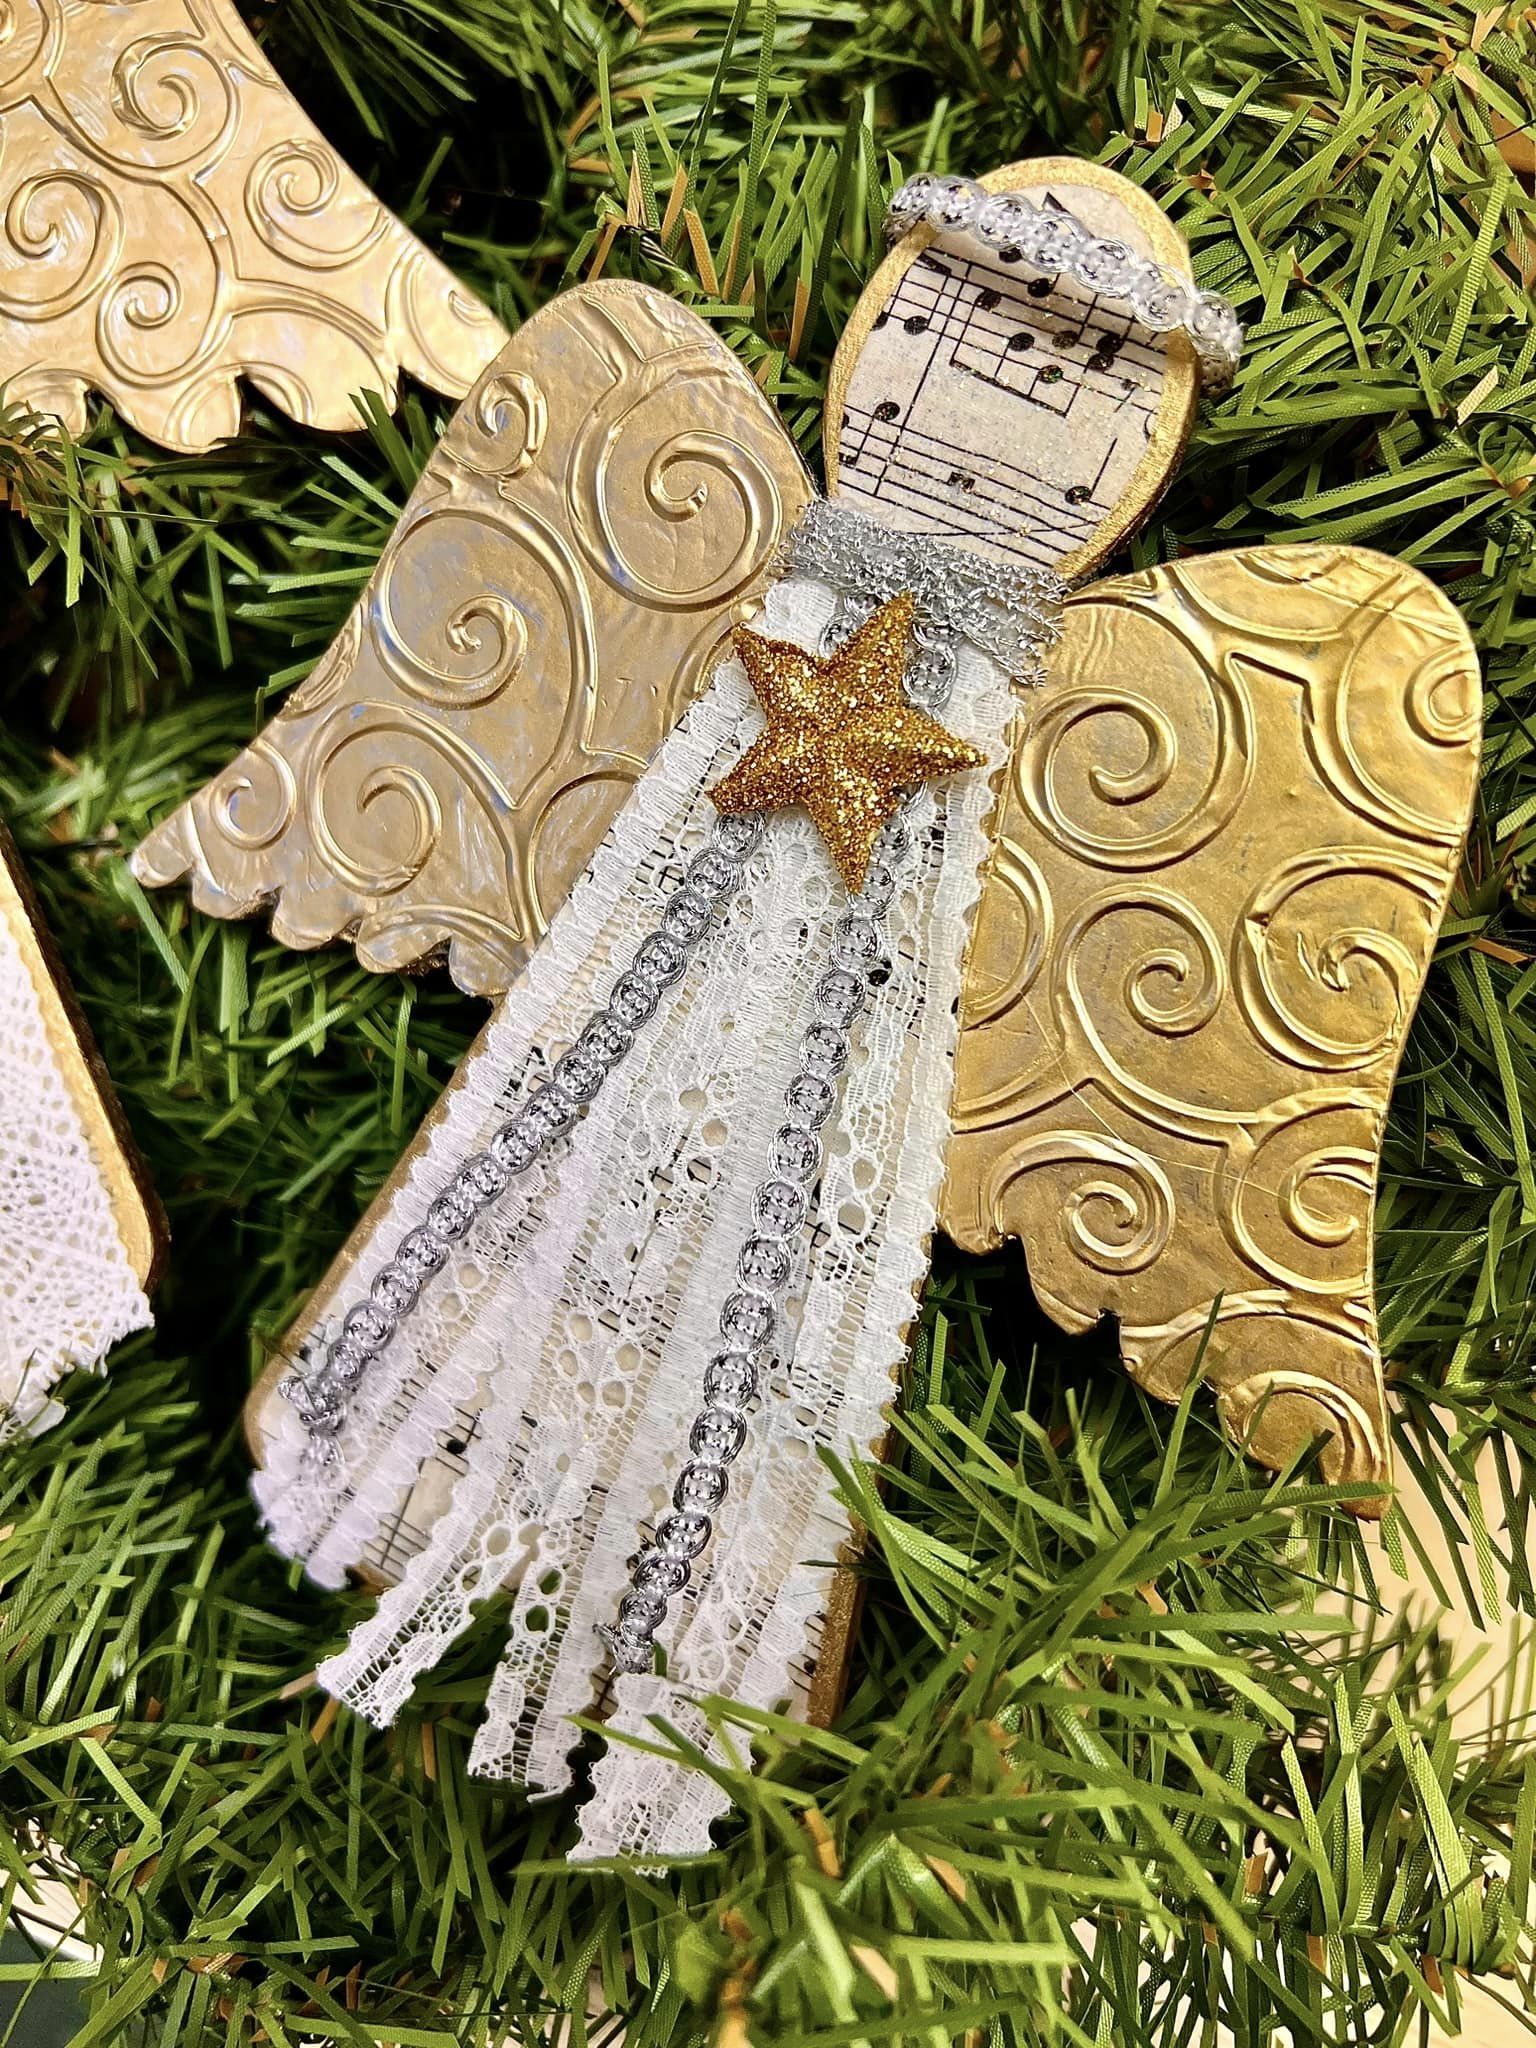
Your Angel DIY Decor kit will include one shiplap angel, pre-embossed foil tape, music note napkin, beautiful lace and silver trims, and a gold star.
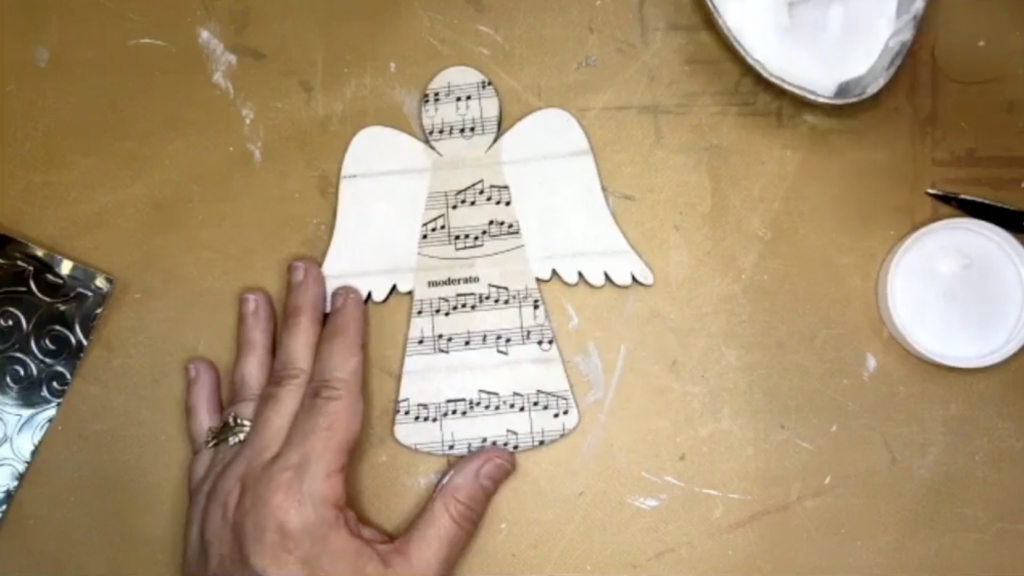
Applying Napkin Art to Your Angel
The first thing you are going to do is apply a coat of Country Chic Paint: Simplicity to your angel. If you are doing the back, do the same thing on the back too. Dry with a heat tool.
Cut your napkin in half so you have some for the front and some for the back. You don’t have to cover your entire angel with the napkin. Place your napkin on top of your angel to determine where you will need to cut for her robe and also her head. Cut the shapes out of your napkin. Separate the plys of your napkin until you have that top layer of napkin art.
Apply a coat of Mod Podge to your angel, lay your napkins on top, place a plastic sheet over that, and smooth it down with your hands. Dry with a heat tool. Take a piece of sandpaper and sand off any excess hanging napkin. Finally, apply another coat of Mod Podge Matte over top to seal your piece and dry again.
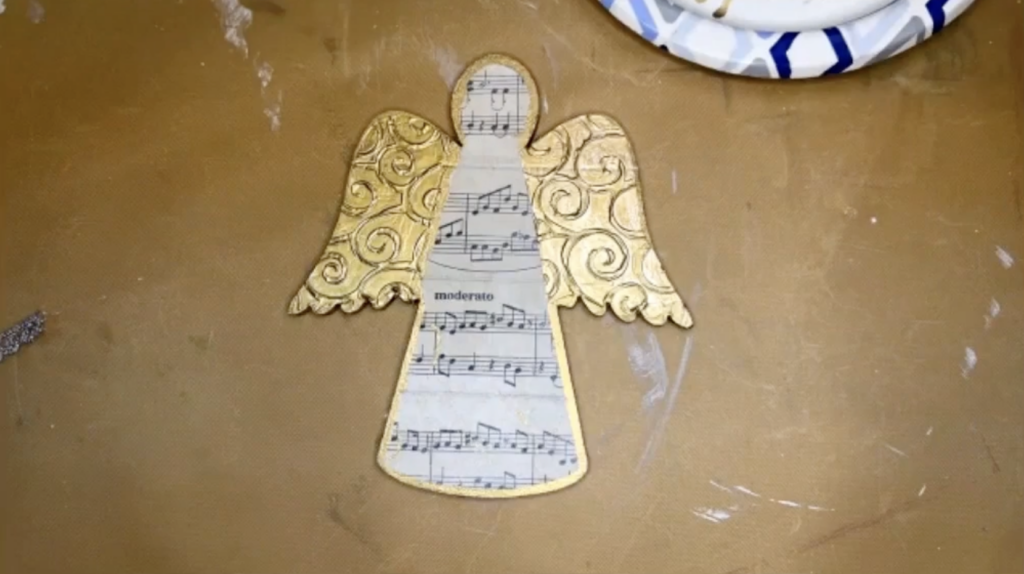
Adding Wings to Your Shiplap Angel
In your kit, you will have pre-embossed foil tape that we will be adding to the wing’s of your angel. If you are using the small angel kit, cut your foil tape in half. Then place the tape over the wing and press down so you can see where to cut. Peel the adhesive backing off and stick it to the wing. The tips of your wing might be showing, so just cut a little piece off and patch that in. Press down any excess that is hanging over the sides.
If you like the silver, you can keep it, but I’m going to make my wings gold. I’m going to take a Krylon Gold Leafing Pen and just color my wings. I’ll also color the edges of my angel and outline her head and body too. Dry with a heat tool.
Finishing the Angel with Details and Embellishments
Next, I’m going to add some sparkler with Stickles – Diamond or Unicorn! Add Stickles to your entire angel’s body and then use a paintbrush to pounce and spread it around. Dry with a heat tool.
In your kit, you will have a piece of lace. Cut that lace into three 5-inch pieces. Add some hot glue slightly below her neck and stick a piece of lace in the middle. Then, add the other two on each side with more hot glue. Then, cut each ribbon right up the middle.
Grab your silver trim and cut that into two 5-inch pieces. Then, add hot glue again right below the neck and place the two pieces of trim onto your angel. Then, add your silver collar piece around her neck over top of those ribbon pieces.
Let’s add her halo! Turn your angel onto the back and put a line of hot glue and stick one end of the silver trim, wrapping it around the front, and then sticking the other end to the back to make the halo. Finally, hot glue your gold star to the middle of your angel.
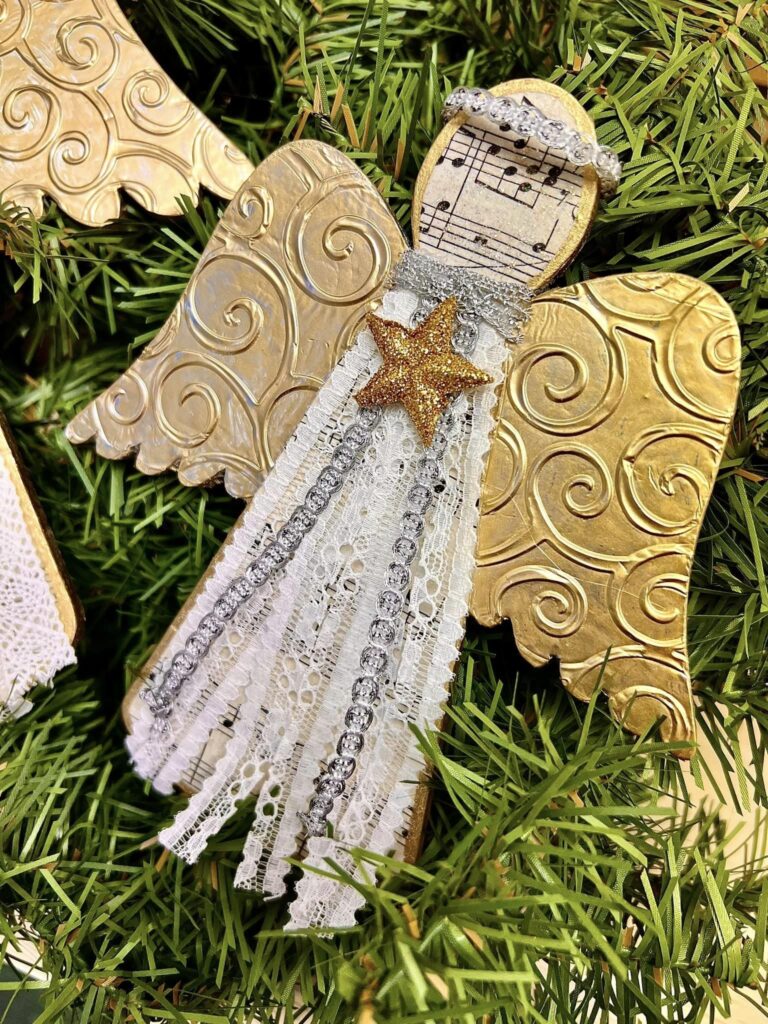
This project comes together so quickly and they are also fun to create! These are absolutely beautiful for the holiday season and are such a lovely gift too. If you would like to make this into a tree ornament, you can just hot glue an ornament hanger to the back too.
I go LIVE on my Facebook page every Friday at 11 am CST for a fun and easy Craft-n-Chat Session. Come learn something new while creating something beautiful!
Join the waitlist for The Napkin Club where Unique Makers can connect, learn, and be inspired to create with the Individual Unique Napkin Collections that you will receive every month! A place where Napkin Lovers can unite and be inspired!




0 Comments