
Supply List:
- Faux Plastic Pumpkins
- Fall Napkins
- Mod Podge Matte
- Plastic Deli Sheets
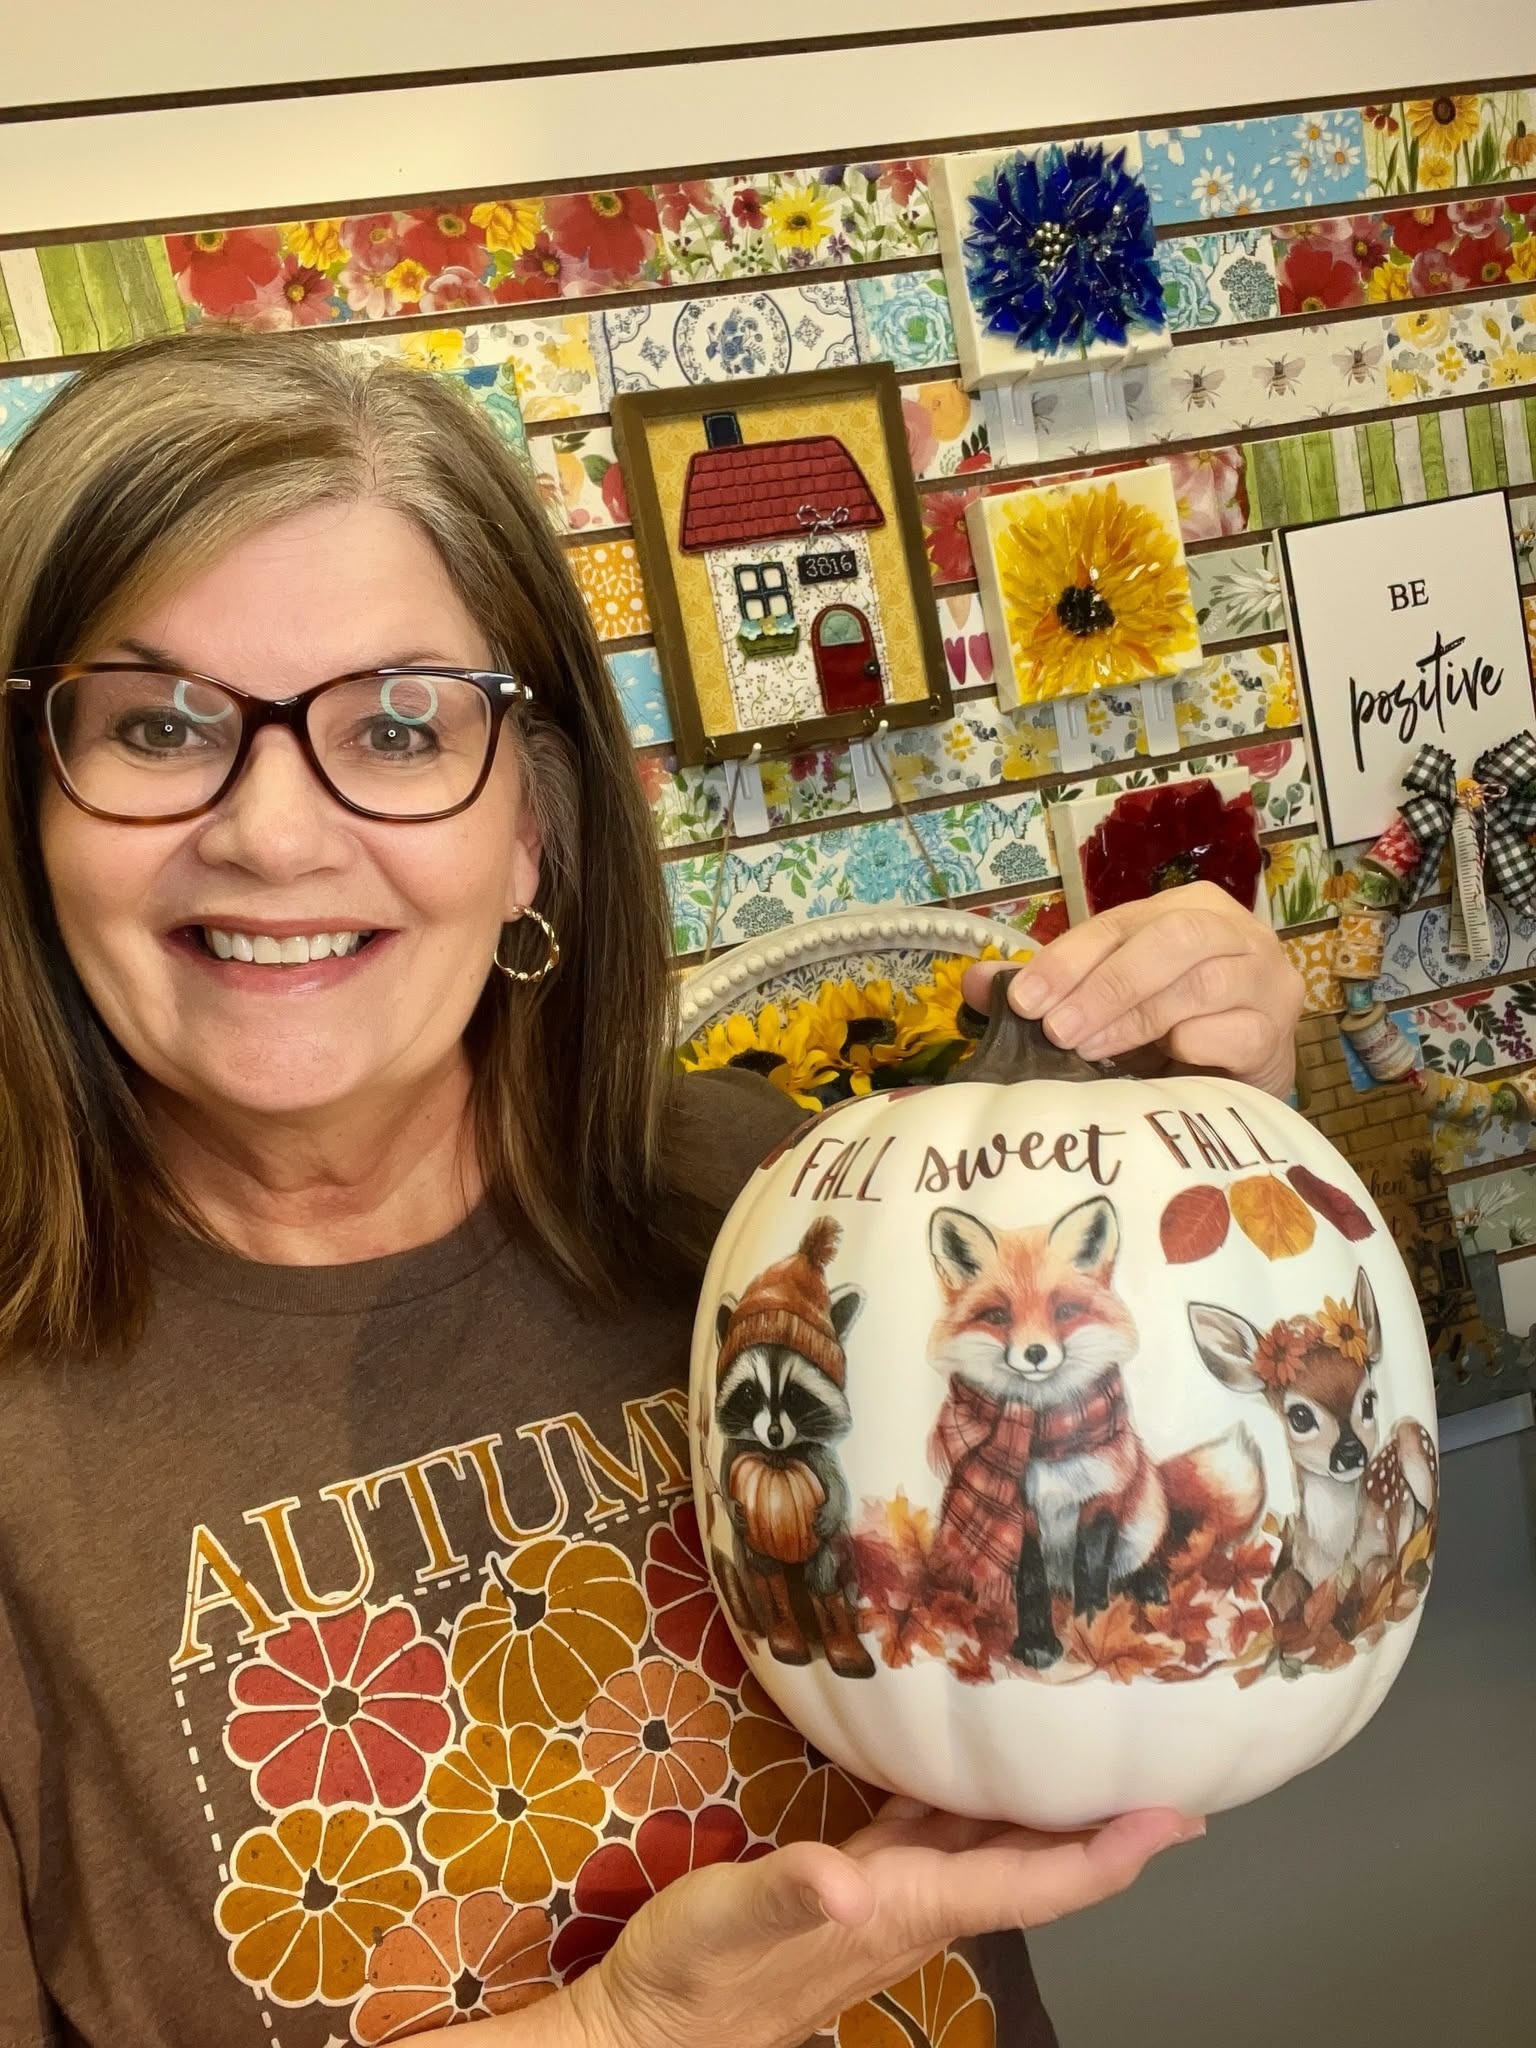
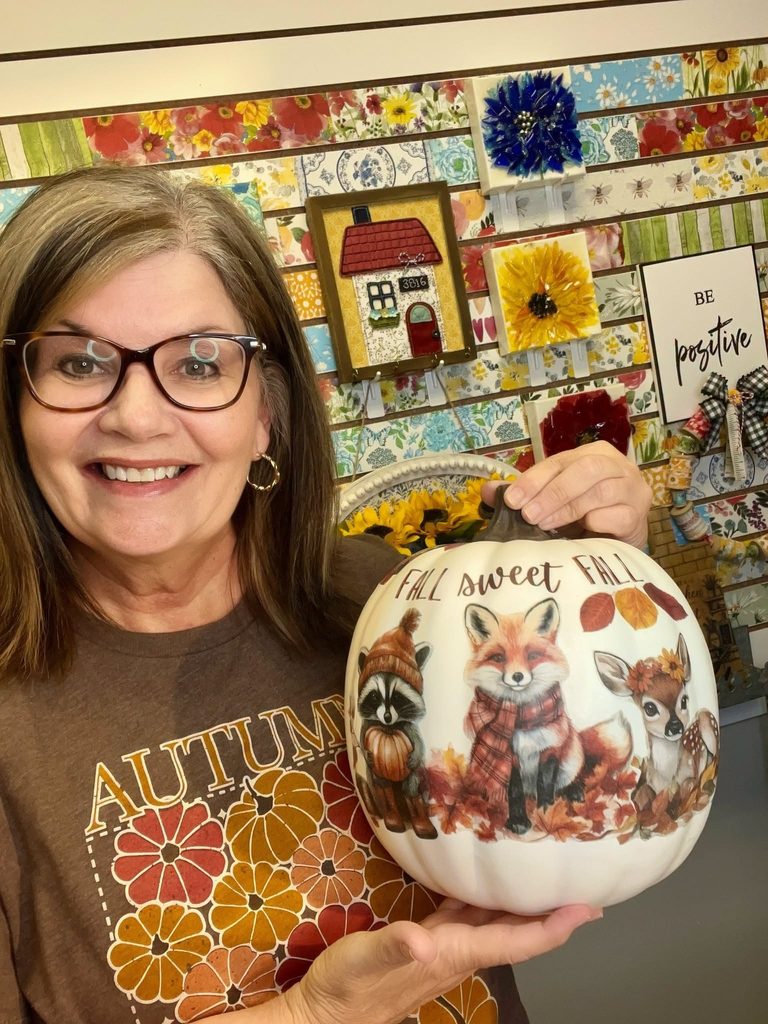
Looking for a fun way to decorate pumpkins without carving or painting? Today, I’m sharing two adorable fall pumpkin projects using decorative napkins and Mod Podge!
For our first project, we’re creating a woodland-themed pumpkin featuring a fox, deer, raccoon, and the words “Fall Sweet Fall.” Then, I’ll show you how to decorate a smaller pumpkin with a vintage-inspired football design that’s perfect for game day.
These DIY Mod Podge pumpkins are a fun way to create your own fall decorations, and you don’t need to be an experienced crafter to make them. Grab a few artificial pumpkins, your favorite napkins, and let’s get crafty!
Project 1: Woodland Animal Fall Pumpkin
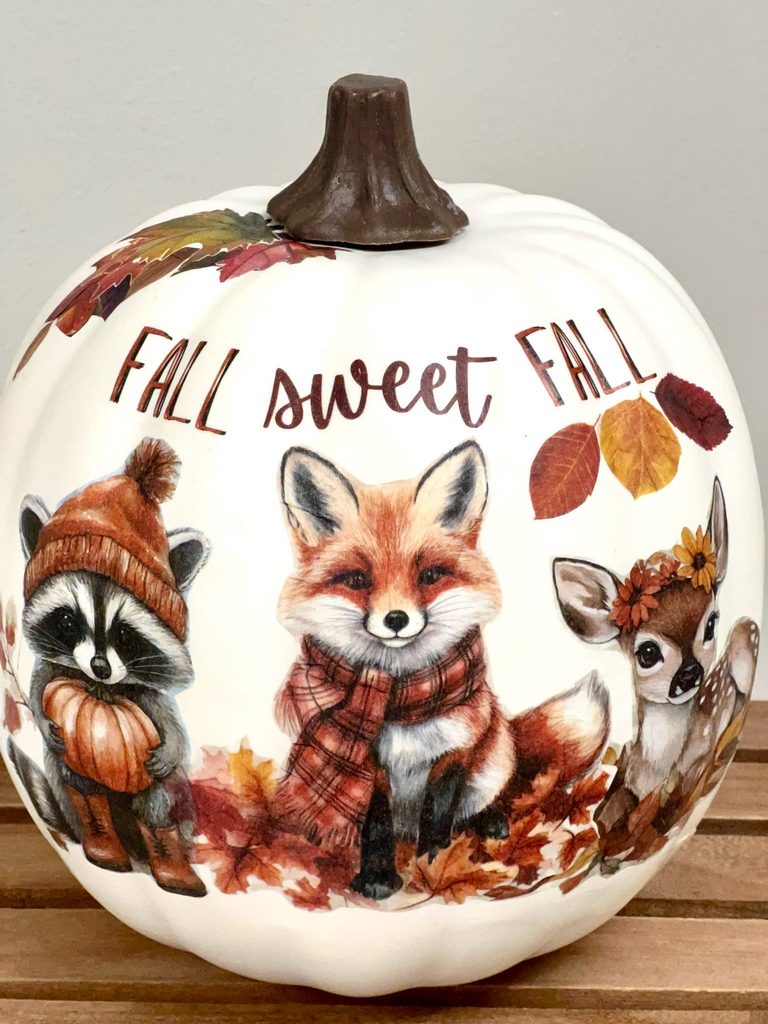
For our first pumpkin, I’m using some of my custom-designed woodland animal napkins from The Napkin Club. These little critters are just the cutest! We’ve got a fox, deer, and raccoon all dressed up for fall, and I’m going to arrange them together to create a sweet little woodland scene.
Step 1: Choose Your Pumpkin and Plan Your Design
I’m starting with a larger white artificial pumpkin that has fairly shallow grooves. When you’re choosing a pumpkin for napkin art, pay attention to those ridges and valleys. Deep grooves can make it harder to position detailed images or lettering.
Before gluing anything down, I like to arrange my napkin designs to see how they’ll look together. I’m positioning my woodland animals around the front of the pumpkin so they appear to be sitting together in a pile of autumn leaves.
One little tip: Make sure to hold your pumpkin upright and check your placement before attaching anything. It’s easy to position your images too low when you’re working with the pumpkin on its side!
Step 2: Cut Out and Separate Your Napkin Designs
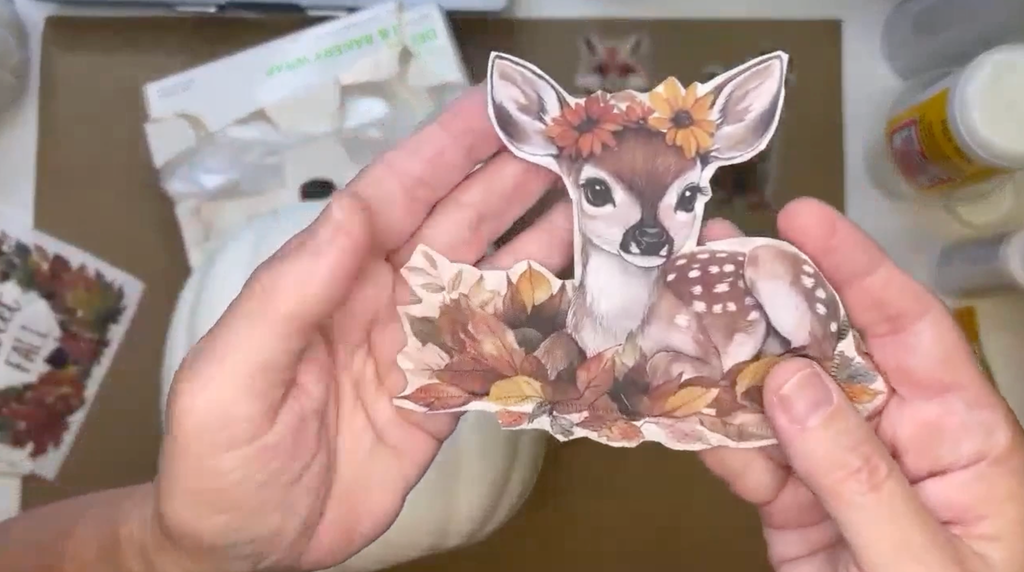
I’ve chosen my fox, deer, and raccoon for this project. I’m going to bubble cut around each design, leaving a little space around the edges instead of cutting right up against every tiny detail. I always recommend cutting your designs before separating the napkin layers. That extra thickness makes the tissue much easier to handle.
Once everything is cut out, I’ll carefully remove the plain backing layers until I’m left with just the printed tissue. My custom napkins are three-ply, so I’ll need to remove two layers. If you’re having trouble separating them, try putting a tiny bit of Mod Podge on your fingertip to help get those layers started.
Step 3: Apply Your First Woodland Animal
I’m starting with my little fox, making sure his face isn’t positioned down inside one of the pumpkin’s deeper grooves.
Using Mod Podge Matte, I’ll gently lift one section of my napkin and brush Mod Podge directly onto the pumpkin underneath. Then I’ll carefully lower the tissue and lightly tap it into place. I like working in small sections rather than applying the entire napkin at once. It gives me more control over how the tissue settles onto the curved surface.
Once the fox is attached, I’ll place a plastic wrap sheet over the design and gently smooth it with my fingertips. I always start with the face and work outward, pressing the tissue into the pumpkin’s grooves as I go. The plastic sheet helps smooth wrinkles without rubbing directly against that delicate napkin tissue.
Step 4: Add the Deer and Raccoon
Next, I’m adding my little deer beside the fox. I want these two to look like they’re sitting together in the same pile of leaves, so I’m going to trim away a small section where their designs overlap. I’ll use my Pilot FriXion pen to mark the area I want to remove, then carefully cut along those markings before separating the napkin layers.
Now I can apply the deer with Mod Podge, starting where the two designs meet and working outward. I’ll use my plastic sheet again to smooth everything into place.
I’ll repeat the process with my raccoon, positioning him beside the other animals to complete our little woodland family. And look how cute they are together!
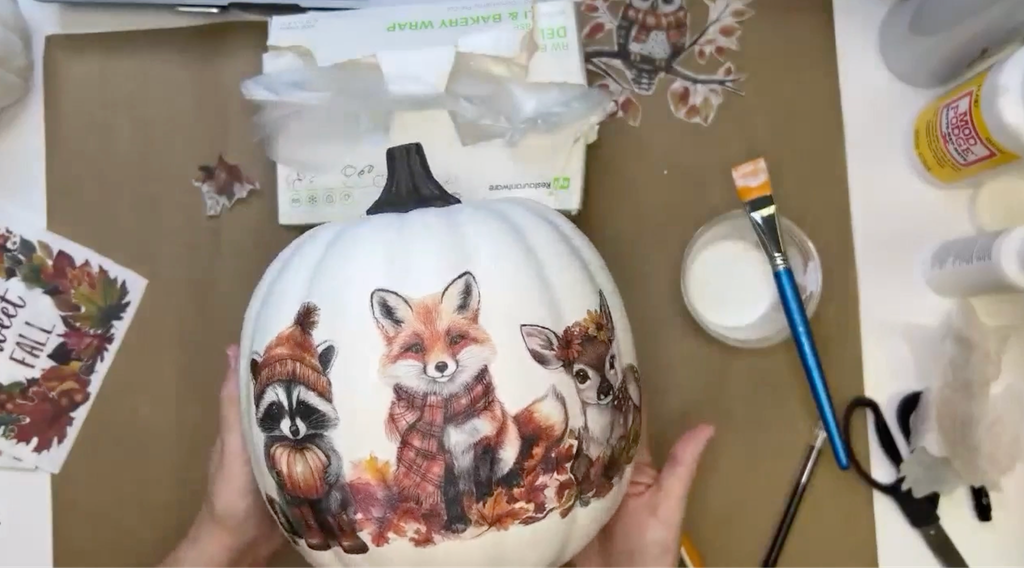
Step 5: Add the “Fall Sweet Fall” Lettering
I think our woodland animals need a little something above them, so I’m adding the words “Fall Sweet Fall” using another custom napkin design.
I’ll cut the phrase into three separate sections so I can arrange the words around the natural curve of the pumpkin. I also like to trim away excess tissue and round off the corners because those softer edges blend more naturally.
I’ll start with “Sweet” above my fox, then position “Fall” on either side. Using the same Mod Podge technique, I’ll carefully attach each word and smooth it into place.
If you don’t have napkins with lettering, you could also use stamps on the plain backing layers of your napkins to create your own custom words!
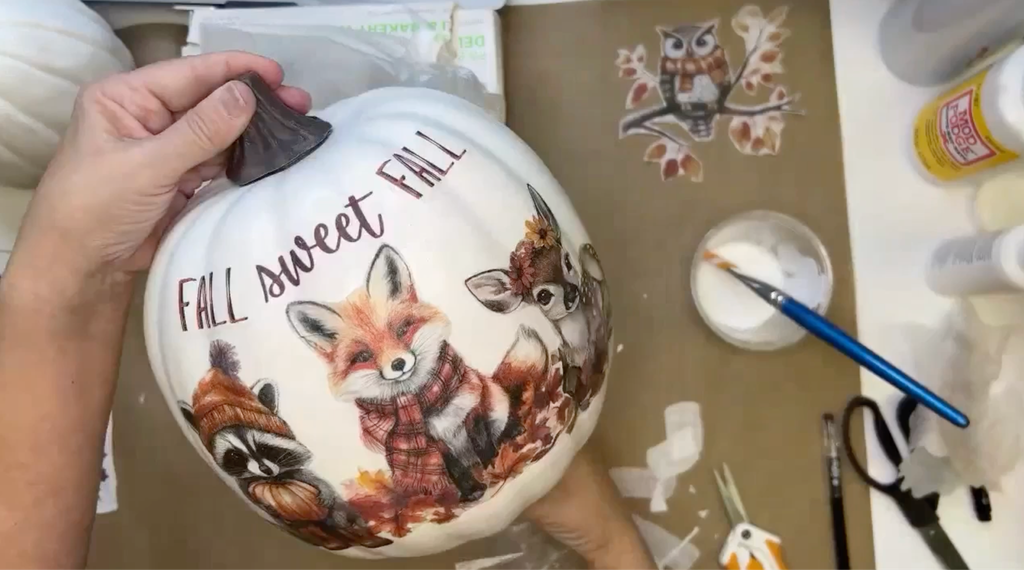
Step 6: Add Finishing Touches and Seal
Now that my woodland animals and lettering are in place, I’m going to take a look at the overall design.
I see a little empty space above my deer, so I think I’ll add a couple of falling leaves. This is why I always save my napkin scraps! Those little leftover pieces are perfect for filling in empty spaces. Once I’m happy with everything, I’ll let my pumpkin dry completely before adding a protective top coat of Mod Podge.
If you’re planning to display your pumpkin outside, I recommend finishing it with a clear spray sealer designed for outdoor use. You could also add ribbon, artificial flowers, or a little fall foliage around the stem. And there we have it! Our woodland animal pumpkin is ready for fall!
Project 2: DIY Football-Themed Fall Pumpkin
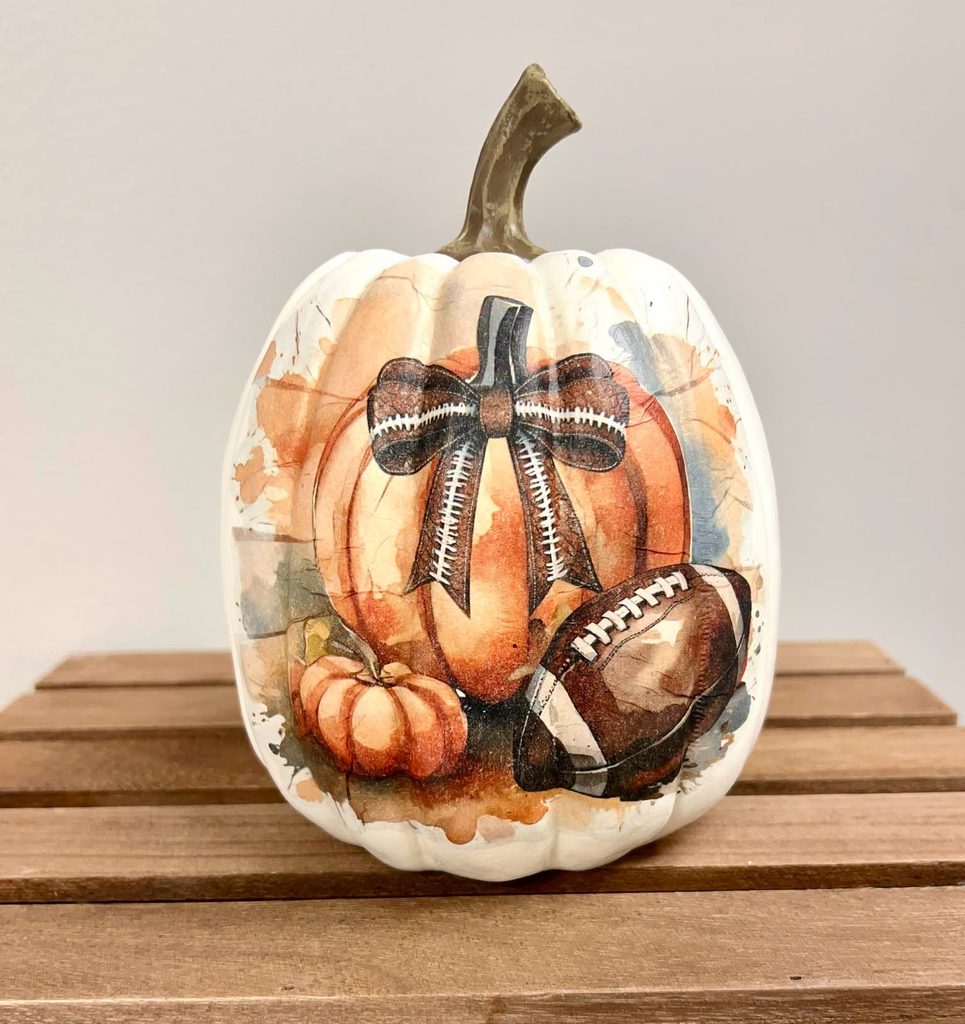
For our second project, I’m doing something a little different! My family loves football, so I thought it would be fun to create a pumpkin inspired by football season. This time, I’m using a smaller white artificial pumpkin with deeper grooves and a vintage-style football napkin design. I’ll show you how to apply a larger piece of tissue to a curved surface while keeping those little wrinkles under control.
Step 1: Prepare Your Pumpkin and Napkin
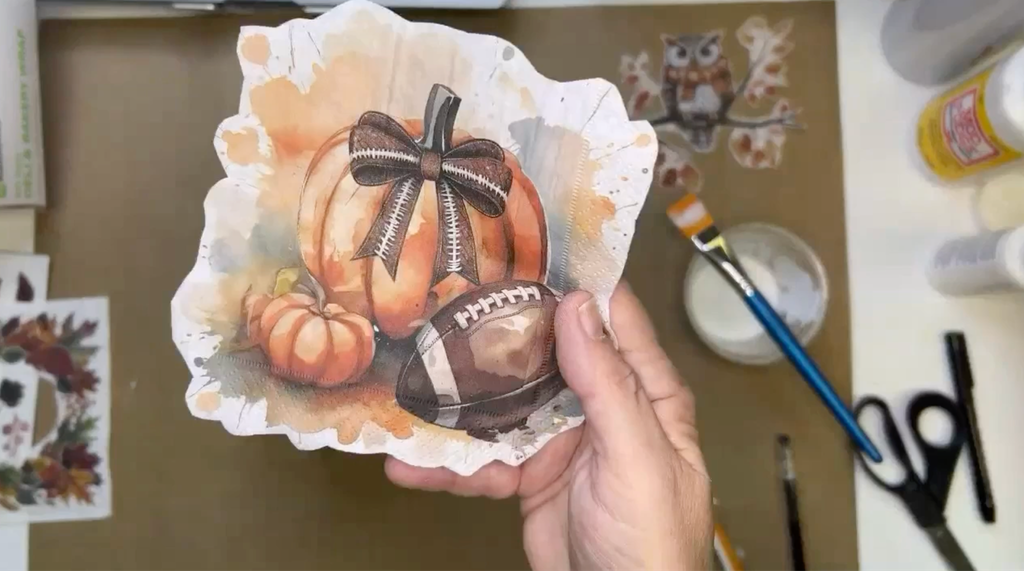
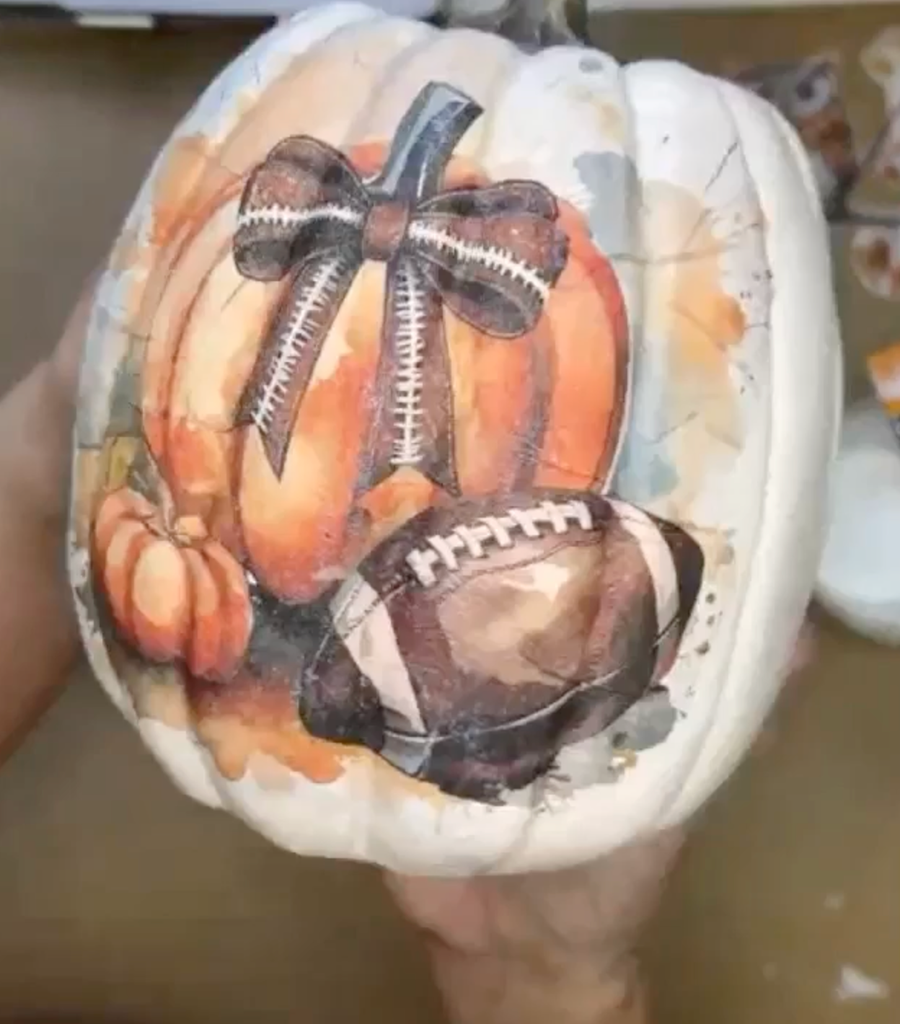
I’m starting with a smaller artificial pumpkin that has much deeper ridges than our first one. I’ve chosen a decorative napkin featuring a football, pumpkin, and pretty bow. I love the vintage watercolor look of this design!
I’ll bubble cut around the image, leaving soft, irregular edges that will blend into the white pumpkin. Then I’ll carefully separate the backing layers until I’m left with just the printed tissue.
Step 2: Apply a Generous Coat of Mod Podge
When you’re working with a larger napkin design, don’t skimp on your Mod Podge! I’m going to use a larger brush and apply a generous coat of Mod Podge Matte across the front of my pumpkin, making sure to get down into those deep grooves. I want the surface nice and wet so I have enough time to position my napkin before everything starts drying.
Step 3: Position and Attach Your Napkin
I’m going to start by positioning the center of my design on the front of the pumpkin. Instead of worrying too much about where the stem is pointing, I’m focusing on making sure the main part of my design looks good when the pumpkin is sitting upright.
I’ll gently lower the center of my napkin onto the wet Mod Podge and lightly tap it into place. Then I’ll work outward toward each side, allowing the tissue to follow the pumpkin’s curves. You might get a few wrinkles, and that’s perfectly fine! I try to keep the most important part of my design smooth and let any wrinkles happen toward the outer edges.
Step 4: Smooth the Napkin Into the Grooves
Now I’m grabbing a clean plastic wrap sheet and placing it over my design. This time, I’m going to smooth the raised sections of the pumpkin first. I’ll gently rub across the tops of the ridges to make sure the napkin is attached securely.
Once those areas are smooth, I’ll use my fingertips to carefully press the tissue down into each groove. I want the napkin to follow the shape of the pumpkin rather than just stretching across the raised sections. When everything looks good, I’ll carefully remove my plastic sheet.
Look at that! Our football design has settled right into those grooves, and those little wrinkles are barely noticeable.
Step 5: Dry, Seal, and Decorate
Once my pumpkin is completely dry, I can decide whether I want to add any extra details. I really love the vintage look of this napkin, so I might leave it just as it is. But you could certainly add a little sparkle, metallic accents, or decorative ribbon around the stem.
I’ll finish with a protective coat of Mod Podge if desired. For outdoor decorating, I’ll use an outdoor-rated clear spray sealer after everything has dried. And that’s it! We’ve got an adorable football-themed pumpkin that’s perfect for fall decorating and game day!
My Favorite Tips for Pumpkin Napkin Art
After making these two pumpkins, here are a few things I want you to remember when you’re working on your own projects:
- Start with shallow grooves. If you’re new to pumpkin napkin art, a smoother artificial pumpkin will be much easier to work with.
- Cut before separating. Always cut out your designs while the napkin layers are still attached.
- Use plenty of Mod Podge. You want enough moisture to position and smooth your napkin before everything starts drying.
- Protect your tissue. Plastic wrap sheets make it much easier to smooth delicate napkins without tearing them.
- Don’t worry about perfection. A few wrinkles are completely normal when you’re working with curved surfaces!
And don’t throw away those extra napkin pieces! Little leaves, flowers, and other scraps are perfect for adding finishing touches to future projects.
More DIY Pumpkin Decorating Ideas
There are so many ways to customize these pumpkins! Try using sunflower napkins, autumn leaves, Halloween designs, or pretty florals for a completely different look.
You could also experiment with painted backgrounds, antiquing wax, metallic accents, or stacked artificial pumpkins. Once you learn how to use Mod Podge and napkins on pumpkins, you’ll find all kinds of ways to create your own seasonal decorations!
Love Napkin Art? Come Join Me in The Napkin Club!
If you enjoyed these DIY fall pumpkin projects, I’d love to invite you to join us inside The Napkin Club! Each month, we explore creative ways to use decorative napkins in our crafting. As a member, you’ll receive my custom-designed napkins, enjoy step-by-step tutorials, and have access to our library of current and past workshops. Whether you’re brand new to napkin art or ready to try something new, I’d love to have you crafting with us! Join The Napkin Club Here!
0 Comments