


Supply List:
- Wood ABC Blocks
- Country Chic Chalk Paint (a light and a dark color—I used Starstruck and Simplicity)
- Scrapbook Paper
- Baby Wipes or Wet Paper Towels
- Plastic Deli Sheets
- Mod Podge Matte
- Chalk Ink
- Heat Tool
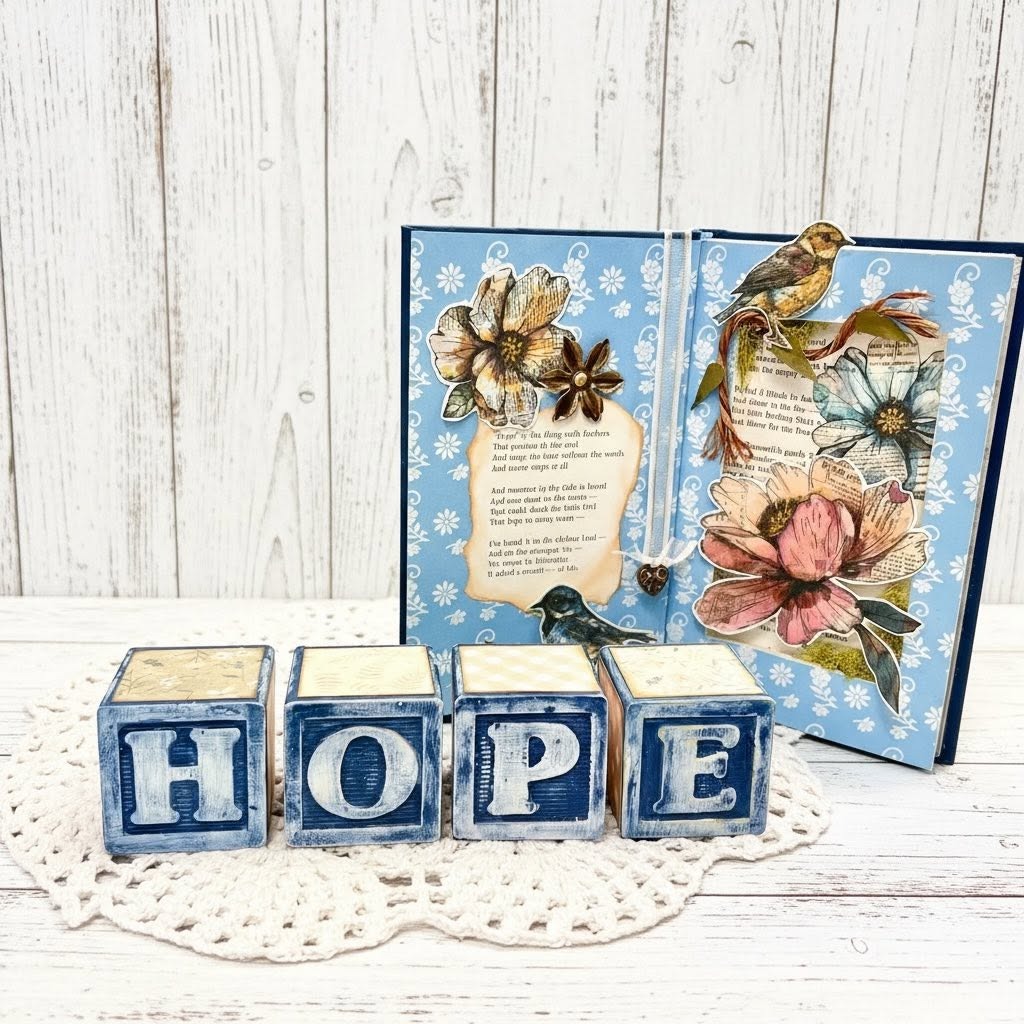
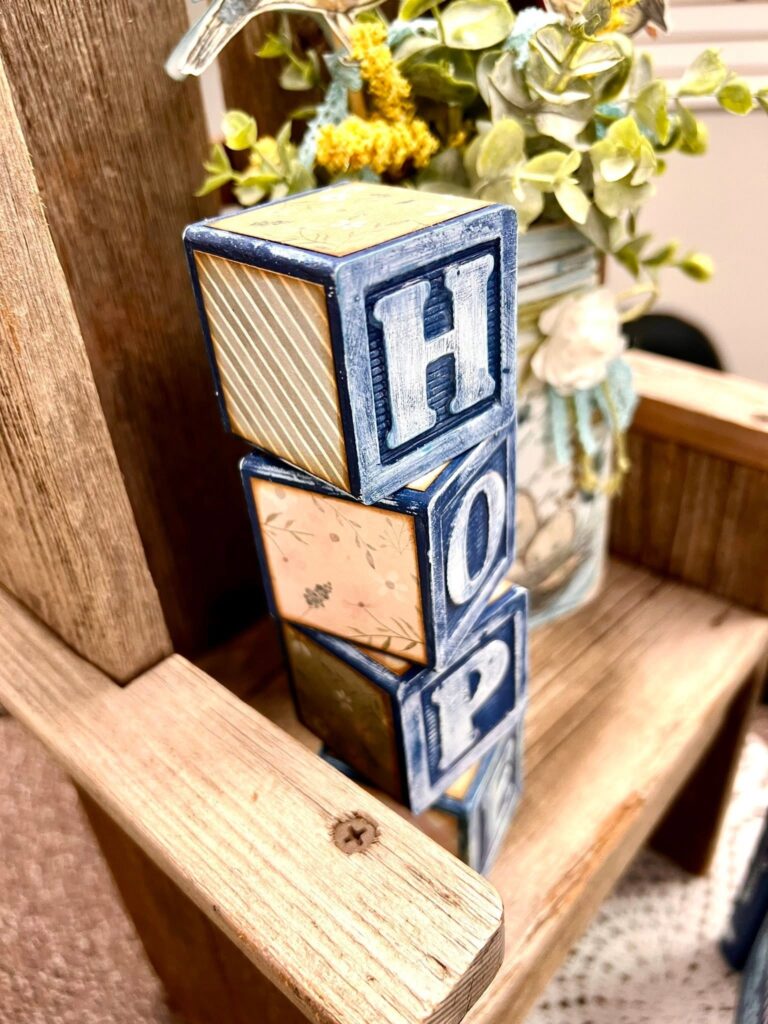
Turn children’s alphabet blocks into meaningful DIY word decor with this easy repurposed craft tutorial. This project is perfect for creating inspirational words, seasonal shelf decor, desk reminders, or handmade gifts using old wooden blocks, paint, scrapbook paper, and Mod Podge.
This project is also a sweet reminder that change can be beautiful. Just like these blocks are getting a fresh purpose, we can give ourselves permission to grow, shift, and embrace new seasons with a little grit and a whole lot of grace.
Step 1: Choose Your Word and Paint Colors
Begin by choosing a word that feels meaningful to you. It might be “hope,” “faith,” “joy,” “trust,” “blessed,” “brave,” or another word that speaks to the season of life you’re walking through. You can also use the blocks for seasonal words like “USA,” “fall,” “boo,” “joy,” or “thanks.”
Next, choose two contrasting paint colors. A light and dark combination works best for this technique because it allows the raised letters to stand out after distressing. For this project, use white as the base coat and a dark blue or navy as the top coat.
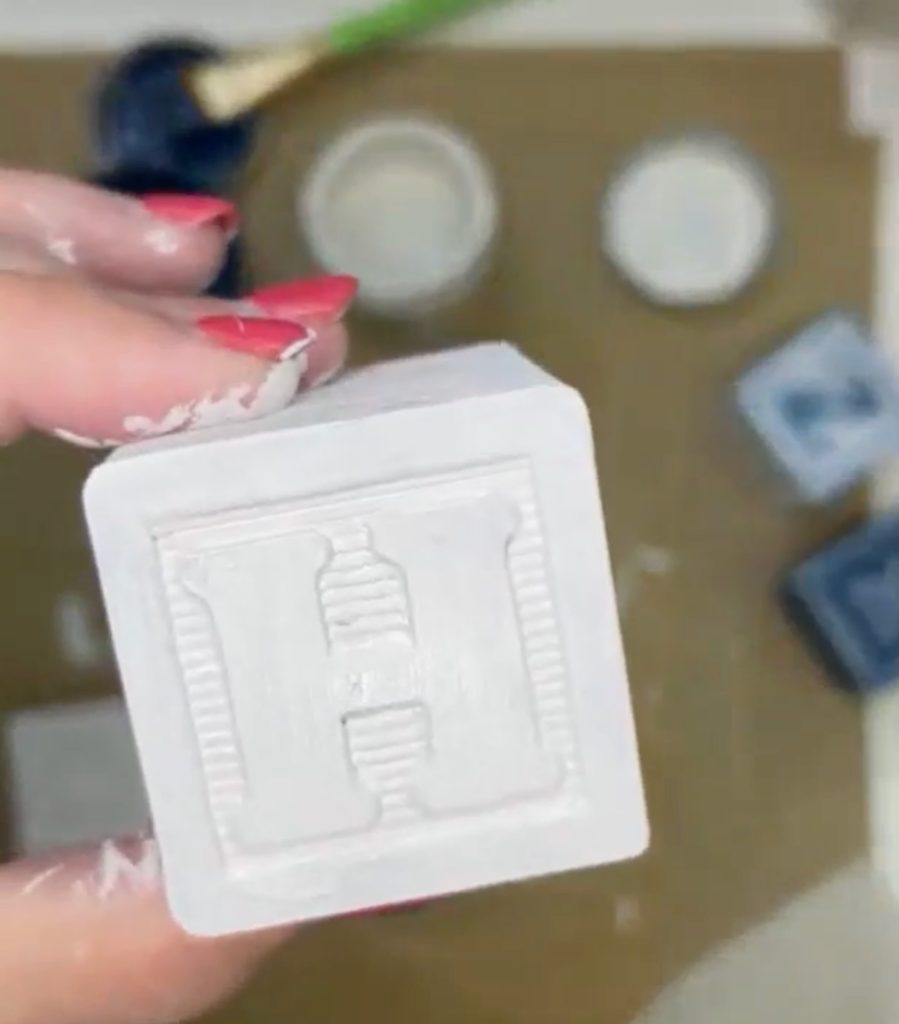
Step 2: Paint the Base Coat
Paint each wooden block with the light paint color first. Be sure to work the paint into all the little nooks and crannies around the raised letters, numbers, and designs. You do not need a perfect paint job, especially if you plan to cover the side panels with paper later.
Let the base coat dry completely before moving on. If the original color of the raised letter still shows through, add a quick extra swipe of paint just over that raised area. Let dry.
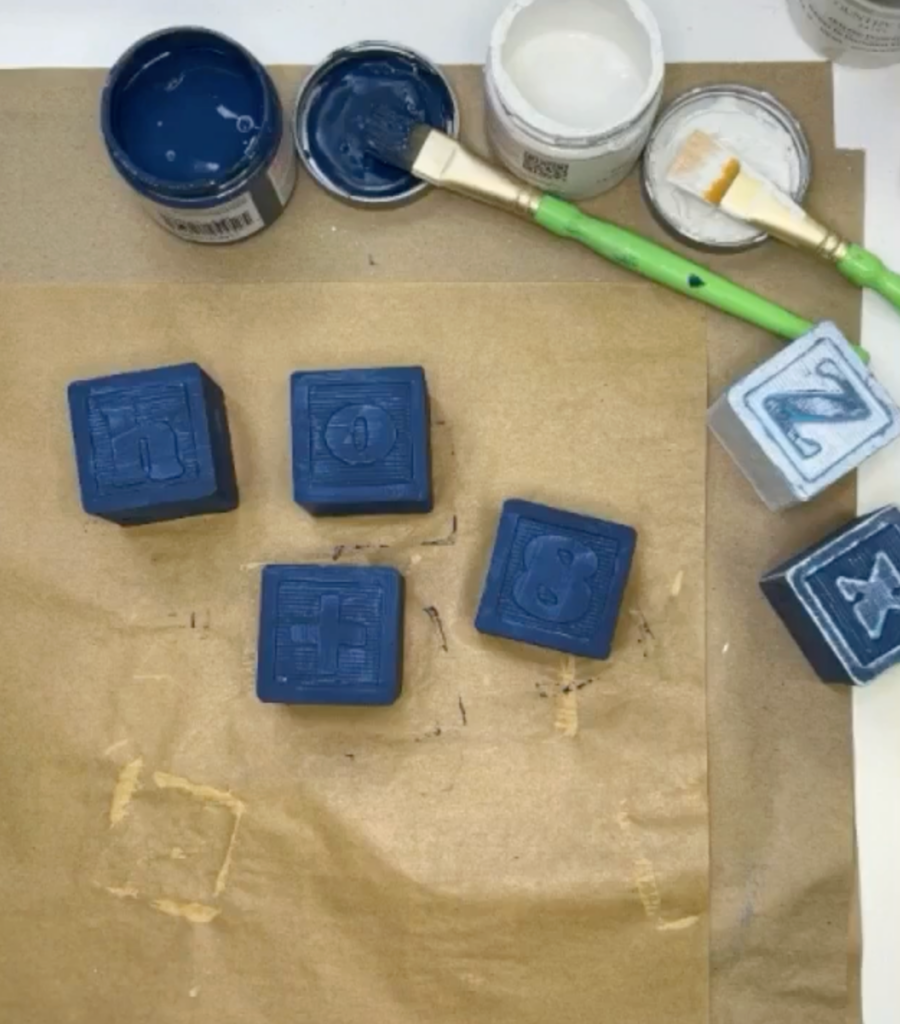
Step 3: Add the Dark Top Coat
Once the light base coat is dry, paint over the block with your darker contrasting color. Again, this does not need to be perfect. In fact, a little streakiness adds to the vintage, shabby, repurposed look.
Paint all sides of the block that you want distressed. Let the top coat dry to the touch, but do not wait too long before the next step. This technique works best before the paint fully cures.
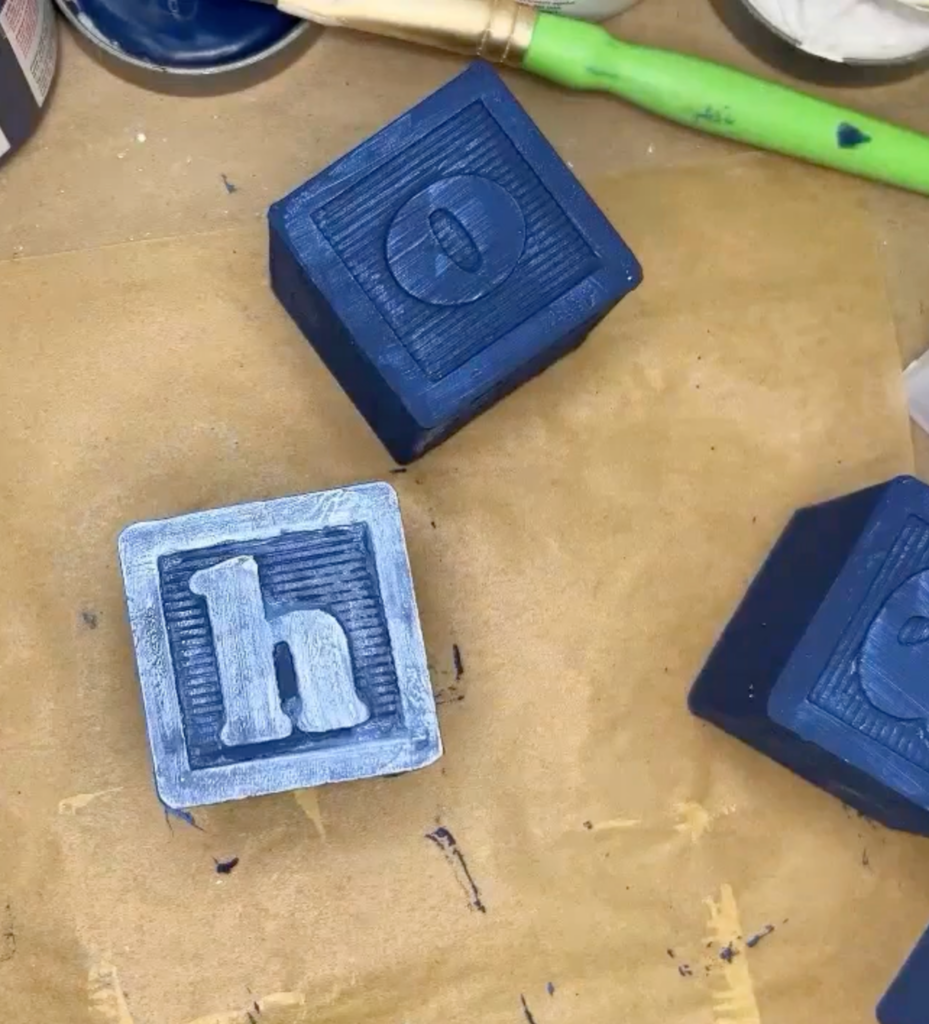
Step 4: Distress with a Wet Paper Towel
Use a damp paper towel or baby wipe to gently rub over the raised letters and edges of the block. This works like a soft “wet sanding” technique and removes some of the top paint color to reveal the lighter paint underneath.
Start lightly and remove a little at a time. Focus on the raised letter, edges, and corners until you like the distressed look. If you accidentally remove too much paint, simply repaint that area and try again once it dries.
Step 5: Add Paper to the Side Panels
Cut scrapbook paper, book pages, music paper, maps, or other decorative paper into small squares to fit the sides of your blocks. For blocks around 1 3/4 inches wide, 1 1/2-inch paper squares work nicely. Use chalk ink to add color and distressing to the edges of your paper if you would like.
Brush a thin coat of Mod Podge Matte onto the side of the block, place the paper square in the center, and smooth it down with plastic wrap or deli paper. This helps the paper adhere smoothly and keeps your fingers from sticking to the glue.
Step 6: Seal the Blocks
Once the paper is dry, add a thin coat of Mod Podge over the paper and any painted areas you want protected. This helps seal the surface and gives the blocks a finished look.
Let everything dry fully before stacking, styling, or storing the blocks in a basket.
Step 7: Display Your Word Blocks
Now comes the fun part. Use your finished blocks to spell out meaningful words around your home. Line them up on a shelf, stack them vertically, place them on a desk, or keep the whole set in a basket so you can change the words whenever you want.
These repurposed wooden blocks can become seasonal decor, inspirational reminders, craft room decorations, faith-based encouragement, or thoughtful handmade gifts.
This DIY wooden block craft is a simple and meaningful way to repurpose something old into something beautiful. Whether you’re embracing a personal change, decorating for a season, or creating words that encourage you, these blocks are a sweet reminder that transformation can bring new purpose.
Want more creative projects like this one? Join one of my monthly creative memberships where we make beautiful things together, like napkin art, fabric crafts, seasonal decor, faith journaling, and more! Whether you’re just getting started or looking for fresh inspiration, there’s a place for you inside our creative community. Learn more here!


0 Comments