

")
Supply List:
- Halloween Fun Mini Napkin Bundle
- Spooky Napkin Value Pack
- 12 x 12 Cardstock
- Patterned Papers
- Mod Podge Matte
- Craft Iron
- Parchment Paper
- Scotch Liquid Glue
- Hot Glue
- Foam Tape or Pop Dots
- Stickles
- Twine
- Ribbon
- Halloween Themed Embellishments
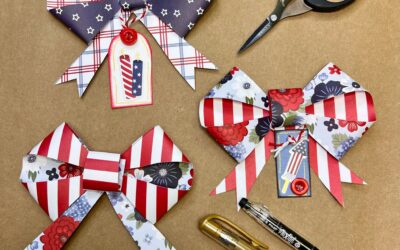
If you’re looking for fun and easy Halloween crafts, grab your stash of seasonal napkins – we’re about to make some magic! In this tutorial, I’ll show you how to use the iron-on Mod Podge method with Halloween napkins to create adorable paper embellishments you can use for treat boxes, gift pockets, and even scrapbook layouts. These beginner-friendly crafts are perfect for spooky season decorating, classroom gifts, or creative memory-keeping.
Step 1: Iron Halloween Napkins onto Cardstock
Start with a sheet of 12×12 white cardstock – smooth or lightly textured is ideal. Apply a thin, even coat of Mod Podge Matte (we recommend the yellow label!) across the entire surface using a sponge brush. Let it dry completely before moving on. If you’re short on time, a heat tool can speed things up.
While the Mod Podge dries, carefully separate your Halloween napkins down to the single printed ply. Once dry, place the napkin print-side up on your cardstock. Then cover it with parchment paper and press with a hot craft iron. The heat reactivates the Mod Podge, bonding the napkin smoothly to the paper with minimal wrinkles. This method works like a charm and gives you a professional finish every time.
Step 2: Cut Out Your Custom Napkin Embellishments
Once your napkin is fully bonded and cooled, it’s time to cut! You can cut around each design element loosely for a “bubble cut” look or trim closely for a more precise finish. Pumpkins, cats, bats, moons, and even shaped napkins work great for this step. These custom embellishments will become your go-to for Halloween crafting – ideal for layering on cards, layouts, and treat holders.
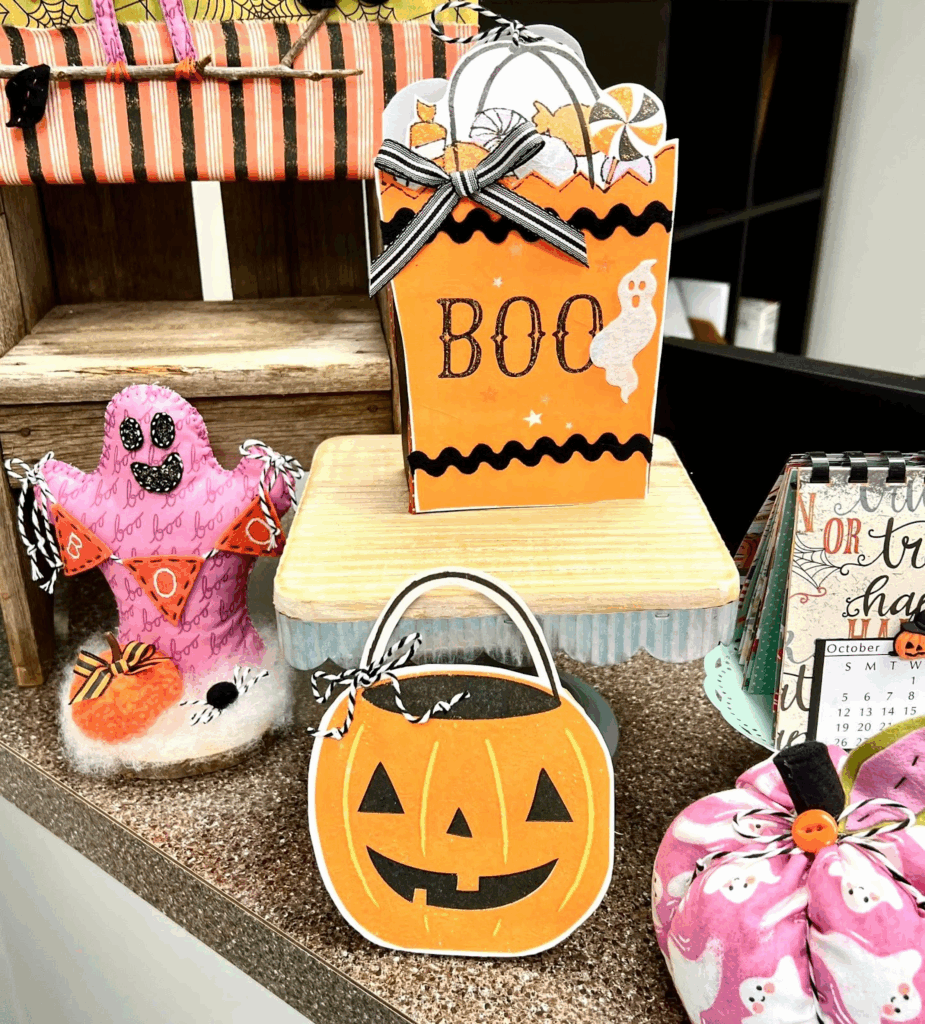
Step 3: Make a Washi-Taped Halloween Treat Box
For a fun and interactive gift, use your napkin art to decorate a mini “Boo Box”. Start with a strip of black cardstock that measures 4″ x 12″, and score it at 5″, 2″, and 5″ to form a U-shape. Fold it into shape and glue a small 2″x4″ insert inside the base to stabilize it.
Attach one napkin-decorated panel to the front and one to the back, lining them up evenly. Then glue along the sides and press gently to secure. Add a strip of washi tape or ribbon along the top to seal or decorate the edges, and punch a hole for a bow or tag if desired. These little boxes are perfect for gifting mini candy bars or spooky notes!
Step 4: Create a Jack-o’-Lantern Treat Pocket
This project is quick, simple, and super cute – ideal for handing out gift cards or candy. Cut a piece of orange cardstock to 8″ x 4″ and fold it in half to make a square. Decorate the front with one of your pumpkin napkin embellishments, then glue the sides shut, leaving the top open to create a pocket.
You can round the corners, trim the edges into a pumpkin shape, or keep it simple and square. Tuck in a treat, tag, or little surprise, and you’ve got a festive fall gift in minutes!
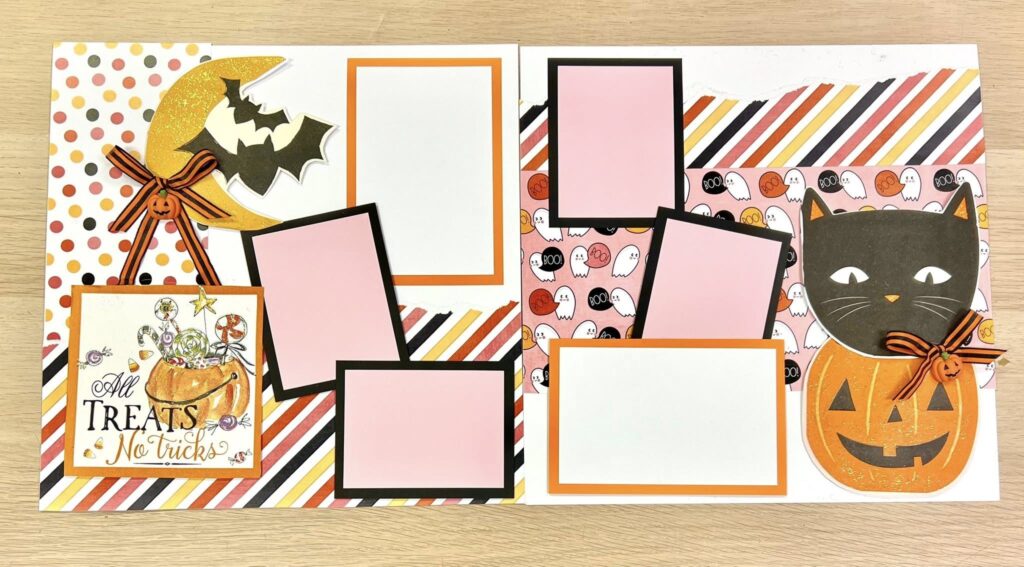
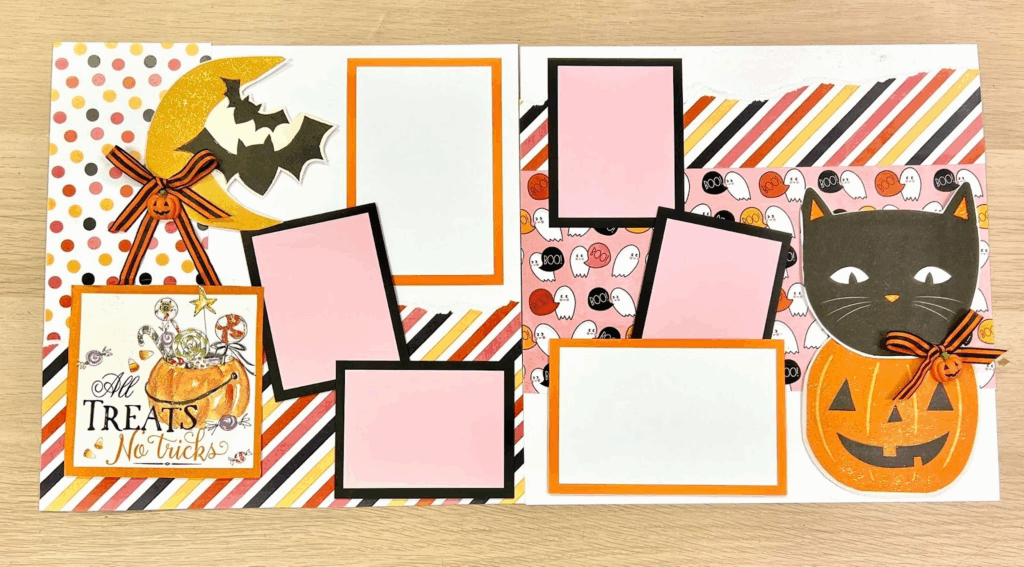
Step 5: Design a Halloween Scrapbook Layout with Napkin Art
Turn your napkin creations into scrapbook-ready embellishments by pairing them with patterned paper and photo mats. Arrange your napkin-cut elements around the page like stickers or ephemera – think pumpkins, cats, full moons, bats, and Halloween quotes. We used a shaped napkin with a black cat in a jack-o’-lantern as our layout’s focal point.
Layer your photos, title cards, and journaling spots over a mix of patterned papers for dimension. You can also tear paper strips or use washi tape for extra texture. Adhere everything with acid-free glue or foam tape to make it dimensional, and finish with glitter glue or Stickles for a spooky sparkle!
Bonus Tips for Working with Napkins on Paper
If you plan to write or doodle on your napkin-enhanced paper, it’s best to apply a thin top coat of matte Mod Podge after ironing. Let it fully cool first! This seals the surface so your pens won’t bleed or catch on the napkin texture.
If you don’t need to write on it, skip the topcoat – your embellishments will stay lightweight and smooth. Feel free to layer on ribbon, gems, glitter, or stickers directly over the napkin designs for extra flair. Leftover napkin scraps? Use them on tags, mini cards, or even inside your art journal!
Did you love this? Join the waitlist for The Napkin Club! We ship out fresh, seasonal napkins to our members every month (many designed by yours truly!) and create gorgeous, easy-to-follow projects together in our private Facebook group. You’ll get access to live tutorials, inspiration posts, a welcoming community, and tons of crafty joy.


0 Comments