


Supply List:
- Fall Shadowbox Napkin Art DIY Decor Kit
- Country Chic Paint – Vanilla Frosting
- Country Chic Paint – Crackle Medium
- Country Chic Paint – Paint the Town
- Country Chic Paint – Persimmon
- Mod Podge Matte
- Foam Tape or Pop Dots
- Snip Scissors *your favorite detailed scissors will work great!
- A Black Detail Pen – I like the Faber Castell Pitt Pens
- Hot Glue – found in my Amazon shop
- White cardstock
- Chalk Ink – Mocha Mama and Roots
- Plastic Wrap
- Parchment Paper
- Sandpaper
- Heat tool
Join me in making this fun and festive project that brings a touch of autumn to your decor – a layered, dimensional shadowbox featuring a charming pumpkin and fall-inspired details. This DIY combines painting, napkin art, and a bit of texture with lace and buttons to create a unique, three-dimensional piece you can enjoy all season long. Plus, you can get everything you need to make it by grabbing one of our kits! Whether you’re looking to add some warmth to your home or make a handmade gift, this project is the perfect way to get creative with fall elements.
Your kit will include: 1 – 8×8 wooden shadow box, 1 – shiplap shape tall mini pumpkin, 5 fall napkins, small wood blocks, 1 brown button, 1 sheet of white cardstock paper, and cut lace & twine.

Prepping Your Fall Shadowbox
We’ll begin by creating napkin art pieces to layer inside the shadowbox using the “iron-on method.” Lay down a sheet of parchment paper and place a piece of white cardstock on top. Apply a coat of Mod Podge Matte to the cardstock with a paintbrush and set it aside to dry.
Now, paint your wooden shadowbox with Country Chic Paint in Vanilla Frosting. Once dry, lightly buff and distress the surface with a foam sander. To add dimension, run brown chalk ink pads (I’m using Mocha Mama and Roots) along the edges of the shadowbox for a vintage look, then dry with a heat tool.
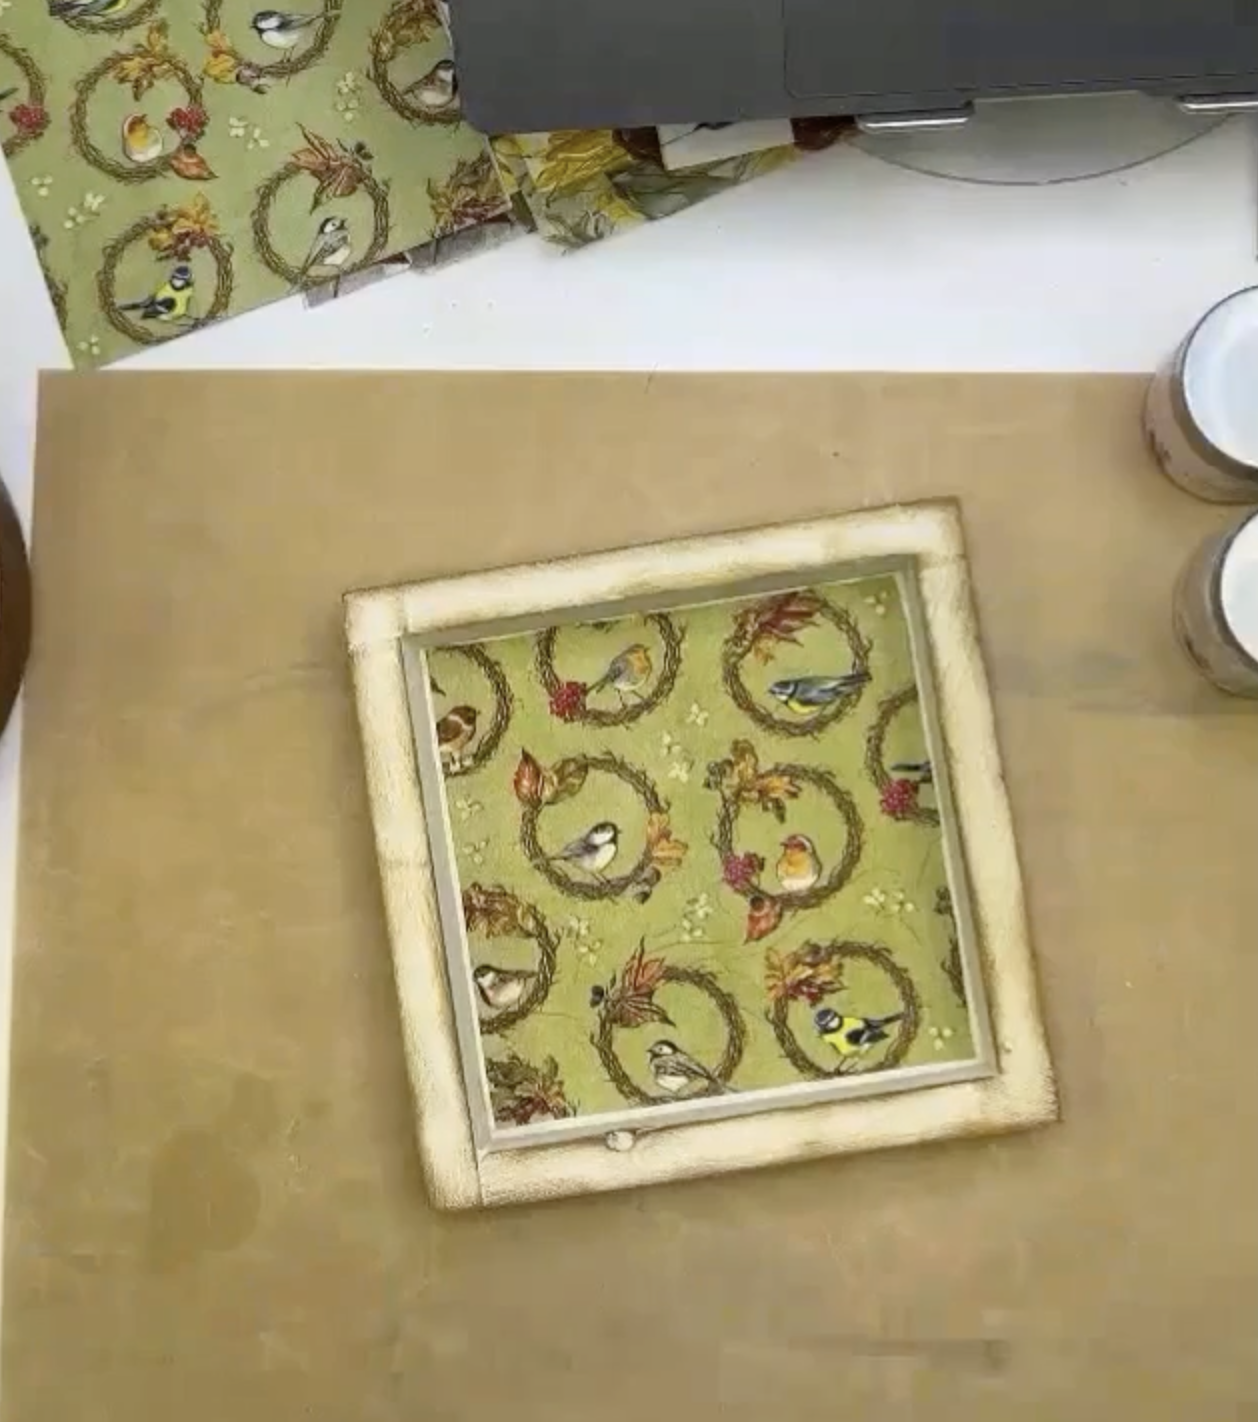
Now, let’s apply the background napkin to the shadowbox. In your kit, you’ll find a napkin featuring wreaths and birds. Cut the napkin to fit the shadowbox and carefully separate the plies until you have only the top printed layer. Brush a coat of Mod Podge Matte onto the background, center the napkin, and gently smooth it down with plastic wrap and your hands to avoid wrinkles. Dry with a heat tool, then apply a top coat of Mod Podge Matte and dry again.
Painting the Wooden Pumpkin
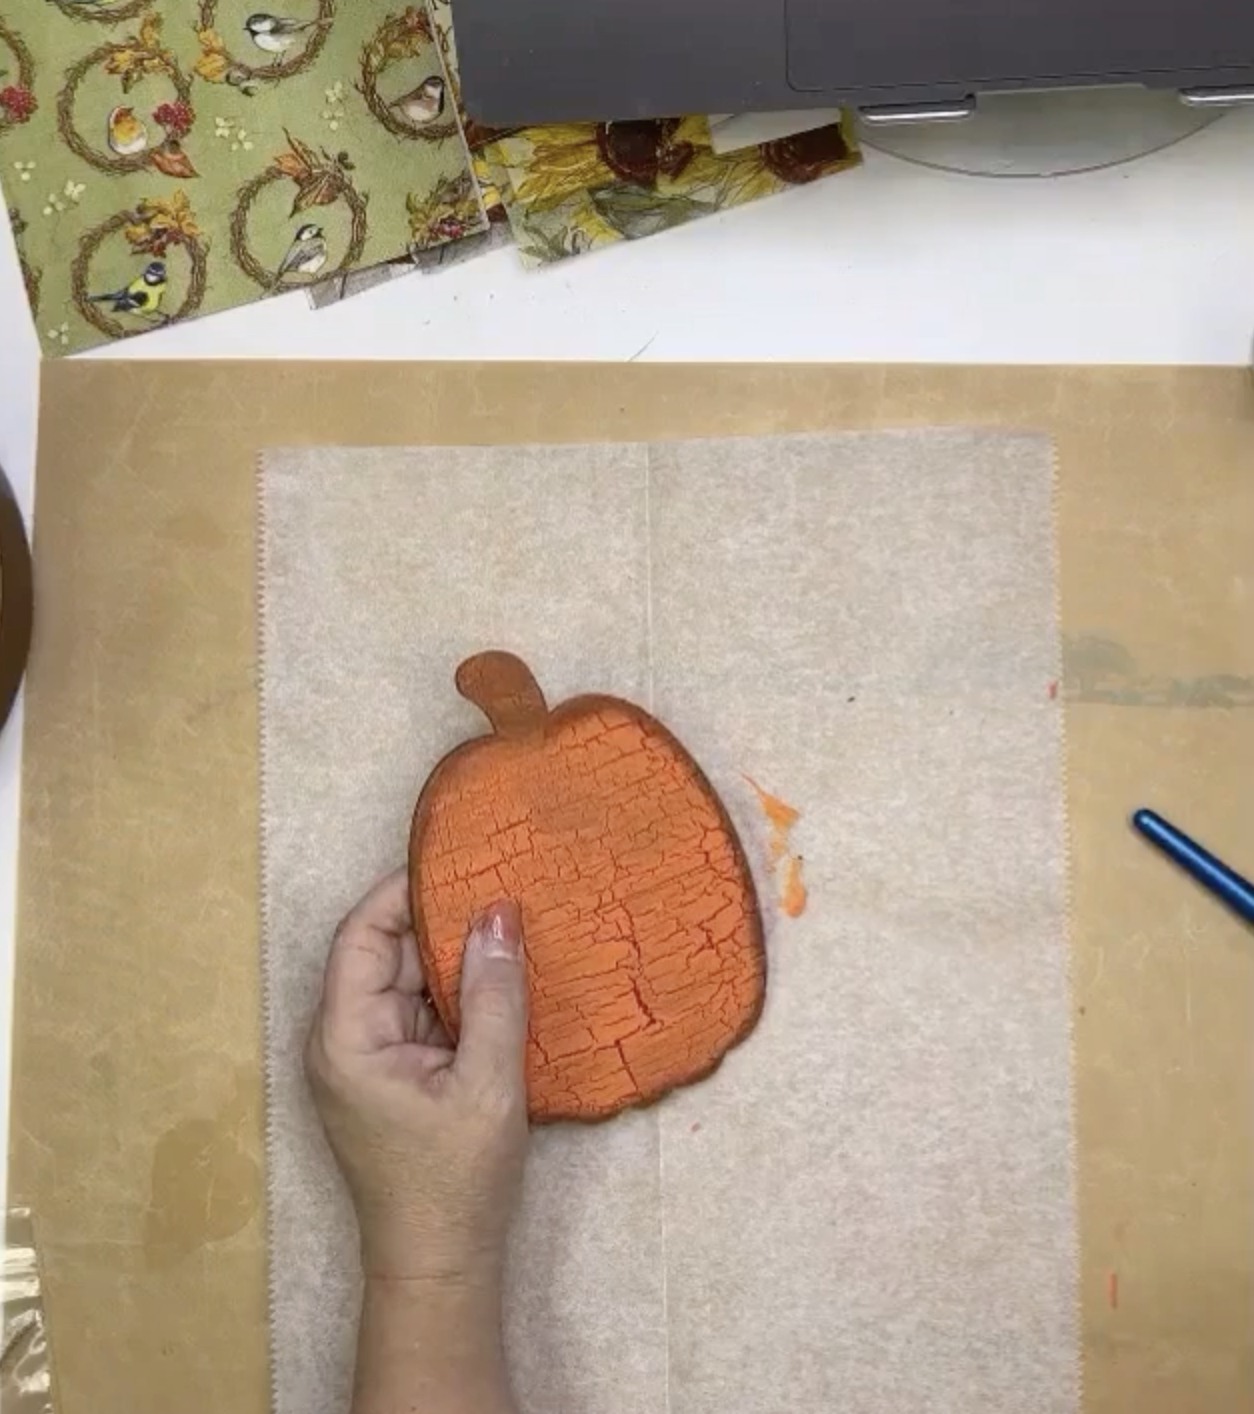
Next, grab the wooden pumpkin from your kit. We’ll create a crackled finish using two paint colors and crackle medium, so the base coat will show through the cracks for a rustic effect!
First, paint the pumpkin with Country Chic Paint in Paint the Town and dry it with a heat tool. Stir (don’t shake) the Crackle Medium by Country Chic Paint, then apply it evenly with a brush and dry again. Now, paint a top coat of Country Chic Paint in Persimmon, applying in a single direction without overlapping strokes. If you lift the brush, simply flip it and continue. Let it dry and self-level, and watch the crackling effect appear!
Once dry, use more of the Persimmon paint color to paint the edges of the pumpkin. Take your same two brown chalk inks and apply them to the edges of your pumpkin.
Creating Napkin Art Pieces for Your Shadowbox
Take your dried piece of white cardstock, and let’s continue creating the napkin art pieces for the shadowbox.
Start by cutting out a few images from the napkins in your kit. I’ll be cutting sunflowers from the sunflower napkin, leaves from the leaf napkin, and acorns from the acorn napkin. If you’d like to make a tag for the side of the shadowbox, cut out the quote “Leaves are falling, Autumn is calling.” Arrange these pieces on top of your white cardstock.
Place a piece of parchment paper over them, and use a craft iron on high (without steam) to activate the Mod Podge, bonding the napkin art to the cardstock. Once it’s cooled, add a coat of Mod Podge Matte on top to seal it, then dry again.
With small snip scissors, cut out the images you’d like to use in your shadowbox. For the tag, trim the corners of the quote piece to create a tag shape, ink the edges with brown chalk ink, and dry it with your heat tool.
Assembling Your Fall Wooden Shadowbox
Let’s start by adding the pumpkin to your shadowbox! Your kit includes two small wooden blocks, which will give the pumpkin a three-dimensional effect. Hot glue the blocks to the back of the pumpkin, then secure it to the center of the shadowbox with more hot glue.
Now, grab a Pitt Pen to outline and add detail to each of your napkin art images. Begin with the sunflower: add two layers of foam tape to the back, apply a bit of hot glue for extra hold, and place it onto the pumpkin. Continue layering your napkin art, using foam tape and hot glue to create dimension as you build up your design.

In your kit, you’ll find a small bag with a button, a piece of jute twine, and crocheted lace. Begin by tying a knot in the lace and trimming it, then hot glue it under the pumpkin’s stem. Next, tie the jute twine into a bow, glue it on top of the lace knot, and place the button in the center with hot glue.
The tag is optional, but if you’d like to add it, tie another knot in the crocheted lace, trim it, and glue it to the top of the tag. Add a small acorn to one corner with hot glue for extra charm. If you want more texture, you can also glue the lace around the shadowbox edges. Use foam tape to attach the tag to the side of the shadowbox for a final touch.
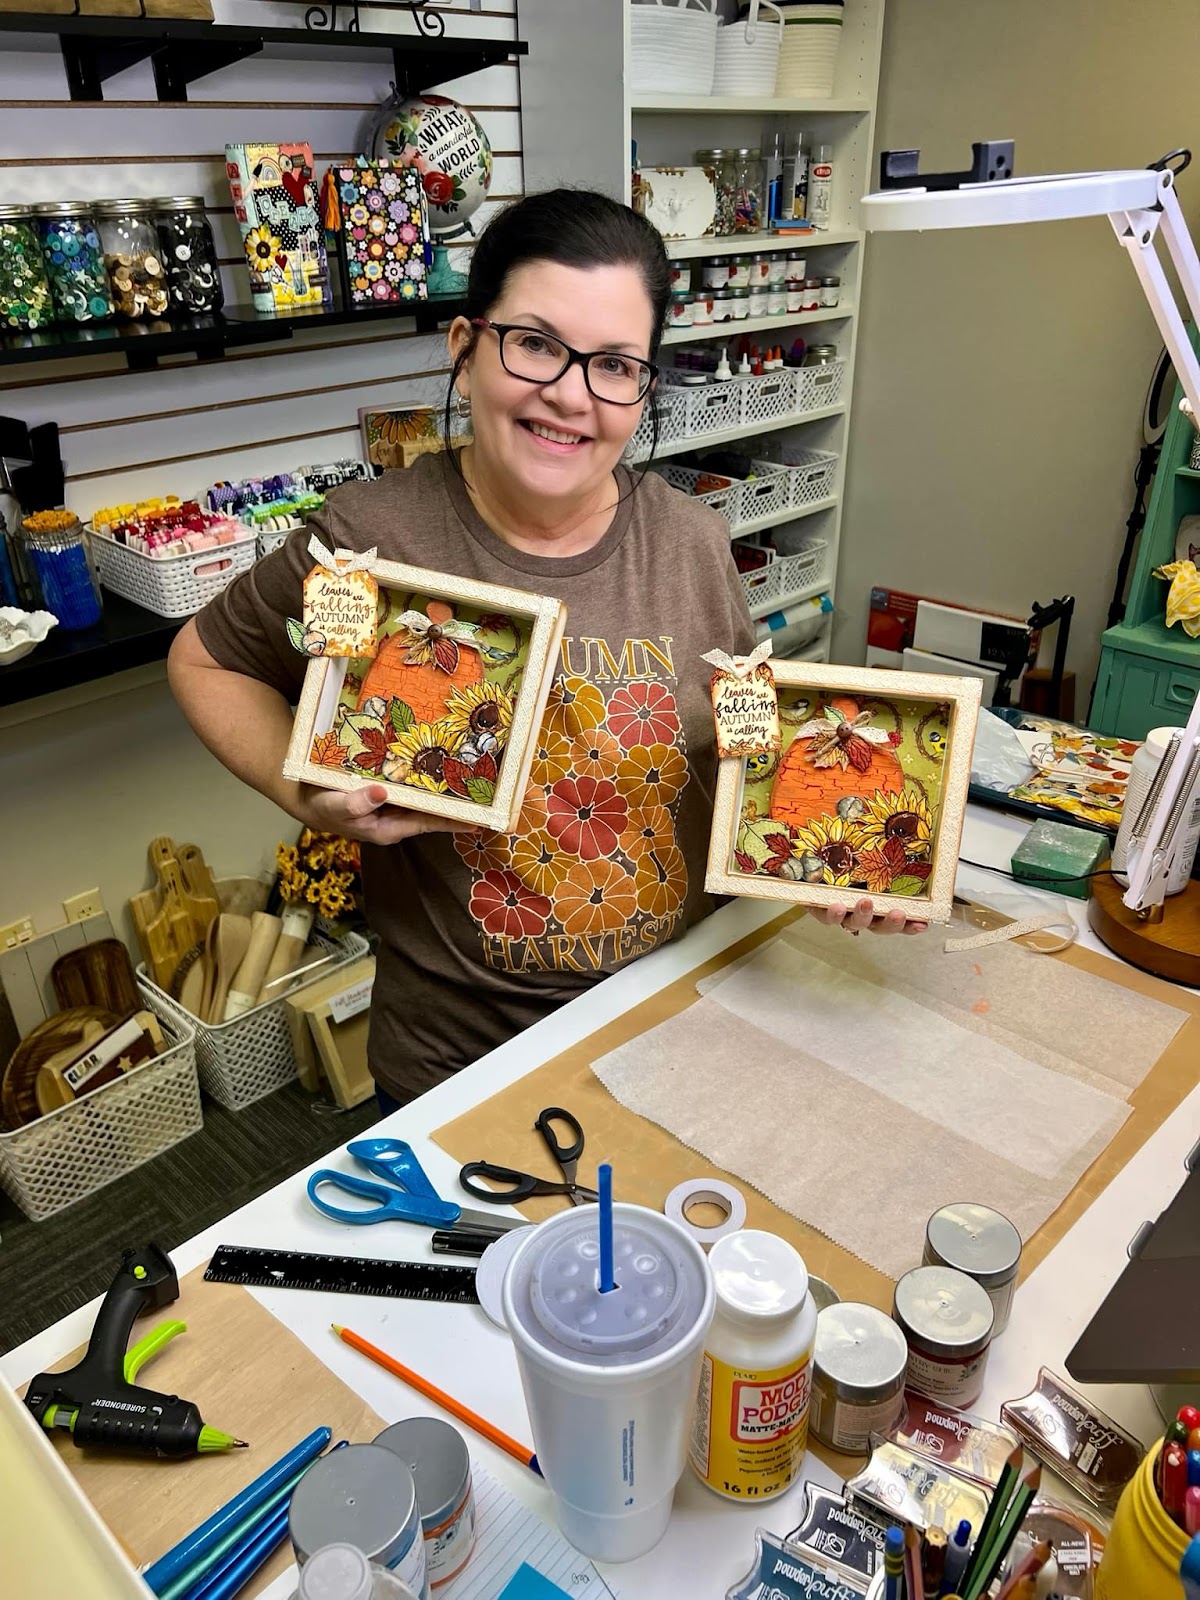
With layered textures, dimensional details, and those cozy autumn touches, your shadowbox is now ready to bring warmth and character to any room. Whether you’re displaying your shadowbox on a mantel, hanging it on a wall, or gifting it to someone who loves fall as much as you do, this handmade piece will bring smiles all season long.
I go LIVE on my Facebook page every Friday at 11 am CST for a fun and easy Craft-n-Chat Session. Come learn something new while creating something beautiful!
Join the waitlist for The Napkin Club where Unique Makers can connect, learn, and be inspired to create with the Individual Unique Napkin Collections that you will receive every month! A place where Napkin Lovers can unite and be inspired!


Looking forwward to it.