


Supply List:
- Medium Shiplap Tree
- Country Chic Paint – Simplicity
- Mod Podge Matte
- Variety of Napkins
- Stickles – Diamond
- Scissors
- Small piece of Sandpaper
- Small Clothespin
As we are in the thick of the holiday season, time is limited, so I thought I would share a quick, easy, and cute napkin art tutorial that y’all can easily create! You will only need a handful of simple supplies to make this merry shiplap tree, which can be used to display cards, photos, or recipes. This would also make an excellent gift for a loved one, friend, or family member!
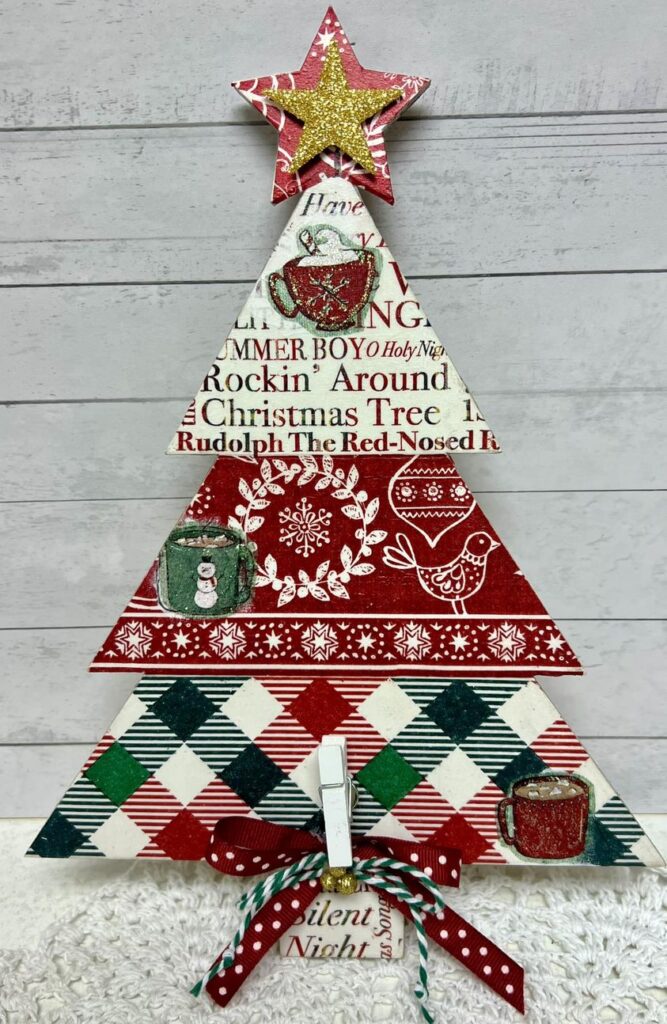
Adding Napkin Art to Your Shiplap Tree
Start by painting your shiplap tree with Country Chic Paint in Simplicity. Let dry or dry with a heat tool.
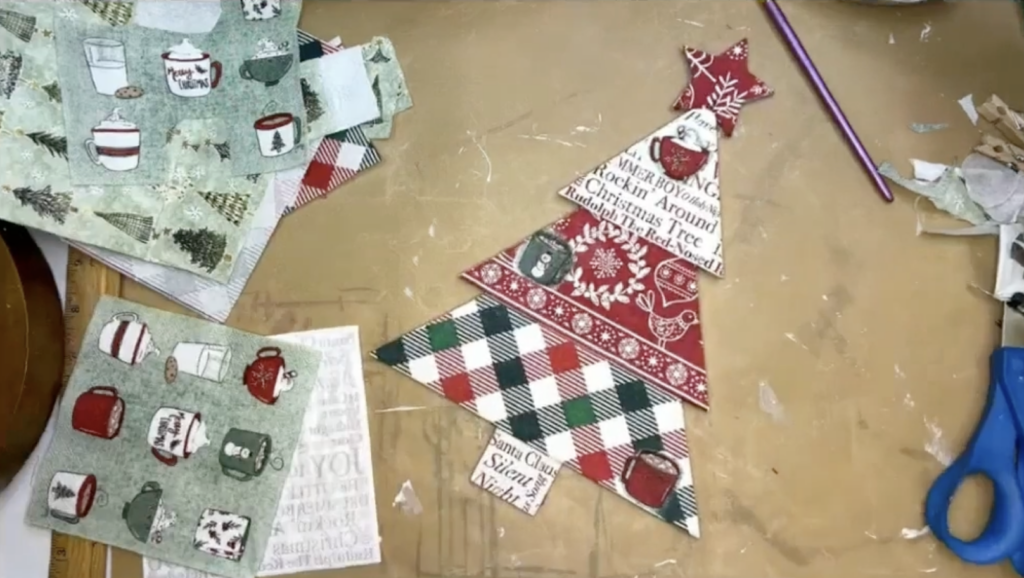
My plan is to put a piece of napkin onto each shiplap section of my tree. You can use whatever napkins you would like, but I have a variety of Christmas-themed napkins. Place a napkin onto each section and crease it along the edges so you know where to cut. Then, cut your napkins and separate the plys until you just have that first layer of napkin art.
Apply a coat of Mod Podge Matte to your first section, lay your napkin on top, and use a piece of plastic wrap and your hands to smooth it down. Repeat this technique for each shiplap section, the trunk of the tree, and the star. Dry with a heat tool then take a piece of sandpaper and sand off any excess napkins.
I also have a couple of napkins with some fun designs that we can cut out and add to our tree. I have a napkin with Christmas trees and another one with mugs. I’m planning on displaying this in my kitchen, so I’m going to cut out three mugs and separate the plys. I’ll add some Mod Podge Matte to the area I am going to apply the mugs and smooth it down with plastic wrap. Dry with a heat tool. Add a top coat of Mod Podge Matte to seal it and dry it again.
Finishing the Tree with Embellishments
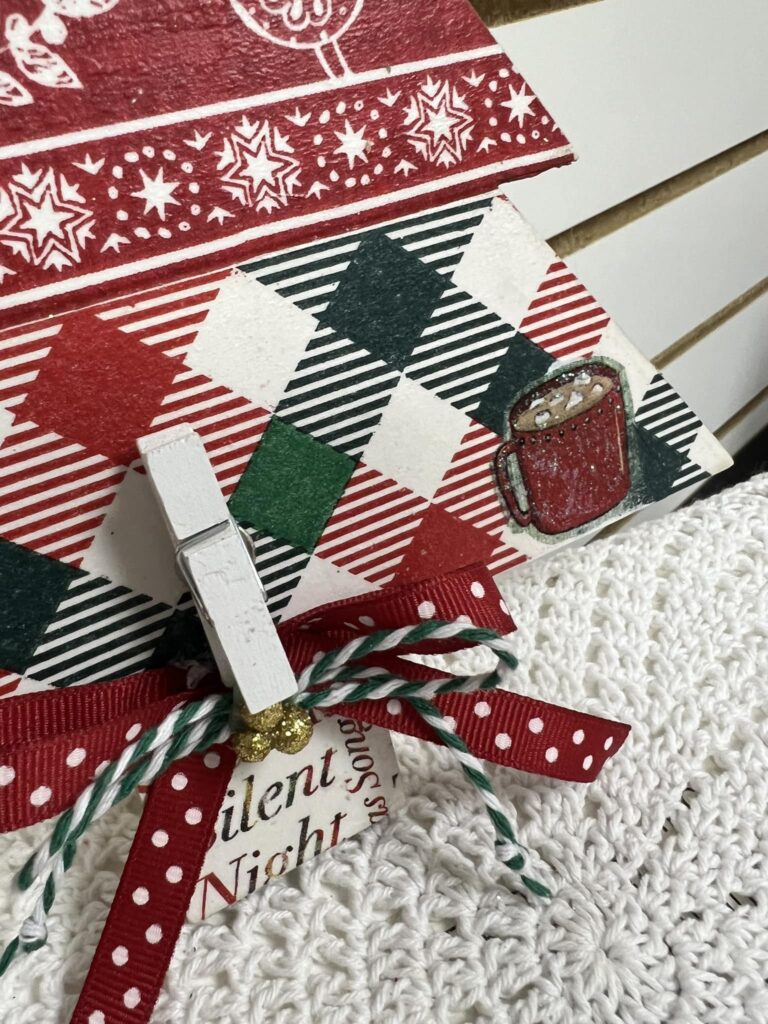
Since we are using this shiplap tree as a display piece, I am going to add a small clothespin to the bottom. You could also secure the clothespin to the top of your tree. My small clothespin has a tack on the back, so I’m just going to push it right into the wood. If yours doesn’t have a tack, you could easily just hot glue it.
I’m going to add a bow to my tree. I have some red polka-dotted ribbon that I will tie off with some baker’s twine. Then, I’ll tie the twine in a bow too. I will hot glue the bow underneath my clothespin. I also have some glitter gold balls that I’ll hot glue to the center of my bow, and I have a glitter gold star that I’ll hot glue to the star on my tree.
Finally, I’ll add some Stickles – Diamond to the mugs on my tree for some sparkle.
There are so many options when it comes to this Merry Tree! You could stand it up on an easel, mount it on a canvas, put it in a wreath, or just display it on a shelf. Enjoy creating and decorating with this simple and easy holiday project!
I go LIVE on my Facebook page every Friday at 11 am CST for a fun and easy Craft-n-Chat Session. Come learn something new while creating something beautiful!
Join the waitlist for The Napkin Club where Unique Makers can connect, learn, and be inspired to create with the Individual Unique Napkin Collections that you will receive every month! A place where Napkin Lovers can unite and be inspired.


Love the tree. Thanks for the inspiration.