


Supply List:
- Christmas Shadowbox DIY Decor Kit
- Country Chic Paint – Poppy & Simplicity
- Stickles
- Mod Podge Matte
- Black Artist Pitt Pens
- Hot Glue
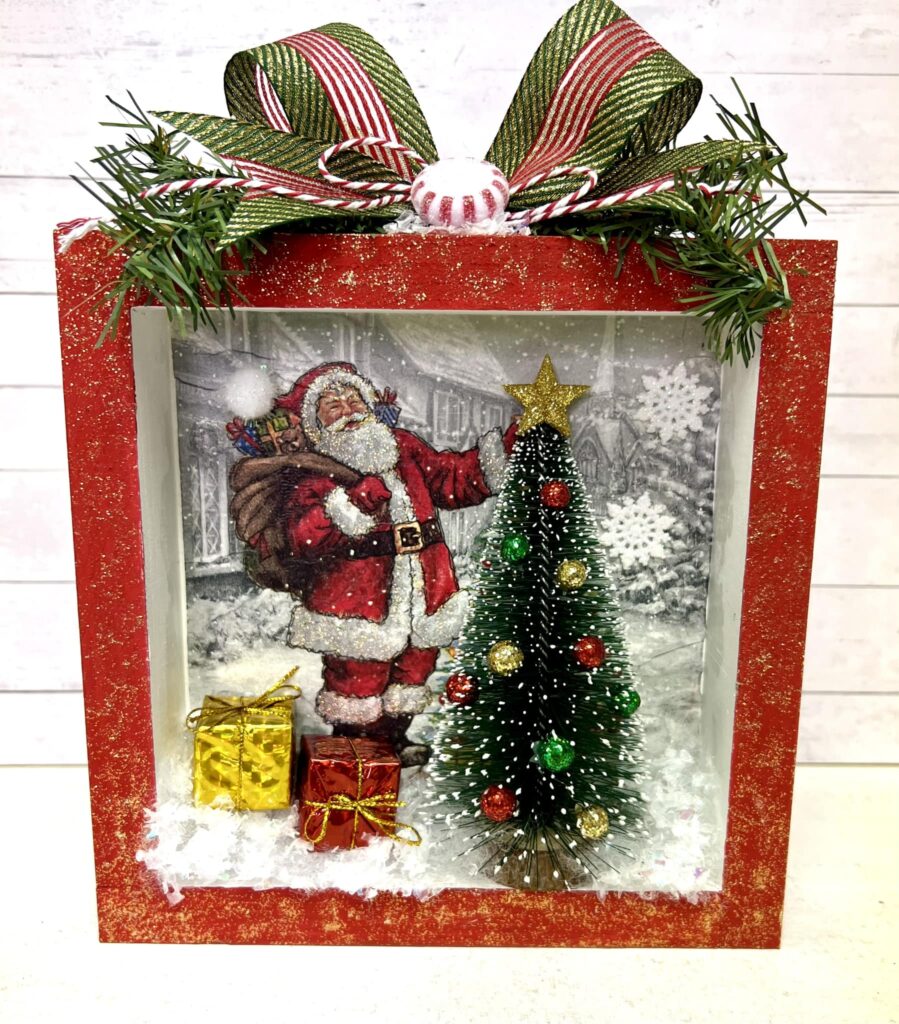
We are creating a spectacular Christmas Shadowbox using festive napkin art and lots of fun embellishments. I’m also going to be sharing with you a really easy technique on how to create the snow at the bottom of the shadowbox. We also have a kit that includes everything you need to create this except for the paints, pens, and glues. If you are a Christmas crafter, you will love creating this beautiful shadowbox decor!
Painting and Adding Napkin Art to the Shadowbox
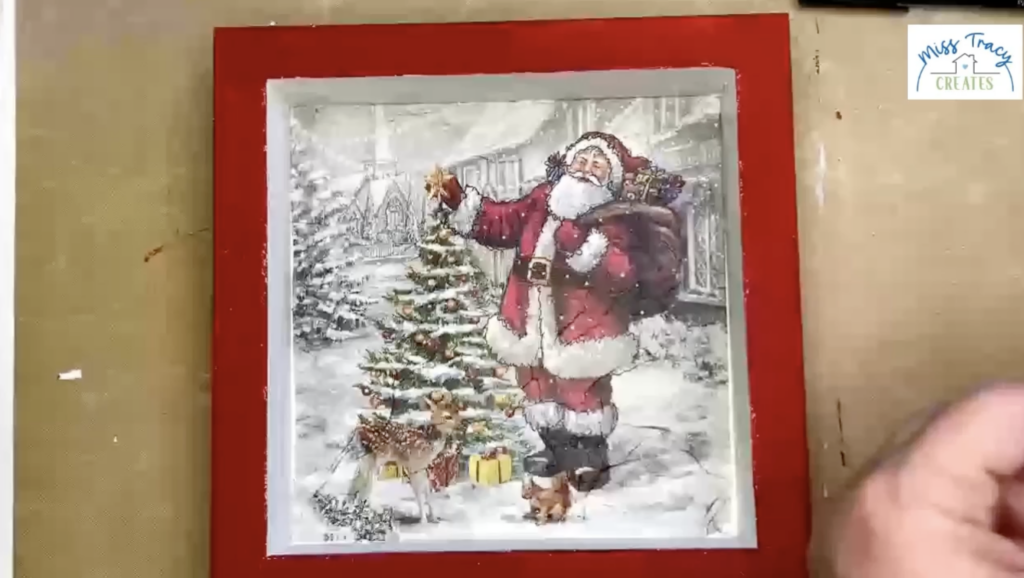
Start by painting the background and inside sides of your shadowbox with Country Chic Paint in Simplicity. Then, paint the back and rest of the sides with Country Chic Paint in Poppy. Let dry or dry with a heat tool.
Grab your Santa napkin, cut the square that you would like to use for this project, and separate the plys until you just have the top layer of napkin art. Add a coat of Mod Podge Matte to your shadowbox background, place your napkin on top, and smooth it down with plastic wrap and your hands. Dry with a heat tool, add a thin top coat of Mod Podge Matte to seal it, and dry again.
Next, we will add some detail lines with our Black Artist Pitt Pens. I’m going to outline and add detail lines on my Santa – around his coat, face, and gifts.
Adding Embellishments to the Christmas Shadowbox
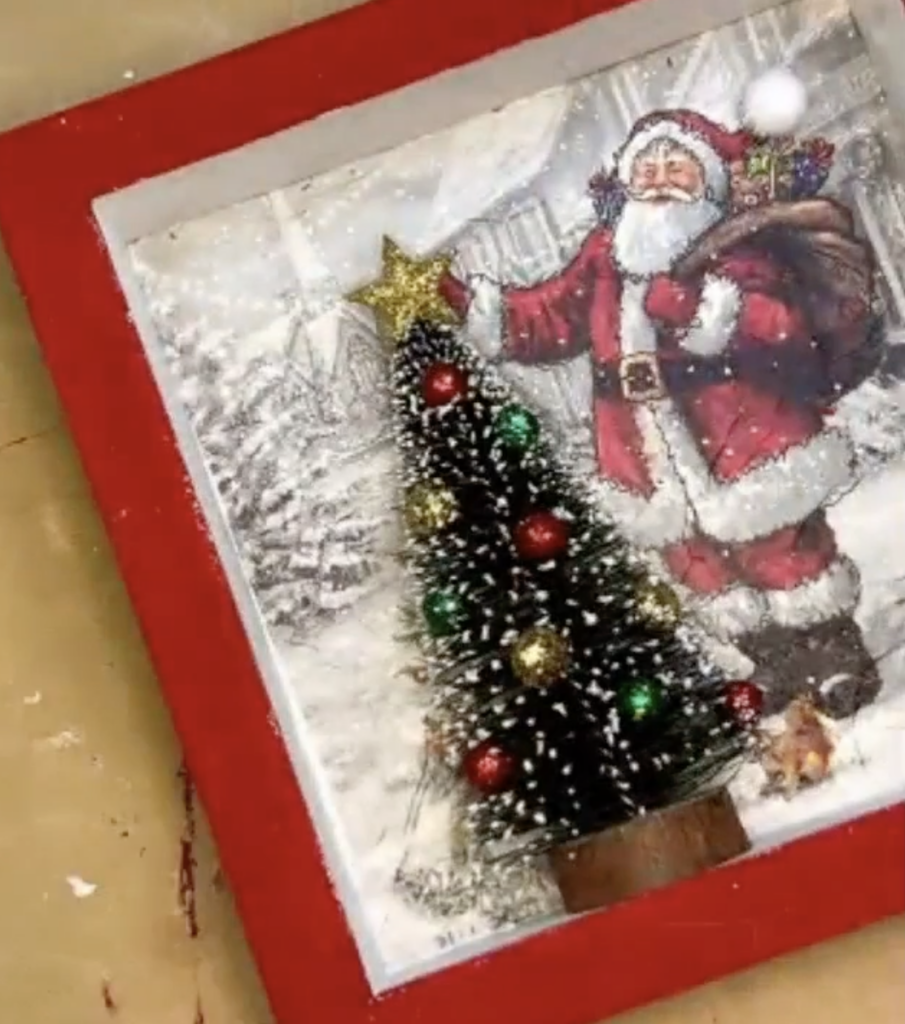
Your kit will include a bottle brush tree that will perfectly fit in your shadowbox – it will just need a slight haircut. You want your tree to be flat and lean back against the shadowbox. Trim the back of your tree to the wooden stump. Make sure you trim it over a trashcan because this can get messy.
Add hot glue to the back of your tree and the bottom. Line up your tree so that it covers the napkin art tree and matches up with the star, and secure it to your shadowbox.
Next, we will add lots of fun embellishments! Hot glue the white pom pom in your kit to Santa’s hat. The star in your kit has a little hole at the top – you can simply cut or break that piece off. Then, hot glue the star to the top of your tree. You might have to trim some of the bristles so that your star can nestle in straight.
You will have several glitter balls in your kit. You can decorate your tree and hot glue the balls randomly onto your tree.
Your kit will include some batting, which you will start to separate into clumps. Add hot glue to the bottom of your shadowbox and secure your batting in clumps. Take your heat gun and add heat to your batting, which will help compact it a little bit. Drizzle more hot glue on top of your batting and then sprinkle on the glitter snow that is included in your kit.
Next, I will add Stickles to anything white on Santa’s clothing. I’ll also add dots of Stickles around the front edge of my entire shadowbox and use a paintbrush to pounce and spread it around. I’ll do the same thing to the top and sides of the box too.
Finishing our Christmas Shadowbox
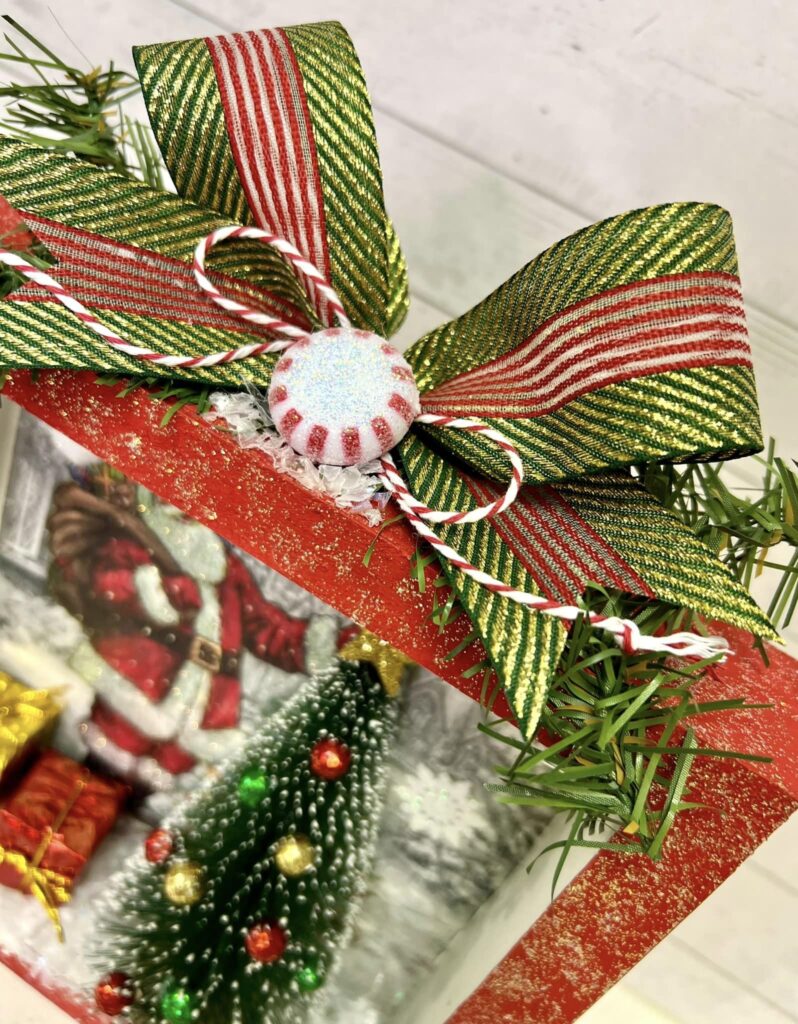
In your kit, you will have ribbon and some twine. Create a tribute ribbon shape with your large ribbon, scrunch it up, and wrap the twine around the middle to make an easy bow. I’ll also cut a flag end on my ribbon and tie the twine in a bow. Hot glue your bow to the top of your shadowbox. Hot glue the greenery sprigs around your bow as well.
I’ll add a little bit of glue to the top of my shadowbox and add the rest of my snowflake glitter. Then, I’ll secure the peppermint on top of that. Finally, I’ll secure the two presents from the kit into the snow in my shadowbox and place the snowflakes in the background.
This is such a cute project and has so many fun, dimensional elements to it! Customize it the way that you would like and enjoy decorating this holiday season with some gorgeous shadowbox decor.
I go LIVE on my Facebook page every Friday at 11 am CST for a fun and easy Craft-n-Chat Session. Come learn something new while creating something beautiful!
Join the waitlist for The Napkin Club where Unique Makers can connect, learn, and be inspired to create with the Individual Unique Napkin Collections that you will receive every month! A place where Napkin Lovers can unite and be inspired.


0 Comments