


Supply List:
- Decorative paper (single-sided or double-sided)
- 65# White Cardstock
- Coordinating Ribbons, Bakers Twine, etc.
- Buttons, Stickers, or Flowers for embellishments
- Hot Glue
- Scotch Glue
- Scissors
- Paper Trimmer
- Stickles
- Pitt Pen
We’re making the cutest, tiniest little envelopes from paper scraps and then turning them into a tag-style “mini mail” piece you can tuck into a larger envelope and actually send. Each tiny envelope holds a tiny note card… and the whole idea is tiny acts of creative love that can travel from person to person.
These are perfect for grandkids, friends you haven’t connected with in a while, your church family, nursing homes, hospital visits, library book surprises, or just leaving a little encouragement somewhere unexpected.
Measurements (The Exact Sizes I Used)
For the tiny envelopes, I used 2.5″ x 2.5″ squares. You’ll cut one square per envelope.
For the tiny note cards that go inside each envelope, cut cardstock to 1.5″ x 2″, then fold it in half to create a mini card.
For the base tag that holds the envelopes, cut cardstock to 3.5″ x 5″. This size is great because it fits easily into a small envelope for mailing.
You can scale this to any size square:
- 2.5″ x 2.5″ = tiniest envelope shown
- 3″ x 3″ = slightly larger
- 3.5″ x 3.5″ = even larger – As long as it starts as a square, you’re good.
Step 1: Cut Your Paper Squares
Choose paper that isn’t super directional (busy stripes or words can look “sideways” after folding). Patterns like dots, tiny hearts, florals, or abstract prints are easiest.Cut as many 2.5″ x 2.5″ squares as you want. I made six envelopes so I could create two tags (three envelopes on each tag).
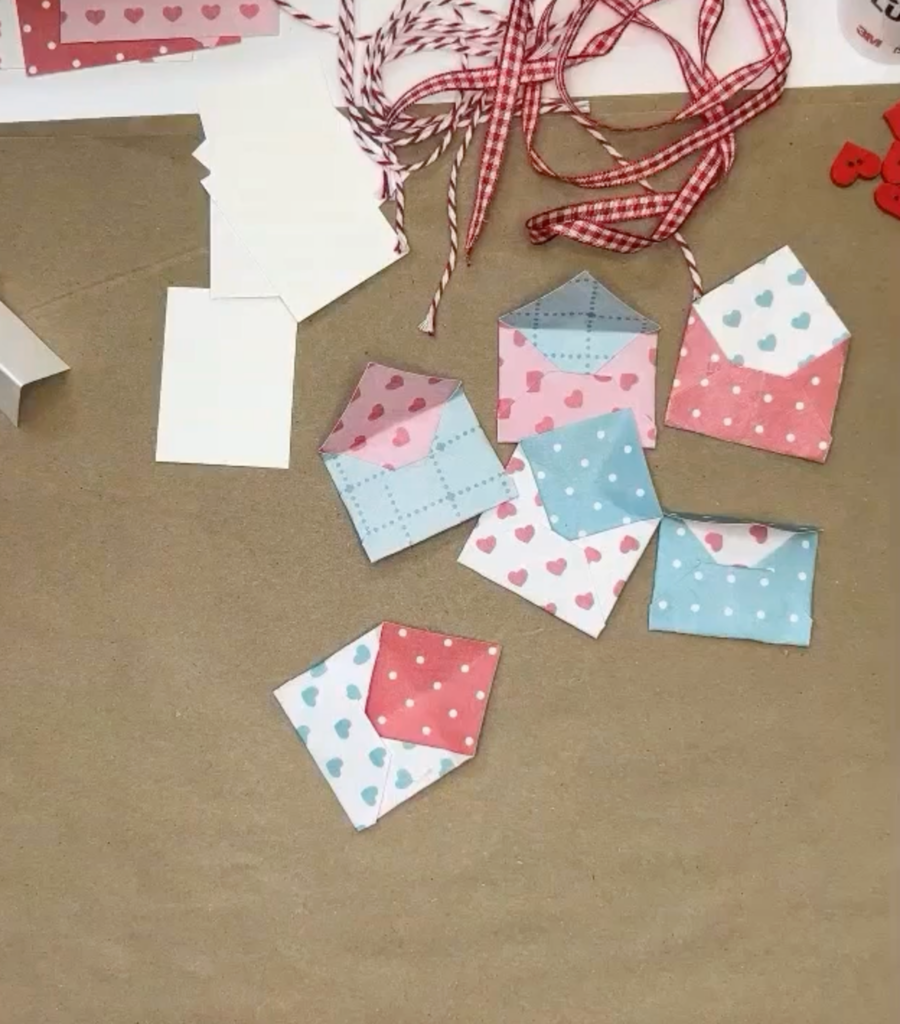
Step 2: Fold Your Envelope
Turn one square so it’s positioned like a diamond (one point facing up, one down). This helps the folds land in the right places and makes it easy to see what’s happening.
Fold the diamond in half corner-to-corner to make a triangle – I call this the taco fold. Press the crease with your fingers. Then open it back up so you can see the center fold line.
Take the left corner and fold it in so the point touches the center crease line. Then take the right corner and fold it in to the center crease line too. You’re creating the envelope sides, and now you should see a shape that looks like two triangles meeting in the middle.
Before you fold the bottom flap up, fold the very bottom point up just a bit so the inside edge becomes more straight. This little fold helps the envelope opening look cleaner and makes it easier to slide the tiny note in and out.
Now fold the bottom flap up, but here’s the trick: don’t fold exactly at the point where the corners meet. Instead, fold it up about ⅛ inch higher than that corner point. You don’t have to measure – just leave a tiny bit of overlap. That overlap helps the envelope hold its shape and gives you room to glue without the paper bunching.
Add adhesive only along the bottom edges where the flap meets the side folds – one small line of glue on the left and one on the right. Press it down to seal the envelope. At this point, you have a tiny envelope pocket! To create the flap, fold the top point down, again leaving about ⅛ inch of overlap from the point.
Step 3: Make the Tiny Note Cards
Cut cardstock to 1.5″ x 2″, then fold in half to create tiny note cards. You can keep them plain, add a sticker, write a word on the front, or decorate them later. The whole point is to keep this easy and meaningful. These mini cards slide perfectly into the tiny envelopes.
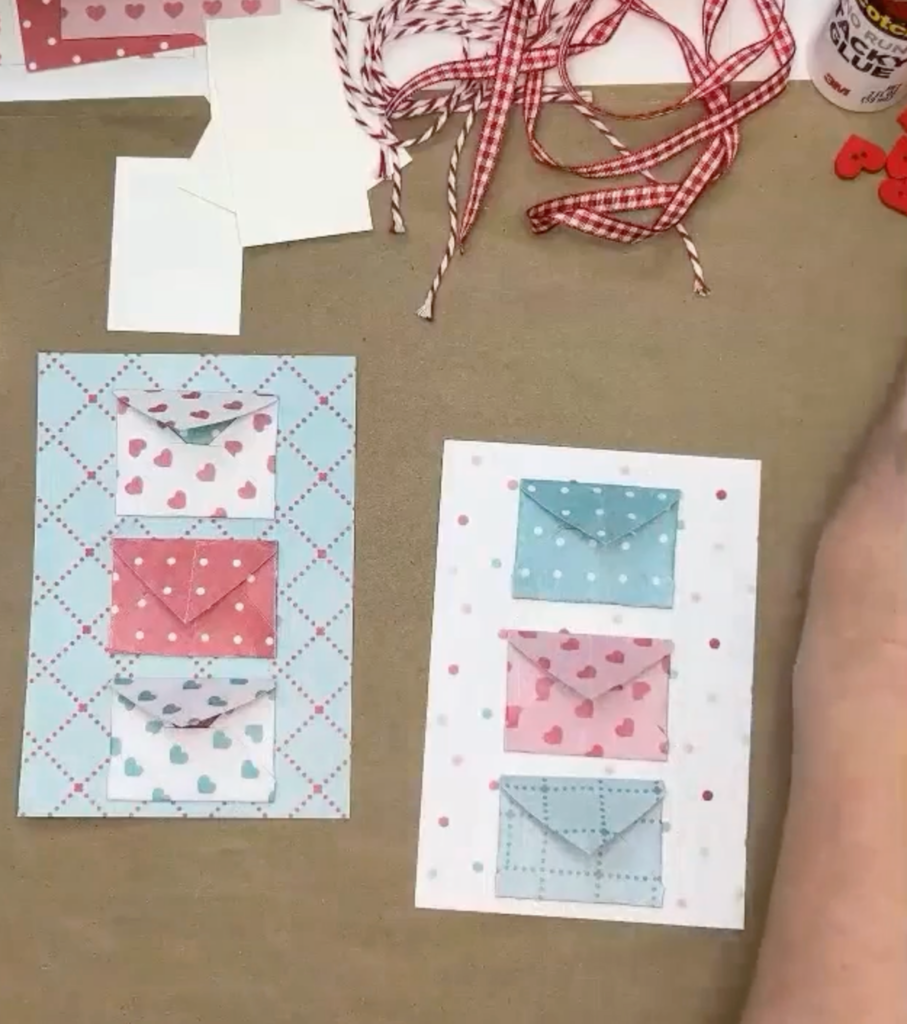
Step 4: Cut the Tag Base
Cut cardstock to 3.5″ x 5″. I used double-sided cardstock so it looks pretty from both sides, but that’s optional. This size fits well inside a small envelope so you can mail it.
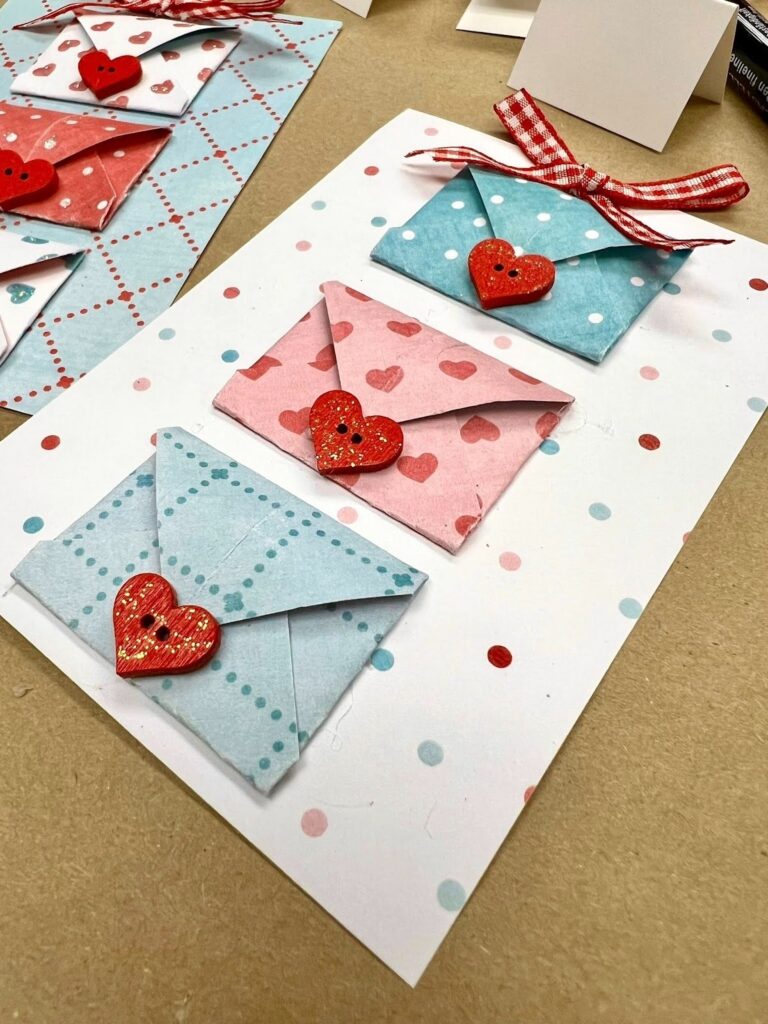
Step 5: Arrange Three Envelopes on the Tag
Before gluing, fold your envelope flaps down so you can see how much space they’ll take when closed. Arrange three envelopes on the tag – top, middle, and bottom – so they look balanced. Mix patterns for a fun look (or keep it matching if that’s your vibe). Once you like the placement, glue each envelope down to the tag.
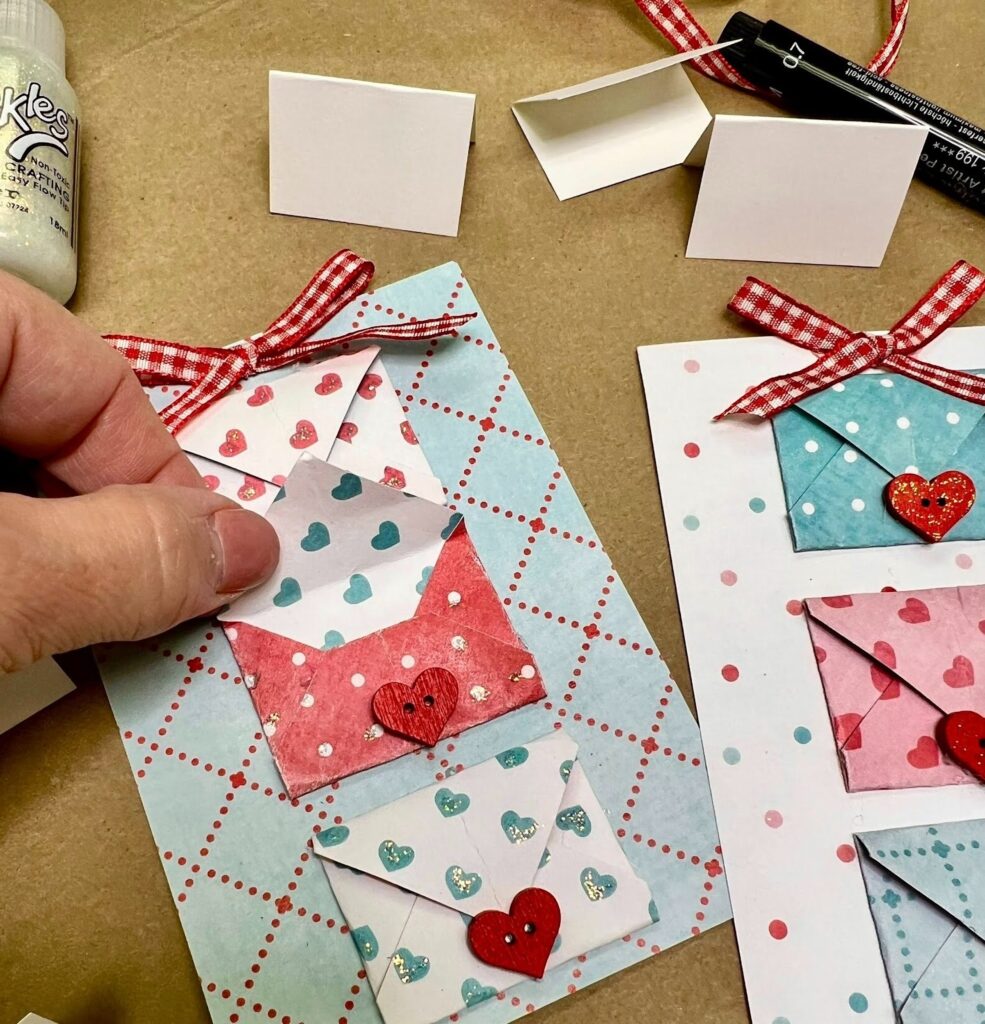
Step 5: Add a “Tuck Closure” Button
This is the cutest little functional detail. Take a small button (I used heart buttons) and add glue only to the bottom half of the button. Press it down near the lower edge of each envelope flap area.
Because only the bottom half is glued, the top half stays slightly lifted, so the envelope flap can slide underneath it like a tuck. This keeps the envelopes closed but still easy to open, and it prevents tearing. Repeat for each tiny envelope.
Step 6: Add a Bow at the Top
Tie a small bow from ribbon, twine, or baker’s twine. Instead of punching a hole and threading it through, I simply glued the bow near the top because it’s faster and still fits inside an envelope easily.
When you glue it, place glue mostly behind the knot and loops – not the tails- so you don’t accidentally glue over your top envelope flap area.
Step 7: Add Optional Sparkle or Finishing Touches
If you want to dress these up, Stickles are an easy win. You can add sparkle to the heart buttons, add glitter to little printed hearts on the paper, or trace details for extra pop. A few small touches make it feel special without turning it into a big project.
Now for the best part.
Write tiny notes of encouragement on your mini cards with a pen and place them into the envelopes. These can be:
- words of affirmation for grandkids
- a scripture reference on the front & the verse written inside
- a quick “I’m proud of you because…”
- “I saw this and thought of you”
- “You’re not alone”
- “Keep going”
Then tuck the envelope flaps under the buttons, slide the whole tag into a larger envelope, and mail it – or hand-deliver it somewhere meaningful.
These are also sweet to leave in a library book, bring to a nursing home or cancer center, share at church, or tuck into a gift.
Want More Beginner-Friendly Paper Crafting Ideas?
If you loved this quick project and want more simple, encouraging crafts you can do with what you have, come hang out with us in the Paper Crafters ClubHouse – we’re always creating, sharing ideas, and turning scraps into something meaningful. Join Paper Crafters ClubHouse here!


0 Comments