


Supply List:
- Jingle & Mingle Spring Birdhouse Kit
- Simplicity – County Chic Paint
- Mod Podge Matte
- Bakery/Deli Sheets
- Craft Iron
- Frixion Pen
- Pitt Pen – Black Fine-Tip
- Foam Tape or Pop Dots
- Hot Glue or Scotch Tacky Glue
Spring is the perfect time to refresh your decor with something bright, cheerful, and full of charm! In this project, we’re creating a spring birdhouse canvas using a 5×7 canvas and a shiplap birdhouse piece as the focal point. With the help of napkin art, we’ll add beautiful patterns and embellishments that bring this piece to life. The best part? We’ve put together a kit with almost everything you need, making it easy to jump in and start crafting.

Adding Napkin Art to Your Canvas
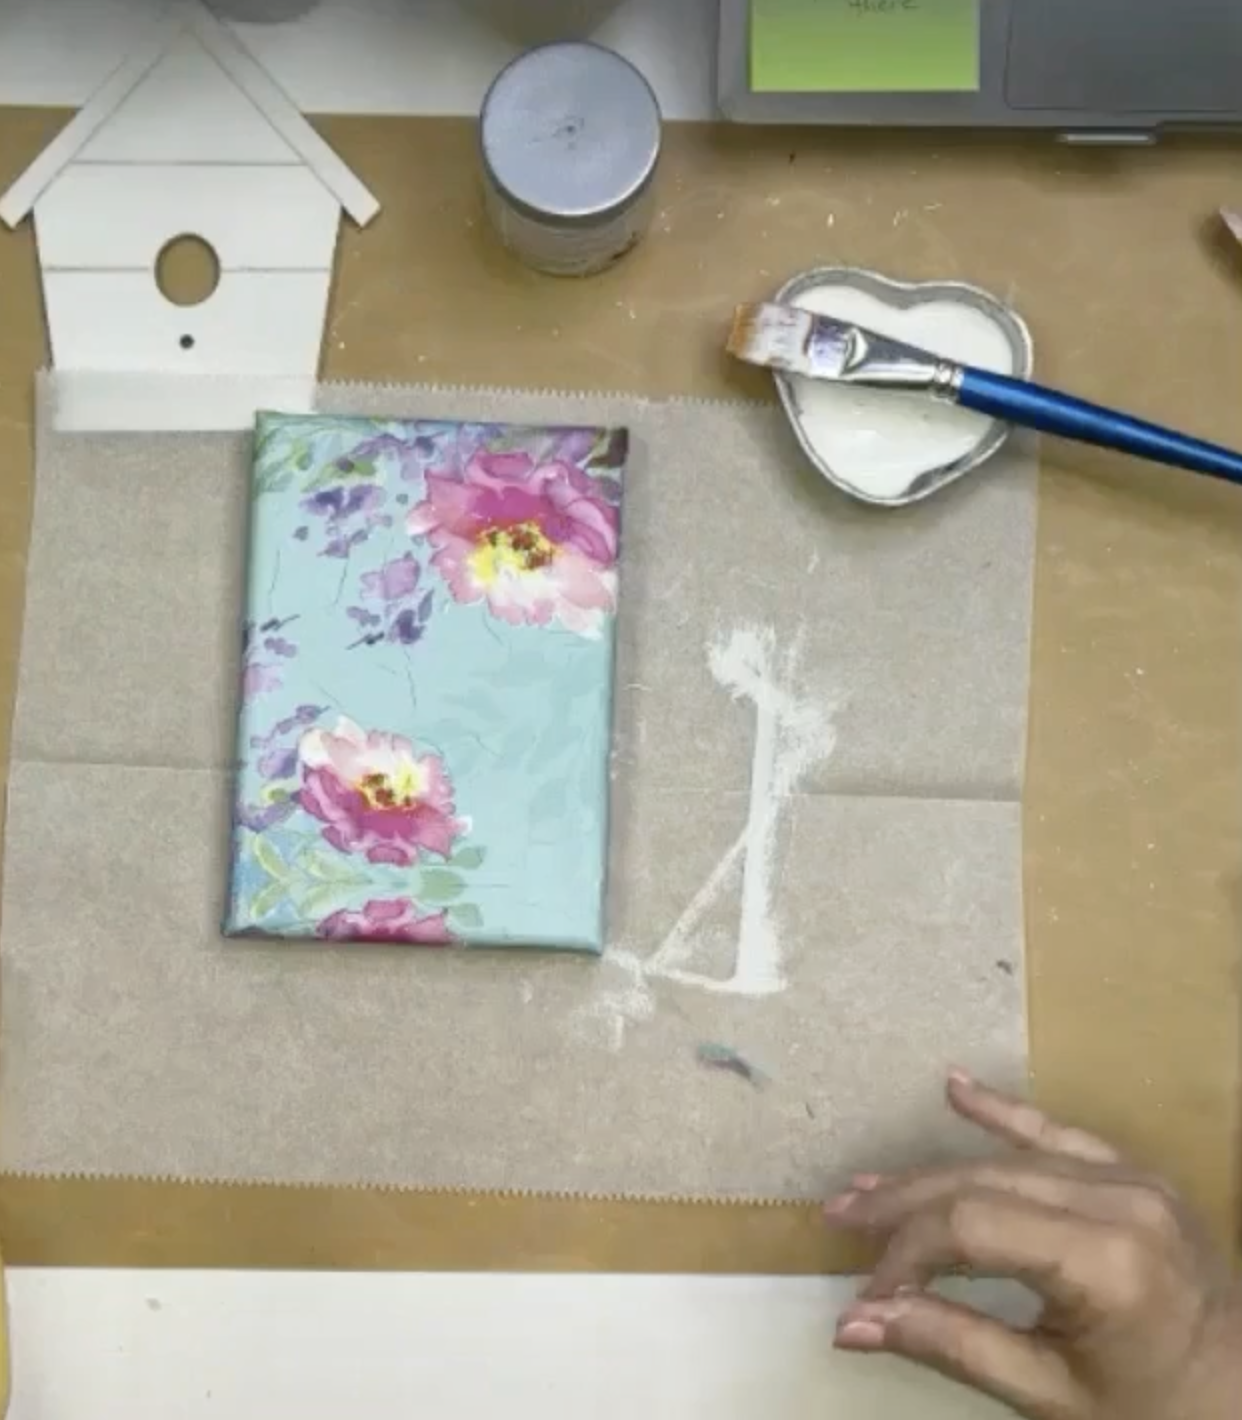
Your kit includes a floral napkin that will serve as the background for our canvas. Start by cutting out one of the squares and carefully separating the plies until you’re left with the top layer of napkin art. Position it so that two flowers sit in the corners of your canvas for a balanced design.
Apply a coat of Mod Podge Matte to the canvas, then gently lay the napkin on top. Use a plastic sheet to smooth it out and remove any wrinkles. Next, brush Mod Podge Matte along the edges of the canvas, wrapping the excess napkin around the sides for a seamless finish. Dry with a heat tool, then trim any lifted corners with scissors. If there’s any excess napkin hanging over the edges, lightly sand it off with sandpaper. Finally, seal everything with a top coat of Mod Podge Matte.
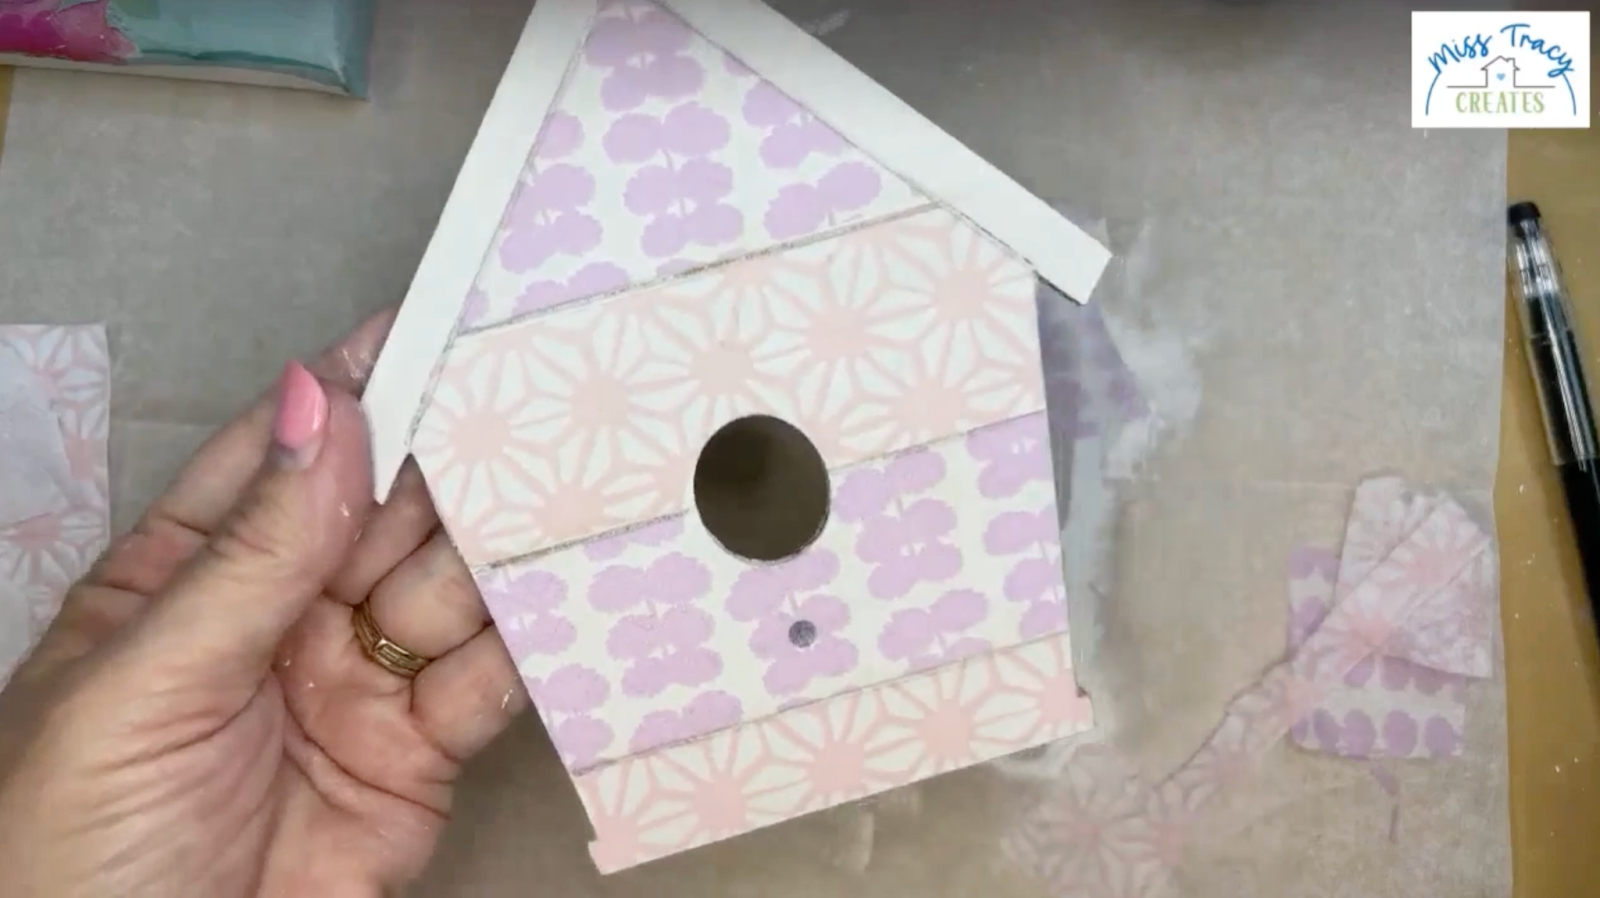
Adding Napkin Art to Your Shiplap Birdhouse
Start by painting your shiplap birdhouse with a coat of Simplicity by Country Chic Paint, making sure to cover the edges as well. Use a heat tool to dry the paint before moving on.
Your kit includes two patterned napkins that will add a decorative touch to the shiplap sections. Take the first napkin, lay it over one section, and gently fold or crease it to mark where you need to trim. Repeat this process for each section, alternating patterns for contrast. Be sure to cut out the area where the birdhouse opening will be. You can also use a Frixion Pen to trace where you need to cut. Once everything is sized correctly, separate the plies so you’re left with the top layer of napkin art.
Apply a coat of Mod Podge Matte to the birdhouse, carefully place the napkin pieces down, and use a plastic sheet to smooth them out. Press into the grooves of the shiplap with your fingers to enhance the texture. Once dry, use sandpaper to remove any excess napkin for a clean, finished look. Seal it with a coat of Mod Podge Matte to protect your napkin art.
Creating Paper Embellishments with Napkin Art
Take the white cardstock from your kit and brush on a coat of Mod Podge Matte. Set it aside to dry completely.
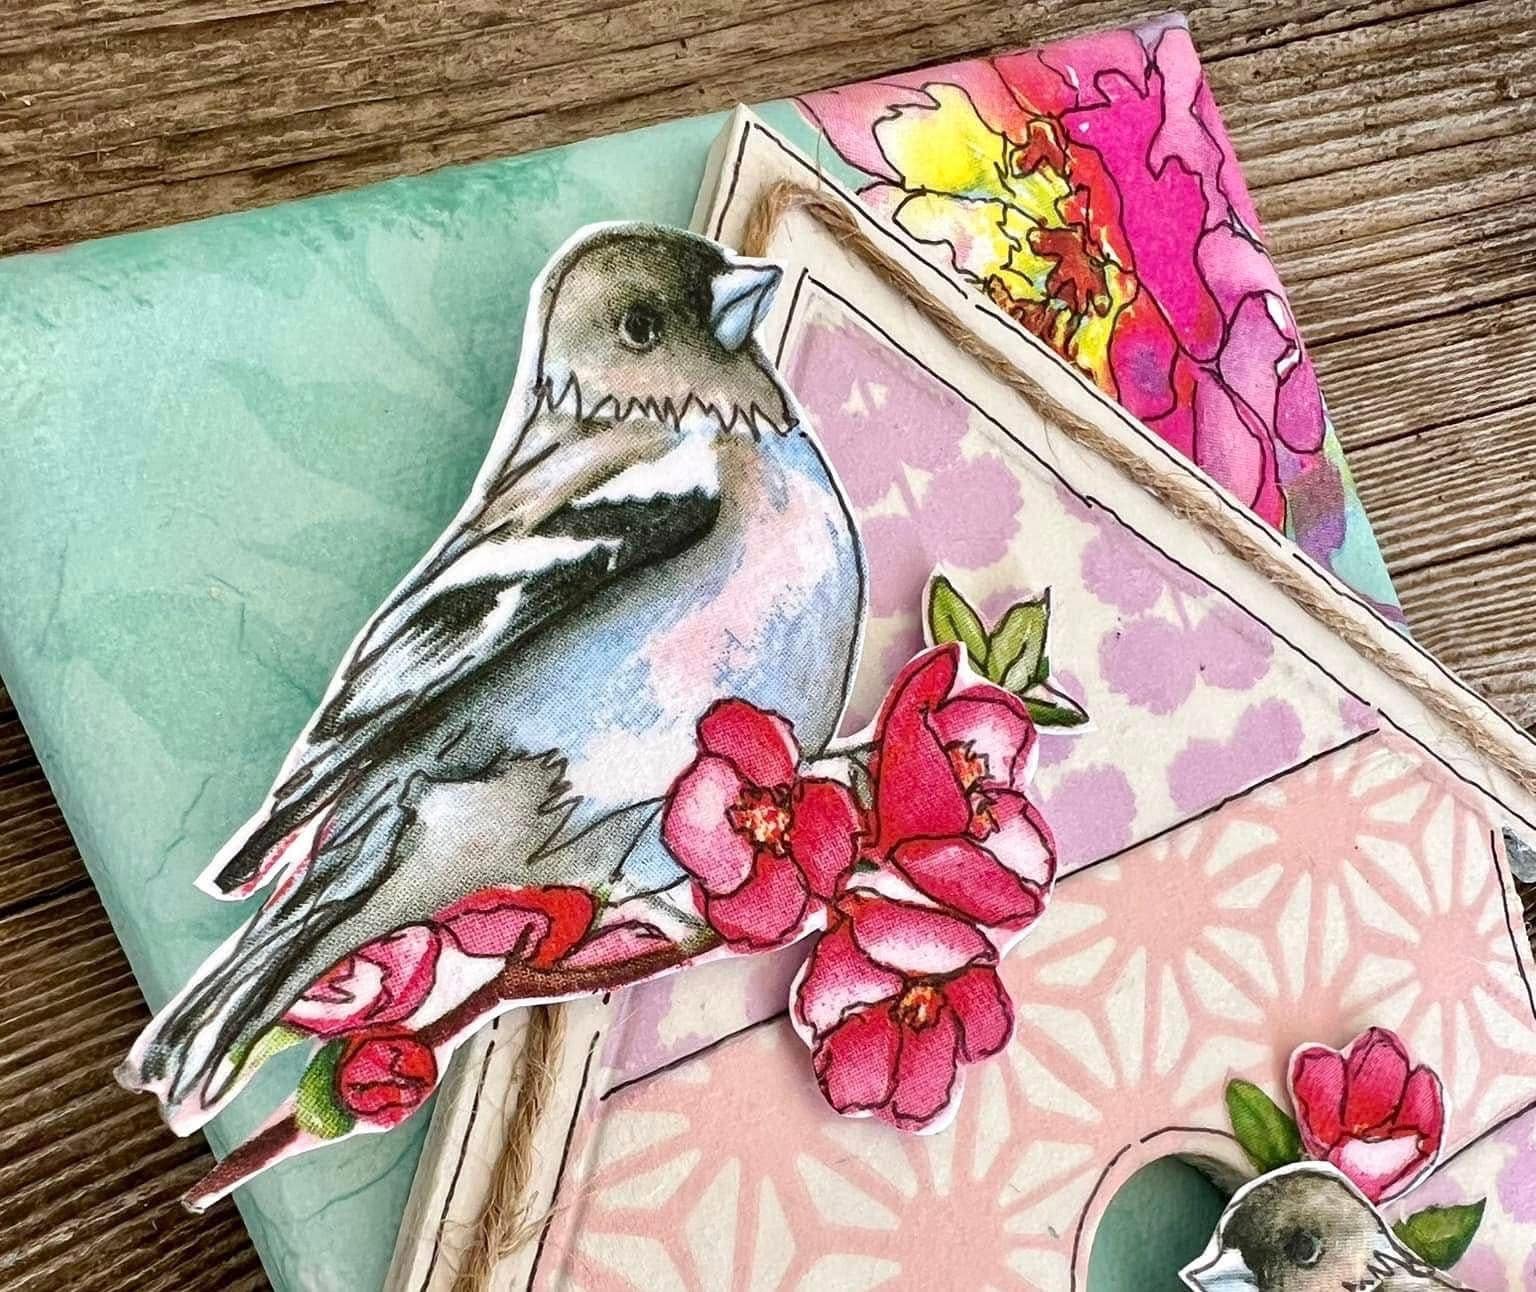
Next, grab the bird napkin from your kit and carefully cut out the birds along with the flower branch. Separate the plies until you’re left with just the top layer of the napkin art.
Prepare your work surface by laying down a piece of parchment paper, making sure you’re working on a heat-resistant mat. Position the napkin art over the dried cardstock and place another piece of parchment paper on top. Using a craft iron on its highest setting (no steam), press over the parchment. The heat will reactivate the Mod Podge, bonding the napkin art to the cardstock for a smooth, seamless finish.
Let the piece cool, then apply a thin coat of Mod Podge on top to seal it. Use a heat tool to speed up drying, then carefully fussy cut around the images with scissors for crisp, detailed edges.

Putting Your Spring Birdhouse Together
Now it’s time to bring everything to life with fine details and dimension!
Grab a black fine-tip Pitt Pen and start outlining the flowers on your canvas background, adding pen strokes for extra depth. Use the same pen to define the shiplap grooves on the birdhouse and enhance different areas with subtle line work. Don’t forget to add delicate details to the birds to make them pop even more!
Next, use hot glue or Scotch Tacky Glue to securely attach the birdhouse to your canvas. To give the birds a three-dimensional effect, attach them with Foam Tape or Pop Dots, making them stand out beautifully against the background.
For the finishing touch, take the jute twine from your kit and glue it along the roofline of the birdhouse. Then, tie a small bow and hot glue it to one of the birds for an extra bit of charm.
I go LIVE on my Facebook page every Friday at 11 am CST for a fun and easy Craft-n-Chat Session. Come learn something new while creating something beautiful!
Join the waitlist for The Napkin Club where Unique Makers can connect, learn, and be inspired to create with the Individual Unique Napkin Collections that you will receive every month! A place where Napkin Lovers can unite and be inspired!


0 Comments