Supply List:
- A Variety of Fabric for Flowers
- Green Felt for Base of Flower
- #7 Sewing Needle
- White Thread
- Frixion Pen
- Sticks or Something for Flower Stems
- Hot Glue
- Scissors
- Jar or Vase
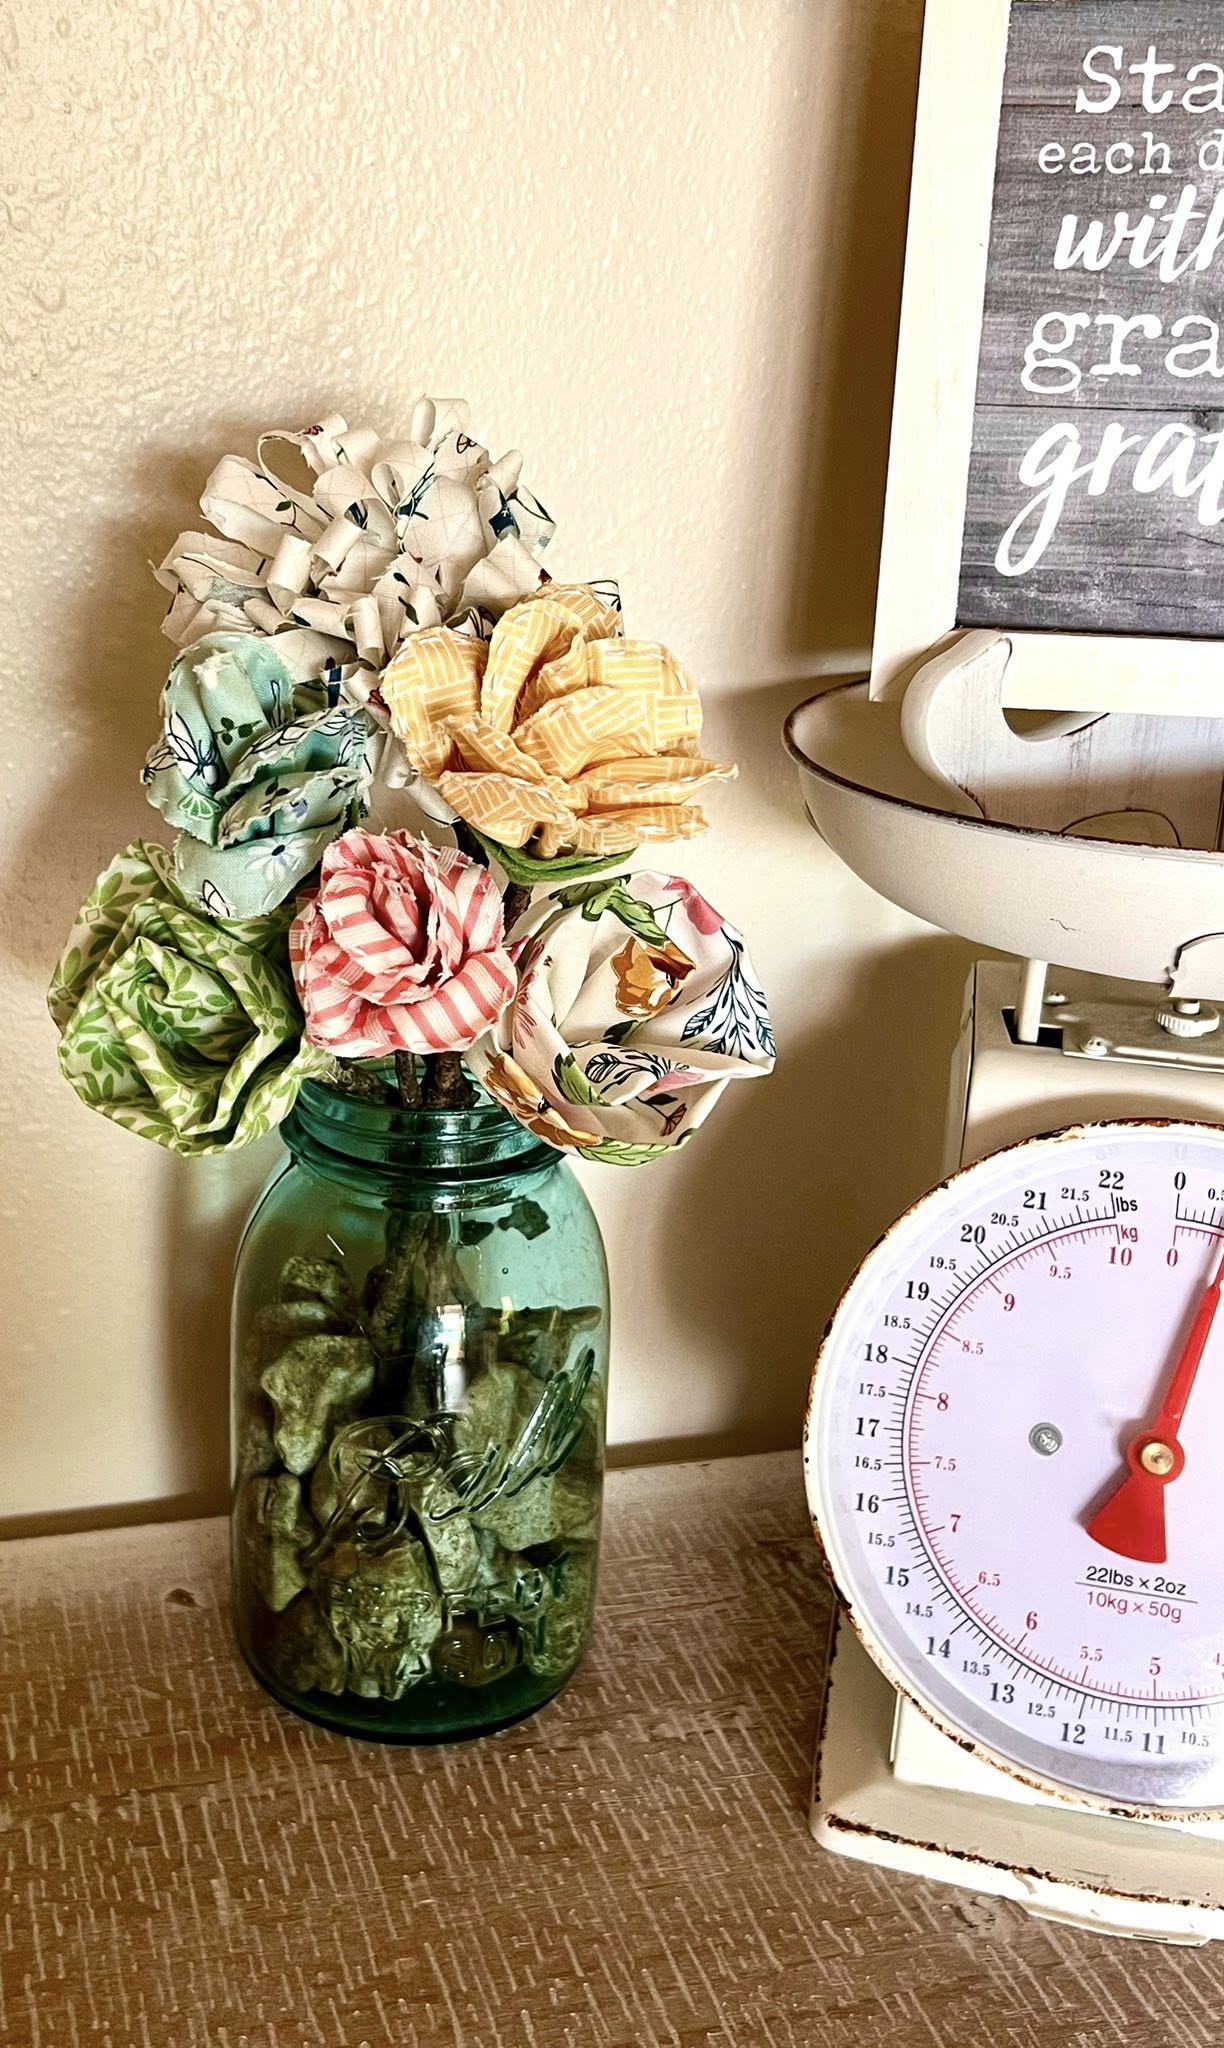
If you’re looking for a sweet, handmade gift or just want to use up those pretty fabric scraps, these stitched fabric flowers are the perfect project! In this tutorial, I’ll walk you through how to make a bouquet of soft, dimensional blossoms using simple hand stitching, fabric strips, and natural twigs from your yard.
Step 1: Prep Your Fabric
Start by folding a 3″ wide fabric strip in half lengthwise. Using your Frixion Pen, lightly draw exaggerated scallops along the folded edge. Don’t worry about perfection – organic shapes look best! Each scallop should be about 1½” tall. These scallops will form the petals of your flower.
Step 2: Add a Running Stitch
Thread your needle with a double thread (about two arm lengths), knot the end, and begin stitching along your scalloped line using a simple running stitch. This is just an in-and-out stitch – think of it like doodling with thread!
Once you’ve stitched along the full length of your scallops, gently cut out your scallop shape, leaving a small border around the stitching.
Step 3: Gather the Petals
Using a new piece of thread, begin a gathering stitch along the raw edge (the opposite of your folded/scalloped side). As you pull the thread, your fabric will naturally begin to gather into a flower shape.
Don’t knot it off right away – adjust your gathers until you’re happy with how the petals look, then secure it with a knot.
Step 4: Create a Felt Backing
Cut a rough 2½” circle of green wool felt and snip out a triangle-shaped “slice” – like a piece of pie – to form a Pac-Man shape. This makes it easy to wrap around the base of your flower and cover any glue or mess.
Step 5: Add the Stem
Take your gathered flower and gently insert a twig between the layers of the first petal. Add a small amount of hot glue inside to hold it in place. Wrap the flower around the twig, securing with glue every few turns to keep the shape.
This forms your flower center and stem in one step! Secure the felt backing with hot glue for a tidy finish.
Step 6: Shape Your Flower
Gently pull down some of the outer petals to create dimension. You can leave some upright and some folded down for a more natural look. Repeat the process to make several flowers, and gather them into a bouquet!
Display them in a mason jar or wrap them with ribbon for a sweet handmade gift that won’t wilt.
Want to learn more hand stitching techniques like this one?
Join me for my Intro to Freestyle Hand Stitching Workshop Series – a perfect way to explore fabric and thread in a fun, relaxed way! You’ll can even opt to get a kit with supplies to make three beautiful beginner-friendly projects.



0 Comments