


Supply List:
- Easter Blessings Napkin Bundle
- 5×7 Wood House Block
- 4×6 and 3×4 Wood Blocks
- Mini Candlestick Wood Bases
- Wood Hanging Crosses (Amazon)
- Small Square 6×6 Shiplap Shapes
- Crinoline – Country Chic Paint
- Mod Podge Matte
- Bakery/Deli Sheets
- Scissors
- Sandpaper
- Pitt Pen- Black Fine-Tip
- Stickles
- Heat Tool
- Ribbon to Hang Shiplap Signs if desired
- Embellishments of your choice if desired (ribbon, greenery, buttons, etc.)
Looking for a meaningful and beautiful way to celebrate Easter this year? In this post, I’m sharing how to create some sweet Easter “smalls” – simple, faith-filled projects that are perfect for decorating your home or giving as thoughtful gifts. These smaller pieces are not only fun to make, but they also carry a lovely message of hope and renewal.
We’ll be adding napkin art from the Easter Blessings Napkin Bundle to a variety of wooden surfaces, including a 5×7 wood house block, 4×6 and 3×4 blocks, wooden hanging crosses, and shiplap squares. Each piece is easy to customize and brings a unique charm to your Easter decor. Whether you’re sprucing up a shelf, adding to a tiered tray, or just enjoying a little creative time, these projects are a beautiful way to reflect your faith through art this season.

Applying Napkin Art to Wooden Surfaces
Start by painting your surfaces with any white chalk paint you like. I’m using Country Chic Paint in Crinoline, but feel free to use your favorite brand.
We’re kicking things off with the Wooden House Block and a striped napkin from the Easter Blessings Napkin Bundle. This striped design pairs beautifully with the He is Risen napkin that we’ll be applying to the front of the house.
Begin by taking the striped napkin and gently creasing it along the sides of the house block – this helps you measure exactly how wide the sides are. Cut the napkin into strips to fit, then separate the layers (plies), keeping only the top printed one.
Apply a coat of Mod Podge Matte to the sides of the block, then carefully place the napkin strips on top. Use a piece of plastic wrap to smooth it out and eliminate any wrinkles. Dry with a heat tool.
Next, position the He is Risen napkin on the front of the house and crease it lightly to mark your trim lines. Trim as needed, and save one of the extra pieces to patch the pointed top of the house since the napkin may not fully cover that area.
Separate the plies, then apply Mod Podge Matte to the front of the block. Lay the napkin in place, including the patch piece at the top, and smooth it all down with plastic wrap. Dry with a heat tool. Once dry, seal everything with another coat of Mod Podge Matte and let it dry again.

Repeat the same process on your remaining wooden surfaces!
I love displaying the 4×6 and 3×4 blocks on wooden candlestick holders for a little added height and charm. I’ll be using the cross napkin from the Easter Blessings Napkin Bundle on these blocks – it adds such a meaningful touch.
You can follow the same steps for the wooden hanging crosses and shiplap squares as well. Just choose the napkin design you love, trim it to fit, separate the plies, and apply it with Mod Podge Matte. Smooth with plastic wrap, dry with a heat tool, and seal with another coat of Mod Podge.
Adding Embellishments and Finishing Touches
Now it’s time to add those fun finishing touches that make your piece really pop!
Grab a black fine-tip Pitt Pen and add penwork wherever you’d like a little extra detail. For example, I’ll be outlining and adding accent lines to the flowers on the wooden house block to bring them to life.
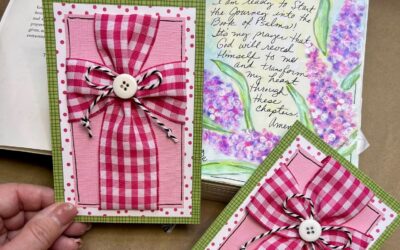
You can also add some Stickles for sparkle! Try applying it around the cross or even over the entire surface. Just squeeze out a small amount and use a fine paintbrush to spread it evenly for a soft, glittery effect.
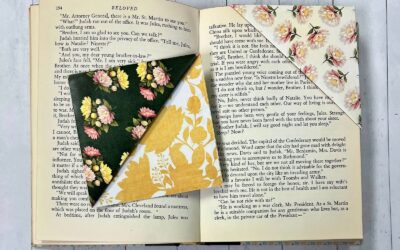
Want to add even more dimension? Try wrapping ribbon around the edges of your blocks and securing it with hot glue. And for the shiplap squares, you can glue ribbon between two pieces to create a hinge. This turns them into adorable shelf sitters that open like a book!

I hope these Easter “Smalls” spark some fresh inspiration for your spring crafting! Whether you’re creating just one piece or making a full collection to decorate your home, each project is a beautiful reminder of the season’s message.
I go LIVE on my Facebook page every Friday at 11 am CST for a fun and easy Craft-n-Chat Session. Come learn something new while creating something beautiful!
Join the waitlist for The Napkin Club where Unique Makers can connect, learn, and be inspired to create with the Individual Unique Napkin Collections that you will receive every month! A place where Napkin Lovers can unite and be inspired!


0 Comments