


Supply List:
- Shiplap Shapes – Medium Round Tag
- Valentine Napkin, Green and White Check Napkin
- Simplicity – Country Chic Paint
- Mod Podge Matte
- Deli/Bakery Sheets
- Sandpaper
- Pitt Pen – Black Fine-tip
- Uniball Pen – White
- Embellishments: Ribbon, Red/White Twine
- Wool Felt – Snow White, Strawberry, Carnation Pink, Light Olive
- Frixion Pen
- Hot Glue
- Stickles
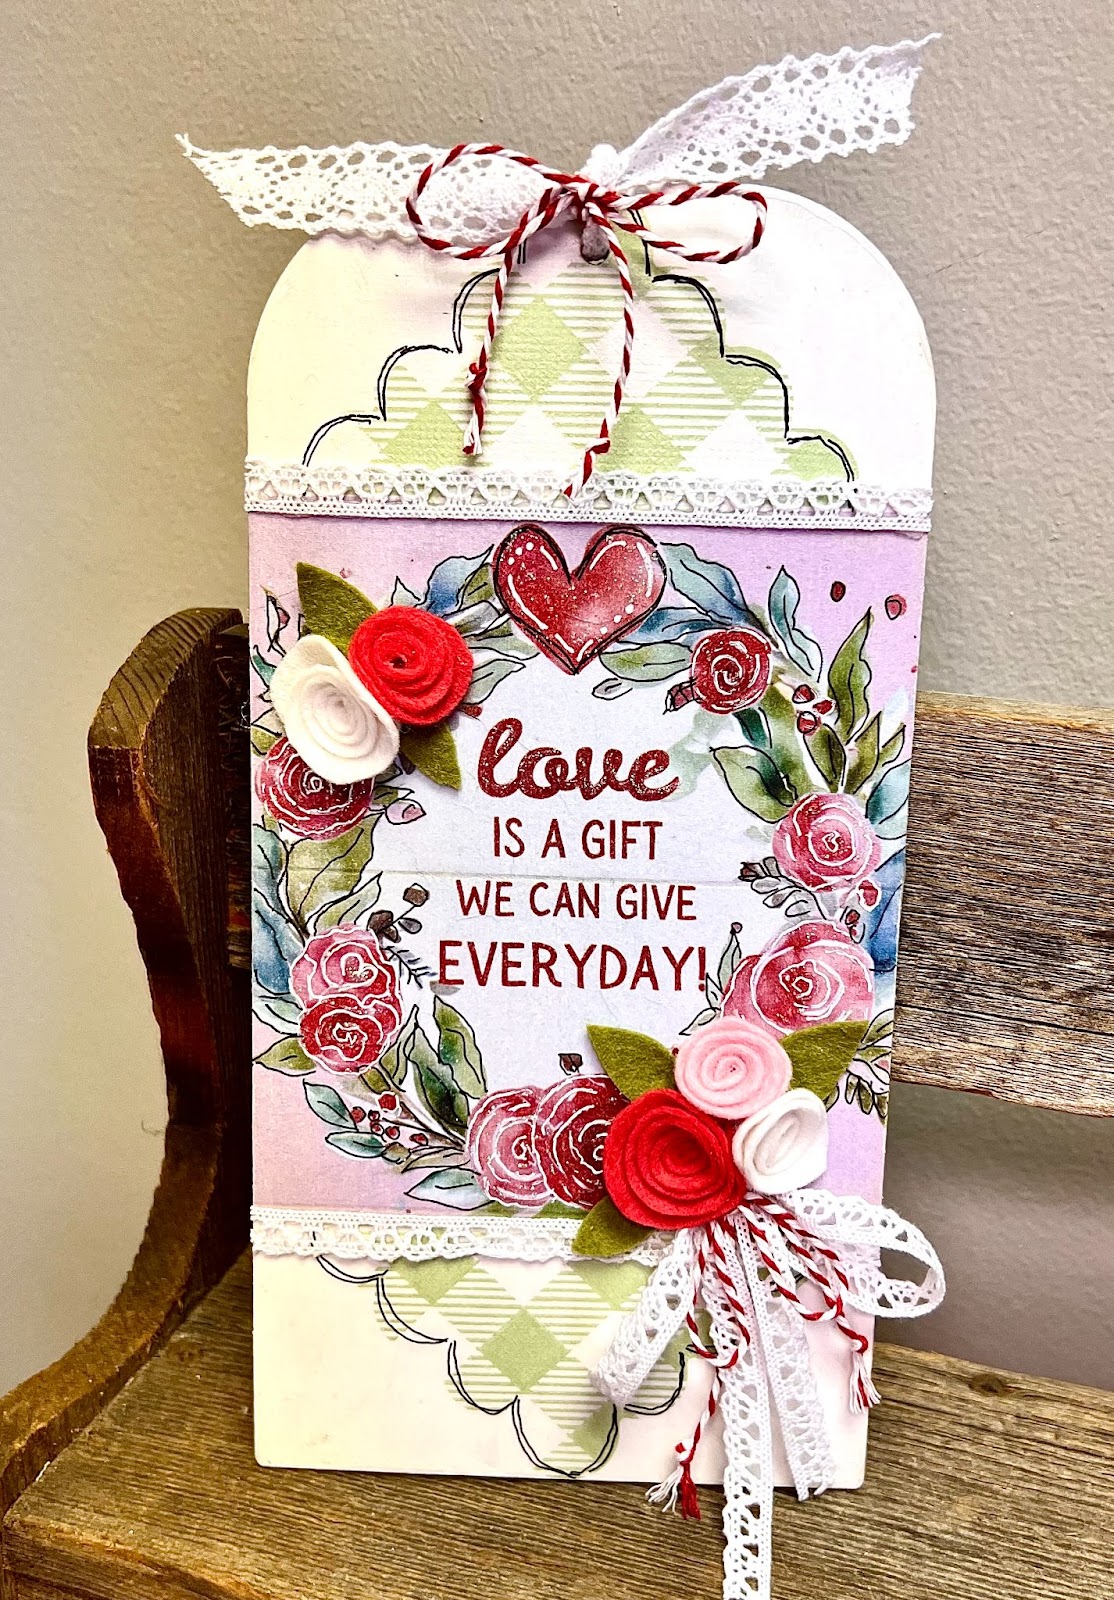
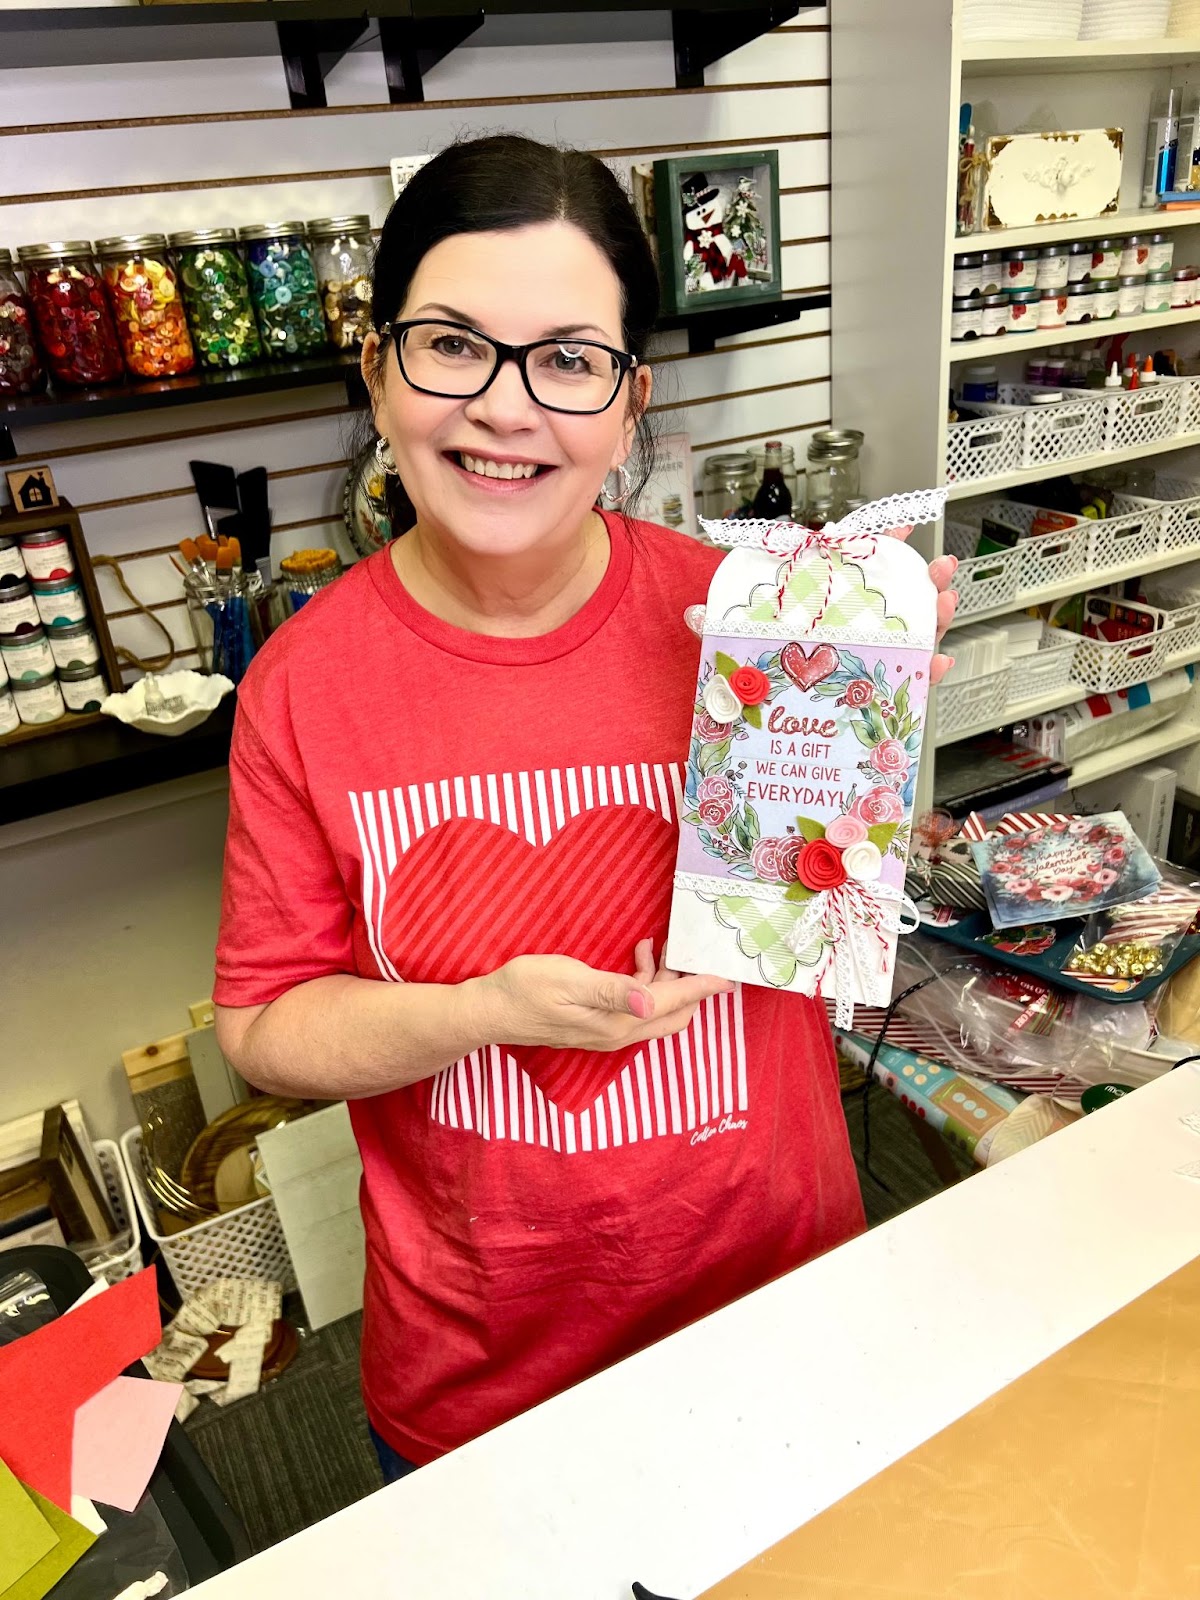
Celebrate the season of love with this DIY Wooden Shiplap Valentine’s Tag! This project is simple, fun, and perfect for adding a handmade touch to your décor. With paint, napkins, and felt embellishments, you’ll create a unique piece that makes a beautiful gift or a charming accent for your home.
Applying Napkin Art to Your Shiplap Tag
Start by giving your shiplap tag a fresh base coat using Simplicity by Country Chic Paint. Be sure to get into the shiplap grooves and along the edges for full coverage. Once the front is covered, use a heat tool to dry it quickly. Flip the tag over and paint the back as well, drying it again before moving on.
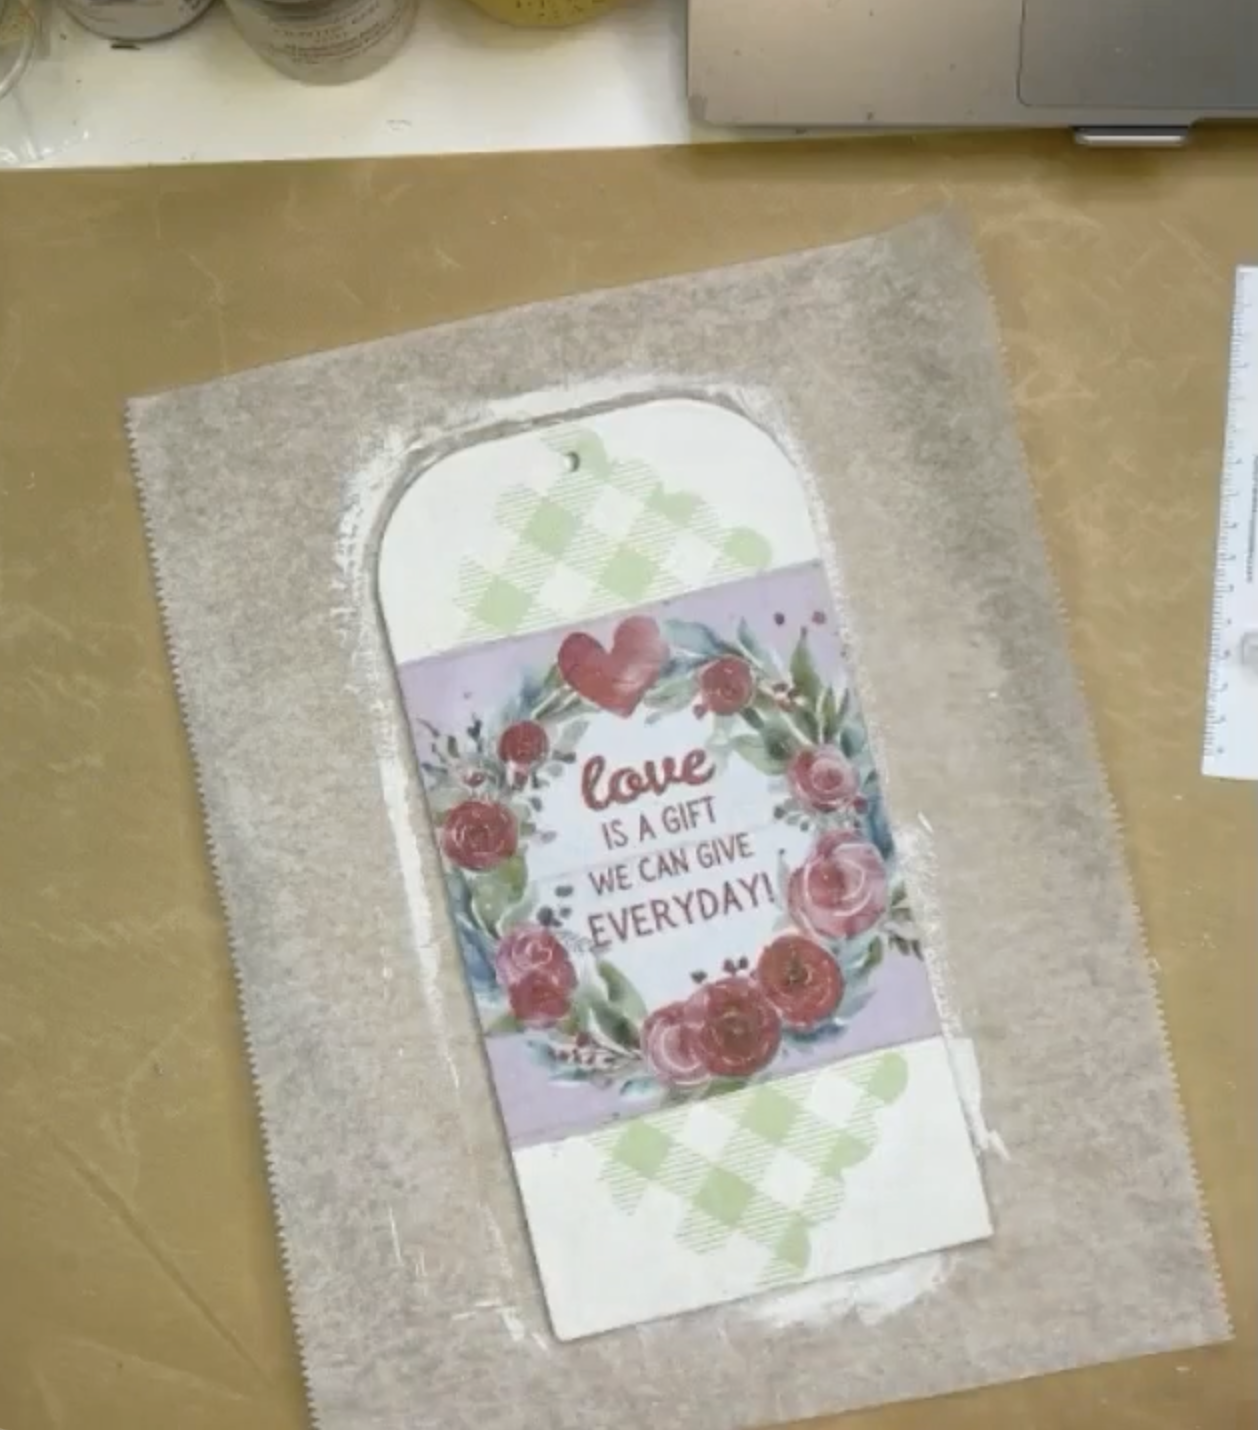
For this design, I’m using a charming checkered napkin with a scalloped edge. First, cut a square section of the napkin and place it diagonally on the top of your tag. Press it gently into the top shiplap groove to mark where you need to trim. Cut along that line so it fits perfectly within the groove. Repeat this step with another napkin square for the bottom groove.
Next, I have a beautiful napkin with the phrase “Love is a gift we can give every day!” – perfect for the centerpiece of this tag. Trim it down to fit nicely in the middle section.
Now, it’s time to add our napkin pieces! Brush a thin layer of Mod Podge Matte onto the areas where you’ll be placing the napkin art. Carefully position your napkin pieces, smoothing them down with plastic wrap and your hands to prevent wrinkles. Once everything is in place, use a heat tool to dry. If any napkin edges extend beyond the tag, lightly sand them off for a clean finish. Seal everything with a top coat of Mod Podge Matte and dry again.
Adding Pen Work and Felt Flowers to Your Art Project
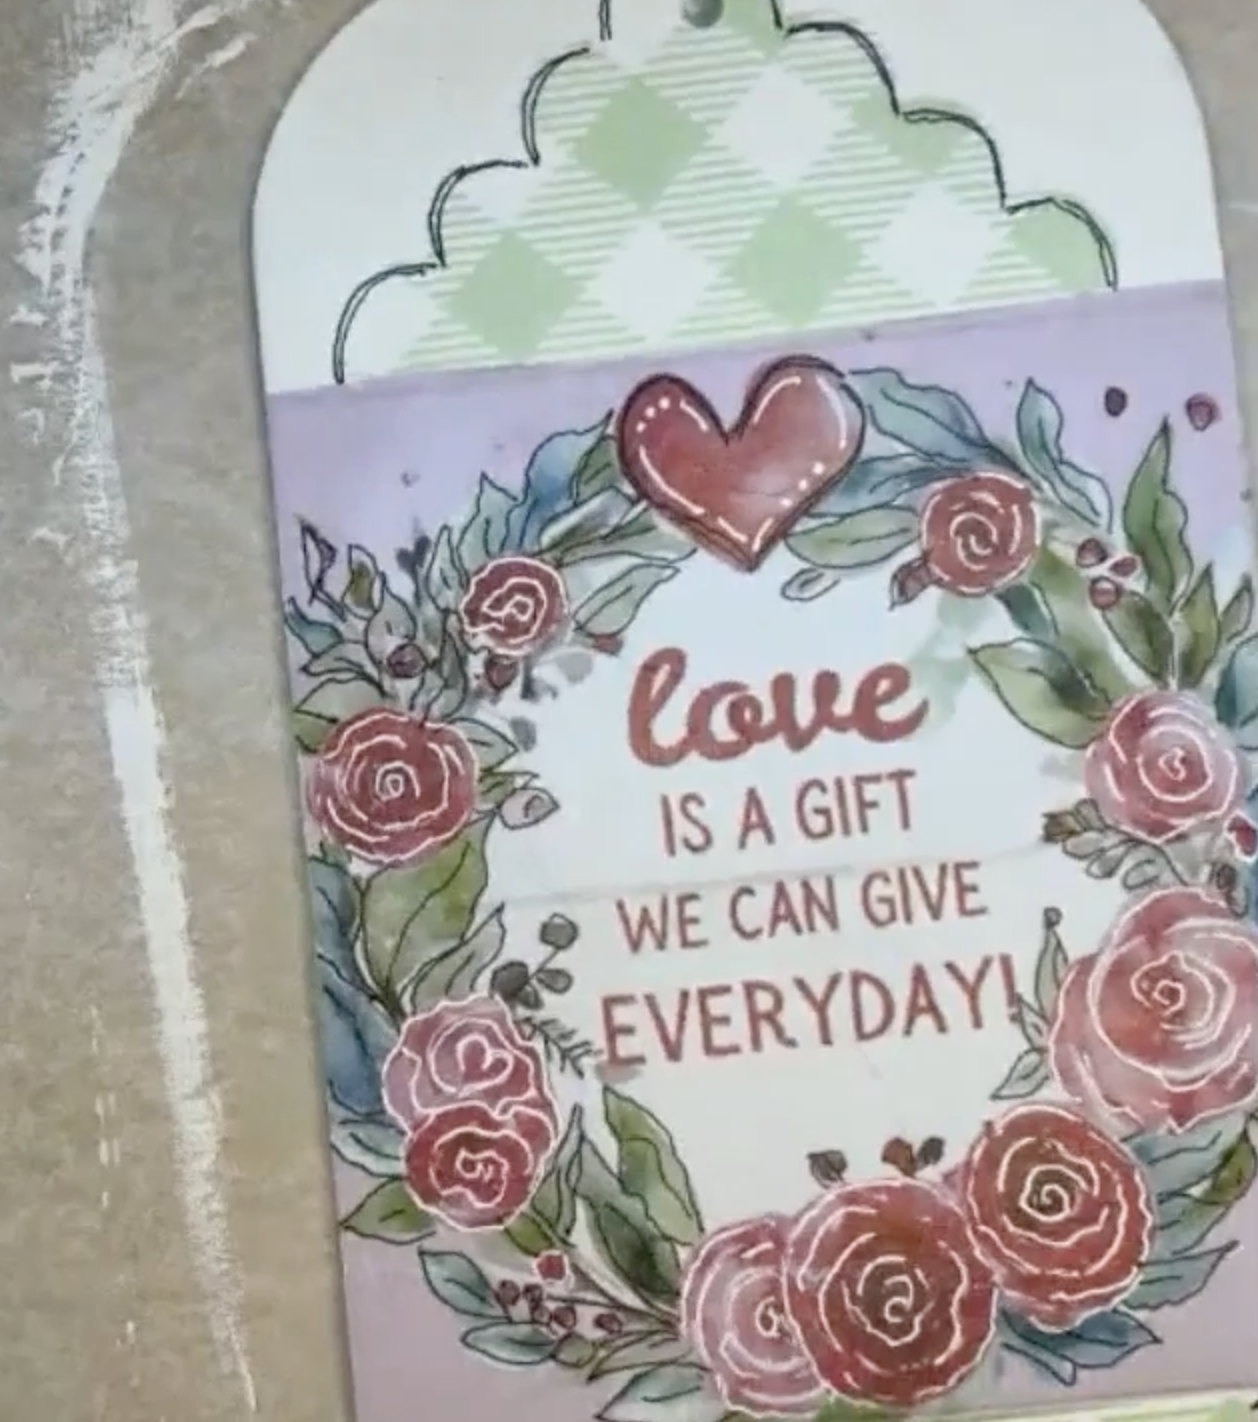
Next, grab a Black Fine-Tip Pitt Pen to add delicate detail lines to your napkin art. For the scalloped edge, I’ll use natural outlining strokes, going around twice to create a whimsical, imperfect look. I’ll also add light, swift lines to enhance the leaves of the wreath and the heart, giving them extra dimension.
To make certain elements pop, I’ll switch to a White Uni-Ball Pen, adding soft highlights to the roses and heart.
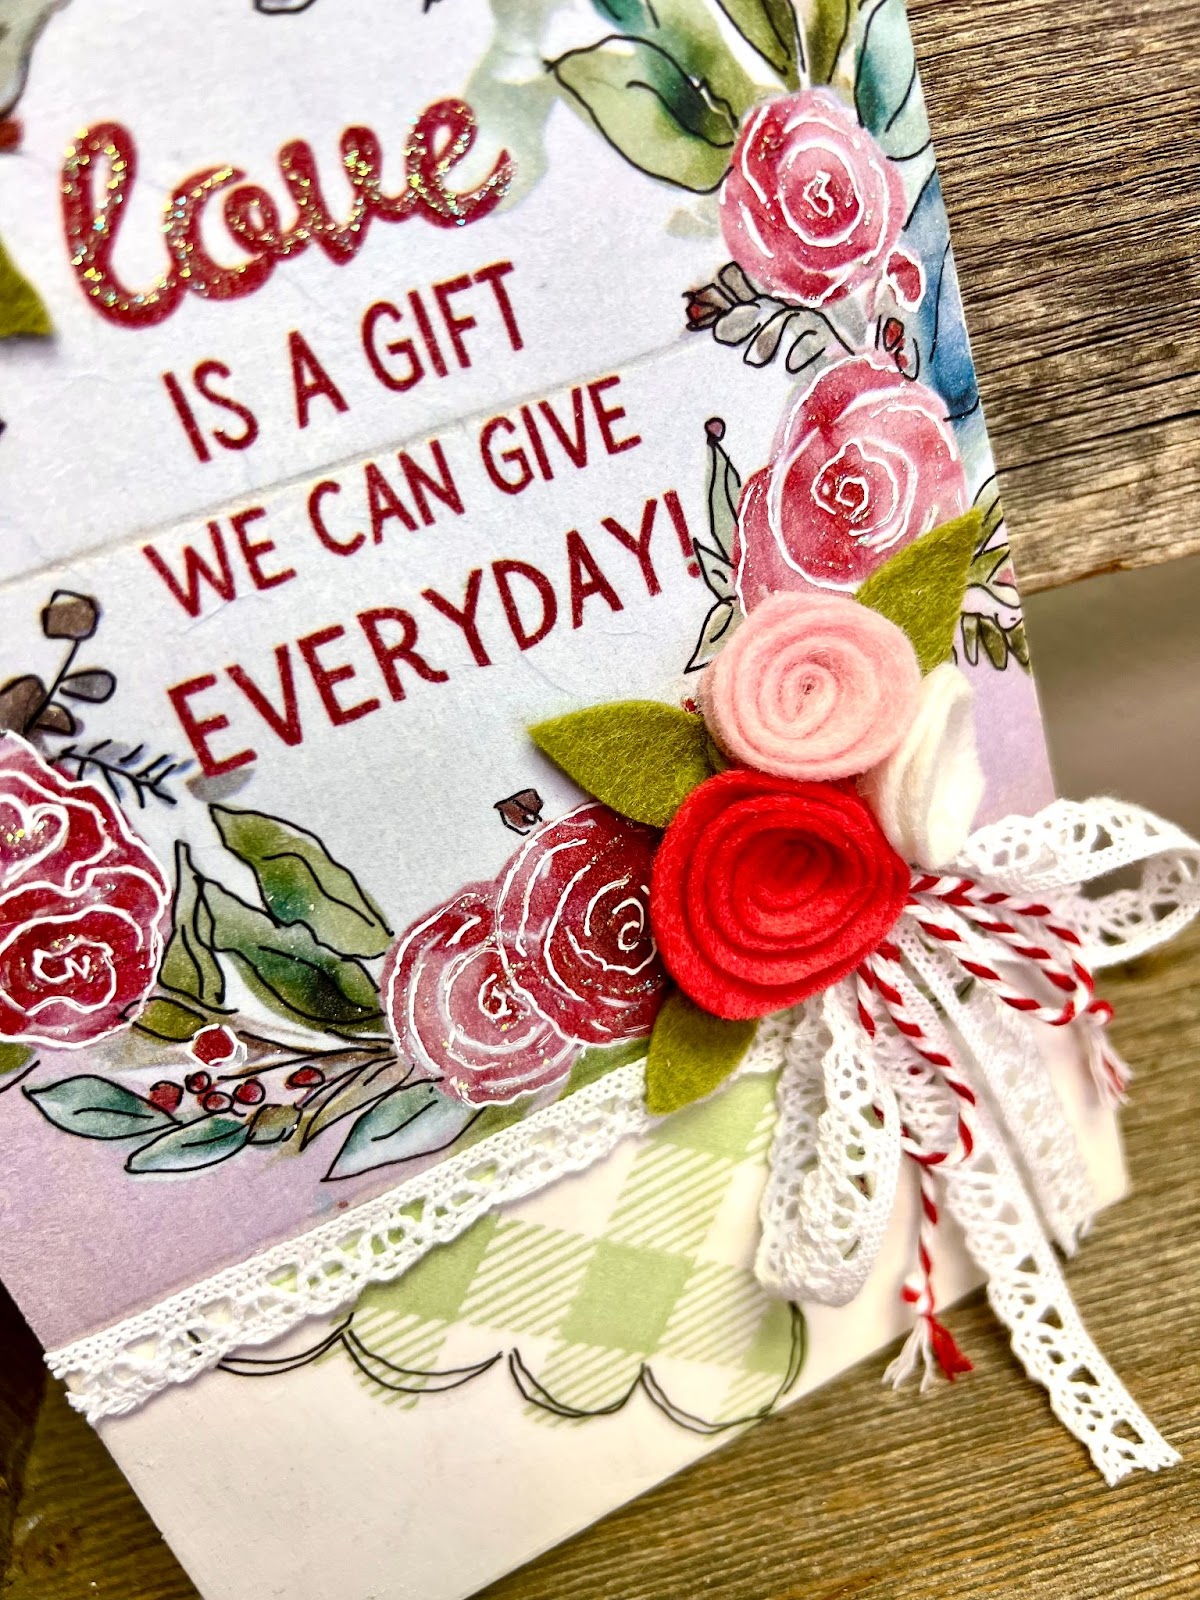
Next, it’s time to add some charming embellishments, starting with adorable wool felt flowers! Using a Frixion Pen, draw a circle on your felt – I’ll be using white, pink, and red for my flowers. Inside the circle, sketch a spiral, then carefully cut along the lines with scissors. To remove any remaining pen marks, simply run a heat tool over the felt.
Now, let’s shape the flowers! Pinch the outer end of your spiral between your fingers and begin tightly coiling it inward, keeping the wrap snug at first. As you move along, loosen the wrap slightly to create a more natural, full bloom.
Once the flower is coiled, flip it upside down and add a dab of hot glue to the center. Secure the end of the spiral to form the base of your flower, then gently press down in the center to give it a fuller, more open look. Repeat this process for as many flowers as you’d like to add to your tag.
To complete the floral arrangement, I’ll cut small leaves from green felt and tuck them around the flowers. Once they’re arranged to my liking, I’ll use hot glue to attach the flowers and leaves in little clusters onto my wooden tag.
I’ll also hot glue thin crocheted lace ribbon along the top and bottom edges of the Valentine’s Day napkin design, adding a sweet, delicate detail to the piece. I’ll run a piece of crocheted ribbon and baker’s twince through the hole in the top of the tag and tie a knot as well as creating a crocheted ribbon tied off with baker’s twine to hot glue to the bottom of my tag.
Finish off your piece by adding Stickles to your heart and roses.
And just like that, you’ve created a one-of-a-kind Valentine’s tag! Whether you hang it on a door, display it on a shelf, or gift it to someone special, this project is a heartfelt way to spread love. Feel free to get creative with colors and embellishments to make it truly your own.
I go LIVE on my Facebook page every Friday at 11 am CST for a fun and easy Craft-n-Chat Session. Come learn something new while creating something beautiful!
Join the waitlist for The Napkin Club where Unique Makers can connect, learn, and be inspired to create with the Individual Unique Napkin Collections that you will receive every month! A place where Napkin Lovers can unite and be inspired!


0 Comments