


Supply List:
- 10 x 10 Canvas
- White Cardstock
- 2 Background Napkins
- 1 Napkin for Featured Image
- Hollow Hill Country Chic Paint
- Simplicity Country Chic Paint
- Liquid Glue
- Mod Podge Matte
- Mini Iron
- Parchment Paper
- Heat Tool
- Hot Glue
- Stickles
- Greenery
- Faux Snow
- Ribbon/Jute Twine
- Embellishments like Snowflakes/Star
If you’ve ever wanted to try a busted canvas, this is the method you’ve been waiting for! In this tutorial, I’m sharing my favorite way to create a busted canvas look using napkins and cardstock instead of tearing into the canvas itself. It’s easier to control, easier to curl, and PERFECT for napkin art, especially if you love dimension, texture, and a cozy winter feel.
This project features a beautiful snowy church napkin framed with a rustic “wreath” look using frosted greenery, mini ornaments, snowflakes, ribbon, and even a little faux snow scene at the bottom.

Step 1: Prep the Cardstock for Napkin Art
Cut your cardstock to 10×10. Then coat both sides with Mod Podge Matte. Paint one side first and let it dry completely, then flip and paint the other side. Your cardstock will likely warp and bubble a bit, which is normal. The iron step later will flatten it out beautifully.
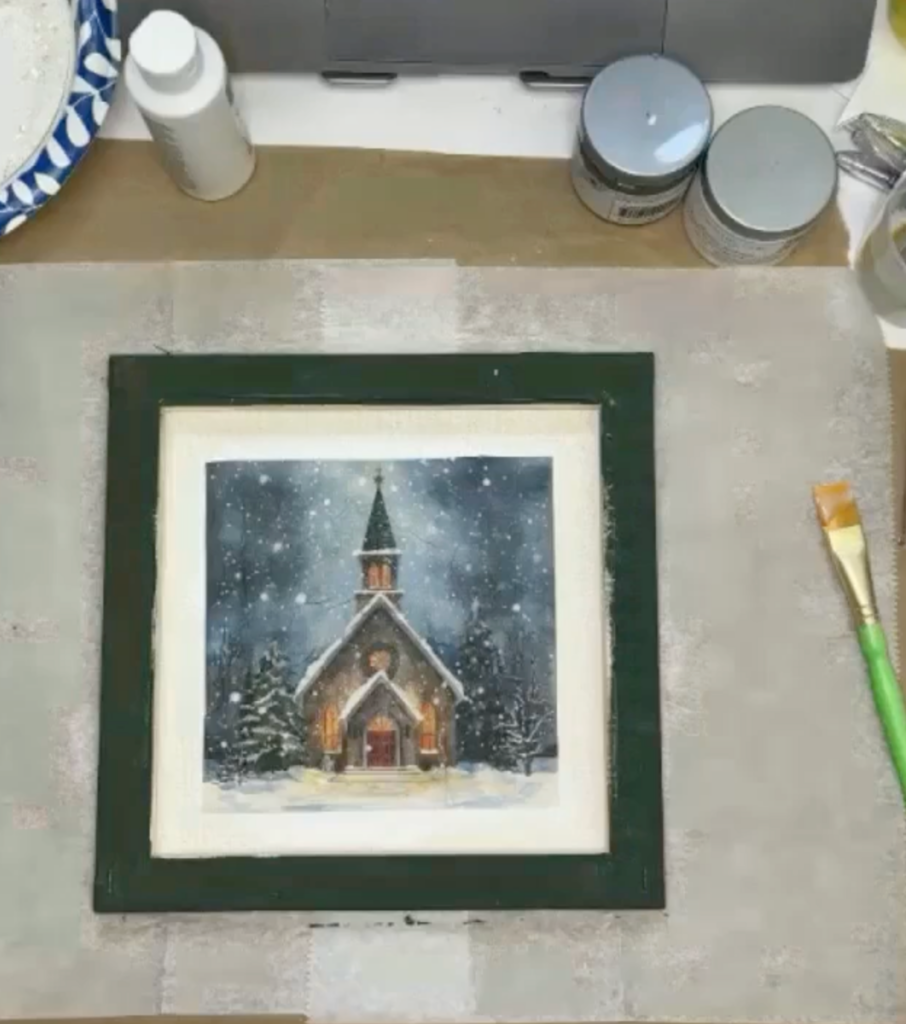
Step 2: Prep the Canvas
Use a deep green (I used Hollow Hill) and paint anywhere the canvas will show around the final design. A single coat is fine – this is mostly about giving the canvas a polished “framed” look.
Flip your canvas so you’re working on the back side (this becomes the front of the finished piece).
Since the back of a canvas is often a natural off-white/cream color, I added a quick swipe of white paint in the center area where the napkin will go. This helps the snowy parts of the napkin look bright instead of dull or beige. Dry that white paint with a heat tool or let it air dry.
Step 3: Mod Podge the Church Napkin to the Canvas
Cut out the square section of the napkin that includes the church scene. Remove the extra napkin plies until you’re left with the top printed layer only.
Brush Mod Podge onto the canvas where the napkin will sit, then gently place the napkin down. Once you’re happy with the placement, use plastic wrap to smooth it from the center outward. This helps prevent wrinkles and keeps the delicate tissue from tearing. Let it dry until it feels mostly set, then add a light Mod Podge topcoat to protect it.
Step 4: Add Loose Faux Snow While the Mod Podge Is Wet
To create a dimensional winter scene, I added faux snow in strategic spots – mostly on the ground and a little on the rooftop areas. Add a small swipe of Mod Podge where you want snow, sprinkle faux snow on top, and lightly tap it into place. If needed, use a clean brush to gently push snow where you want it to stay. Tap off the excess when you’re done. Set the canvas aside to dry.
Step 5: Napkinize BOTH Sides of the Cardstock (Iron-On Method)
Now you’ll turn your Mod Podge-coated cardstock into a double-sided decorative sheet – this is the key to my easier busted canvas method.
Shiplap side:
Lay your shiplap napkin on one side of the cardstock, line up the corners, cover with parchment paper, and iron on the highest setting with no steam. The heat reactivates the Mod Podge and “melts” the napkin into the paper.Trim off excess napkin edges.
Burlap side:
Flip the cardstock and repeat the process with the burlap napkin on the other side. Now you have cardstock that’s shiplap on one side and burlap on the other – perfect for busting and curling.
Step 6: Add the Cardstock to the Canvas
I trimmed my finished cardstock down from 10×10 to about 9.5×9.5, so a thin border of the painted canvas shows around the edges. This gives the final piece a clean, framed look and hides the canvas staples. Place your cardstock (shiplap side facing up, burlap side down) on the canvas and glue it down. I used Fast Grab Tacky Glue and added a few dots of hot glue, so it holds immediately while the tacky glue sets. Press it down well. Any glue that squishes out will dry clear.
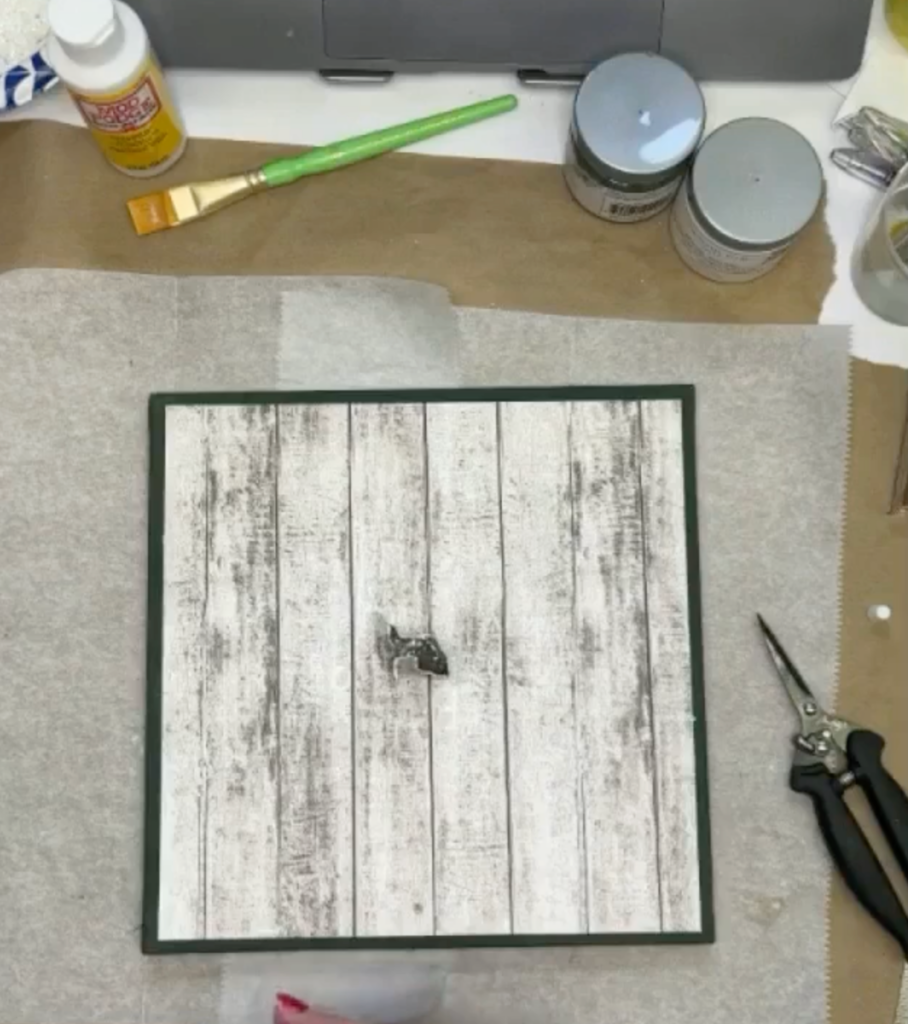
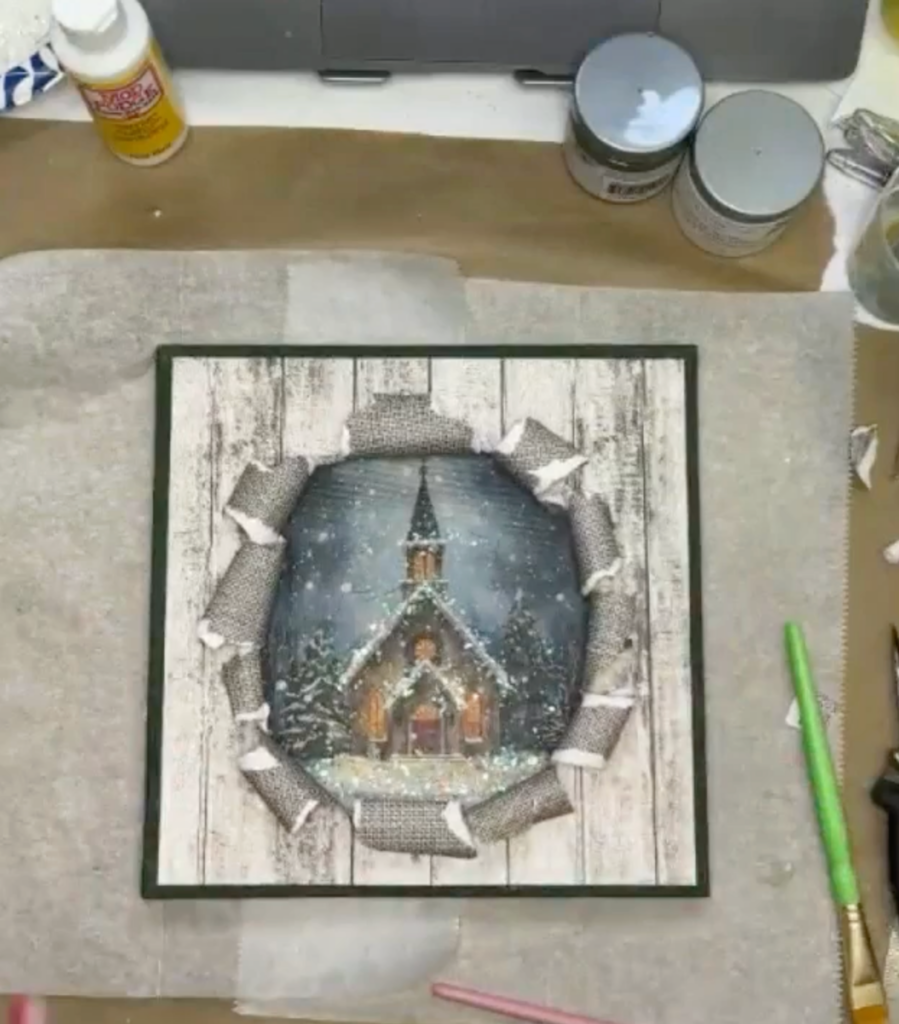
Step 7: Create the “Busted” Opening
This is the fun part! Decide which side you want to show when you curl back the paper. I chose burlap as the underside because it feels more natural to curl like fabric.
Make your first “bust” by gently stabbing a small hole near the center using scissors. Once you can get your fingers through, begin tearing outward. Tear slowly and keep checking your focal image so you don’t expose the edges of the napkin square. The goal is to reveal the church scene while keeping the napkin edges hidden. If a tear gets too long or messy, just tear it shorter. This is a forgiving technique.
Use a paintbrush handle, pen, or marker to roll the torn edges back. Curl a section, add a small dot of hot glue under it, and hold it down for a second until it sets. Work your way around the opening, curling and gluing as you go. This is where the busted canvas gets that gorgeous dimensional “rolled back” look. Use a heat tool at the end to remove hot glue strings.
Step 8: Add Finishing Touches
If you want extra winter magic, add Stickles to snowy dots, the roofline, trees, and even window areas. This step is totally optional, but it adds a pretty shimmer when the finished piece catches the light.
I also took a frosted greenery pick and curved it around the opening like a wreath.
I trimmed pieces as needed, tucked sprigs into the rolled paper edges, and used hot glue to secure everything. Keeping the greenery flowing in one direction helps it look like a true wreath shape.
Add a bow using twine, jute, or ribbon. I kept it natural and rustic to match the burlap and shiplap look. Then I added a simple accent like a metal star ornament and a small pinecone in the center of the bow for a cozy, farmhouse finish. You can also add snowflakes, mini ornaments, or other small embellishments from your Christmas stash.
To make the church look like it’s truly sitting in snow, tuck a small amount of polyfill at the bottom of the opening. Once it’s in place, dab Mod Podge onto the polyfill with a brush (just “plop” it in spots), then sprinkle faux snow over it. Let it dry before pressing or shaping it. This adds the prettiest finishing touch and really sets the scene!
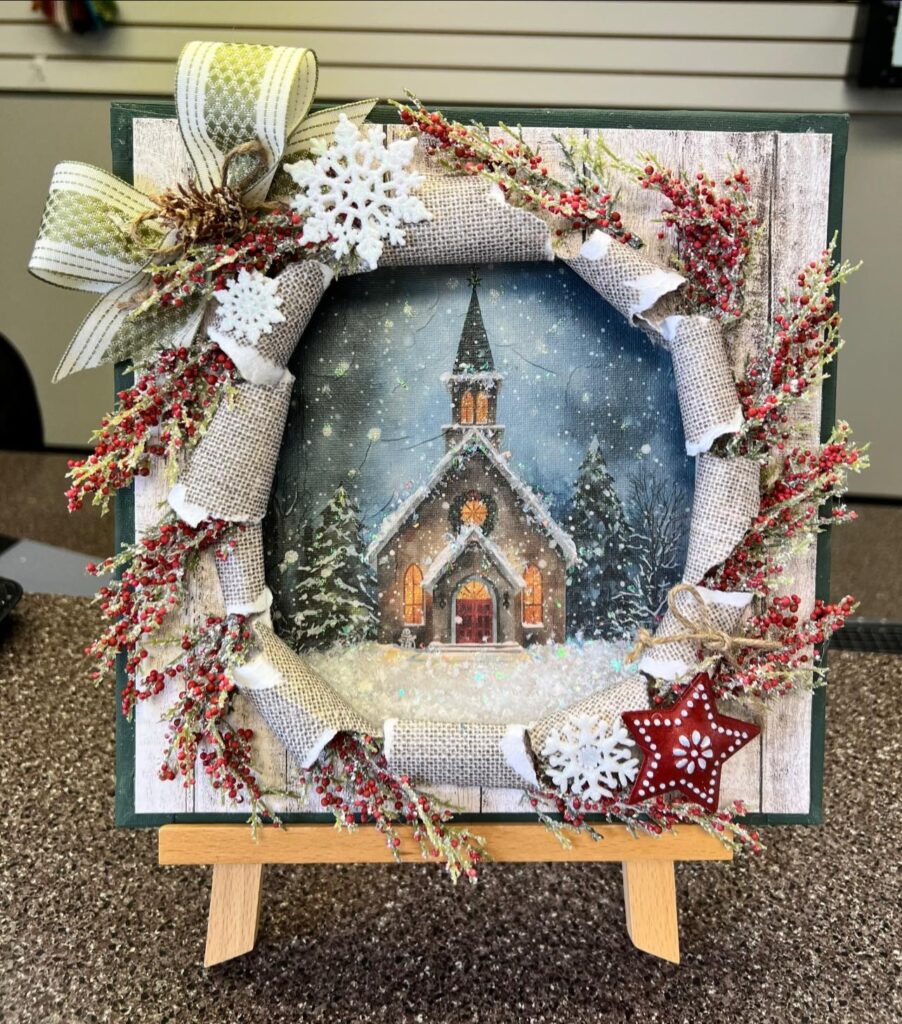
Once everything is dry, you’ll have a gorgeous winter church busted canvas that works for Christmas AND can stay out all winter. Display it on a mini easel, shelf, mantel, or riser. The dimension is stunning in person and makes the project feel extra special, especially as a gift.
Watch the full replay here!Want more napkin art projects like this? If you loved this technique, you’ll love learning inside the Napkin Club, where I teach napkin art projects, creative techniques, seasonal crafts, and tons of inspiration using napkins in fun, unexpected ways. Join the Napkin Club here and craft along with us!


0 Comments