


Supply List:
- Fall Fabric Remnants
- Styrofoam Cones
- Scarecrow Head Picks (Dollar Tree)
- Pennies
- Rubber Bands
- Fabric Scissors
- Jute Twine or Ribbon
- Fall Florals/Berries
- Hot Glue Gun
Looking for a sweet and simple fall craft to make with your grandkids or as part of a weekend DIY session? This no-sew standing scarecrow is not only easy to make – it’s affordable, customizable, and downright adorable. Using fabric scraps, Dollar Tree finds, and a little creativity, you can create a standing scarecrow perfect for your fall decor or table centerpiece.

Step 1: Weight the Base
Flip your cone over and glue three pennies to the bottom using hot glue. This will help add a little heft to your scarecrow so it stands tall without toppling over. Since the foam is lightweight, this is a quick and easy way to stabilize your project without any fancy tools.
Step 2: Attach Fabric to Cone
Place your foam cone in the center of a square of fabric. Add a dab of hot glue to the pennies on the base and press the fabric down to adhere. Next, gently fold up the four flat sides of the fabric (not the corners) and glue them in place near the top of the cone.
Once your sides are glued, gather the four corners and pull them up to create a gathered effect at the top of the cone. Fold in any raw edges and smooth the fabric with your fingers. It should resemble a ruffled dress or pumpkin shape when gathered properly.
Step 3: Secure with a Rubber Band
Wrap a rubber band around the gathered fabric to hold it snugly in place. You should place the band slightly below the top of the cone so that the gathered fabric poofs above it. Once it’s secure, trim the top of the excess fabric about ½–¾” above the rubber band, leaving a little “ruffle” edge for charm.
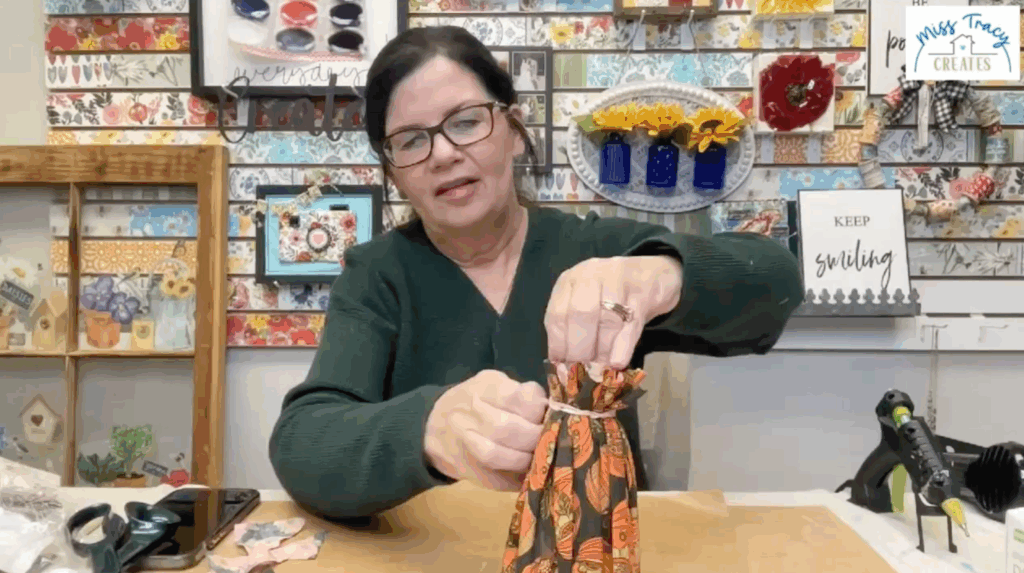
Step 4: Cover the Rubber Band
To hide the rubber band, wrap jute or a wide piece of ribbon around it several times and tie in a knot or bow. Add a dab of hot glue under the knot to keep it secure. You can even fray the ends of your jute or tie them off with little knots for a rustic tassel effect.
Step 5: Add the Scarecrow Head
Take your scarecrow pick and snap off part of the wooden dowel to shorten it. Push the stick into the top center of your foam cone, adjusting as needed so the head sits upright and looks balanced. If you’d like to add some extra flair, tuck in a faux sunflower, leaf, or raffia bow right at the neckline.
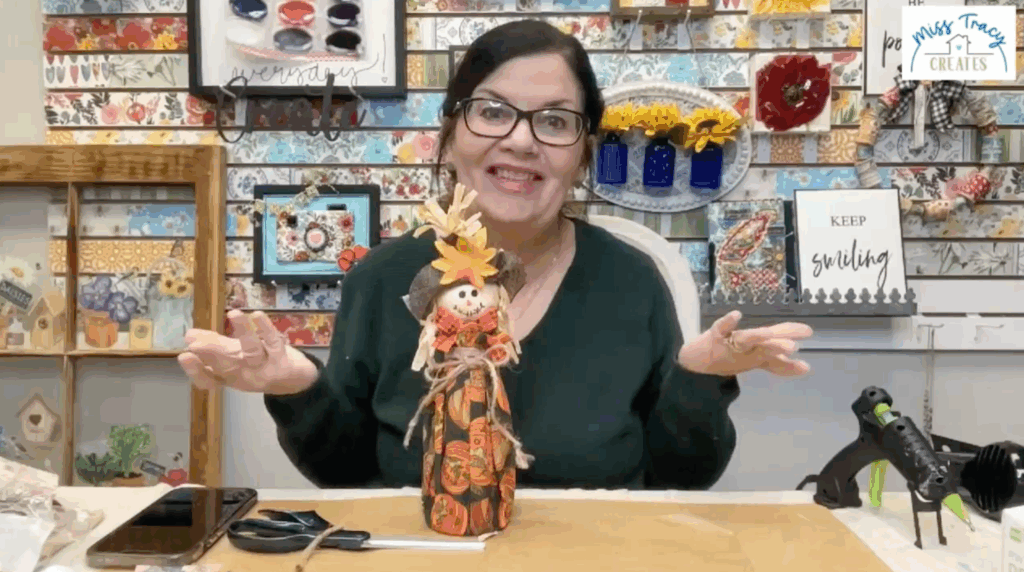
Step 6: Embellish with Fall Touches
This is where your scarecrow really comes to life! Use hot glue to add little faux berries, leaves, sunflowers, or even mini pumpkins around the neckline or hat. You can also cut arms from the leftover stick and insert them into small slits in the fabric on either side of the cone. Get creative – make it festive, make it fun!
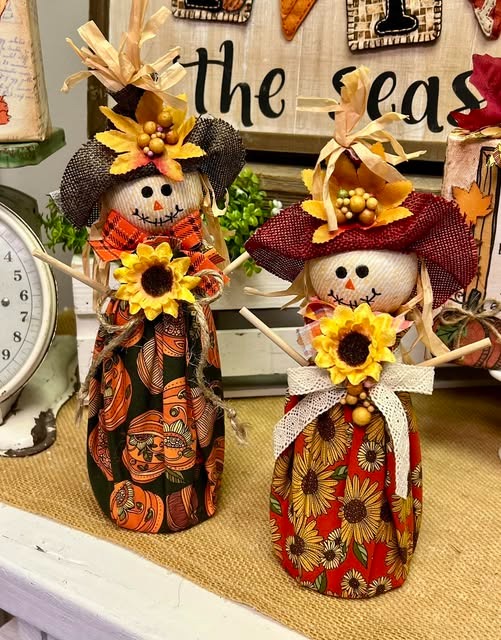
Step 7: Make a Whole Family
Repeat the process using cones of different heights and fabric patterns to create a whole scarecrow family. Cut your cones down with scissors or a craft knife for a shorter scarecrow body. Use contrasting hats, ribbons, and embellishments to give each one their own personality. These make darling centerpieces, shelf decor, or gifts for teachers, neighbors, or Thanksgiving hosts.
Watch the full replay here!If you loved this project, you’ll love the Fabric Fan Club – a creative community full of seasonal projects, exclusive kits, and monthly tutorials that celebrate the joy of stitching and crafting with fabric. Join the waitlist here!


0 Comments