


Supply List:
- Nativity Snow Globe Napkin Set
- 6 x 6 Chunky Canvas
- Tide Pool Country Chic Paint
- Mod Podge Matte
- Plastic Deli/Bakery Sheets
- Uniball Gold and White Gel Pens
- Stickles
- Ribbon/Twine
- Snowflake or Embellishment
- Greenery
- Hot Glue
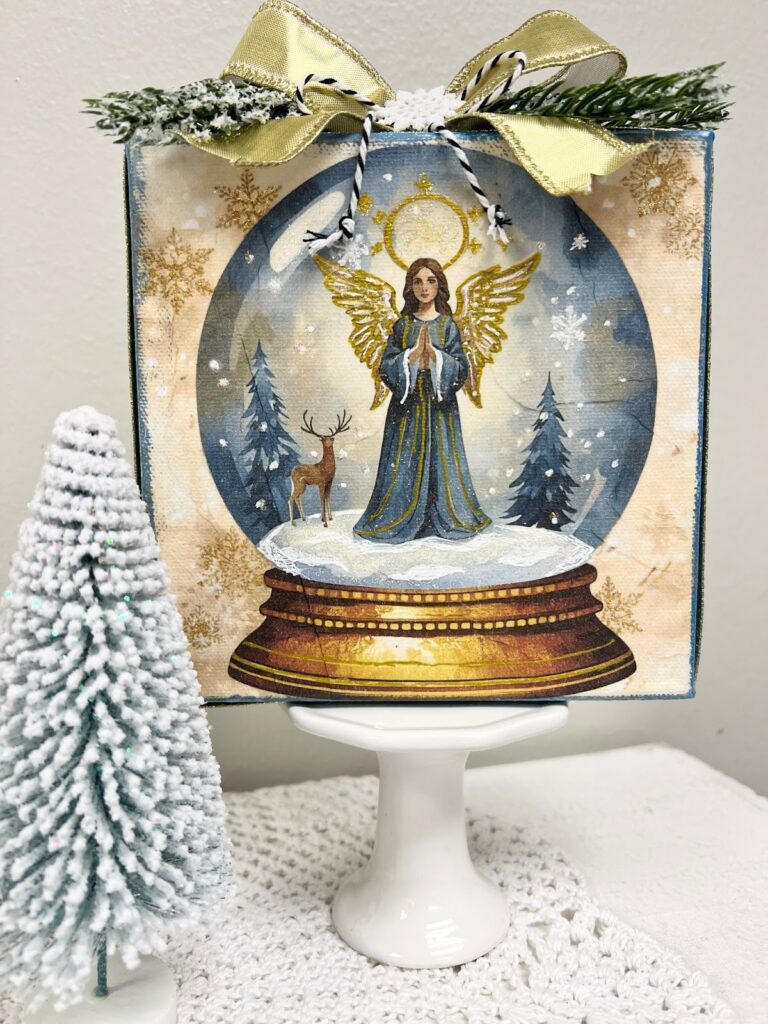
Looking for a faith-based Christmas craft that’s meaningful, beautiful, and beginner-friendly? I’m showing you exactly how to create a stunning Nativity Snow Globe Canvas using my brand-new Nativity Snow Globe Napkin Set. This is a quick and easy Mod Podge napkin art project that transforms into a heartfelt handmade Christmas gift – perfect for neighbors, friends, teachers, and anyone who has been an “angel” in your life.
This step-by-step tutorial walks you through painting, napkinizing, sealing, detailing, embellishing, and adding sparkle to create a keepsake Christmas canvas you’ll display year after year.
Step 1: Prepare Your Napkin for Decoupage
Start by cutting out the angel snow globe image, leaving enough tissue around the edges to extend slightly past the canvas. Because each napkin in this set is 3-ply, remove the two white backing layers until only the top printed tissue remains. This ensures the artwork applies smoothly and the colors stay vibrant. Napkin tissue is sheer, so keeping a white background on your canvas will help your snow globe design glow.
Step 2: Paint the Canvas Sides
If you want a clean, polished look, paint the sides of your chunky canvas using Tidepool chalk paint – a shade that perfectly matches the snow globe artwork. Painting the edges adds depth and gives the canvas a finished, professional look. Let a bit of the color sweep onto the front edges to create a soft halo under the napkin, then allow the canvas to dry fully.
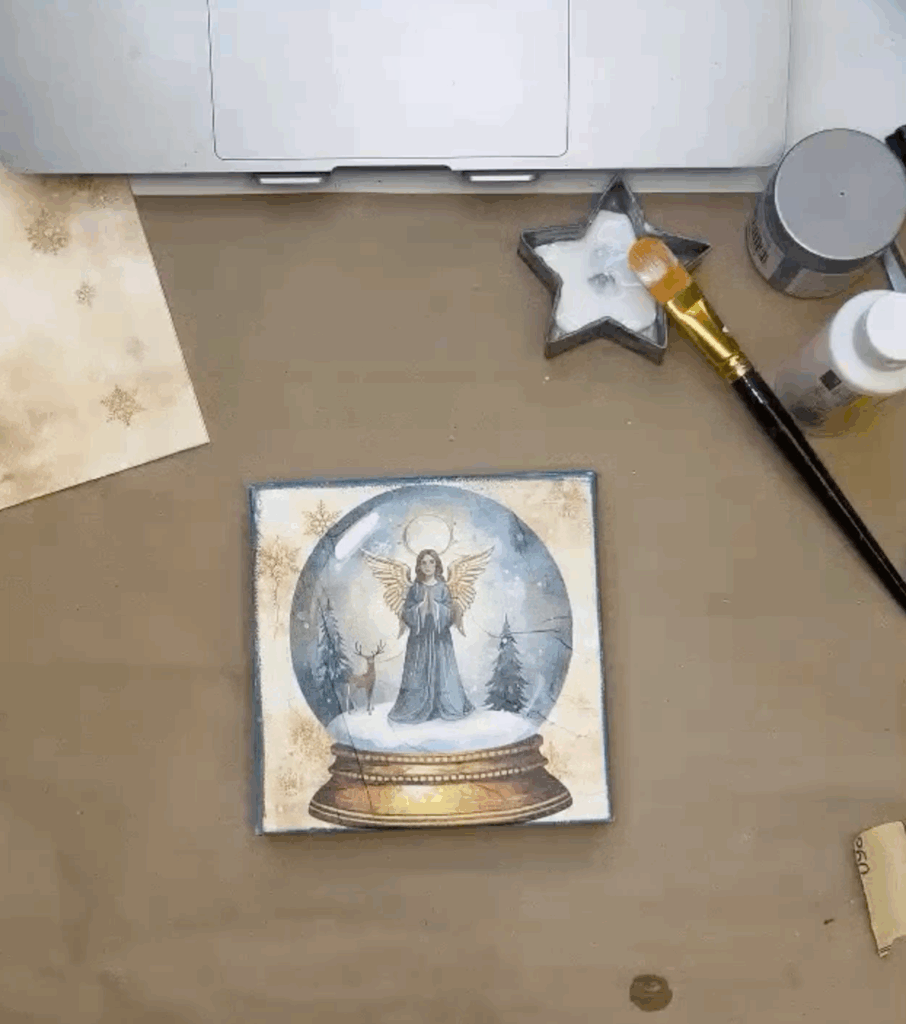
Step 3: Apply the Snow Globe Napkin with Mod Podge
Brush a full, even coat of Mod Podge Matte onto the front of the canvas. Carefully place the napkin onto the wet Mod Podge, starting from the center and gently smoothing outward. Using deli-sheet plastic or non-stick wrap prevents tearing and helps remove wrinkles. Once adhered, allow the napkin to dry completely before moving on.
When the napkin layer is dry, sand all four sides of the canvas with downward strokes. This removes the excess napkin and creates perfect decoupage edges. Lightly distress the corners if you’d like – the white canvas peeking through adds a vintage snowy feel that fits perfectly with a nativity snow globe design.
Brush a topcoat of Mod Podge over the entire canvas front and sides. This seals the artwork, protects the tissue, and prepares the surface for pen work, doodles, and glitter. A heat tool works wonderfully if you’re an impatient crafter and want to move on to the next step quickly.
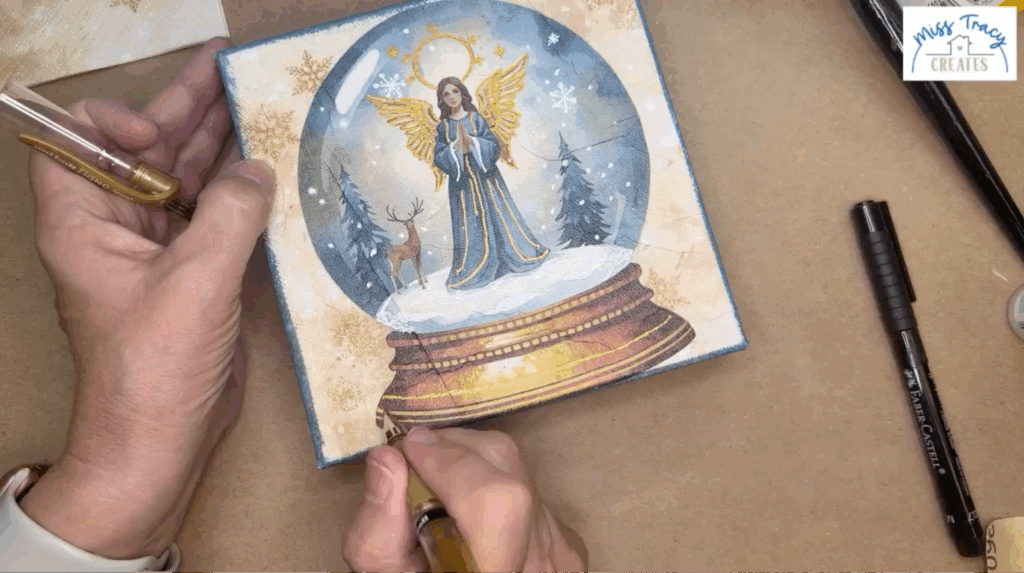
Step 4: Add Pen Work
Now the magic begins! Using a Uniball Signo gold pen, trace the angel’s halo, wings, robe accents, stars, and gold details to add warmth and metallic shine. Then, with a Uniball Signo white pen, brighten the snowflakes, add tiny snow dots, outline snowy drifts, and add white highlights to the wings.
Use the white pen to draw loose curved lines along the bottom of the snow globe to create soft, dimensional snowdrifts. These lines become even more beautiful after the Stickles go on. Don’t overthink it – simple textured strokes look stunning once everything is layered.
Step 5: Add Stickles for Holiday Sparkle
Apply Stickles glitter glue anywhere you want the canvas to shimmer. Add it to the halo, stars, snowflakes, robe, and glass-like highlights of the snow globe. In the snowdrift area, add Stickles only between the white pen lines – this creates a layered, dimensional effect that looks magical under holiday lights.
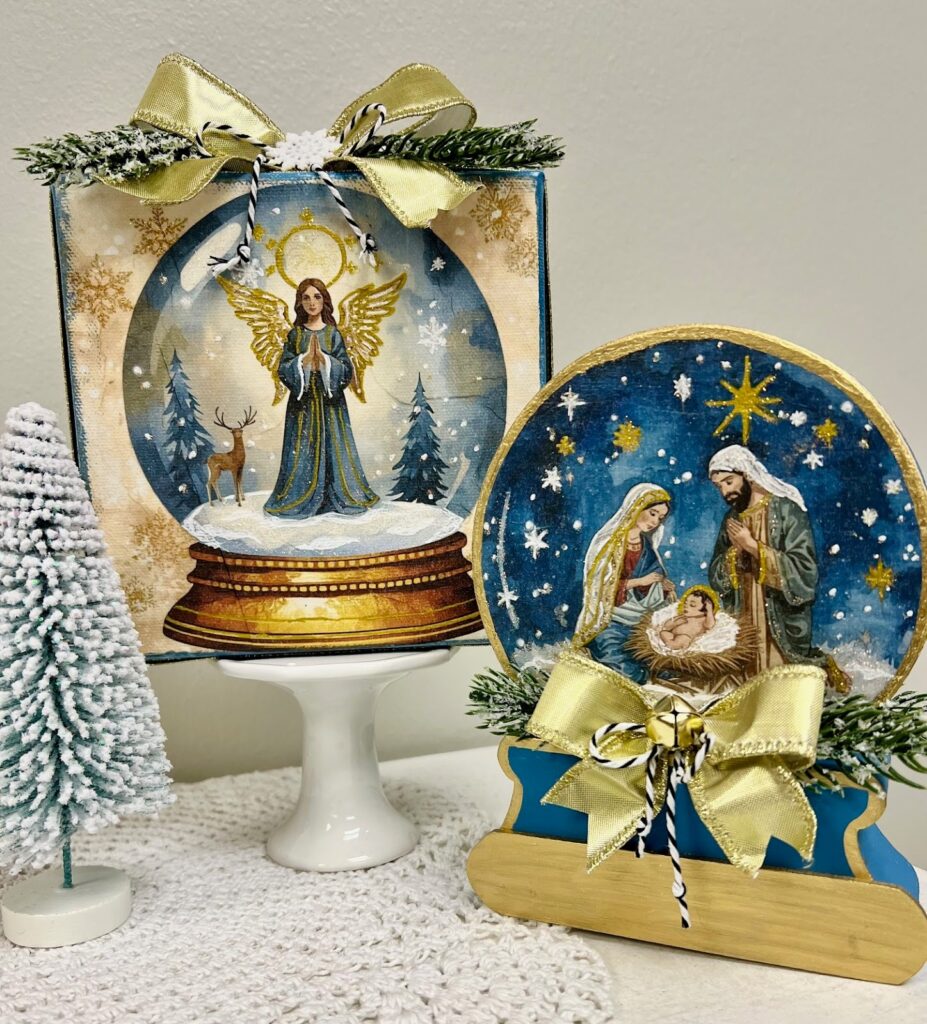
Step 6: Add Ribbon, Greenery & a Topper
Wrap a piece of wired gold ribbon around the top edge of the canvas and secure it with hot glue. Create a Tribute-style bow with the same ribbon, tie it off with black-and-white twine, and “fluff” it. Tuck small greenery sprigs under the loops for a festive finish. Finally, add your topper – a gold jingle bell or a pretty snowflake – to complete the look.
For an ultra-special finishing touch, place a battery-operated tealight behind the canvas. The light shines softly through the napkin tissue, making the snow globe glow beautifully at night. It’s a small detail that elevates this craft into a truly magical piece of faith-based Christmas decor.
If you loved creating with this Nativity Snow Globe napkin, you’re going to adore being part of The Napkin Club. Every month, members receive a curated bundle of beautiful napkins, exclusive tutorials, creative inspiration, and a fun community that encourages you to keep crafting all year long. Come napkinize with us – it’s such a joyful place to create! Join The Napkin Club here!


0 Comments