


Supply List:
- Seasonal Napkin Art “Advice” Kit (Christmas Tree or Snowman)
- Mod Podge Matte
- Deli/Bakery Plastic Sheets
- Heavy Duty Scissors or Wire Cutters
- Cranberry Sauce Country Chic Paint (or color of your choice)
- Hot Glue
- Stickles
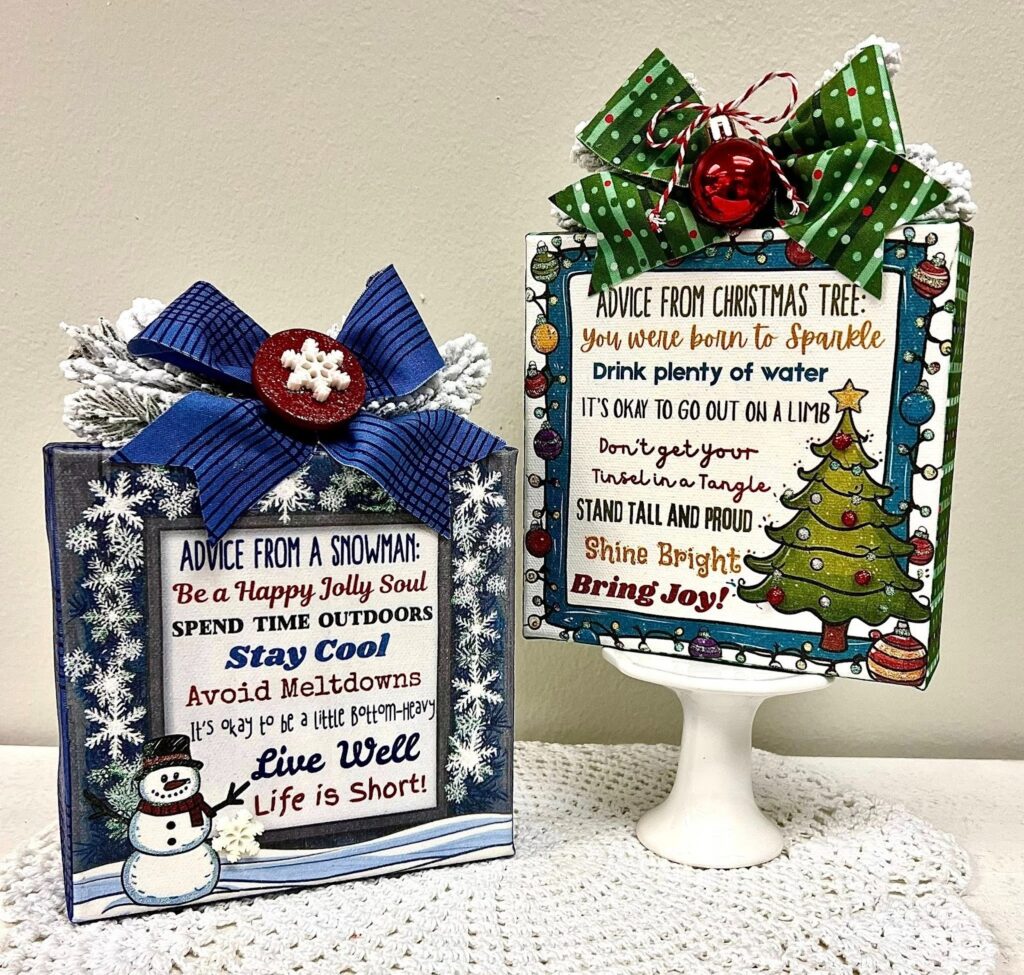
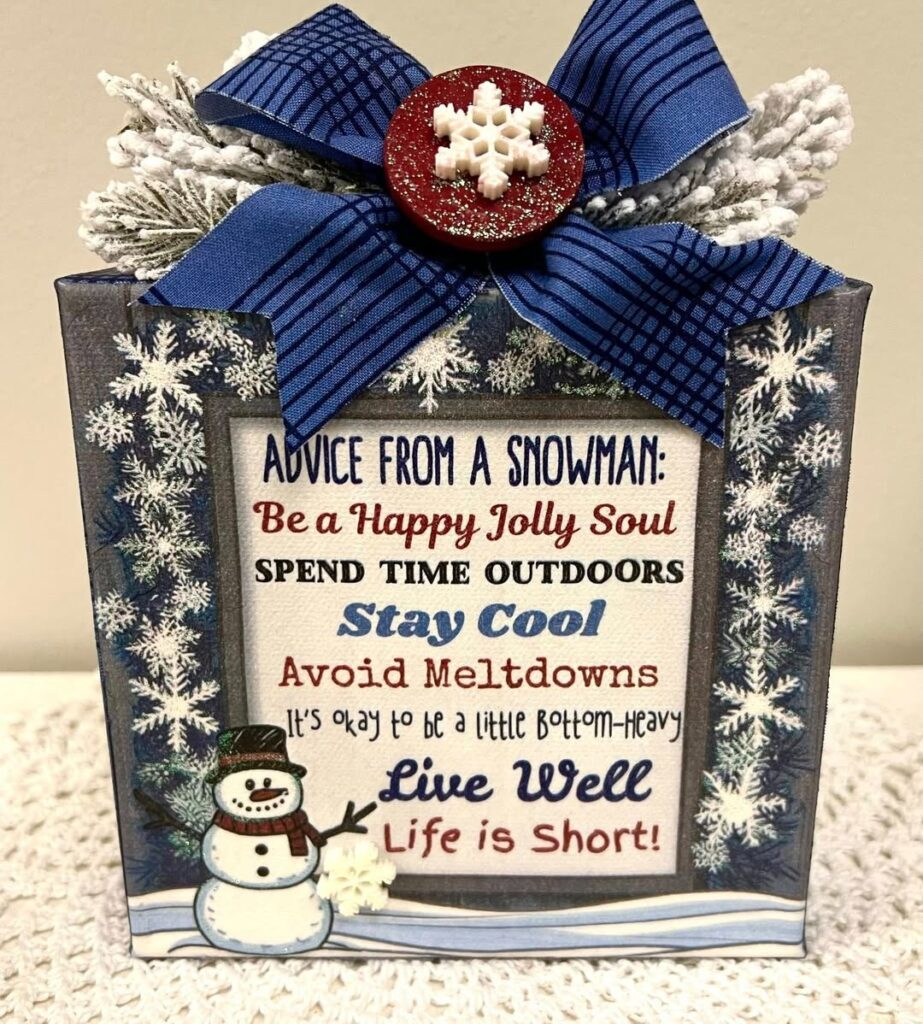
If you’re looking for a quick holiday project, you’re going to love these! I’m sharing how to make two adorable Advice from a Snowman and Advice from a Christmas Tree canvases. Each one features one of my exclusive napkin designs – created with cute words of wisdom you won’t find anywhere else! Whether you make one for yourself or gift one to a friend, these 6×6 canvases are sure to bring smiles and sparkle all season long.
Each kit includes everything you need to make one festive 6×6 canvas – the printed napkin, chunky canvas, coordinating fabric strip, snowy branches, and embellishments. You’ll just need a few extra supplies from your stash, like Mod Podge Matte, a paintbrush, scissors, and a glue gun.
Step 1: Prepare Your Canvas and Napkin
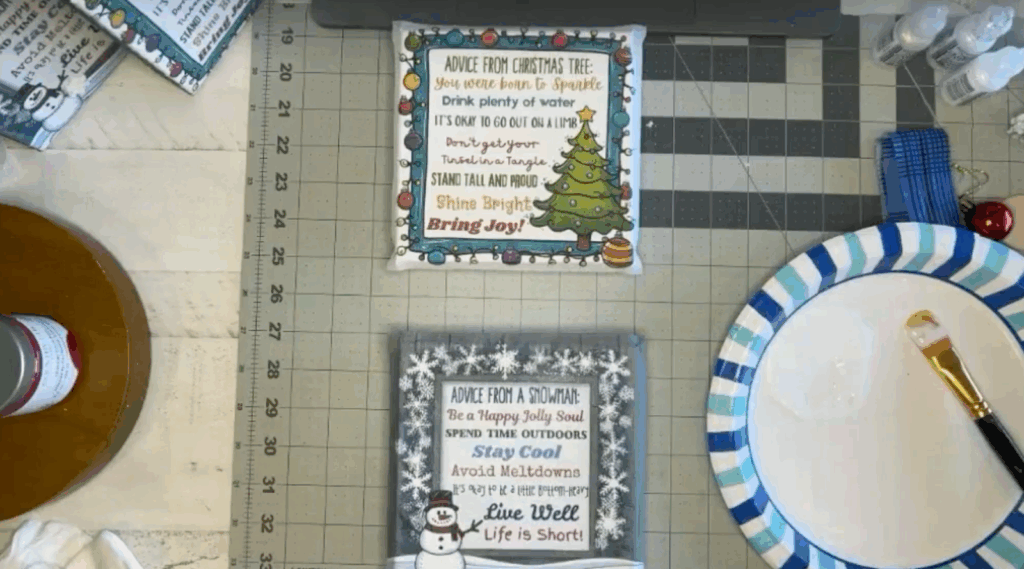
Separate the napkin layers using my signature “lick and stick” method – lightly touch your fingers to your tongue (or a dab of Mod Podge) and rub to separate the plies. Each napkin has three layers, so remove the bottom two, keeping only the top printed ply for decoupage.
Brush on a healthy, even coat of Mod Podge Matte over the front of the canvas. Starting at the top, gently place your napkin down and smooth it using a plastic deli wrap sheet or piece of cling film. Work from the center outward to avoid bubbles and wrinkles.
If the napkin slightly overlaps the edge (it’s 6¼” square), you can either sand off the excess once dry or Mod Podge it down around the sides.
Step 2: Seal with a Top Coat
Once the napkin layer is dry, brush on a thin top coat of Mod Podge Matte to seal and protect the tissue. This step helps prevent the napkin from absorbing moisture or ink later and keeps it durable. Allow everything to dry completely before moving on.
Step 3: Add the Fabric Border
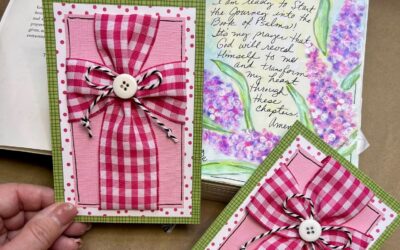
Each kit includes a coordinating strip of fabric cut to the perfect width to wrap around your canvas edges – green with polka dots for the Christmas Tree, and soft blue tones for the Snowman.
Cut the long fabric strip in half at the fold. Set one piece aside for your bow and use the other to wrap the sides of the canvas. Apply Mod Podge around the edges and press the fabric directly into it, smoothing as you go. Work one side at a time and continue wrapping until all edges are covered.If you’re short by an inch or two, trim a small piece from your extra strip to fill the gap. Mod Podge will hold it perfectly in place.
When finished, brush another coat of Mod Podge over the fabric to seal it and prevent fraying. It will look milky at first but dries clear.
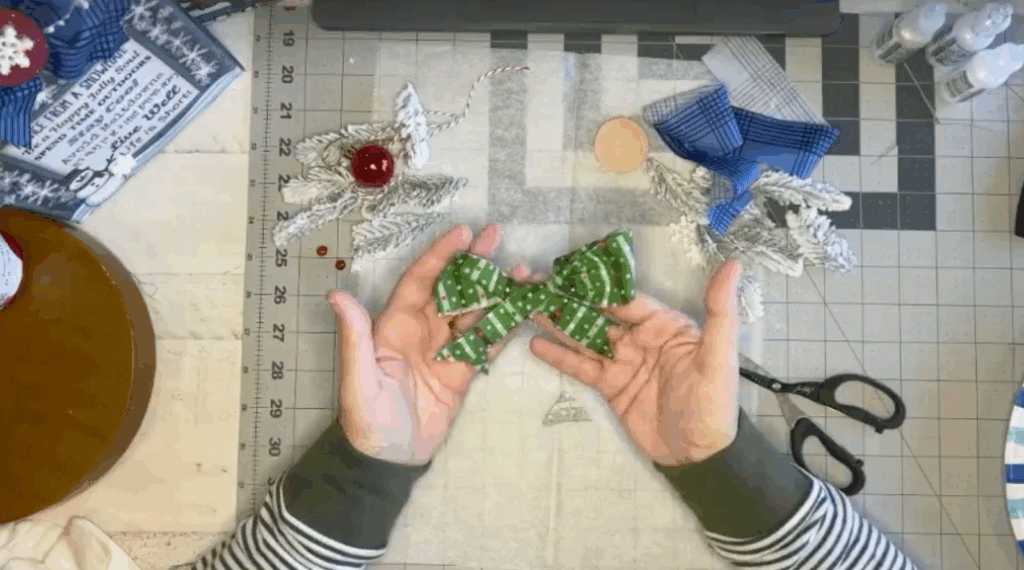
Step 4: Create the Fabric Bow
Use your remaining piece of fabric to create a simple looped bow. I used a fun technique shared by my friend Susan, tying the bow “inside out” so the right side of the fabric shows on the finished knot.
Start with the fabric wrong side out, make two loops (“bunny ears”), and tie them together just like a regular bow. Gently flip the loops right-side out and adjust until you’re happy with the shape. Trim the ends into flags for a polished look.
Repeat for both canvases using your coordinating fabrics.
Step 5: Add Embellishments
Each kit comes with a few special finishing pieces:
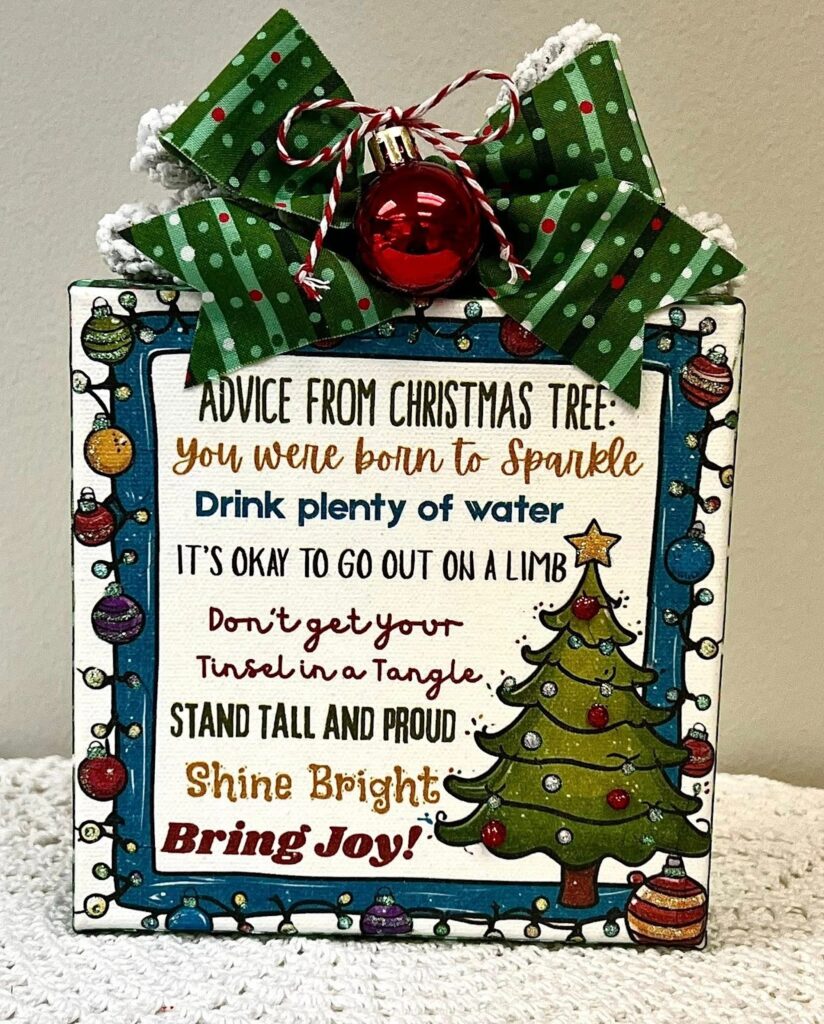
- For Advice from a Christmas Tree: a red shatterproof ornament, baker’s twine, tiny red glitter balls, and snowy branches.
- For Advice from a Snowman: a wooden disc, resin snowflakes, and snowy branches.
For the Christmas Tree Canvas:
Cut the snowy branch pick into six smaller sprigs. Hot glue two longer ones in the back and four shorter ones around the bow to create a full, festive topper.
Tie a small red-and-white baker’s twine bow around your ornament and hot glue it in the center of the bow. Cut the tiny glitter balls in half (for a flat surface) and glue them onto the printed ornaments on the tree for extra dimension.
For the Snowman Canvas:
Paint your small wooden disc in red (I used Country Chic Paint in Cranberry Sauce). Glue the larger resin snowflake onto the disc, then attach it to the center of your bow.
Add your snowy branches just like before, arranging them to lift the bow slightly. Place a second, smaller snowflake directly on the canvas near the snowman for an extra frosty touch.
Step 6: Add Sparkle with Stickles
Finish both canvases with your favorite clear Stickles – Diamond, Crystal, or Unicorn are perfect choices. Apply the sparkle over ornaments, snowflakes, or anywhere you want shimmer. You can squeeze directly from the bottle or use a small brush for detailed areas. For any stray hot glue “spider webs,” run a quick pass with your heat tool to make them disappear.
These sweet holiday canvases remind us that simple crafts can spread a lot of joy – both while creating and when gifting. Whether you make one for yourself or share one with a friend, you’ll love the cheerful “advice” and handmade charm of these projects!
Want More Holiday Creativity?
If you enjoyed this project, you’ll love what’s coming next in the Napkin Club! Members get access to exclusive napkin designs, monthly projects, and creative tutorials that use napkin art in new and exciting ways. Click here to learn more!


0 Comments