


Supply List:
- Snow Globe
- Snow Globe Specialty Napkin Set
- Simplicity Country Chic Paint
- Tropical Cocktail Country Chic Paint
- Scissors
- Sanding paper/sanding block
- Mod Podge Matte
- Paint Brushes
- Bakery/Deli Sheets
- Tacky Glue
- Silver Krylon Pen
- Pitt Pens
- Black Snowflake Ribbon
- Jute/Twine
- Snowflake embellishment
- Hot Glue/Hot Glue Gun
- Frosted Greenery
- Clothes pin/Chip Clip
- Crystal Stickles
Using my custom-designed Christmas snow globe napkins, we’ll create a double-sided, sparkly, and totally adorable piece that’s perfect for gifting or displaying. Whether you’re a seasoned crafter or brand new to napkin art, this project is simple, fun, and full of festive possibilities.
I’ll walk you through how to decorate a wooden snow globe surface with my snowman and gingerbread house designs, plus share tips for embellishing and sealing your project so it lasts for many Christmases to come.

Step 1: Paint Your Snow Globe Base
Start by painting all the wooden pieces. The inside of the snow globe should be painted with Country Chic Paint Simplicity — this helps your napkin art stay bright and crisp. For the base and accents, choose colors that complement your napkin design.
For my snowman snow globe, I used a tropical aqua shade for a pop of wintery color called Tropical Cocktail. Remember, blues mix well with most holiday palettes, so don’t be afraid to go bold.

Step 2: Prepare and Apply the Napkin Art
Carefully separate your napkin layers until you’re left with just the printed top layer. (The “lick and stick” method or a dab of Mod Podge on your fingers helps!)
Brush a layer of Mod Podge Matte onto the painted white section of your snow globe. Lay your napkin gently over the area, then use a piece of plastic wrap to smooth it out from the center toward the edges. Trim or sand away any excess napkin.
Repeat the process for the second side — in my case, I used the gingerbread house design, so my snow globe is reversible.
Step 3: Add Music Note Trim
For a fun border, cut strips from the music note napkin that matches your design. Apply these strips along the edge of your snow globe with Mod Podge Matte, smoothing them down with plastic wrap. You can use ribbon, rickrack, or tinsel here instead if you prefer. Finally, add another coat of Mod Podge Matte to your napkin art to seal it. Let dry.
Step 4: Accent with Metallic Paint and Pen
Use a silver, gold, or copper paint pen to outline the globe’s rim or accent pieces. This gives the project a polished, dimensional look — silver for the snowman side, gold for Santa, or copper for a warm, rustic feel.
Next, use a Pitt Pen to add some penwork to your napkin art. I’ll outline my snowman’s face and add doodle lines around the buttons and body.

Step 5: Assemble the Snow Globe
Attach the snow globe to its base using Fast Grab Tacky Glue (it holds better long-term than hot glue). Make sure it’s centered, then let it set before adding embellishments.
Step 6: Embellish for Extra Festive Flair
Here’s where you can get creative! I added:
- Snowy greenery sprigs (from a disassembled wreath)
- A ribbon bow layered with jute for texture
- A mini snowflake ornament
- Stickles glitter glue on the snow, scarf, and background for sparkle
For the gingerbread side, you could add mini candy embellishments, peppermint charms, or gumdrops.
Whether you’re making one of these DIY Christmas snow globes for yourself or giving it as a handmade gift, you’ll love how quickly it comes together and how much joy it adds to your holiday season!

I go LIVE on my Facebook page every Friday at 11 am CST for a fun and easy Craft-n-Chat Session. Come learn something new while creating something beautiful!
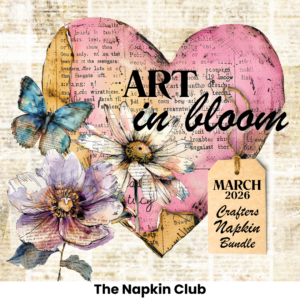
Did you love this? Join the waitlist for The Napkin Club! We ship out fresh, seasonal napkins to our members every month (many designed by yours truly!) and create gorgeous, easy-to-follow projects together in our private Facebook group. You’ll get access to live tutorials, inspiration posts, a welcoming community, and tons of crafty joy.


0 Comments