

Supply List:
- Fabric cut to 7 × 16 inches
- Embroidery needle (I like a size 7)
- Hand-stitching thread (I’m using Sulky 12-weight, 100% cotton)
- Temporary fabric glue stick
- Scissors
- Polyfill or fiberfill stuffing
- Baker’s twine or thin jute
- Hot glue gun and glue sticks
- Wool felt
- Decorative button (optional)
- Ribbon, flowers, or other embellishments (optional)
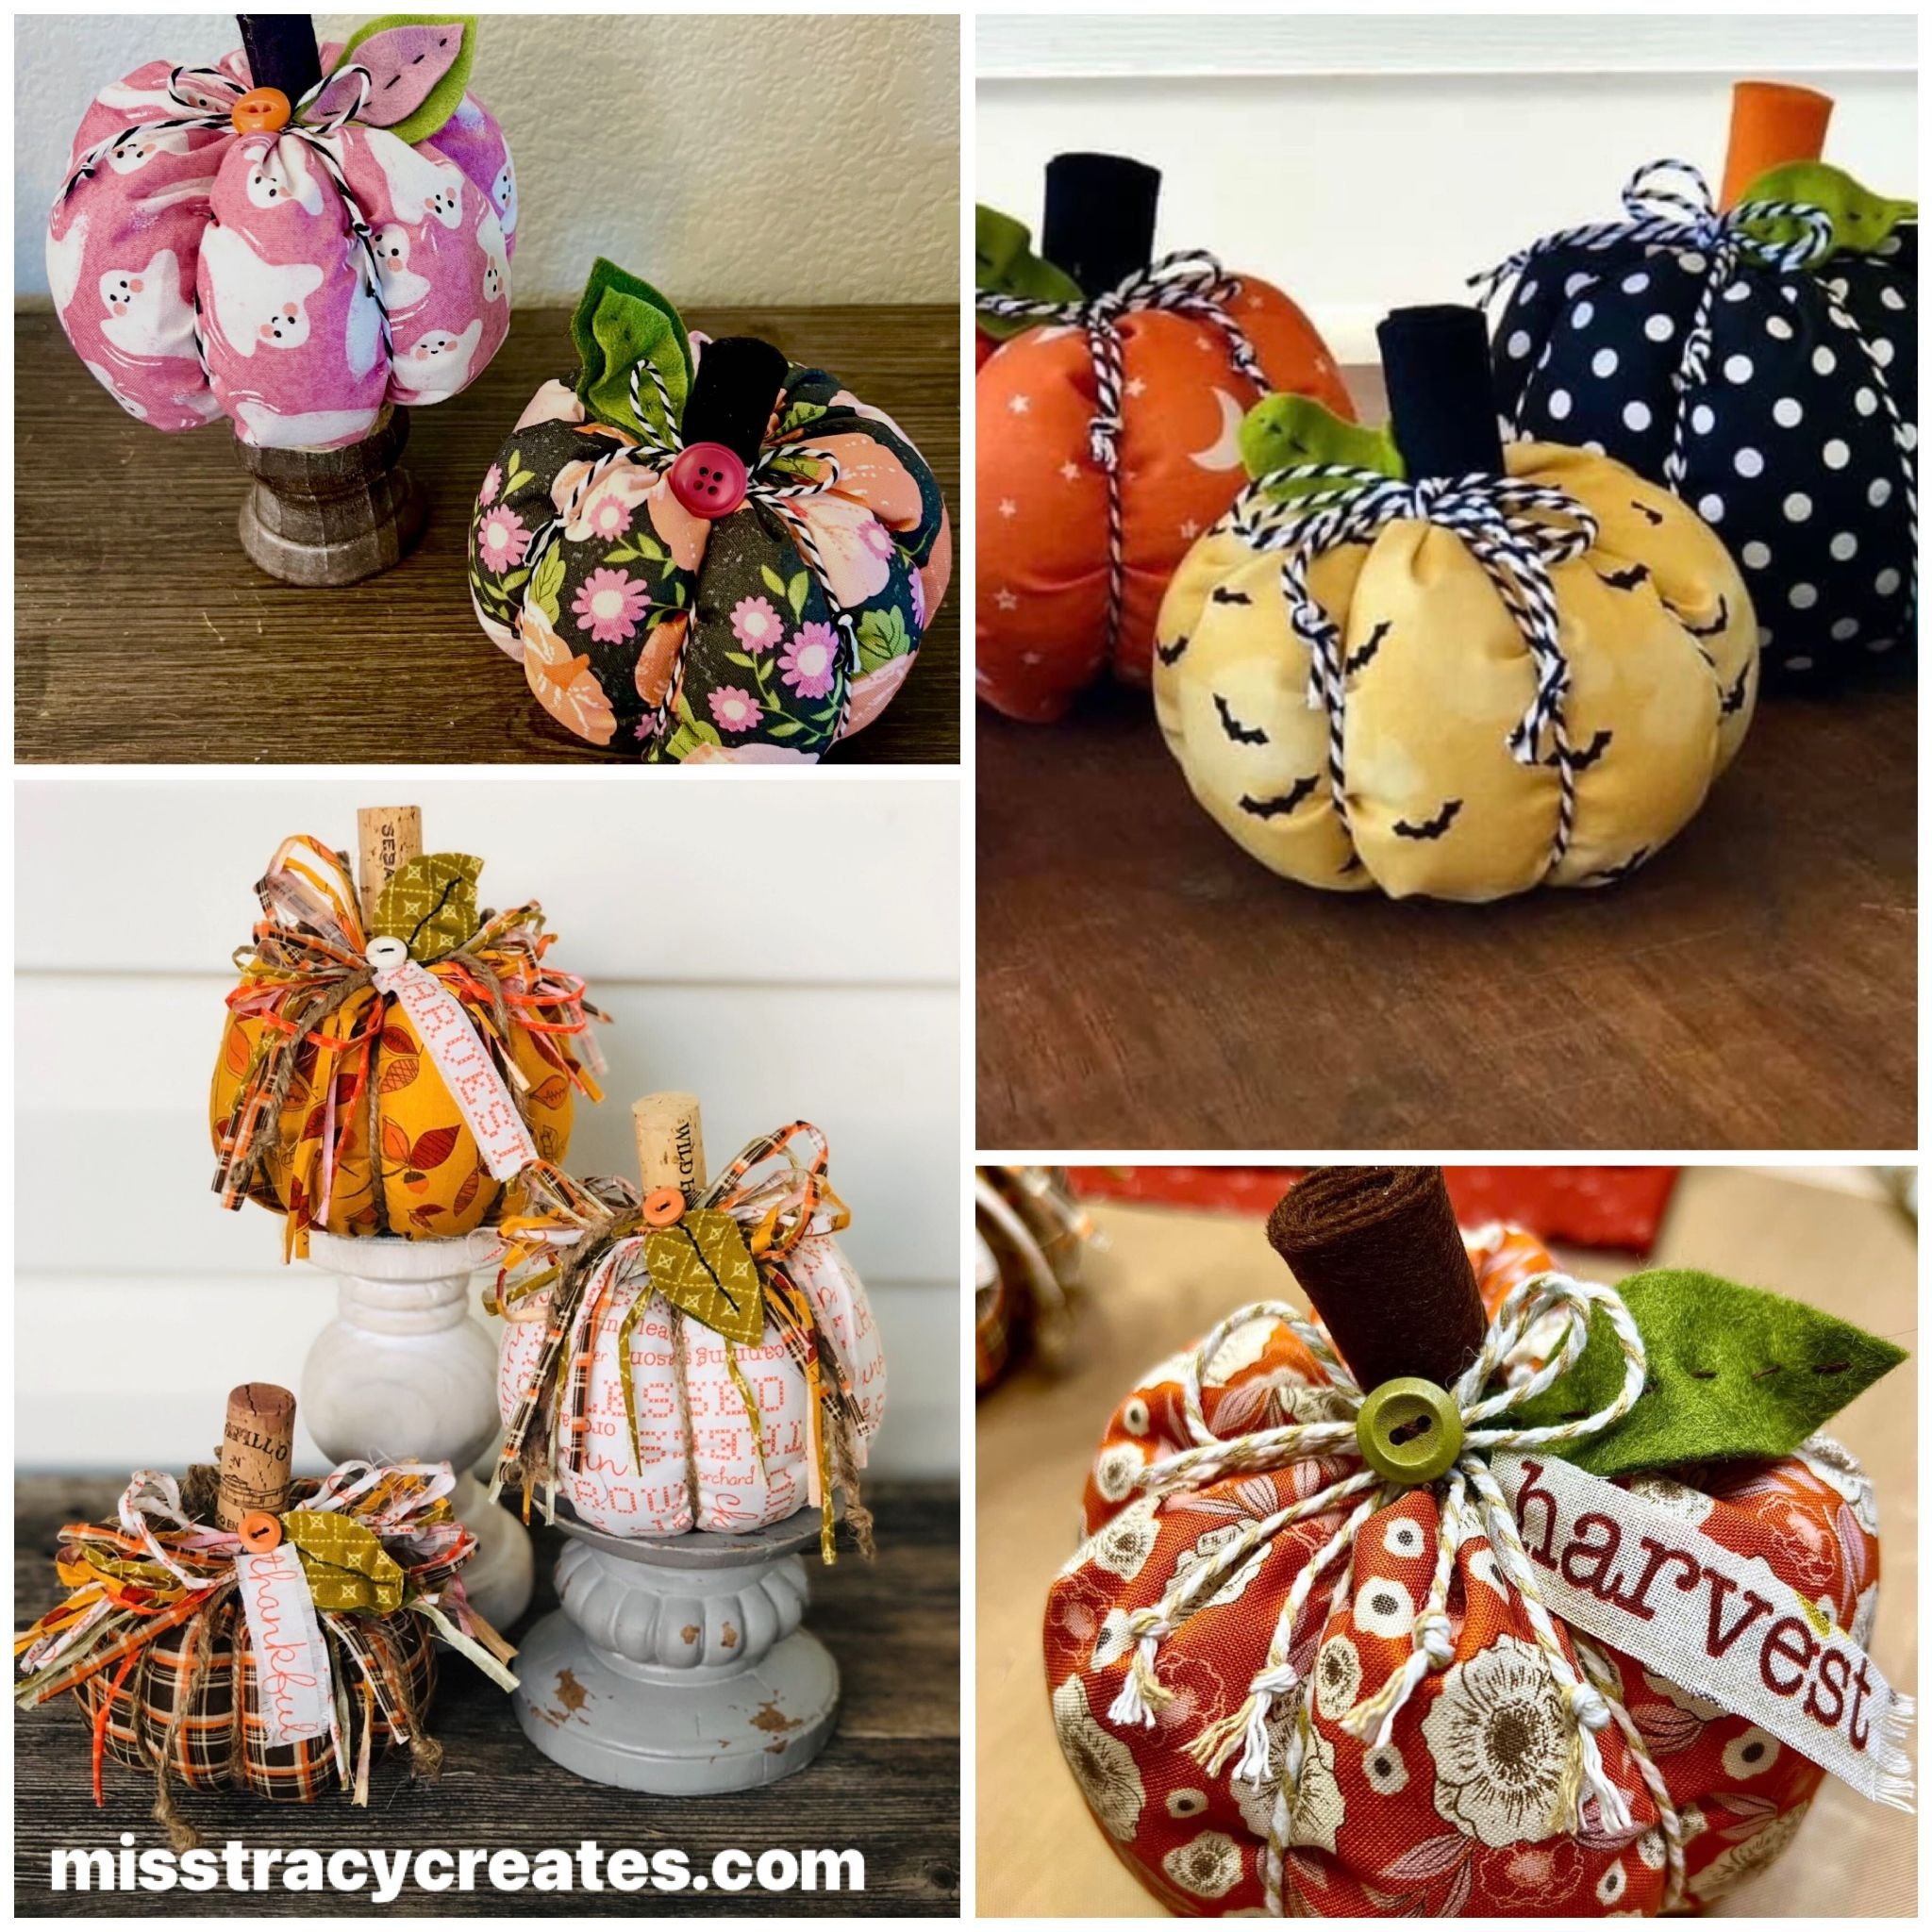
There’s just something about cute little fabric pumpkins that makes me happy! I love making these every fall, and I keep adding new ones to my collection. They’re adorable tucked into baskets, arranged on tiered trays, or displayed in little groups around the house.
Today, I’m going to show you how to make your own stuffed fabric pumpkins using a few simple hand-stitching techniques. We’ll create the pumpkin shape, add sections with baker’s twine, and finish it off with a rolled felt stem and a dimensional wool felt leaf.
And here’s the best part: You don’t need a sewing machine or perfect stitches to make these! We’re using a basic backstitch and running stitch, so even if you’re new to hand sewing, you can follow along. Grab some of your favorite fall or Halloween fabrics, and let’s get started!
Step 1: Prepare Your Fabric
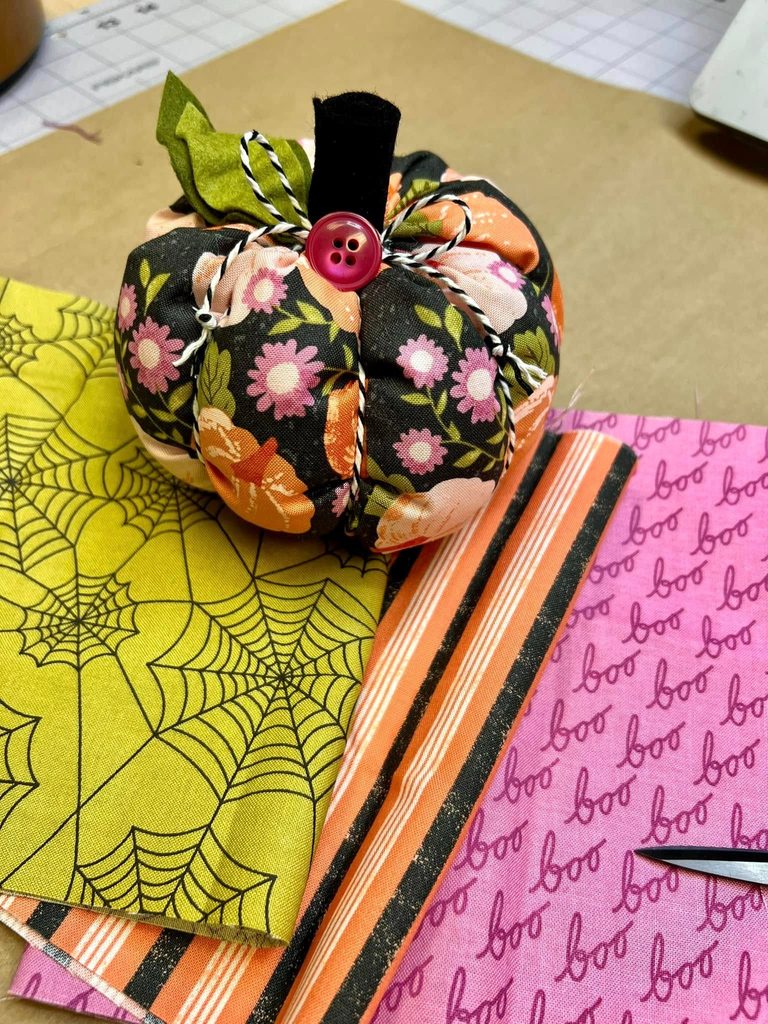
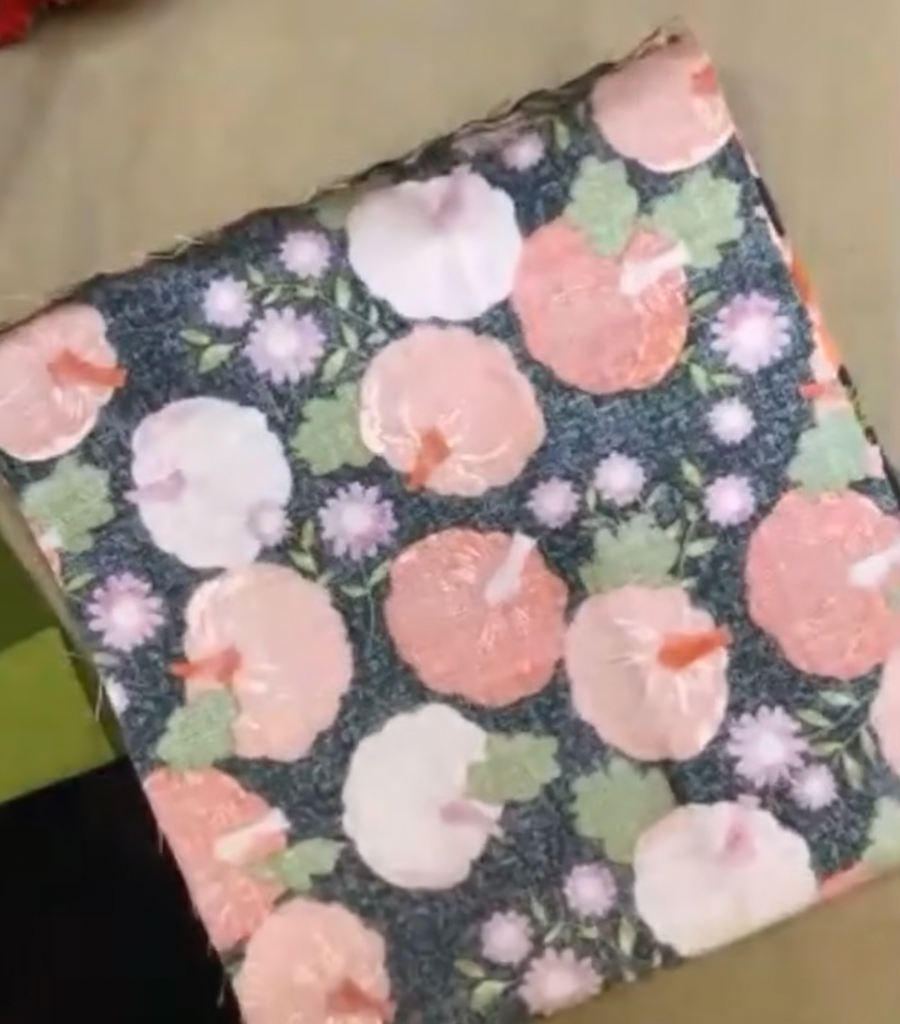
I’m starting with a piece of fabric that measures 7 inches by 16 inches. For this project, I’m using some adorable fall and Halloween fabrics, but you can choose any pattern or color you like. If your fabric has a directional print or words, make sure the design is running the correct way before you start sewing.
I’m going to bring the two short edges together, with the right sides of the fabric facing each other, to create a tube. I like to use a temporary fabric glue stick along the edge to hold everything in place while I stitch. It saves me from having to use pins, and I find that much easier when I’m hand sewing.
Step 2: Sew the Side Seam with a Backstitch
Now I’m going to stitch those two edges together using a simple backstitch.
I’m using a size 7 embroidery needle and Sulky 12-weight cotton thread. One little trick I love is to thread my needle by bringing the needle to the thread rather than trying to push the thread through the eye. I also pull my needle to the middle of the thread so I can stitch with two strands while only threading the needle once.
To make a backstitch, I’ll bring my needle through the fabric ahead of my previous stitch, then go backward to meet the stitch I just made. I’ll continue working down the entire edge until my fabric forms a tube. Don’t worry about making these stitches perfect! This seam will be hidden inside the pumpkin, so nobody is going to see it.
When I reach the end, I’ll secure my thread by slipping the needle underneath a stitch, bringing it through the loop, and pulling it tight to make a knot.
Step 3: Gather the Bottom of Your Pumpkin
Now that I’ve made my fabric tube, I’m going to close one end using a running stitch, also called a gathering stitch.
I’ll keep my fabric inside out and work around one open edge of the tube. A running stitch is simply moving the needle in and out of the fabric, gathering several little folds onto the needle before pulling the thread through. These stitches don’t need to be even or pretty because they’re going to be hidden inside our pumpkin.
Once I’ve stitched all the way around, I’ll gently pull the thread to gather the fabric together. I’ll keep pulling until the opening is closed, then run my needle through several of the gathered folds and secure everything with a few knots.
I like to stitch through the folds from different directions to make sure the bottom is nice and secure.
Step 4: Turn Your Pumpkin Right Side Out
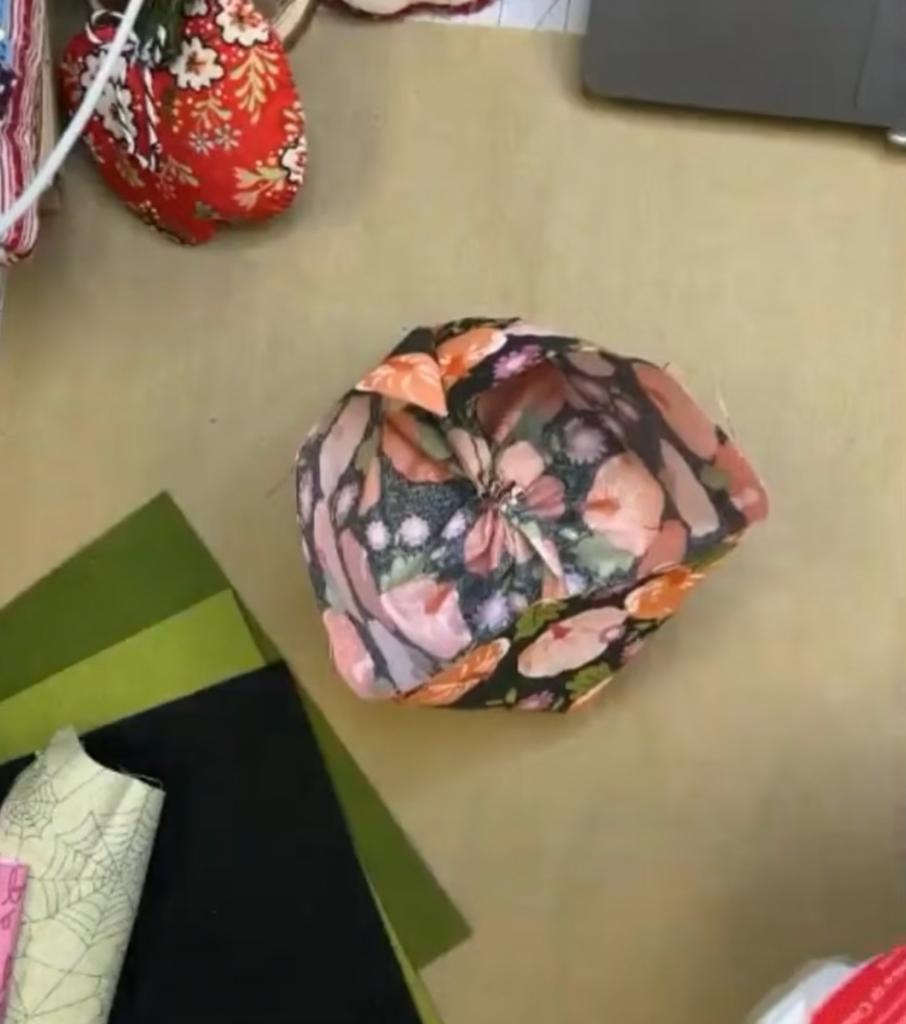
Now I’m ready to turn my fabric tube right side out! I’ll reach inside, pull the fabric through, and spread it out a little. We’ve basically created a small fabric bag with a gathered bottom.
Step 5: Stuff Your Fabric Pumpkin
Next, I’m going to fill my pumpkin with polyfill or fiberfill stuffing. I like to pull the stuffing apart a little with my hands before putting it inside. Then I’ll start filling the pumpkin, spreading the stuffing around so it creates a nice, full shape.
I’ll keep adding polyfill until I’m about an inch from the top opening. We’re going to gather this opening closed next, but don’t put your stuffing away just yet! One thing I always tell people is that when you think your pumpkin is full, add another good handful of stuffing. I love a nice, fat pumpkin!
Step 6: Gather and Close the Top
Now I’m going to use the same running stitch technique to close the top of my pumpkin.
I’ll thread my needle, tie a knot, and start stitching around the open edge, making sure my knot stays on the inside. Just like before, I’ll move my needle in and out of the fabric, creating little gathers as I go.
Once I’ve stitched all the way around, I’ll begin pulling the thread to close the opening. Before pulling it completely tight, I’ll add a little more polyfill to make sure my pumpkin is nice and full. When I’m happy with the shape, I’ll pull the gathering thread tight and secure it with several knots, stitching through the folds from different directions.
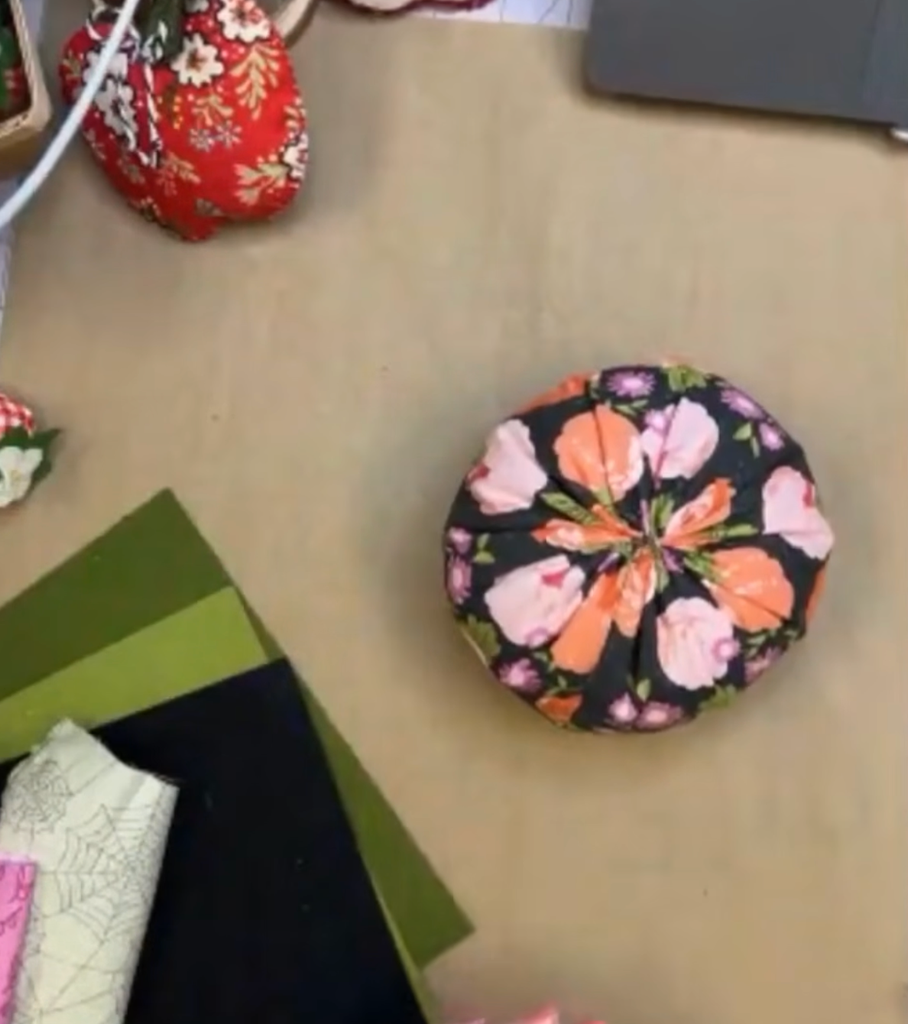
Step 7: Create Pumpkin Sections with Baker’s Twine
Our little stuffed pumpkin is already cute, but I like mine to have those rounded sections that make it look more like a real pumpkin.
For this step, I’m using black-and-white baker’s twine to coordinate with my Halloween fabric. You could also use orange baker’s twine or thin jute for a more traditional fall look. I’ll cut four pieces of twine, approximately 14 inches long each. You can always make them a little longer if you need more room for tying.
I’m going to turn my pumpkin upside down and place a small dab of hot glue in the center of the bottom. Then I’ll arrange two pieces of twine in a plus sign and the other two in an X, securing them with the glue. When I turn my pumpkin upright, I’ll have eight loose ends hanging around the sides.
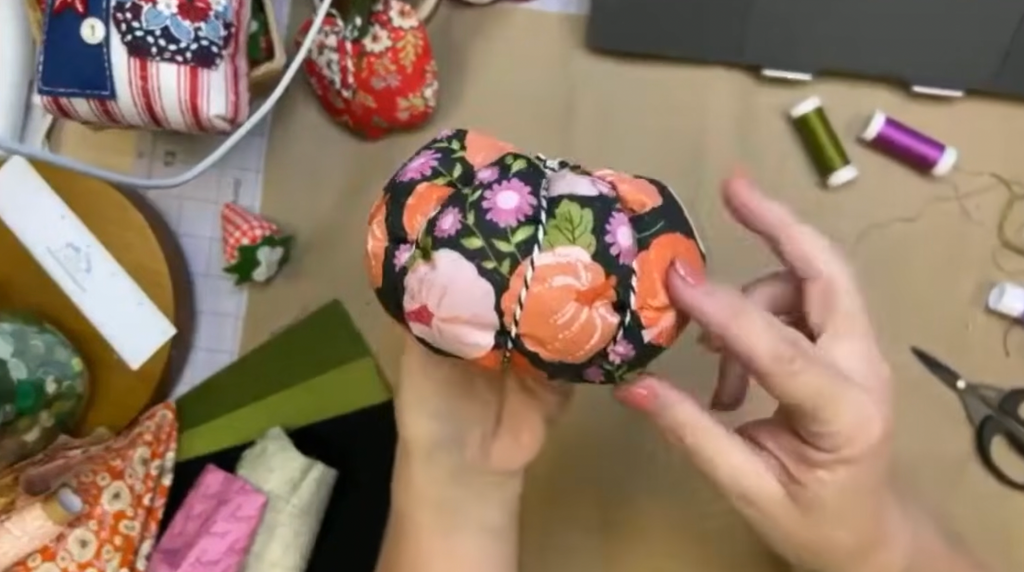
Now I’ll bring opposite ends of each piece of twine up over the pumpkin and tie them together at the top. I’ll pull each pair snug enough to create those pretty pumpkin sections without pulling so tightly that I distort the shape. I’ll repeat this with the remaining pieces of twine until I’ve created eight sections.
If one section looks a little uneven, I can simply slide the twine around until everything looks balanced. Then I’ll trim away the extra ends.
Step 8: Make a Rolled Felt Pumpkin Stem
Now our pumpkin needs a stem! I’m using black wool felt for mine, but you could also use a wine cork, cinnamon sticks, a small tree branch, or even rolled fabric.
To make my felt stem, I’ll cut a strip of wool felt that’s approximately 1 to 1¼ inches tall. Then I’ll start rolling it tightly, adding a little hot glue at the beginning to hold everything together. I’ll continue rolling until the stem is as thick as I want it. Once I’m happy with the size, I’ll secure the outer edge with another little bit of hot glue. If my stem looks too tall, I can easily trim it down with scissors.
Now I’ll add a generous dab of hot glue right over the gathered stitches and twine knots at the top of my pumpkin. I’ll press the rolled felt stem into the glue and hold it in place until it’s secure.
Step 9: Cut Two Wool Felt Leaves
I love adding leaves to my fabric pumpkins, and I’m going to show you a fun way to give them a little extra dimension. I’m using two shades of green wool felt for this project. I love working with wool felt because it has such a beautiful texture and is wonderful for hand stitching.
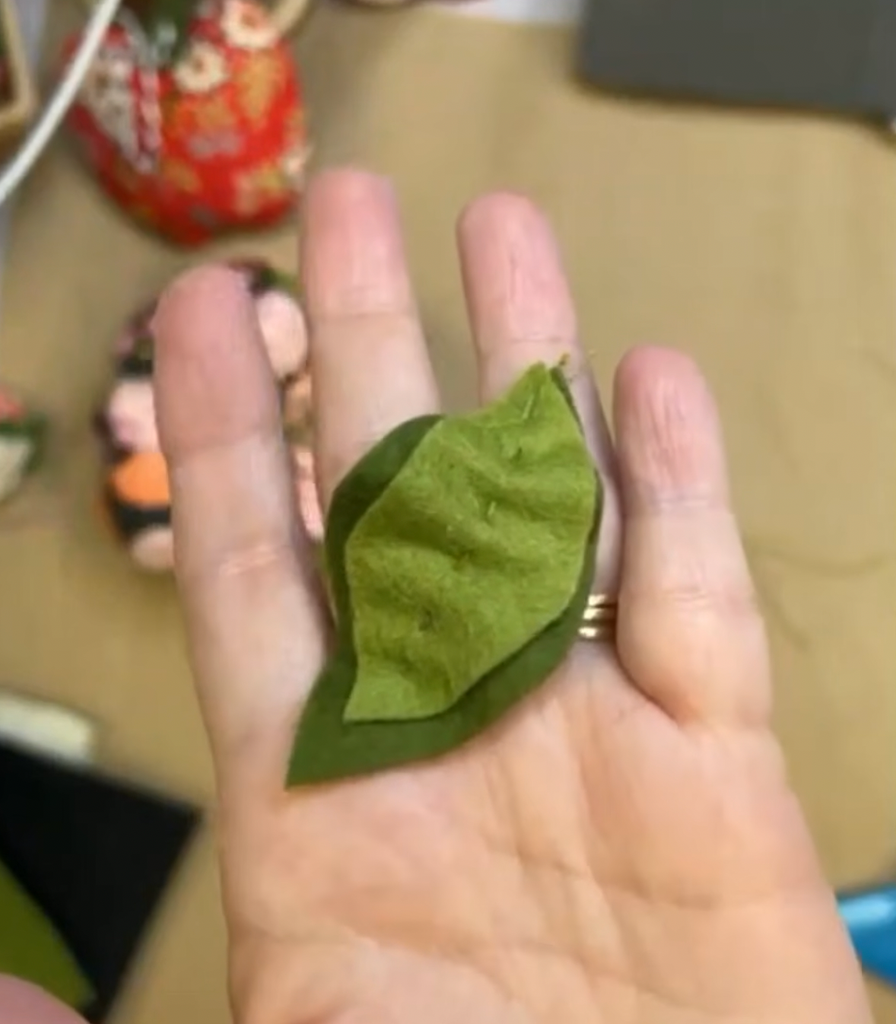
To make my leaves, I’ll simply cut two teardrop shapes, making one slightly larger than the other. I don’t usually use a template for these. I think they look more natural when they’re not all exactly the same! But if you prefer, you can draw your leaf shapes with a FriXion pen before cutting. I’ll layer the smaller leaf on top of the larger one, lining up the pointed ends.
Step 10: Stitch and Gather Your Leaves
Now I’m going to add a little stitching to give our leaves some movement. With my two felt leaves layered together, I’ll bring my needle up through the pointed end, keeping the knot on the back. Then I’ll make a running stitch up the center of the leaves, leaving a little space between each stitch. Unlike the stitches we used to make our pumpkin, these will be visible, so I’m going to take a little more care to keep them neat.
Once I’ve stitched along the center, I’ll gently push the felt together along the thread to create little ripples and gathers. I don’t want to pull everything too tightly. I just want enough gathering to give the leaves some dimension and movement.
When I’m happy with the shape, I’ll secure my thread with a knot on the back of the larger leaf. Look at that! Our leaves have a little life to them instead of lying completely flat.
Step 11: Attach the Felt Leaves
Now I’ll decide which side of my pumpkin I want to be the front. Once I’ve chosen my favorite side, I’ll add a small dab of hot glue near the base of the stem and press the pointed ends of my felt leaves into place.
I’m only gluing the leaves near the stem because I want the rest of them to stay loose and dimensional. You can position your leaves in whichever direction you like. There’s no right or wrong way to do this!
Step 12: Add a Twine Bow and Button
For my final embellishment, I’m going to make a simple little bow using the same baker’s twine I used to create my pumpkin sections. I’ll tie the twine just like I’m tying my shoes. Nothing fancy!
I also like to tie tiny knots near the ends of my bow tails, then unravel the twine below each knot to create little tassels. Once I’m happy with my bow, I’ll attach it near the stem with a dab of hot glue.
And because I love adding little details, I’m going to finish mine with a decorative button in the center of the bow. Of course, you can decorate your pumpkin however you like! Add a ribbon bow, some fall flowers, an acorn, or leave it simple with just the stem and leaf. That’s what makes these little pumpkins so much fun. You can make each one completely your own!
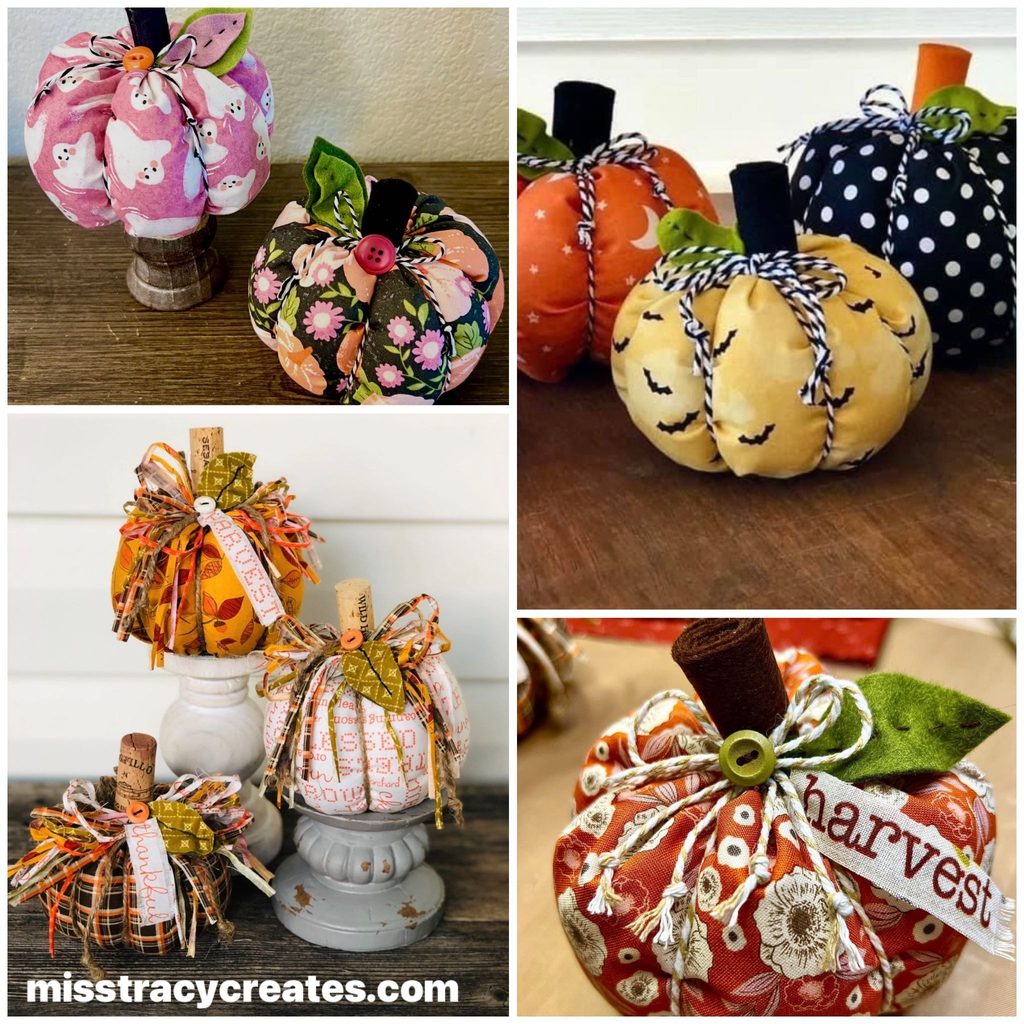
Ways to Decorate with Your DIY Fabric Pumpkins
I love making these stuffed fabric pumpkins in different colors and patterns so I can mix and match them throughout the fall season.
They’re adorable tucked into a basket, arranged on a tiered tray, or grouped together on a shelf or mantel. You can use traditional fall fabrics, Halloween prints, or even neutral patterns that coordinate with your home.
And these make such cute handmade gifts! You could make a few for friends, teachers, or family members and personalize each one with their favorite colors. Once you make your first pumpkin, don’t be surprised if you want to make a whole collection!
Love Fabric Crafts? Join Me in the Fabric Fan Club!
If you enjoyed making these stuffed fabric pumpkins with me, I’d love to invite you to join us inside The Fabric Fan Club!
We have so much fun exploring creative ways to use beautiful fabrics, learning new stitching techniques, and making projects we can enjoy in our homes or give as gifts.
Whether you’re just getting started with hand sewing or you’ve been stitching for years, I’d love to have you crafting with us! Join the Fabric Fan Club Here!


0 Comments