

Supply List:
- Tree Template (found in Create & Connect Facebook Group)
- 8 x 10 Canvas
- Graphite Paper
- Watercolors & Paintbrush
- Faber-Castell Pitt Pens
- Pencil
- Liquid Glue
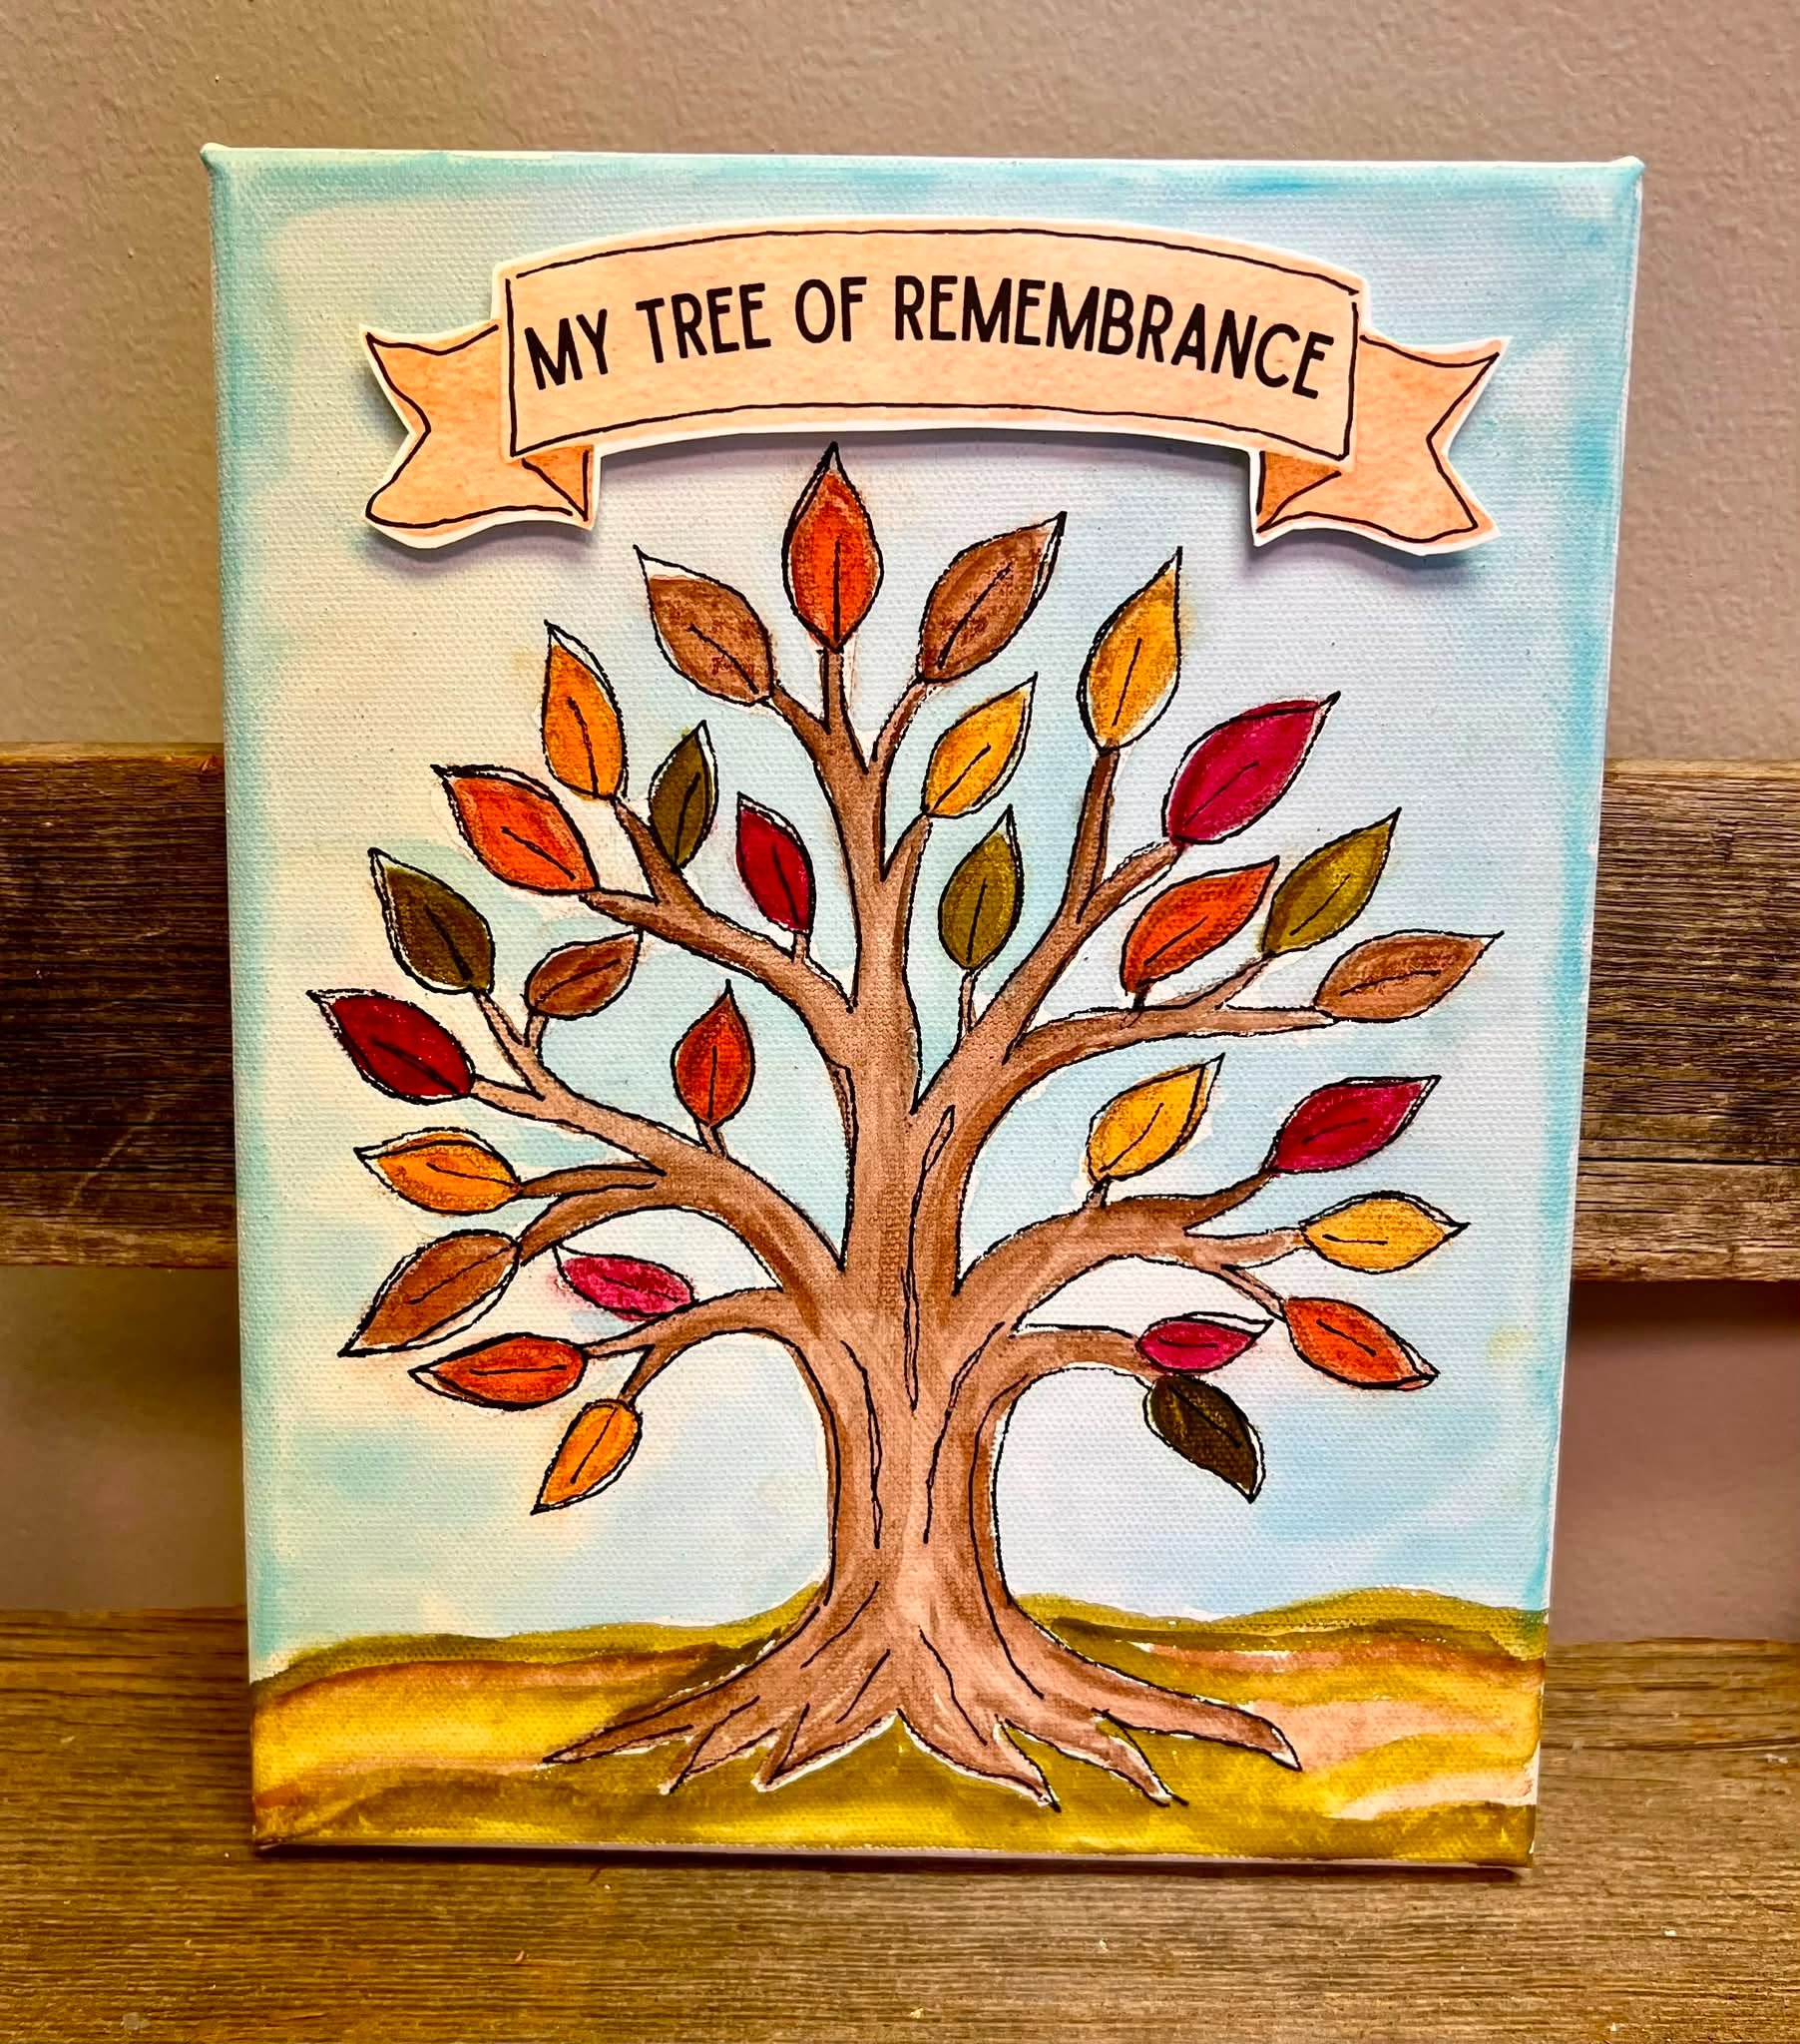
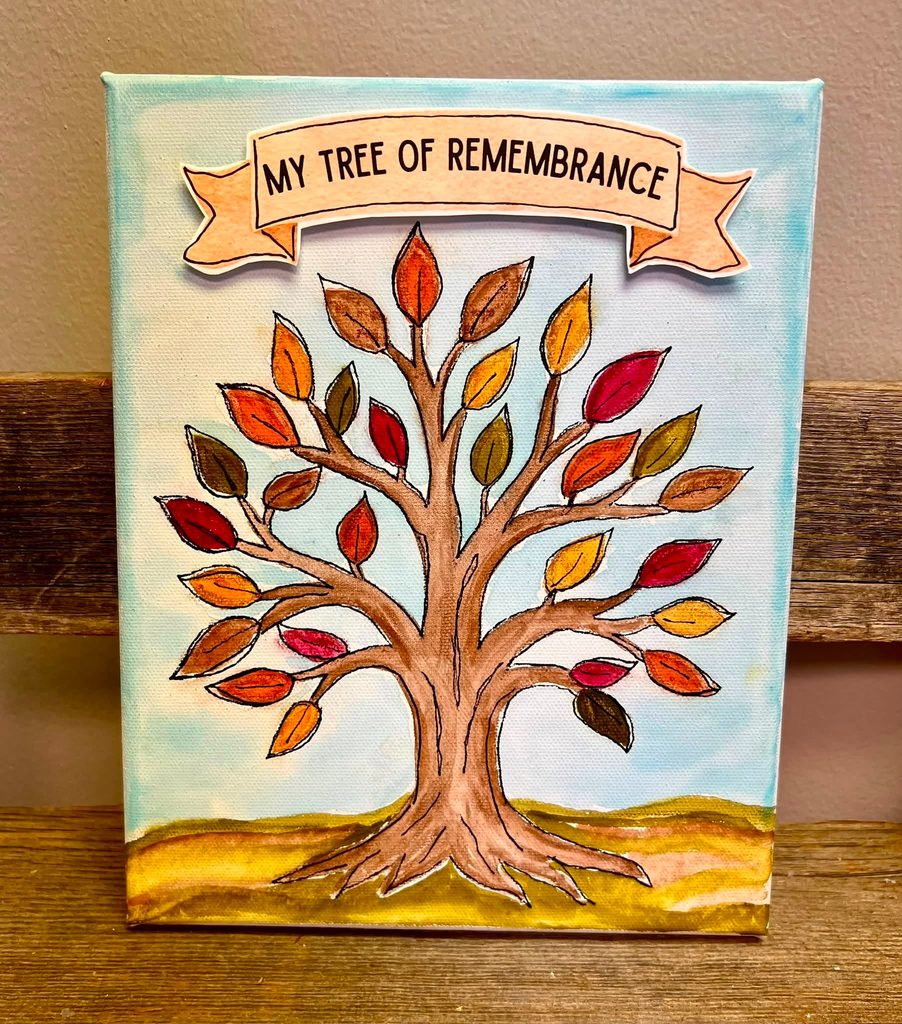
This Tree of Remembrance watercolor canvas is more than just a pretty fall craft. It is designed to become a visual reminder of what God is teaching you as you slow down, reflect, and notice His presence in your life.
The tree begins as a simple watercolor canvas, but over time, you can add special leaves with words, prayers, scripture, or key takeaways from your devotional time. By the end, you have a beautiful piece of faith-based artwork filled with personal reminders of what you have learned and want to carry with you.
Step 1: Prepare the Tree Printable
Print the Tree of Remembrance design on lightweight cardstock or regular printer paper. If your printable includes a banner at the top, cut or separate that section from the tree before tracing. The banner will be added later as a dimensional embellishment. Position the tree lower on the canvas so there is enough room above it for the banner.
Step 2: Position the Graphite Transfer Paper
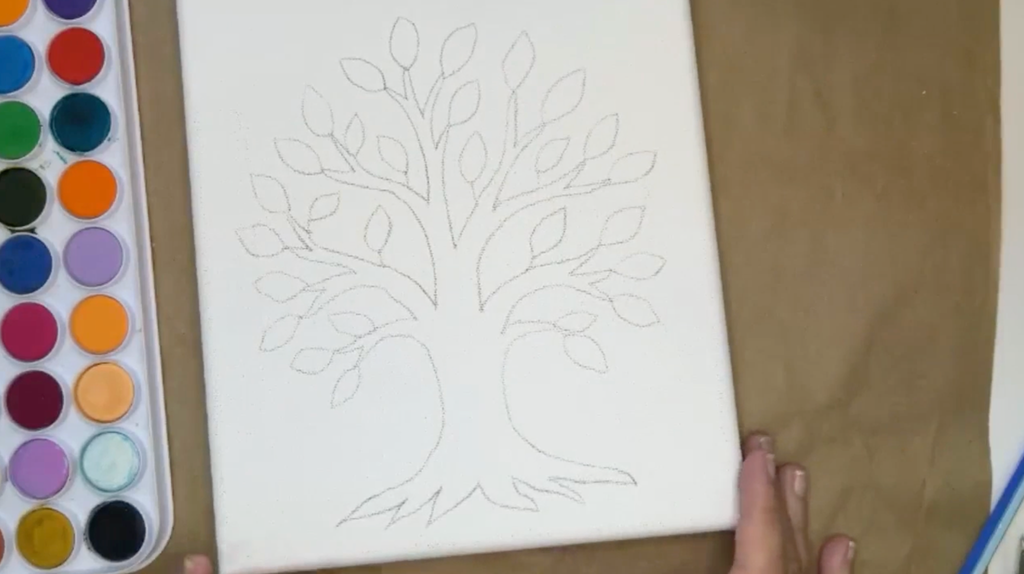
Lay a sheet of graphite transfer paper over the canvas with the graphite side touching the canvas. Place the tree printable on top.
Your layers should be: Canvas → graphite paper → printable
If you are unsure which side of your graphite paper transfers, test a small area first. The transferring side should face the canvas. Graphite transfer paper is reusable, so save it after this project and continue using it until the graphite no longer transfers well.
Step 3: Trace the Tree
Use a pencil or pen to trace over the tree design. Work one branch at a time so you do not accidentally skip leaves or sections of the tree.
You do not need to press extremely hard. Trace a small area first, lift the printable without moving it completely, and check that the image transferred clearly. Continue tracing the branches, leaves, trunk, and roots until the entire tree is visible on the canvas.
Step 4: Prepare the Watercolors
You can use a traditional watercolor palette, watercolor pencils, watercolor crayons, or another favorite watercolor medium.
If using a watercolor palette, add a few drops of water to the colors you plan to use. Let the water sit briefly so the pigments begin to soften and activate.
A water brush is especially convenient because the barrel holds water and allows you to control how much moisture reaches the paint.
For this fall tree, use warm shades of brown, gold, orange, rust, olive green, red, and other autumn-inspired colors.
Step 5: Paint the Tree Trunk and Branches
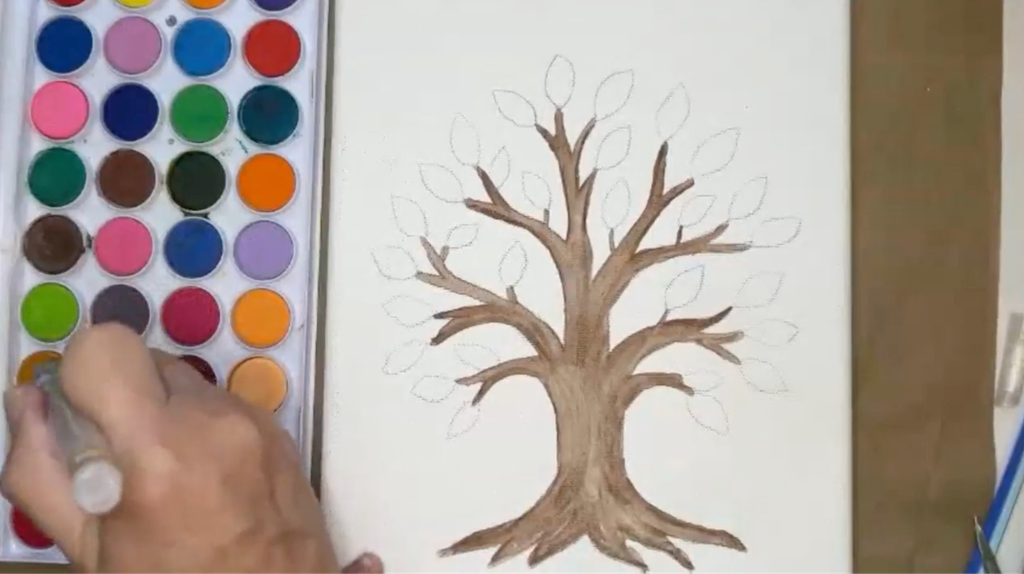
Begin with the trunk and branches. Choose a medium brown and paint inside the transferred lines. Use the tip of the brush for the smaller branches and a slightly broader stroke for the trunk.
Let some areas become darker and others lighter. Watercolor naturally creates variation, and that unevenness gives the tree a softer, more organic look. Do not worry about staying perfectly inside the lines. You will add pen work later, and slight imperfections are part of the watercolor style.
Step 6: Add Shading to the Tree
Once the first brown layer begins to dry, return with the same brown or a slightly darker version. Add small strokes along selected areas of the trunk, roots, and branches.
You do not need to shade the entire tree. A few darker marks are enough to create depth. Let some areas remain light so the watercolor has movement instead of looking flat.
Step 7: Watercolor the Leaves
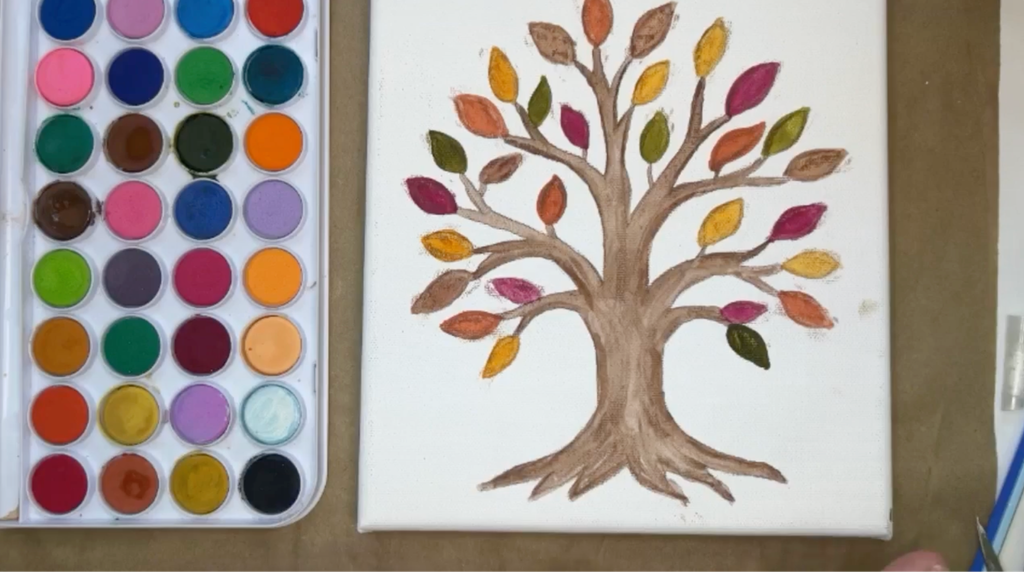
Begin filling in the leaves with fall colors. Use a mix of gold, orange, rust, olive green, reddish brown, red, or any colors you enjoy.
Outline each leaf lightly and then fill the center. Alternate colors throughout the tree rather than clustering too many of the same shade together. The finished tree should feel colorful and varied.
If you only have a small watercolor palette, blend colors together to create additional tones. Add brown or black to mute a bright orange, add white to soften a color, or mix green with yellow for a warmer fall shade.
Step 8: Add Extra Depth to the Leaves
After the first layer of watercolor dries slightly, add a little darker color around some of the leaf edges.
Use your fingertip or a cotton swab to gently pounce and soften the darker watercolor. This creates extra texture and makes the leaves feel less flat.
Do not worry if the color extends slightly beyond the leaf shapes. The final pen work will help define them.
Step 9: Create the Ground
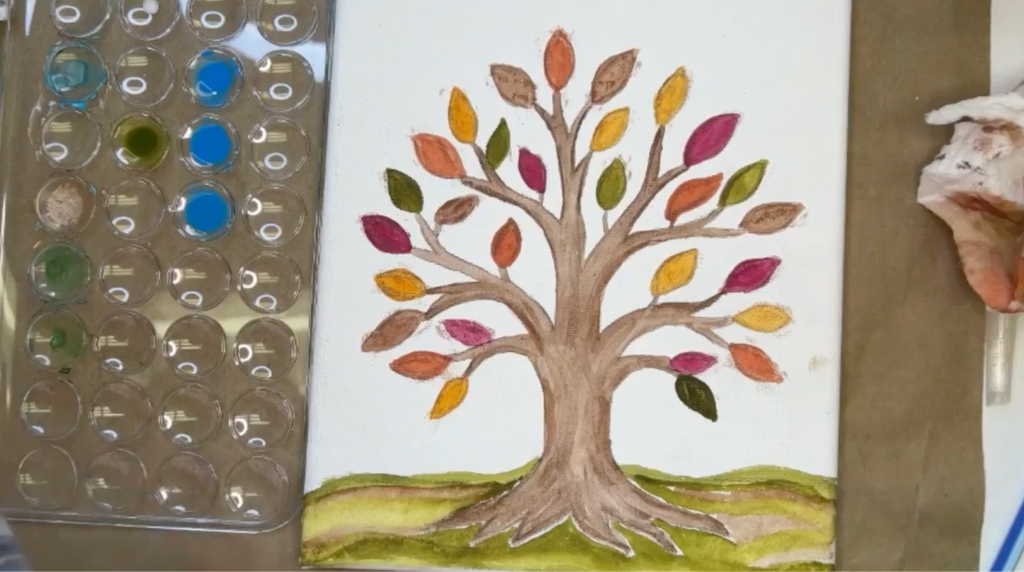
Use a pencil to lightly sketch where you want the ground to begin. Paint the bottom portion of the canvas with earthy green, gold, brown, or ochre colors.
Let the ground be slightly uneven or hilly rather than creating one perfectly straight line. When painting around the roots, leave a tiny bit of white canvas showing between some of the roots and the surrounding ground. This creates a natural highlight and helps the tree stand out.
Step 10: Add Texture to the Ground
Layer another earthy watercolor over portions of the ground. While the paint is still damp, wad up a paper towel and gently blot the surface.
The paper towel lifts some of the watercolor back off the canvas and creates beautiful mottled texture. You can repeat this anywhere you want a softer or more weathered look.
Step 11: Paint the Sky
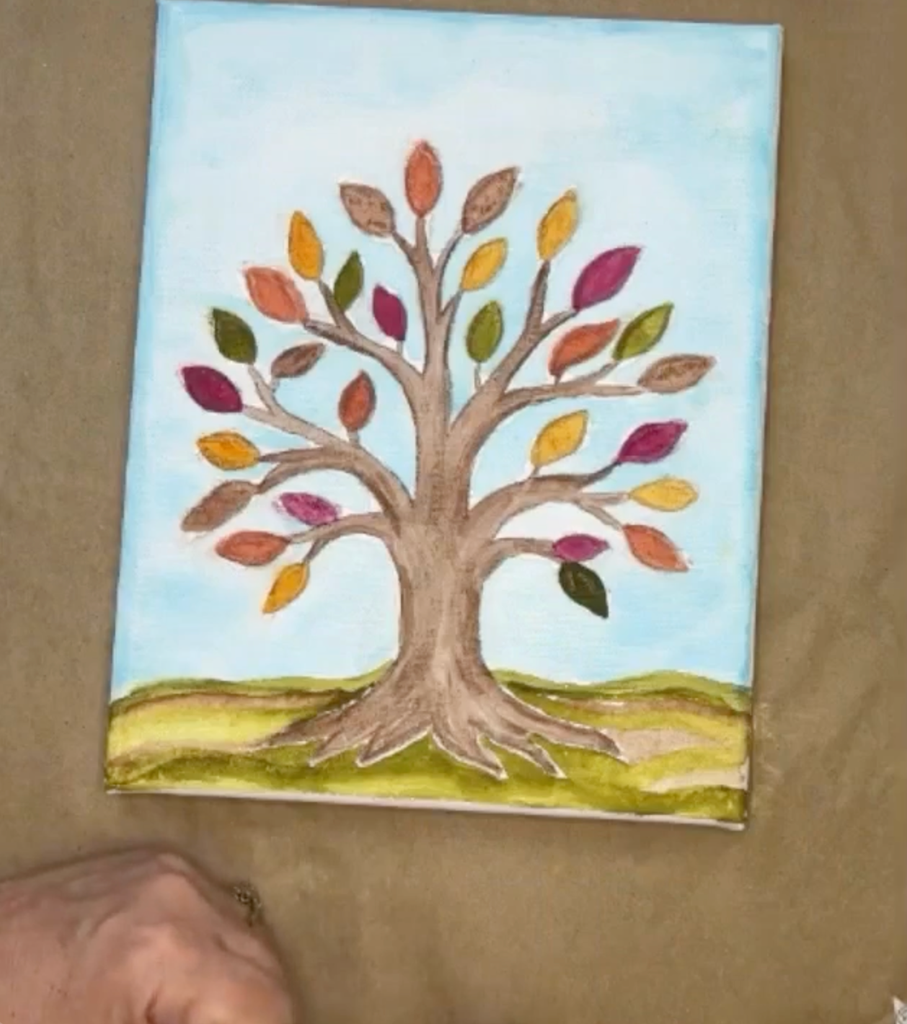
Paint the background last. Begin by wetting sections of the canvas with clean water. This allows the watercolor to move and blend more softly.
Mix blue with a little white to create a pale sky color. Brush the diluted blue around the branches and leaves, leaving small hints of white around some of the tree shapes. Those white spaces act like soft highlights. Continue working across the canvas until the background is filled.
Step 12: Add Darker Blue Shading
Once the first blue layer is in place, mix a slightly stronger blue. Float this darker color around the outside edges of the canvas and into a few areas of the sky.
Blend the darker blue into the lighter blue rather than covering the entire background evenly. If any area becomes too dark, blot it gently with a paper towel. The combination of lighter and darker watercolor creates a soft, layered sky.
Step 13: Ink the Canvas Edges
Allow the watercolor to dry. Use a coordinating chalk ink to lightly shade around the outside edges of the canvas. This subtle darker border helps frame the artwork and gives the canvas a finished look. Apply the ink lightly and build it gradually.
Step 14: Add Doodle-Style Pen Work to the Leaves
Make sure the canvas is completely dry before adding pen. Use a waterproof black permanent pen. Loosely outline each leaf using a slightly sketchy, doodled line. Do not try to trace the watercolor perfectly.
Let your line wander inside and outside the painted edge slightly. This hand-drawn look works especially well on textured canvas and keeps the piece feeling relaxed and artistic. Add one simple line down the center of each leaf for a vein if desired.
Step 15: Outline the Trunk and Branches
Continue the doodled pen work around the trunk, branches, and roots. Move fairly quickly rather than trying to create perfectly smooth lines. The texture of the canvas will naturally make the pen line slightly bumpy. Add a few extra loose lines through the trunk or double-trace a few sections for additional character.
Step 16: Cut Out & Attach the Banner
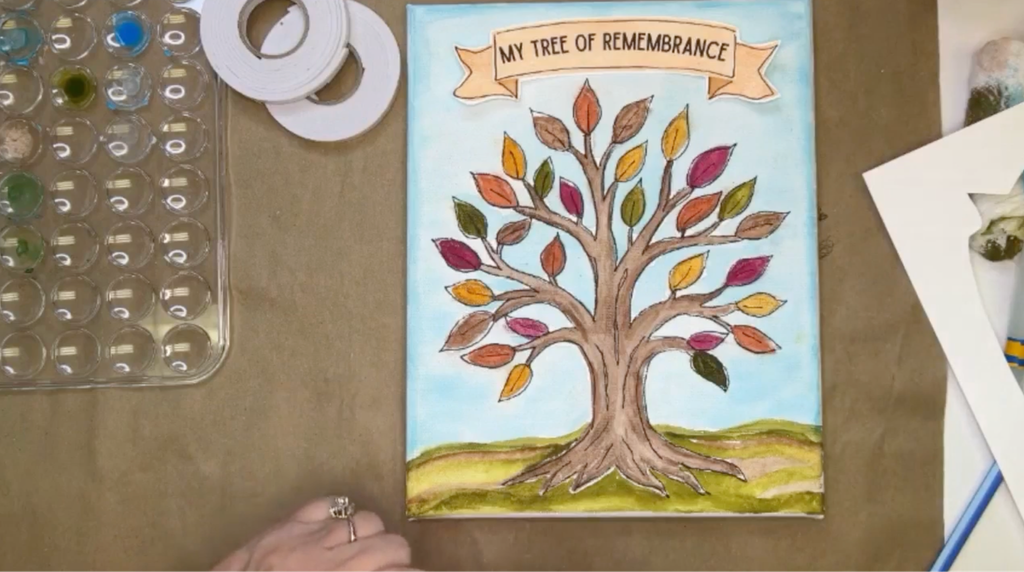
Cut the “My Tree of Remembrance” banner from the printable. Leave a narrow white border around the design instead of cutting directly against the printed outline. This small border gives the piece a clean, finished look. Add loose black pen work around the banner if desired.
Once the canvas is fully dry, position the banner above the tree. Use foam adhesive or pop dots to raise the banner slightly off the surface. For extra security on canvas, add a small amount of hot glue to the foam adhesive before pressing it in place. The dimensional banner creates a layered mixed-media effect and helps separate it from the painted background.
Step 18: Begin Adding Your Remembrance Leaves
The canvas itself is only the beginning. As you work through devotionals, scripture study, or personal reflection, add special remembrance leaves to the tree.
Each leaf can represent a devotional, lesson, prayer, truth, or takeaway you want to remember. Write a word or short phrase on the front of the leaf, and consider writing a personal note, prayer, or reflection on the back.
Attach the special leaves with foam dots so they stand out from the watercolor leaves underneath. Over time, the tree will become filled with meaningful reminders of how God has met you and what He has taught you.
Want to Try Faith Journaling?
If this project makes you curious about Bible journaling or creative faith practices, I would love to invite you into the Faith Journaling Experience.
You do not need to consider yourself an artist, and you do not need a special journaling Bible to begin. You can start in any journal you already have and grow into the process at your own pace.
Inside the Faith Journaling Experience, we use devotionals, scripture, creative printables, watercolor, pen work, and other simple techniques to slow down and connect with God’s Word in a more personal and visual way. Learn more here!




0 Comments