

Supply List:
- Cardstock and Patterned Paper Scraps
- Stickers
- Ribbon/ Twine
- Buttons
- Hole Punch
- Pop Dots or Foam Tape
- Hot Glue
- Faber Castell Pitt Pens
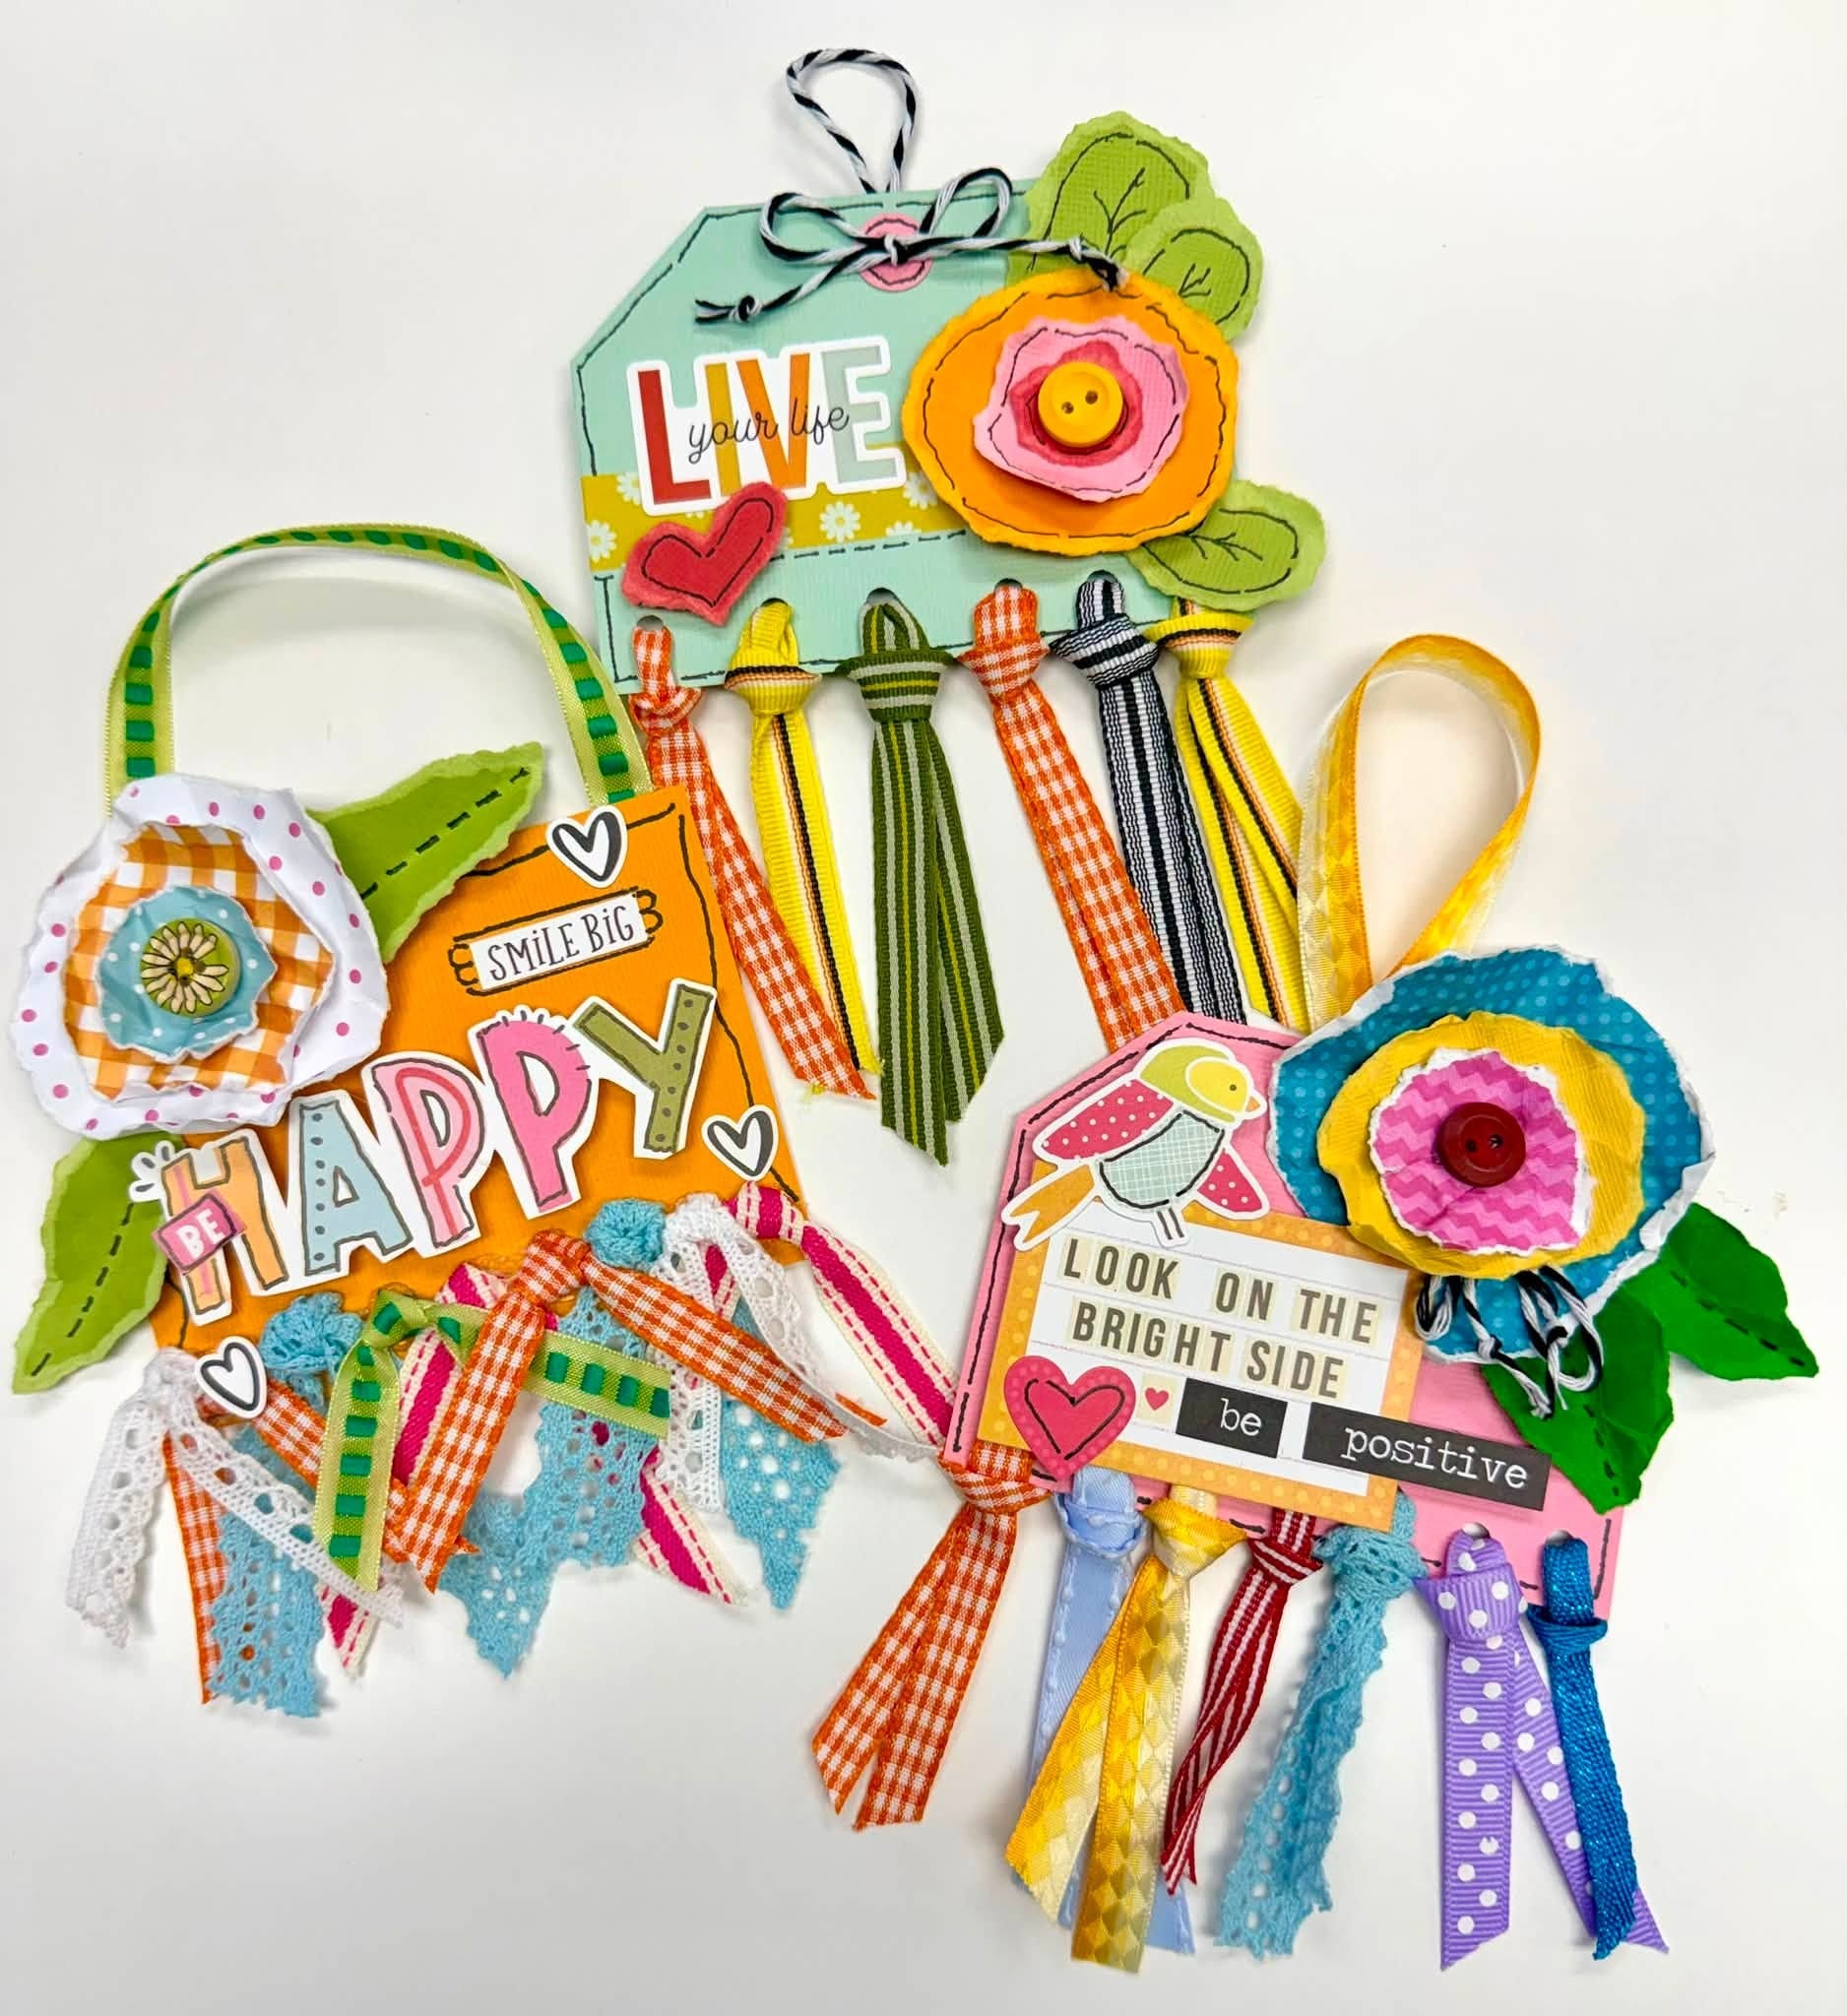
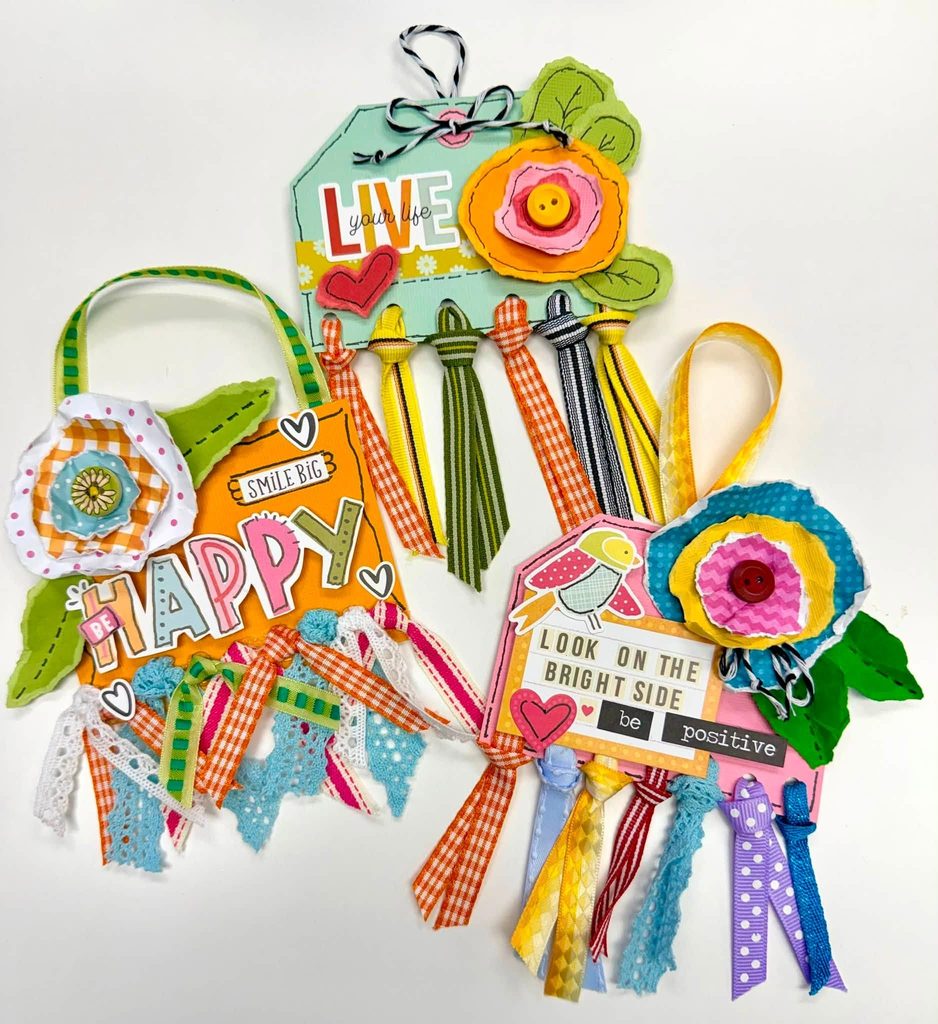
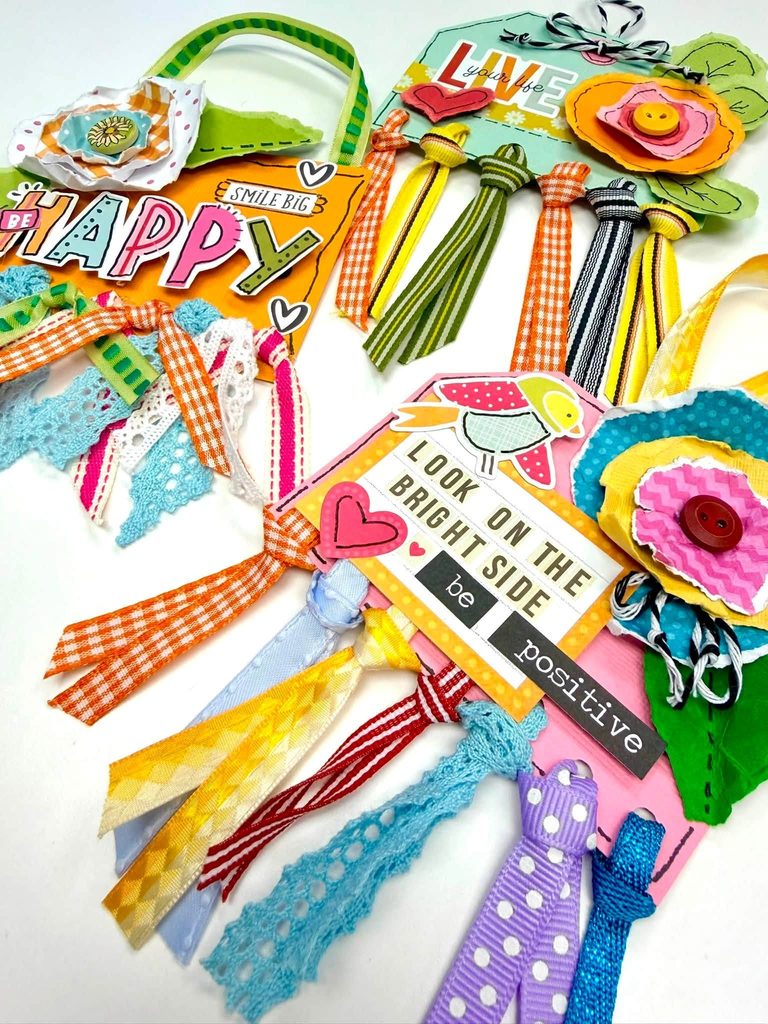
If your craft room is anything like mine, you probably have plenty of little leftovers that feel too useful to throw away – short pieces of ribbon, partially used sticker sheets, scraps of cardstock, bits of lace, buttons, and patterned paper. This colorful Scrap Happy Tag project is all about giving those leftovers a new purpose.
These little tags are easy, cheerful, and completely customizable. Use them as gift tags, encouragement tags, scrapbook embellishments, junk journal pieces, craft room decor, scripture tags, or little handmade surprises for friends, teachers, coworkers, neighbors, or anyone who could use a little extra happiness.
There really are no rules for this project. Pull together the scraps already sitting on your table and let yourself create without worrying about making everything perfectly coordinated. That relaxed, playful approach is exactly what makes these tags so much fun.
Step 1: Create the Tag Base
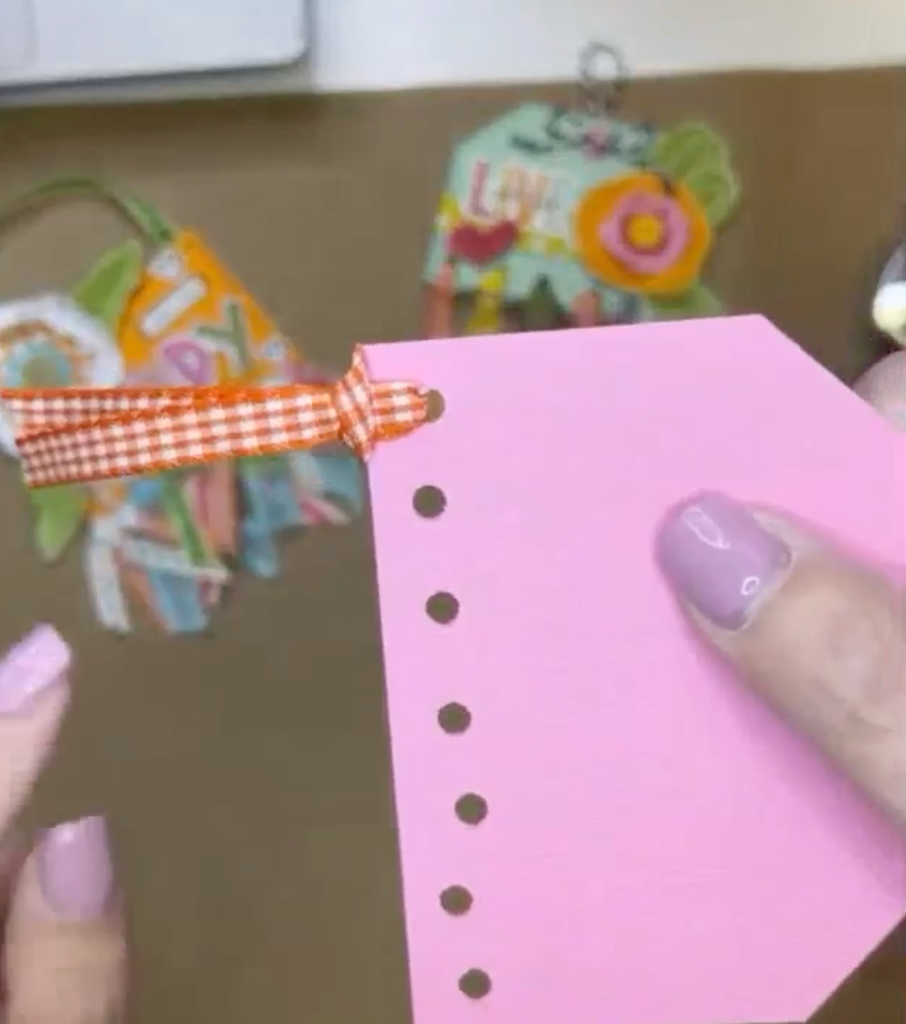
Cut a piece of cardstock or patterned paper to approximately 3×4 inches. You can leave the base as a simple rectangle or turn it into a traditional tag shape by trimming the two upper corners. To make the corners match, cut one corner first, then flip that little triangle over and use it as a guide for the opposite side.
Step 2: Punch Holes Along the Bottom
If you want to create the looped ribbon version, punch a row of holes across the bottom edge of the tag. Use a regular hole punch or a larger craft punch such as a Crop-A-Dile. Space the holes approximately 1/2 inch apart, but don’t stress about getting them perfectly straight or evenly spaced.
In the original project, seven holes fit nicely along the bottom of the 3×4 tag. If you prefer a simpler look, skip the holes altogether and glue knotted ribbon scraps directly along the bottom edge instead.
Step 3: Choose Your Ribbon Scraps
Dig through your ribbon stash and choose a mix of leftover pieces. This is a great place to use those little six- or eight-inch scraps that aren’t quite long enough for a bigger project.
Mix gingham, polka dots, solids, lace, narrow trims, wider ribbon, and different textures. The colors do not have to match perfectly. In fact, the variety is part of what gives these tags their happy, collaged look. Cut approximately one piece of ribbon for each hole you punched.
Step 4: Add the Ribbon with Lark’s Head Knots
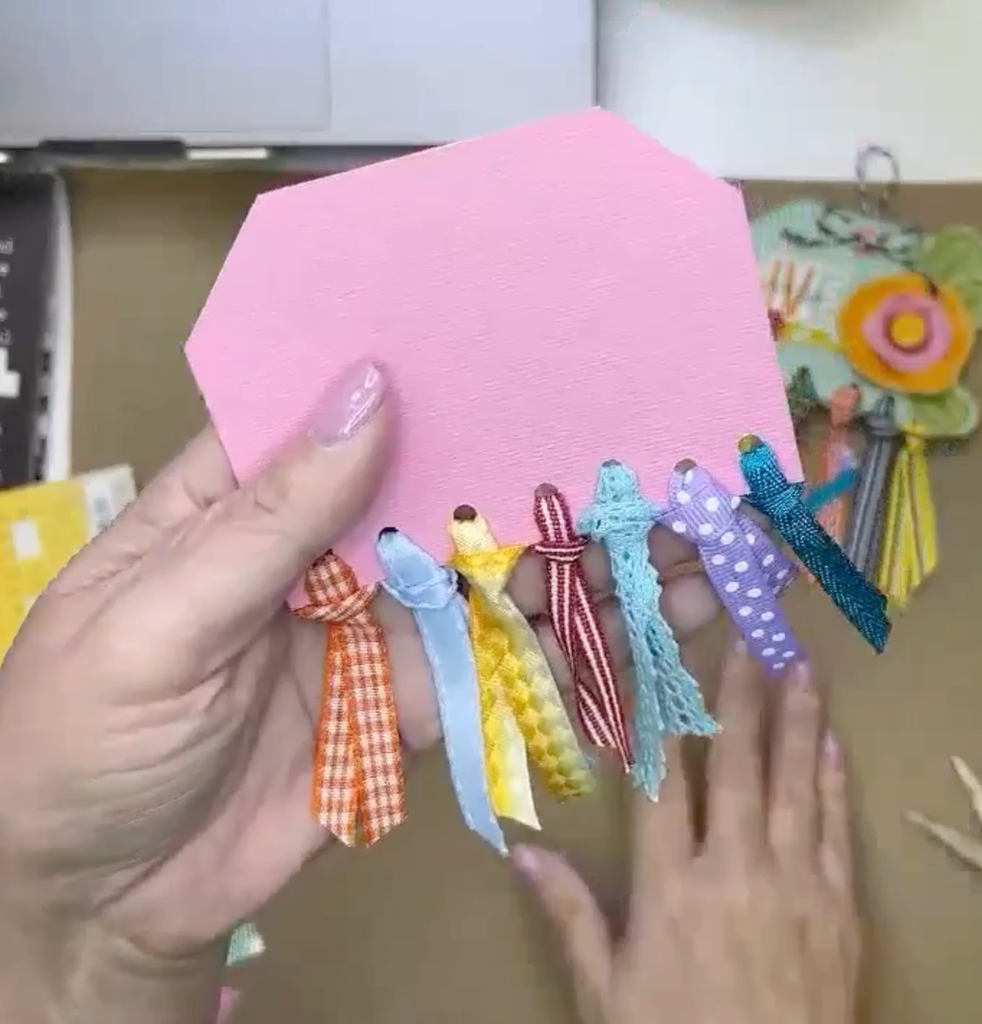
Fold one ribbon scrap in half. Push the folded end through one of the punched holes, creating a loop. Feed the two loose ribbon tails through that loop and gently pull until the knot sits against the edge of the cardstock. This is sometimes called a lark’s head knot.
Continue adding ribbons across the bottom of the tag. Be gentle when tightening the knots because pulling too firmly can tear the cardstock around the hole. Once all of the ribbons are attached, trim the tails at different lengths and angles for a loose, playful finish.
Step 5: Secure the Ribbon Knots
Turn the tag over and lift one edge of each ribbon knot. Add a tiny dot of hot glue underneath and press it back into place. This helps the ribbons stay secure and also encourages them to lay a little flatter against the back of the tag. You only need a very small amount of adhesive.
Step 6: Try the Knotted Ribbon Version
For an even faster version, skip the punched holes and simply tie knots in your ribbon scraps. Arrange the knotted ribbons along the bottom edge of your tag and hot glue them directly onto the cardstock. Mix in lace, baker’s twine, crochet trim, or other scraps for additional texture.
This method is especially helpful for those really small ribbon leftovers that might be difficult to pull through a hole.
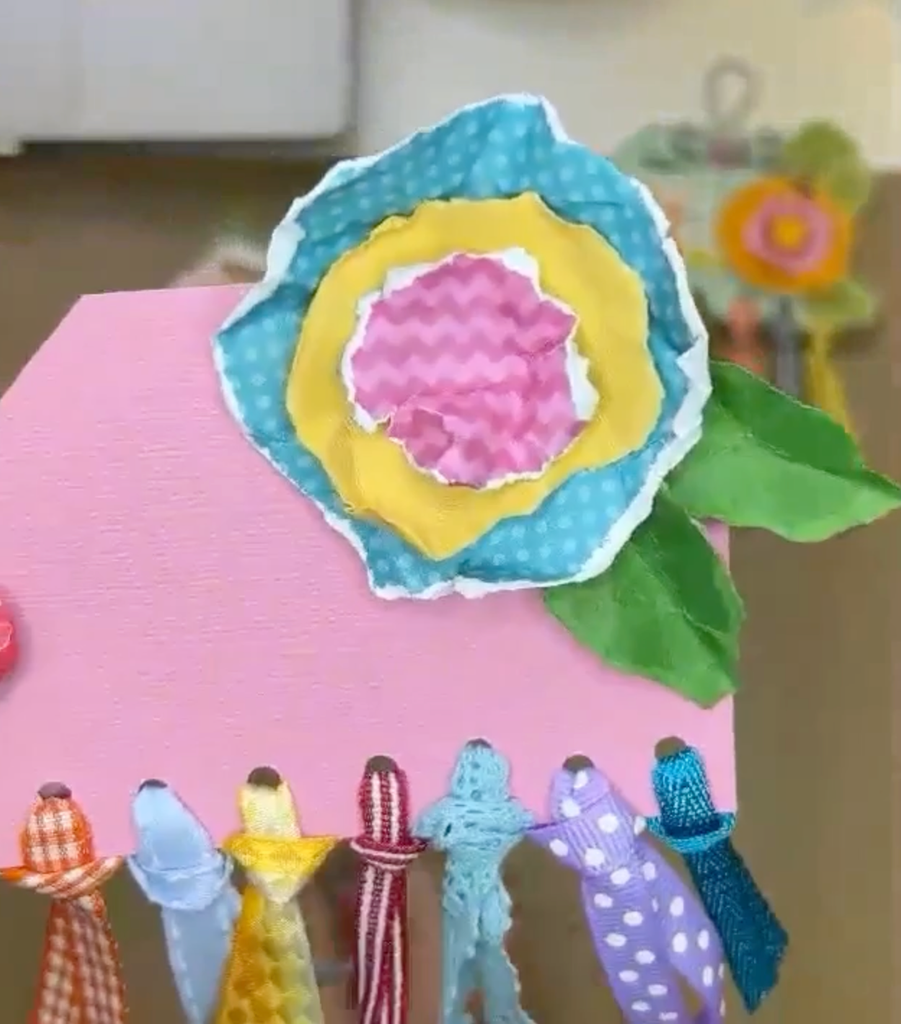
Step 7: Tear the First Flower Circle
Choose a scrap of patterned paper for the largest layer of your flower. Tear a rough circular shape from the paper. If freehand tearing feels intimidating, lightly draw a circle on the back first and use it as a guide.
For a pretty torn edge that shows the white core of the paper, tear the paper back toward yourself as you work around the circle. The shape does not need to be perfectly round. “Circular-ish” is exactly what you’re going for.
Step 8: Crumple the Paper for Texture
Once you have your first circle, wad it up in your hand. Open it, crumple it again in another direction, and then gently flatten it back out. This adds wonderful texture and gives your flower a softer, more dimensional look.
If you’re working with heavier cardstock and it feels difficult to crumple, mist it lightly with water or press a damp baby wipe over it first. Once it dries, the texture will remain.
Step 9: Tear Two Smaller Flower Layers
Choose two additional scraps in coordinating or contrasting colors. Tear a second circle slightly smaller than the first and a third circle smaller than that. Crumple each one just as you did the first. This is a great place to mix patterned paper and solid cardstock together. You could also use old book pages, sheet music, maps, wrapping paper, magazines, or junk journal papers.
Step 10: Layer the Torn Paper Flower
Place a small dot of hot glue in the center of the largest flower layer. Add the middle layer, then place another small dot of glue in the center and add the smallest layer.
If one layer looks too large, simply tear a little more away from the outside edge until you like the proportions. Leave the center unfinished for now. You can add a button later once the rest of your tag comes together.
Step 11: Tear the Paper Leaves
Choose a green paper scrap and tear one or two leaf shapes. Your leaves can be rounded and teardrop-shaped or long and skinny. There is no correct shape.
Fold or lightly crumple each leaf to add texture and dimension. You can also add pen lines down the center to suggest veins. Torn paper leaves are especially forgiving because their irregular edges make them look organic and handmade.
Step 12: Attach the Flower and Leaves
Place the flower on the tag wherever it feels right. Try not to overthink the placement. Part of the fun of this project is letting yourself glue something down and build around it instead of planning everything in advance.
Attach the flower with hot glue, then tuck the paper leaves underneath. Because you only glued the center of the flower layers, you should still have enough movement to slide the leaves beneath them.
Step 13: Dig Into Your Leftover Sticker Sheets
Now comes one of the best scrap-busting parts of the project – those partially used sticker sheets!
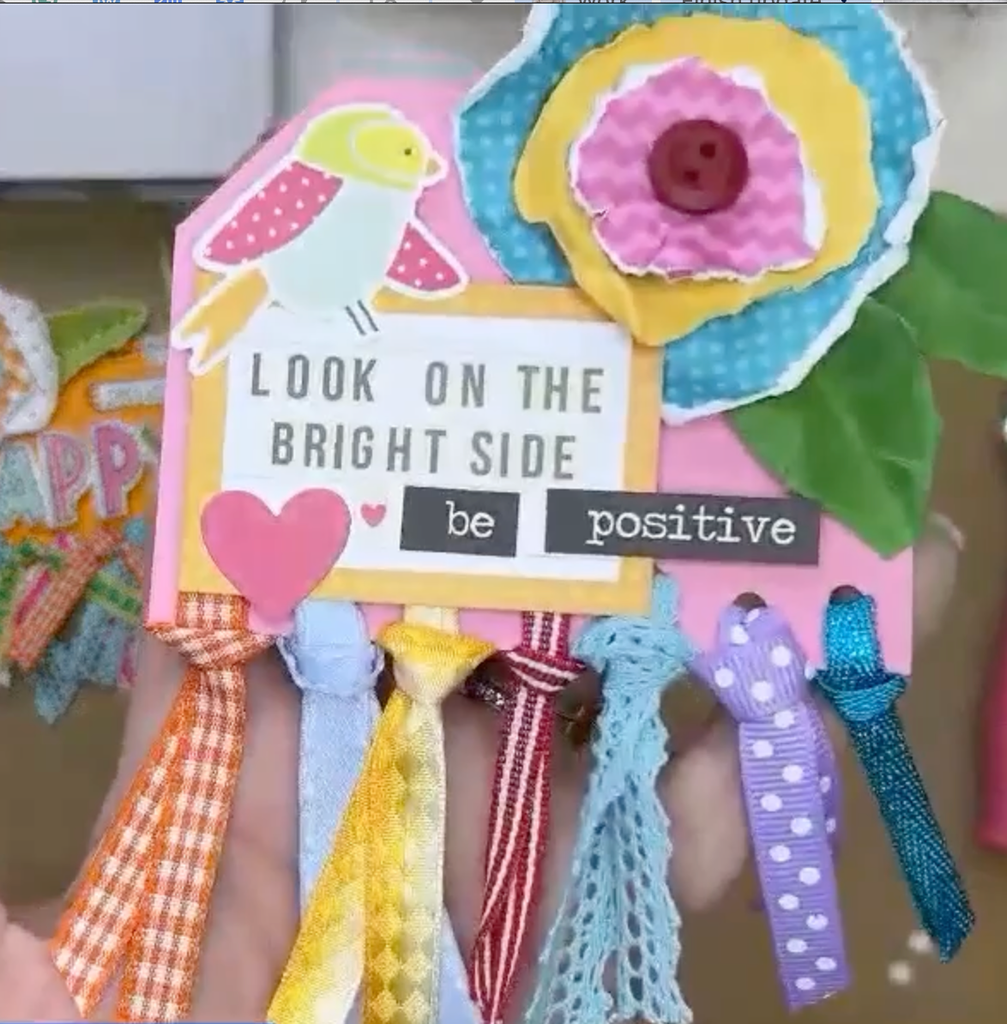
Look for words, phrases, hearts, birds, flowers, sunshine, or any little embellishment that feels cheerful. Combine stickers from different collections if you want. They absolutely do not need to come from the same sheet.
Phrases such as Look on the Bright Side, Be Positive, Happy, Smile Big, or Live Life in Full Color work perfectly for encouragement tags.
Step 14: Add Dimension with Foam Adhesive
Instead of sticking everything directly to the cardstock, place foam adhesive dots or tape behind some of your stickers.
This lifts the elements away from the tag and makes inexpensive stickers look more like dimensional embellishments. Add a tiny dot of craft glue or hot glue to the foam adhesive if you are layering the sticker over textured paper or other uneven surfaces. This gives it a little extra staying power.
Step 15: Add a Button to the Flower
Choose a button from your scrap stash and hot glue it into the center of the torn paper flower. Let the button color pull in one of the other colors already used in your ribbons or stickers. That simple little detail finishes the flower and gives the tag even more dimension.
Step 16: Add Doodle-Style Pen Work
Use a black permanent pen to add loose doodled details around the tag. Draw a broken line around the outside edge, add leaf veins, outline a sticker, or create little faux stitch marks.
Keep the lines imperfect. This is meant to look handmade, not measured or machine-perfect. A few black pen details can also help tie together lots of different colors and patterns.
Step 17: Make a Small Baker’s Twine Bow
Cut a short piece of black-and-white baker’s twine and tie a small bow. Glue the bow beneath the torn paper flower or beside another embellishment. This small pop of black and white works especially well if you’ve already added black pen details around the tag.
Step 18: Add the Hanger
Choose another ribbon scrap and decide how large you want the hanging loop to be. A small loop works well if the tag will be attached to a gift bag or package. A larger loop makes it easier to hang the tag from a doorknob, hook, craft room shelf, or other display.
Glue the ends of the ribbon together and attach the loop to the top of the tag. If you want a cleaner back, attach the ribbon before adding a second piece of cardstock to the reverse side so the glued ends are hidden between the layers.
Step 19: Finish the Back
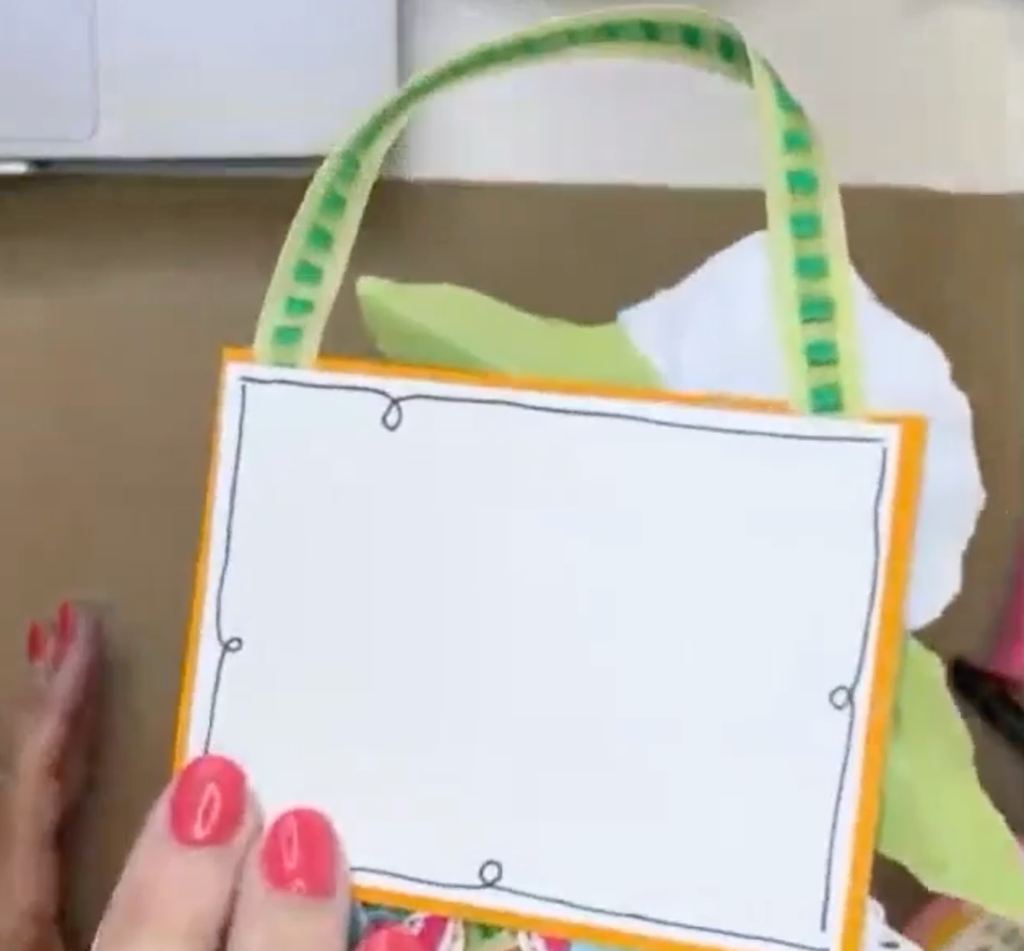
Add a coordinating scrap of white or light-colored cardstock to the back of the tag if you would like a place to write.
Use this space for an encouraging message, scripture verse, handwritten note, name, gift message, or little reminder to yourself. You could also turn the back layer into a small pocket and tuck in a gift card or note.
Step 20: Add a Little Sparkle
If you love sparkle, finish your tag with a little Stickles glitter glue. This is also a clever way to use up bottles that are almost empty. If you can no longer squeeze glitter from the tip, carefully cut into the bottle and use a small paintbrush to scoop out the glitter that remains inside.
Add a touch to flower centers, sticker details, hearts, leaves, or anywhere that could use a little shine.
Ways to Use Your Scrap Happy Tags
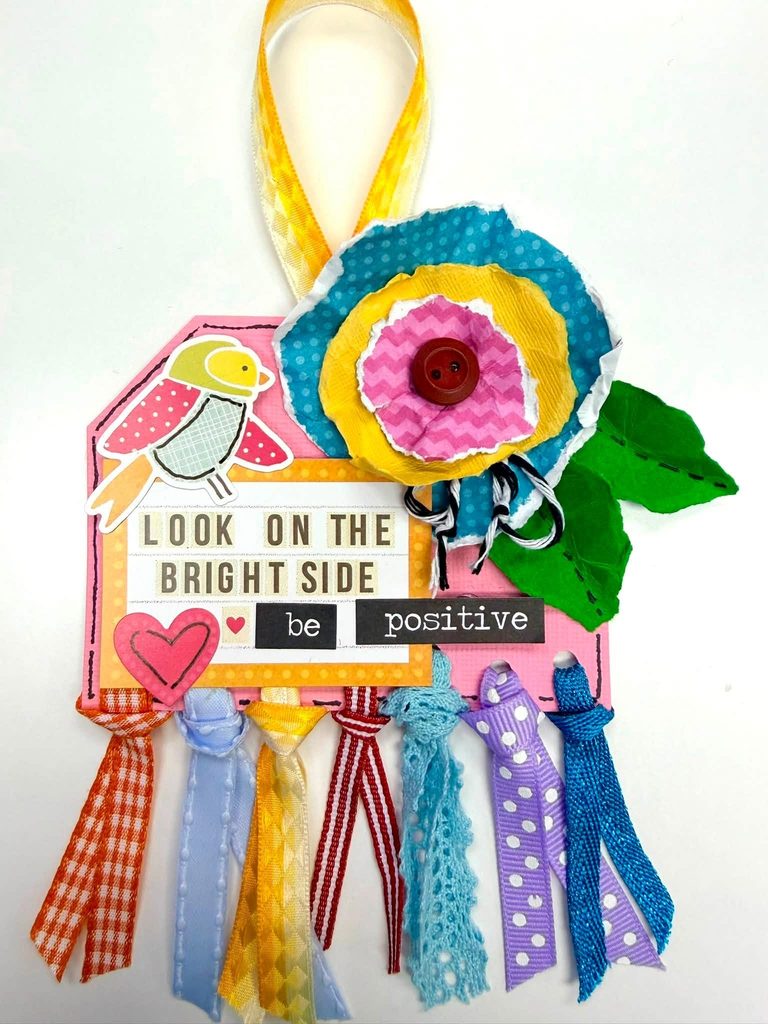
These little tags can become so much more than gift tags. Hang one in your craft room with an encouraging phrase, add one to a scrapbook layout, tuck one inside a junk journal, use one as a scripture tag, add one to a gift bag, or make personalized tags for a retreat or party.
They would also make sweet little encouragement gifts for teachers, nurses, coworkers, neighbors, friends, hairstylists, family members, or someone going through a hard week.
You could even host a Scrap Happy Craft Party. Invite friends to bring a bag of their own leftovers, spread all of the paper, ribbon, stickers, buttons, and trims across the table like a crafting buffet, and create tags together.
Love Paper Crafting?
If digging through your scraps and turning them into something new makes you happy, come join us inside the Paper Crafters ClubHouse!
Inside, we explore card making, scrapbooking, specialty paper projects, new techniques, and creative ways to actually use the beautiful paper already in your stash. We also spend time working with those lovely leftovers so fewer scraps get forgotten in bins and bags.
Come create with a community of fellow paper lovers, learn new techniques, and find even more inspiration for putting your paper stash to work. Learn more here!



0 Comments