

Supply List:
- Pot Holder with a Pocket
- Napkins
- White Paint (Country Chic Simplicity)
- Mod Podge Matte
- Chip Brush
- Plastic Deli/Bakery Sheet
- Heat Tool
- Hot Glue
- Frixion Pen
- Black Pitt Pen
- Chalk Ink
- Felt
- Ribbon/Twine
- Buttons
- Stickles
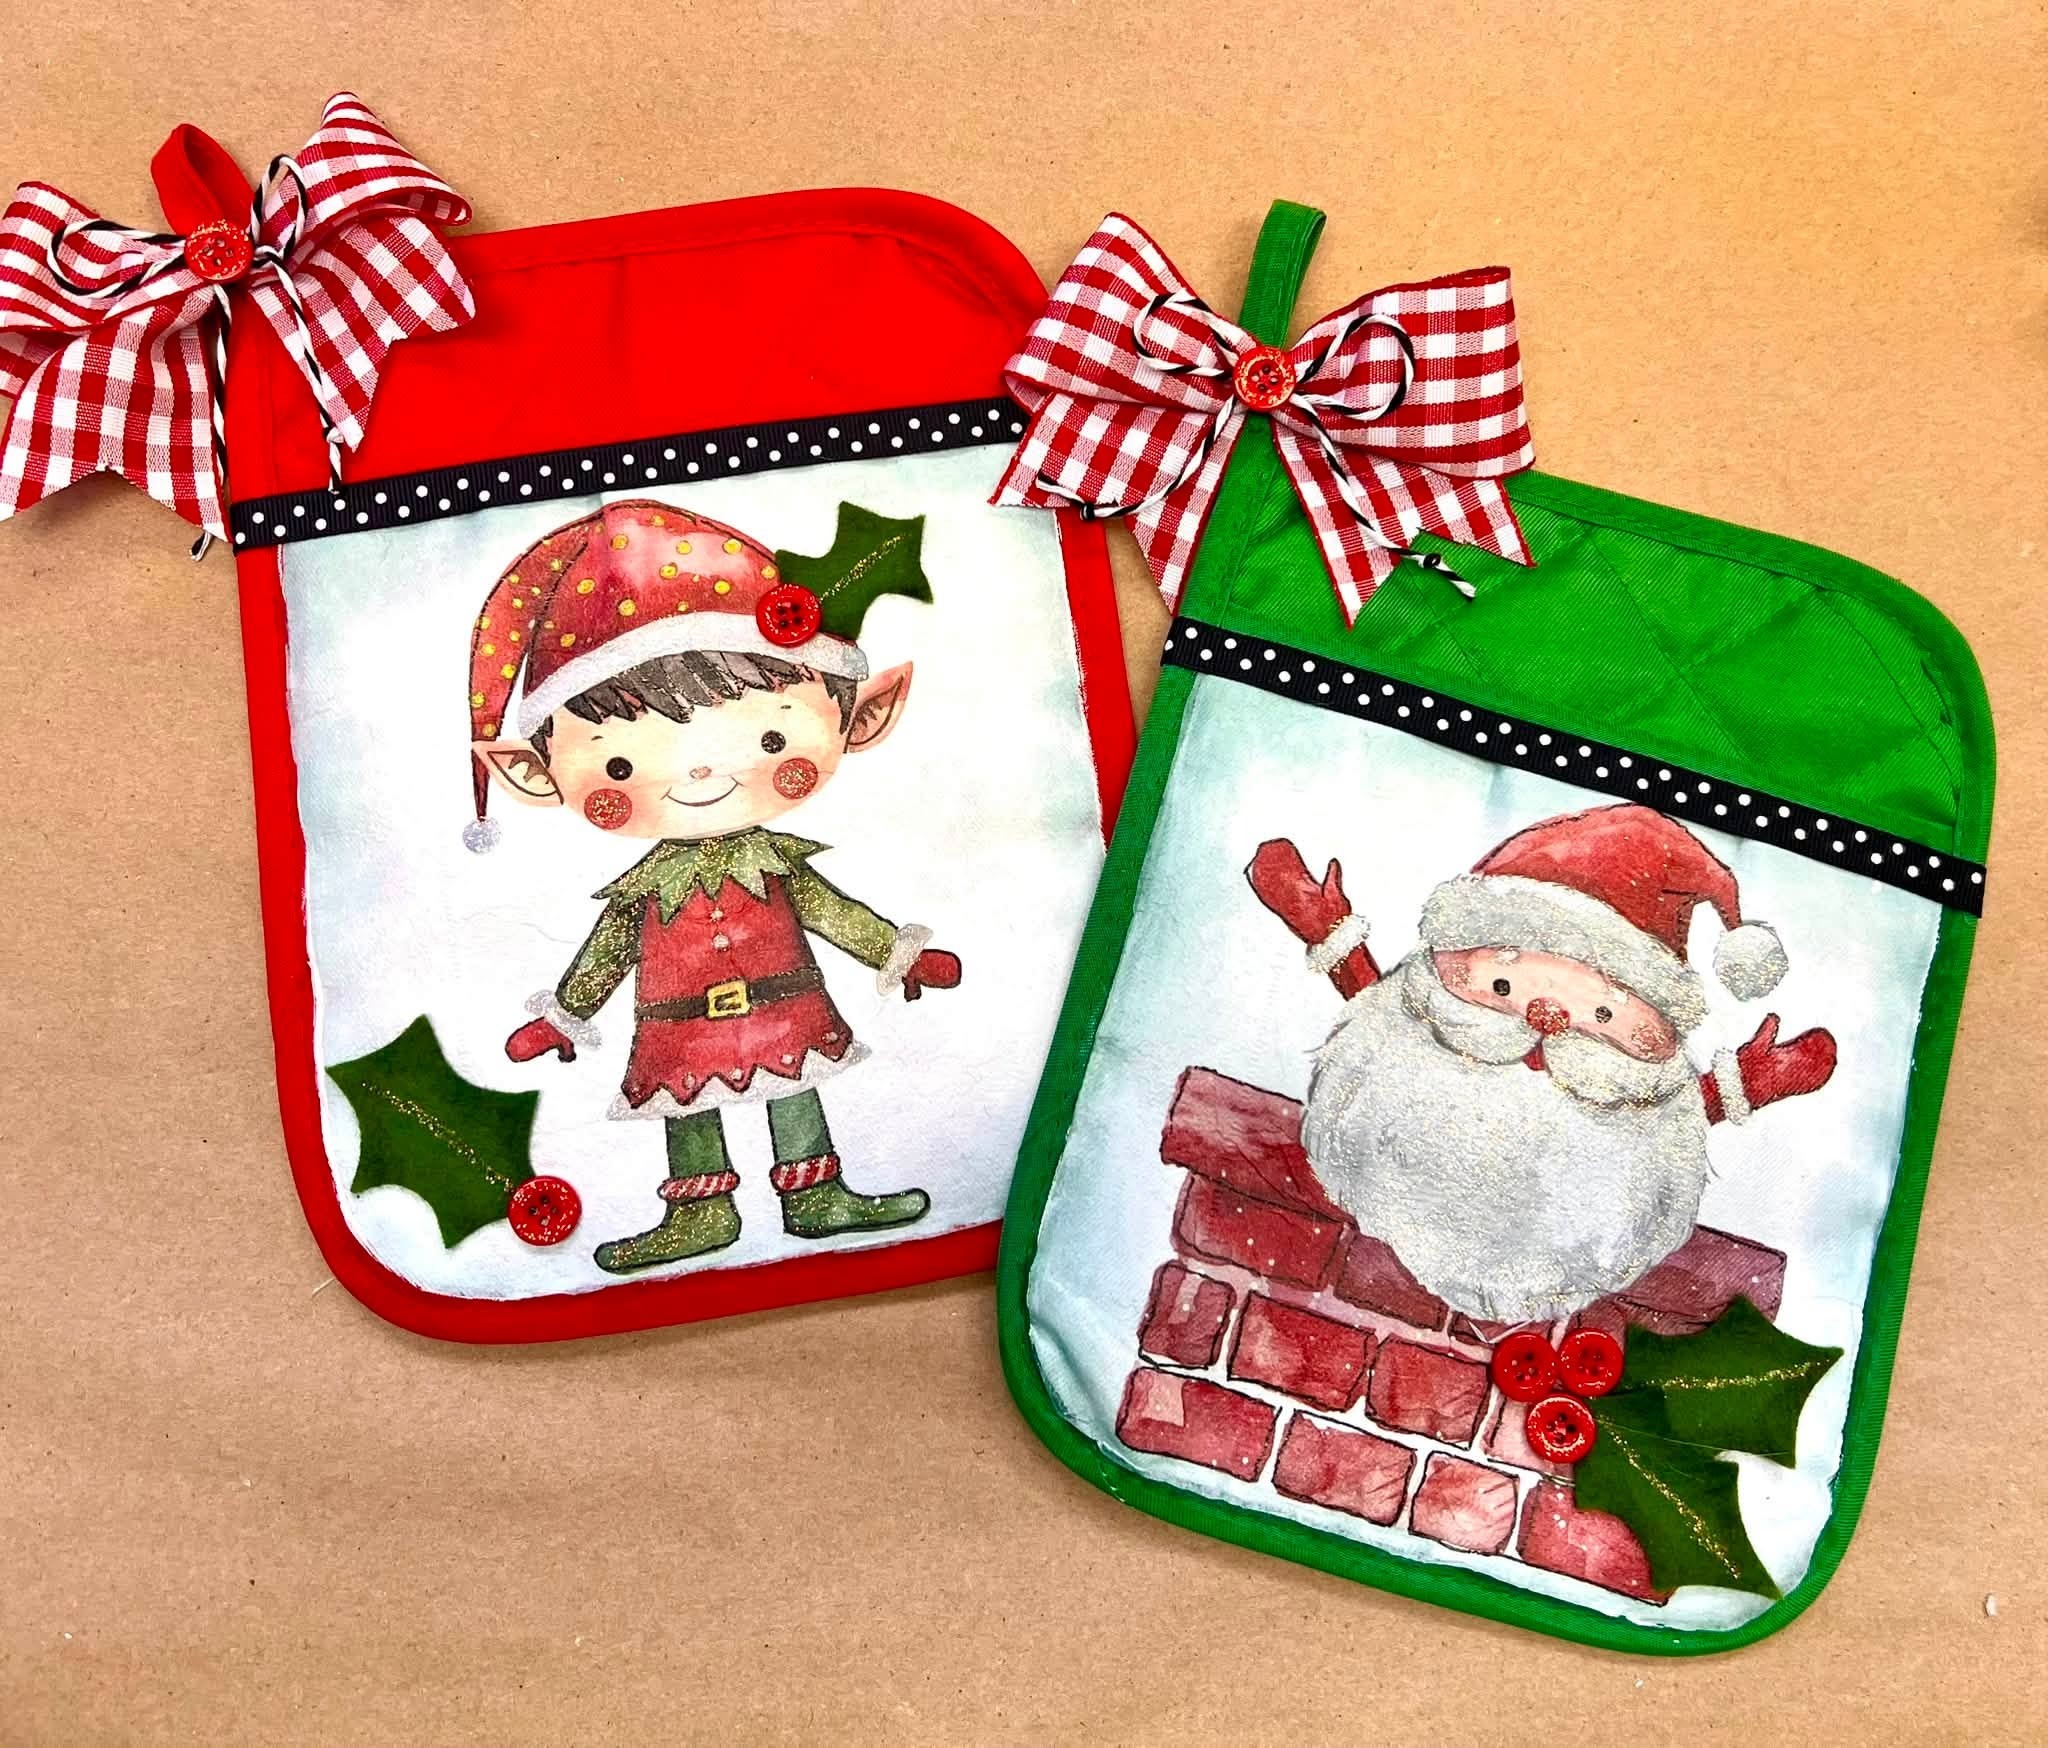
These festive Christmas napkin art pot holders are a fun way to turn an inexpensive kitchen essential into a handmade holiday gift. By decorating the pocket of a pot holder with Christmas napkins, Mod Podge, ribbon, buttons, felt, and sparkle, you can create something that is both practical and decorative!
The pocket makes this project especially giftable. Fill it with a favorite recipe, cookie mix, sprinkles, a small spatula, a gift card, or another little kitchen treat. These handmade Christmas pot holders would be perfect for neighbors, teachers, coworkers, friends, hostess gifts, stocking stuffers, or anyone who appreciates a thoughtful handmade present.
Step 1: Choose a Pot Holder with a Pocket
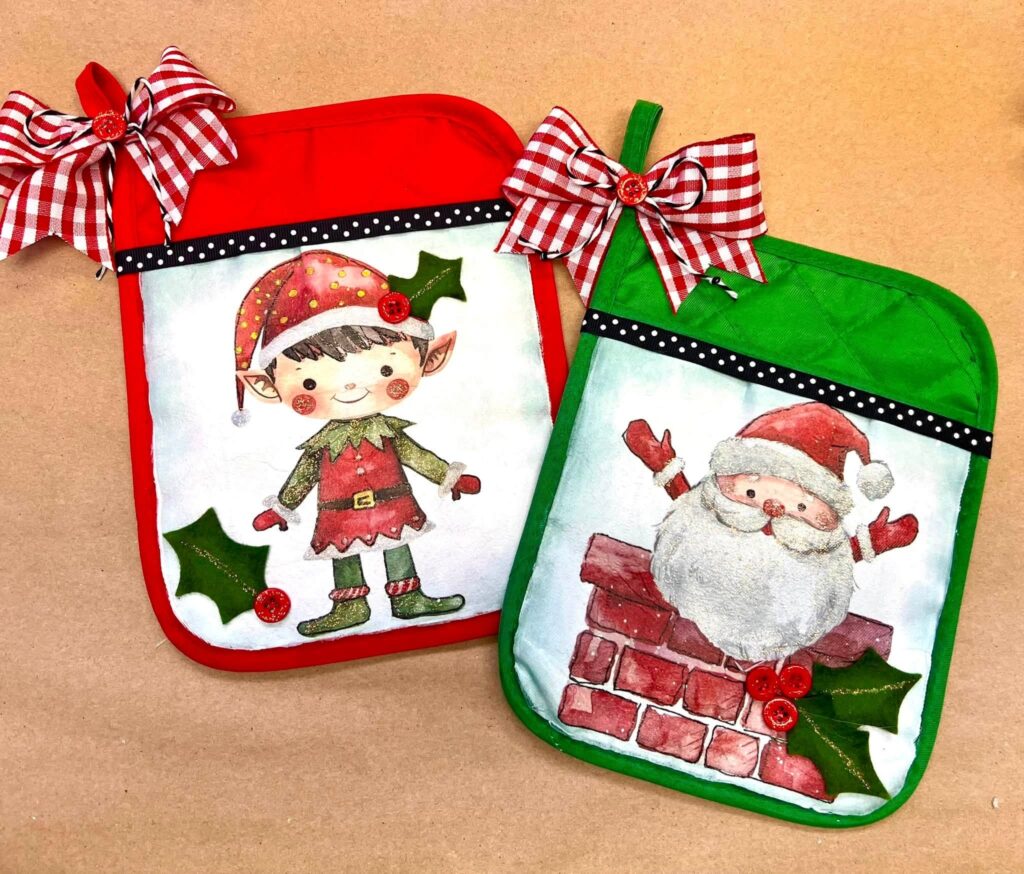
Begin by selecting a pot holder that has a sewn pocket across the front. The pocket is the area you will paint and cover with napkin art.
Do not apply paint, Mod Podge, or decorative napkins to the thick quilted back of the pot holder. That side contains the heat-protective padding and should remain unchanged if you want the pot holder to stay functional.
Step 2: Paint the Pocket White
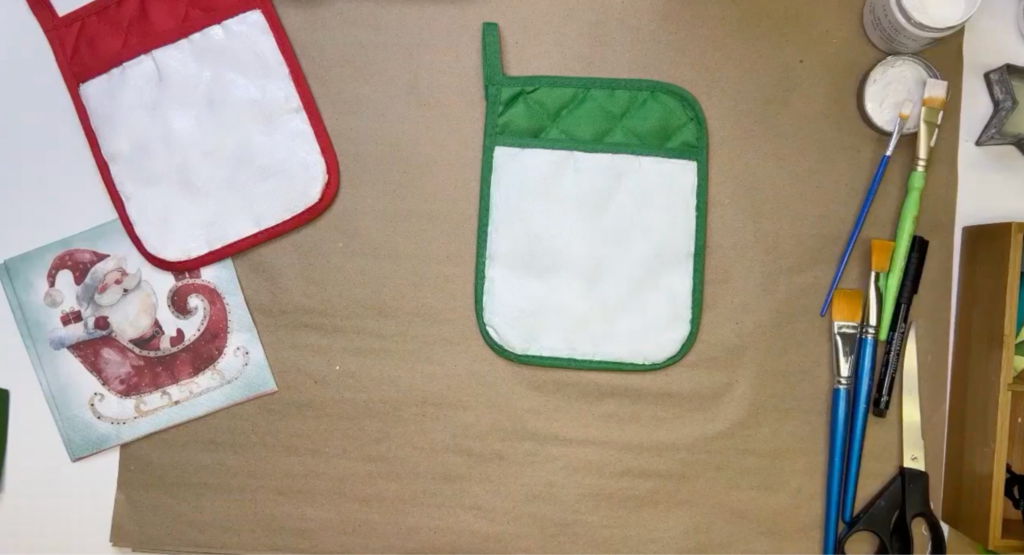
Slide a piece of parchment paper inside the pot holder pocket before painting. This helps prevent paint or Mod Podge from soaking through and sticking the layers together. The parchment paper does not have to fit perfectly. Simply trim or fold it so it covers the inside area behind the pocket.
Apply white chalk or mineral-based paint to the front of the pot holder pocket. A solid white background is important because paper napkins are extremely thin and slightly transparent. The white paint acts like a bright spotlight behind the design, helping the original colors remain clear and vibrant.
Begin with a smaller flat brush and carefully paint around the raised stitched border. Lift and support the padded pocket with your fingers as you work so the fabric stays as flat as possible.
After outlining the edges, use a larger brush to fill in the center of the pocket.
Allow the first coat to dry, then add a second coat of white paint. Dark colors such as red, black, and green may require an additional touch-up coat to become fully covered.
Dry the paint completely with a heat tool or allow it to air-dry. Check the center carefully for any dark areas that could show through the napkin design, especially beneath white details such as Santa’s beard or an elf’s face.
Step 3: Apply the Napkin Art
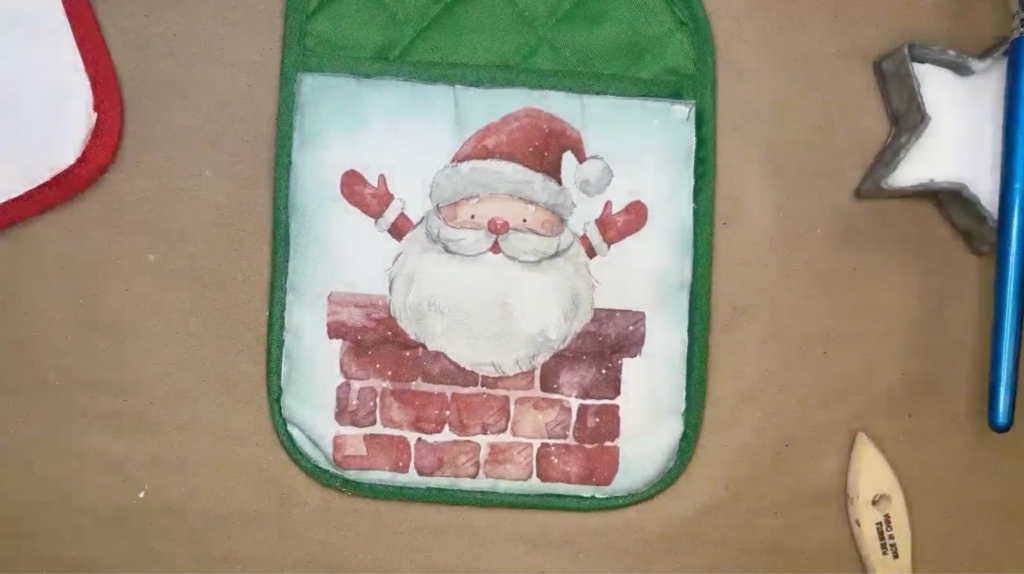
Lay the full napkin square over the painted pocket before removing its extra plies. Use your fingernail or another smooth-edged tool to press along the stitched border of the pot holder. This creates a visible crease that shows you where to trim.
Cut along the crease so the napkin fits inside the pocket’s border. It does not have to be absolutely perfect. Any slightly uneven areas can be covered later with ribbon, twine, or another decorative trim. It is easier to create this crease while the napkin still has all of its layers because the tissue becomes very delicate once the backing plies are removed.
Next, remove all plain backing layers until only the thin printed top ply remains. Brush a generous, even coat of Mod Podge Matte over the painted pocket. Fabric is absorbent, so use enough Mod Podge to cover the entire area without leaving dry patches.
Hold the napkin above the pocket and begin by positioning the top edge. Keep the lower portion lifted while you line everything up, then gently lower the rest of the napkin onto the Mod Podge.
Use a clean, dry, natural-bristle chip brush to pounce straight up and down over the napkin. Do not brush back and forth.
The pouncing motion presses the tissue into the textured fabric and allows the napkin to take on a soft cloth-like appearance. Work gently but thoroughly, especially around the center of the image and near the curved edges.
If a small section of napkin extends beyond the painted area or falls outside the Mod Podge, trim it carefully with scissors.
Use a heat tool to dry the napkin art thoroughly. While the surface is still slightly warm, place a plastic deli sheet or plastic wrap over it and gently smooth across the design. This can help flatten any raised areas and make sure the tissue is fully adhered.
Once the napkin is completely dry and cool, apply a thin, even top coat of Mod Podge Matte. This protective layer seals the napkin, strengthens the tissue, and prepares the surface for pen work or other embellishments.
Step 4: Add Doodle-Style Pen Work
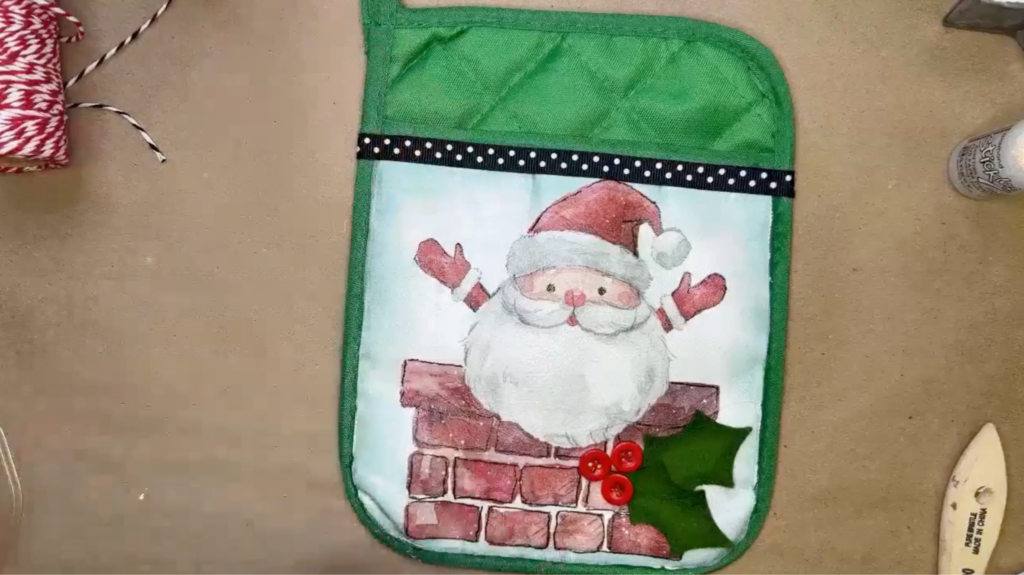
Use a permanent ink pen to outline selected portions of the napkin design. Trace around areas such as Santa’s mittens, the chimney bricks, an elf’s clothing, facial features, or other details you want to emphasize.
Keep the lines loose and slightly imperfect. The fabric texture will naturally make them a little wiggly, which gives the project a charming hand-drawn look. Avoid outlining white areas if you plan to add glitter there later.
Step 5: Add Ribbon Trim
Glue a strip of ribbon across the top edge of the napkinized pocket. Black-and-white polka-dot ribbon creates a playful contrast against traditional red and green Christmas colors, but any coordinating trim will work.
Apply a thin line of hot glue, press the ribbon down, and trim the ends so they align neatly with the stitched border. You could also add ribbon along the bottom edge or wrap baker’s twine around the entire pocket if you would like more definition.
Step 6: Make Simple Felt Holly Leaves
Cut a small rectangle of green wool felt. Use a Frixion Pen to mark a pointed shape at each end and small registration points along both sides. Cut shallow curved scoops between the marks, moving from one point to the next. These little smile-shaped cuts quickly create the classic jagged shape of a holly leaf. Repeat the process to create one or two leaves. Heat the felt briefly with a heat tool to make the pen marks disappear.
Use black chalk ink to lightly shade the outside edges of the holly leaves. This step adds depth and helps the felt stand out against the pot holder. Apply the ink directly from the pad with a light touch. You can leave the center bright green and concentrate the darker color around the points and edges.
Add a small line or squiggle of hot glue only through the center of each felt leaf. Leave the pointed edges loose so they lift slightly and create dimension. Arrange the leaves near one lower corner of the pot holder. Glue three red buttons over the base of the leaves to resemble holly berries. Smaller buttons, beads, pom-poms, or felt circles would also work.
Step 7: Make an Easy Gingham Bow
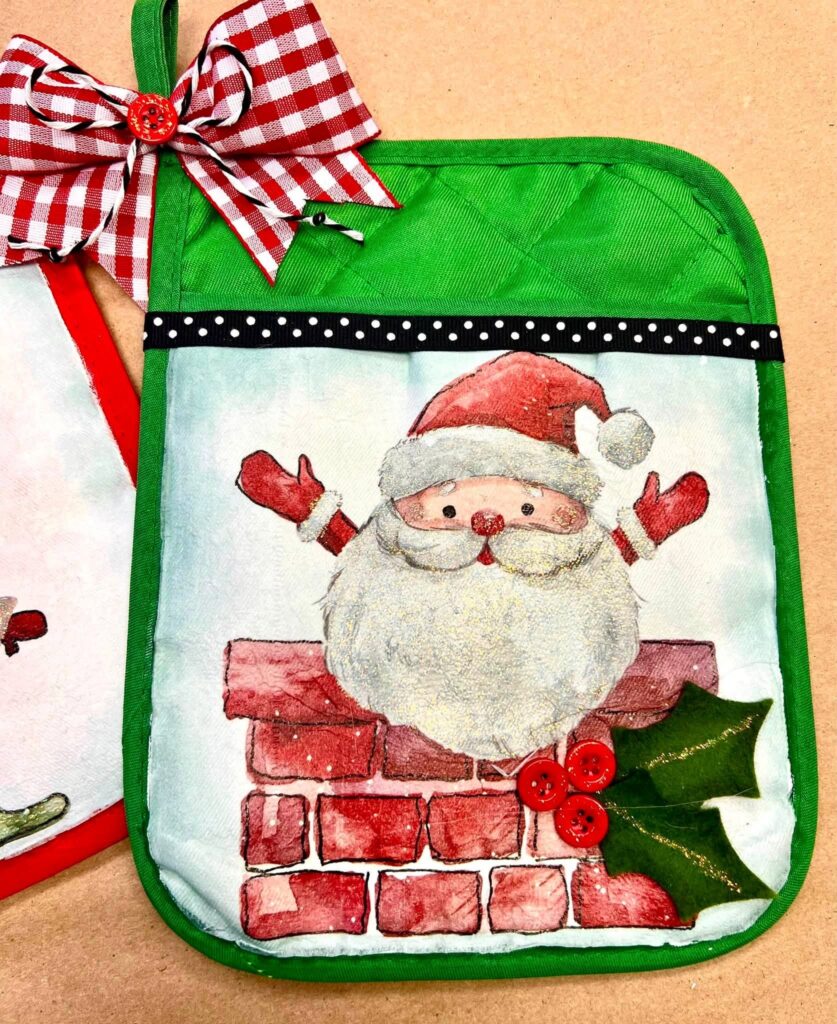
Create a bow using red-and-white gingham ribbon. Form the ribbon into a loop that resembles an awareness ribbon, with the two tails crossing at the bottom. Pinch the intersection and bring the top of the loop down into the center. Scrunch all the layers together and hold them with a clothespin while you tie the center with baker’s twine.
Once secure, remove the clothespin and adjust the loops. Trim the tails with flag-shaped ends by cutting a slit up the middle and trimming diagonally from each corner toward the top of the slit.
Thread the baker’s twine through the existing hanging loop at the top of the pot holder. Tie it securely so the bow sits near one upper corner. A removable bow is useful if you want to keep the pot holder functional. For a purely decorative piece, you can glue the bow directly in place and add more embellishments. Add a button, small ornament, bell, charm, or other decorative accent to the center of the bow.
Step 8: Add Christmas Sparkle
Use Diamond or Unicorn Stickles to add glitter to white areas such as Santa’s hat trim, eyebrows, mustache, beard, or pom-pom.
Squeeze out a small amount and use the bottle tip to spread the glitter. For larger areas, squiggle the Stickles over the surface and gently tap it into place with your fingertip or a paintbrush.
Add a glittered center line to the felt holly leaves and a little sparkle to the red buttons if desired. Santa’s nose can also receive a magical touch of glitter. Set the pot holder aside until the Stickles are completely dry.
Can the Finished Pot Holder Be Used?
Yes, the pot holder can still be used as long as you only decorate the pocket side and leave the heat-protective quilted back untouched.
Keep embellishments minimal if you want it to remain practical. Wash gently and allow it to air-dry rather than placing it in the dryer. Highly embellished pot holders are best used as decorative kitchen accents, cabinet-door hangings, or festive gift containers.
Love Creating with Decorative Napkins?
These Christmas pot holders are a fun introduction to applying napkin art to fabric. Decorative napkins can also be used on wood, canvas, paper, glass, metal, plastic, burlap, and many other surfaces.
Inside The Napkin Club, members receive creative inspiration, exclusive napkin designs, tutorials, and projects that explore different napkin art techniques throughout the year.

0 Comments