


Supply List:
- Wrapping Paper Scraps
- Scissors
- Hot Glue
- Optional: Tree Topper
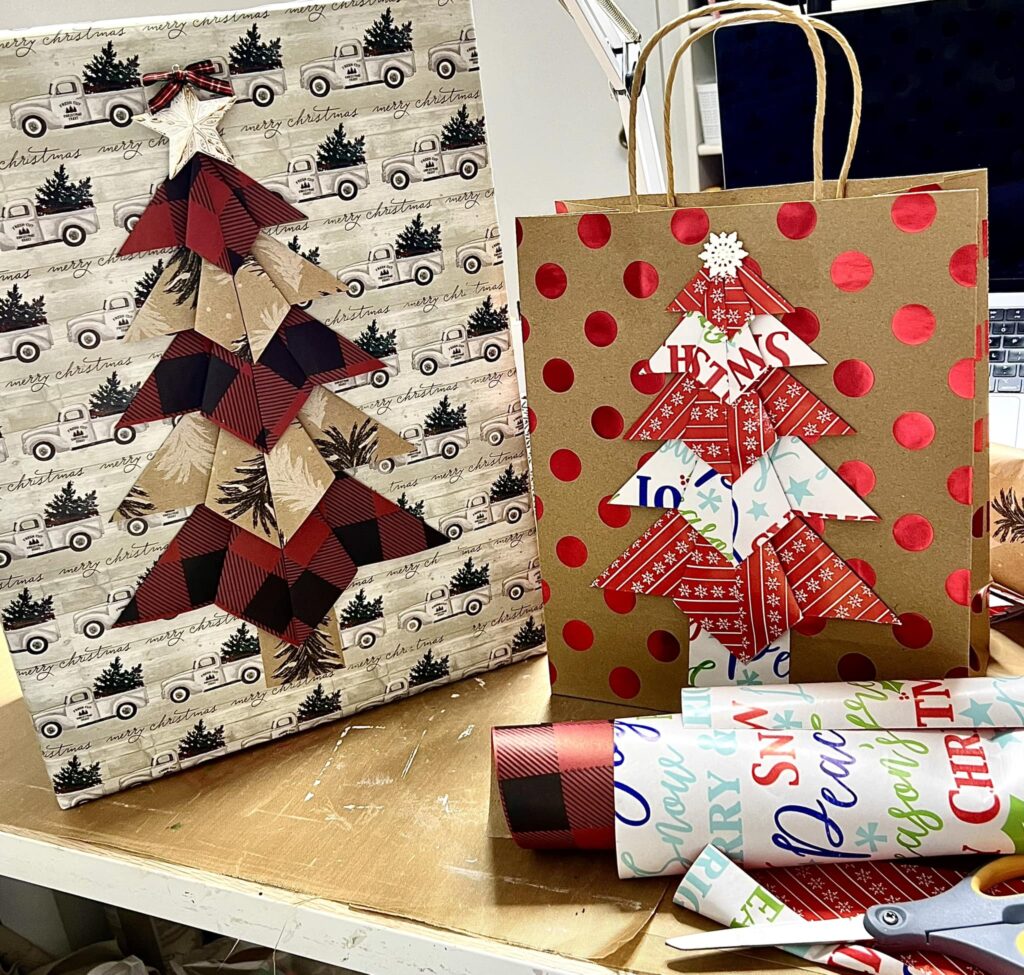
We are going to “wrap” up these Christmas crafts by repurposing wrapping paper scraps into adorable folded Christmas trees. This is also something that you could do with scrapbook paper, book pages, music paper – anything you can fold! These folded wrapping paper trees are perfect for decorating gifts, gift bags, cards, or even home decor like a cutting board. You can adjust the size of your trees based on the size of the squares you are using, so the options are truly endless.
Using a Folding Technique to Make Paper Christmas Trees
You can use whatever wrapping paper you have scraps of – any patterns, designs, double-sided or not, and even words. You will need to cut your scraps into squares. For my tree, I have an 8×8, 7×7, 6×6, 5×5, 4×4, and 3×3. Depending on how big you would like your tree, you can simply add more sections.
Here is the folding technique:
- Fold your square in half once. (I call this the hotdog fold.)
- Fold this rectangle in half once. (I call this the hamburger fold.)
- Open your folds up.
- Fold your square in half to the points. (I call this the taco fold.)
- Turn it the opposite way and fold it in half to the points again.
- Open your folds back up and you will have creases of an x and a +.
- Fold two sides of your square in. (I call this the football fold.)
- Then, you will make an airplane by folding the top sides in.
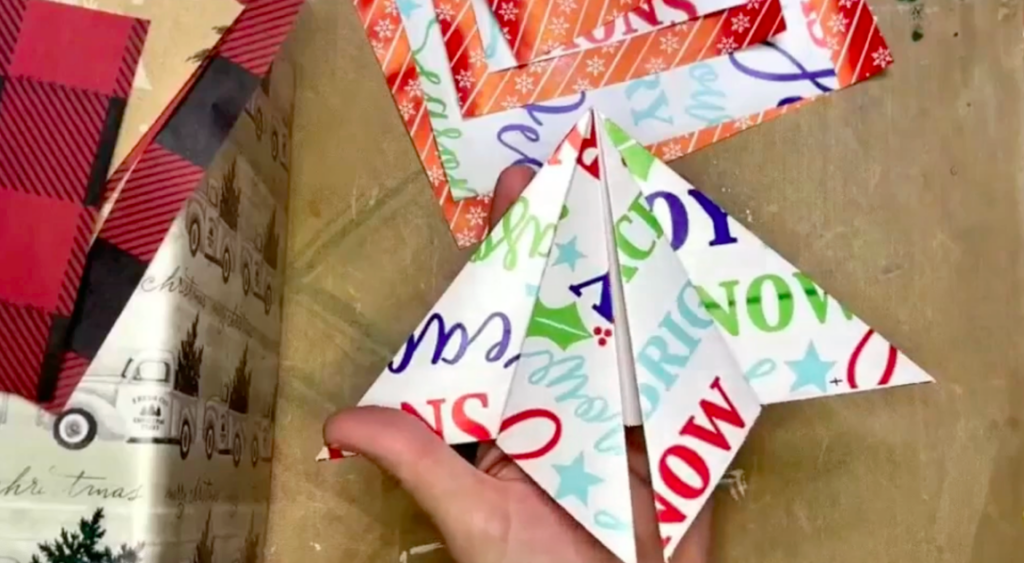
You will continue to use this folding technique for each square you have to make the different sections of your tree – starting with the biggest to the smallest.
Assembling the Folded Christmas Tree
I am going to add my folded tree to a gift bag. Start with the biggest fold, add hot glue to the top of it, and then secure your next folded section on top. Continue to do each section, tucking and layering them with hot glue.
I like my trees to have a trunk, so I will cut out another little rectangle piece of wrapping paper, add hot glue, and tuck that inside of the bottom layer. Finally, add lines of hot glue to the back of your tree and secure it onto your gift bag. If you don’t like the folds sticking up, you can secure them down with some additional hot glue.
At this point, you can leave your tree the way it is, or you can add a little star or snowflake tree topper.

You are going to WOW whoever you give these gifts to with this extra little touch! Plus, you are repurposing wrapping paper that you would have otherwise just thrown away. Feel free to use this technique throughout your other paper crafts as well.
I go LIVE on my Facebook page every Friday at 11 am CST for a fun and easy Craft-n-Chat Session. Come learn something new while creating something beautiful!
If you love creating with me, check out my online creative memberships! They are all a little different, and each is designed to ignite your imagination, inspire your craft, and connect you with fellow art enthusiasts. If you’re a creative looking for an online space to learn and thrive, we have something for everyone! Check them out HERE!


0 Comments